

Creating an Application Using a Custom Template
You can customize an application by customizing deployment actions based on project requirements. This section describes how to use a custom template to create and deploy an application.
Application Scenarios
A custom template can be used in the following scenarios:
- If the existing system templates cannot meet your requirements, you can customize a template on the application template page or customize a template using the blank template.
- You can also customize a template when creating an application or customize a template from an existing application for other members in the project to quickly create applications.
- A custom template can be directly used during application creation.
- Generating an application using a custom template: Choose Templates > Custom and click
 in the Operation column of the target template to generate an application within a few clicks.
Constraints
For details about the maximum number of applications that can be created in a single project, see Specifications and Constraints > Basic constraints > Application management.
Creating a Custom Template on the Application Template Page
- Go to the CodeArts homepage.
- Log in to the CodeArts console, click
 , and select a region where you have enabled CodeArts.
 - Click Go to Workspace.
If your account uses the old billing mode (see Old Billing Modes), click Access Service.
- Log in to the CodeArts console, click
- Click the target project name to go to the project.
- Choose CICD > Deploy.
- Choose Templates > All.
- Click Create Template.
- Edit the basic information, deployment actions, and parameters as required. For details, see Creating an Application with a Blank Template.
- Click Save in the upper right corner to create a custom template.
Customizing from a Blank Template
- Go to the CodeArts homepage.
- Log in to the CodeArts console, click , and select a region where you have enabled CodeArts.
- Click Go to Workspace.
If your account uses the old billing mode (see Old Billing Modes), click Access Service.
- Log in to the CodeArts console, click
- Click the target project name to go to the project.
- Choose CICD > Deploy.
- On the Applications tab page, click Create Application, enter basic information and an application is created. You can modify basic information such as the Name, Description, and Execution Resource Pool as required. For details, see Editing Basic Application Information. Then click Next.
- Click Blank Template to enter the Deployment Actions tab page.
- Edit the deployment actions based on service requirements.
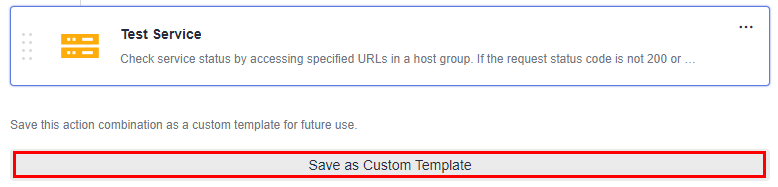
- Click Save as Custom Template. In the dialog box displayed, enter a template name and description, and click OK.
Creating a Custom Template During Application Creation
- Go to the CodeArts homepage.
- Log in to the CodeArts console, click , and select a region where you have enabled CodeArts.
- Click Go to Workspace.
If your account uses the old billing mode (see Old Billing Modes), click Access Service.
- Log in to the CodeArts console, click
- Click the target project name to go to the project.
- Choose CICD > Deploy.
- On the Applications tab page, click Create Application, enter basic information and an application is created. You can modify basic information such as the Name, Description, and Execution Resource Pool as required. For details, see Editing Basic Application Information. Then click Next.
- Click Next, choose Blank Template > Custom. Click New Template on the right of Custom.
If no template is available, you can click New Template to customize one.
- Configure basic information, deployment actions, and parameter settings as needed.
- Click Save in the upper right corner to create a custom template.
Customizing a Template from an Existing Application
- Go to the CodeArts homepage.
- Log in to the CodeArts console, click , and select a region where you have enabled CodeArts.
- Click Go to Workspace.
If your account uses the old billing mode (see Old Billing Modes), click Access Service.
- Log in to the CodeArts console, click
- Click the target project name to go to the project.
- Choose CICD > Deploy.
- On the Applications tab page, select an application to be deployed and find its Operation column. Click
 on the right of the application, click Edit to view the detailed configuration information of the application.
 - Edit the deployment actions based on service requirements.
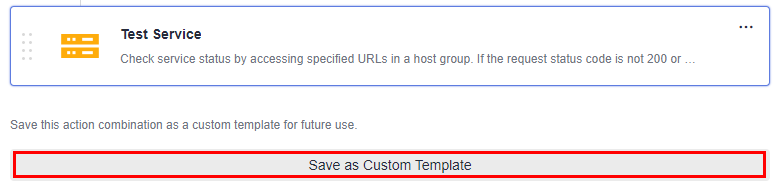
- Click Save as Custom Template. In the dialog box displayed, enter a template name and description, and click OK.
Favoriting, Editing, or Deleting a Custom Template
- Go to the CodeArts homepage.
- Log in to the CodeArts console, click , and select a region where you have enabled CodeArts.
- Click Go to Workspace.
If your account uses the old billing mode (see Old Billing Modes), click Access Service.
- Log in to the CodeArts console, click
- Click the target project name to go to the project.
- Choose CICD > Deploy.
- Choose Templates > Custom Templates.
- Click
 next to a template to add it to your favorites. Then the template will be pinned on the top of the custom template list.
 - Click
 in the row of a template to be edited and click Edit.
 - Click
 in the row of a custom template to be deleted and click Delete. Once deleted, the template cannot be restored.

- Click

For other operations such as configuring deployment actions, setting application parameters and host environment, deploying applications, and viewing results, see deployment actions in Creating an Application with a Blank Template.
What is your overall rating for this page?
Thank you very much for your feedback. We will continue working to improve the documentation.See the reply and handling status in My Cloud VOC.
For any further questions, feel free to contact us through the chatbot.
Chatbot


