
Creating a Data Masking Rule
You can create a masking rule for the plaintext data in the database to ensure security.
- If you are familiar with the database table structure, add a data masking rule on the Data Masking Policy page. After the rule is created, users who are not in the whitelist can view only masked data when querying database information.
- If you are not familiar with the sensitive data distribution, scan your database by referring to Sensitive Data Discovery. Then, create a masking rule in the result. For details, see Creating a Masking Rule in the Result.
If the data in the data table is encrypted and also masked, the following will occur based on different scenarios:
- If the user is authorized, the masked data is returned.
- If the user is not authorized, the ciphertext data which is not masked is returned.
Procedure
- Log in to a database encryption and access control instance as the sysadmin user.
- In the navigation pane on the left, choose Dynamic Data Mask > Data Masking Policy.
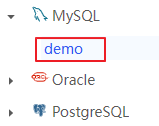
- Choose Data Type > Asset Name. Figure 1 Selecting a data source
- On the masking rule list page of the target data source, click Add Custom Rule.
- In the displayed Add Masking Rule dialog box, configure the parameters. Table 1 lists the parameters.
Table 1 Adding a masking rule Parameter
Description
Rule Name
Set a masking rule name.
Schema
Select a data asset mode.
Table
Select a data asset table.
Column
Select the column to be masked.
For details about supported algorithm types, see Checking the Encryption Algorithm.
Data Type
Select the data type of the selected column.
You can add a custom data type. For details, see Adding a User-Defined Data Type.
Masking Rule
Select the masking rule to be used.
You can add a custom masking rule. For details, see Adding a Custom Masking Algorithm.
Figure 2 Adding a masking rule
- Click Save.
Operation Result
- You can view and manage the created masking rule in the masking rule list. The created masking rule is enabled automatically. Figure 3 Masking rule

- After the data is masked, users who are not in the whitelist can view only masked data when querying the plaintext data. Figure 4 Masked data

Related Operations
You can manage the masking rules as follows:
- Enabling or disabling: Locate the target rule and click the button in the Enable/Disable column.
- Editing: Locate the target rule and click Edit in the Actions column.
- Deleting: Locate the target rule and click Delete in the Actions column.
- Batch operations: Select the target rules and choose batch enabling, disabling, or delete from the Bulk Actions drop-down list.
Feedback
Was this page helpful?
Provide feedbackThank you very much for your feedback. We will continue working to improve the documentation.See the reply and handling status in My Cloud VOC.
For any further questions, feel free to contact us through the chatbot.
Chatbot


