
Releasing and Deploying Applications Quickly
Scenario
You can deploy an application to the runtime or sandbox environment with a single click. This process packages the application and its dependencies into an asset package, which is then installed in the selected environment.
Asset packages are used for testing, deployment, and production. They can be installed in different environments: development, sandbox, and runtime. Note: Developers cannot install asset packages they developed themselves.
- After the application asset package is installed in the development environment, you can choose Assets > Applications > Installed on the application development page to view the asset package. The asset package can only be viewed but cannot be edited. Figure 1 Viewing installed asset packages

- After the application asset package is installed in the sandbox environment and runtime environment, you can view the asset package in Application Management > Applications in the Huawei Cloud Astro Zero environment configuration page. Figure 2 Viewing installed applications in the production environment

One-Click Application Deployment
- Log in to the application designer by referring to Logging In to the Application Designer.
- On the main menu, choose Publish > Packaging App > Packaging Settings.
- On the Copyright Settings page, set the copyright information and authorization mode, and click Next. Figure 3 Copyright settings

After the copyright information is set, you can download the application package to the local host and view the copyright information in the packageinfo.json file of the application package.
- Copyright Information: Copyright information of the application package.
- Copyright Description: Description of the application package. You are advised to set it to the function provided by the application.
- Contact Email: Email address for receiving problems of the current application package.
- Document Address: Document link of the current application package.
- Authorization mode: Set the integrity and confidentiality of the application package.
- Protect package by encryption: The content in the application package is signed and encrypted to prevent someone from viewing or even tampering with the content in the package in plaintext.
- Allow viewing code after installation: When an application is installed as an asset in the environment, you can view its code in the application designer but cannot edit it.
- In the Initialized Data page, set the data to be released with the application packaging and click Next.
Applications can be packaged by object name. Click Add Objects to set data export conditions. After an object is selected, the data that meets the conditions in the object is packaged during application packaging. In addition, you can view the incremental data of system parameters, scheduled tasks, and object clearing tasks, and the picklist on other tab pages.
Installation policy selection suggestions: When an application is deployed for the first time, select Sample data for testing or Fixed data for production deployment. During application upgrade, if you want to retain the original data in the environment, select Incremental data. If you want to update the data to the latest configuration, select Fixed data.Figure 4 Setting factory data Figure 5 Viewing the incremental data of system parameters
 Figure 6 Viewing the incremental data of the scheduled tasks
 Figure 7 Viewing the incremental data of the object deletion tasks
 Figure 8 Viewing the picklist data

When an application is packaged and released again, the installation policy of the factory data can be modified. After the modification, when the application is upgraded, the new installation policy is used. That is, the record ID contained in the factory data is changed. For details about the change rules, see Table 1.
Table 1 Change rules Installation Policy
Sample Data (New)
Fixed Data (New)
Incremental Data (New)
Sample data (old)
-
During an upgrade, if the data in your environment is sample data, it will be replaced with fixed data by ID, even if you have made changes to it. However, if the original data set does not have this ID, no changes will be made during the upgrade.
During an upgrade, if the data in your environment is sample data, it will be replaced with incremental data identified by ID, even if you have made changes to it. However, if the original data set does not have this ID, no changes will be made during the upgrade.
Fixed data (old)
During an upgrade, no new sample data is added. The factory data is not fixed data and all previous fixed data is deleted.
-
If the data in the environment is part of the factory data, the data is overwritten as incremental data and the status is not modified. Otherwise, delete it directly.
Incremental data (old)
The new sample data is not written because the upgrade is performed. Only the policy of clearing the environment data is deleted.
If the data in the environment is part of the factory data, the data is overwritten as fixed data. Otherwise, only the policy for deleting the environment data is deleted.
-
- In the Action Settings page, set the script to be executed during application package installation and click Save. Figure 9 Setting actions

- Install Pre-script: script executed before instantiated configuration data is imported during app installation. This script is used to pre-delete data to avoid data conflicts. You can select an existing script or click Generate Sample Scripts to create a script.
- Install Post-Script: script executed after instantiated configuration data is imported during app installation. This script is used to delete or update data. You can select an existing script or click Generate Sample Scripts to create a script.
- On the main menu of the application designer, choose Publish > Release App > One-click deployment.
- Select the environment to be deployed and click Deploy Now. Figure 10 Clicking Deploy Now

- In the displayed dialog box, click Deploy Now.
In the lower left corner of the page, you can view the deployment progress, as shown in Figure 11.
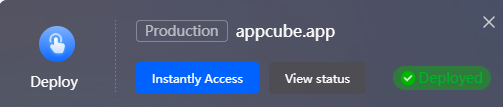
After the deployment is successful, the information shown in Figure 12 is displayed.
- Click Instantly Access to access the application in the production environment and experience service functions.
- Click View status. Choose Monitor dashboard > Application Dashboard to view the basic information, alarm statistics, page access statistics, and API statistics of the application.
- Click Ongoing. In the task list that is displayed, click
 to delete the task.
 - Choose Publish > Manage App Packages to view the published application packages. Click
 and select Download to download the application package. Click Create Installation Package or Create Patch Package to generate the installation package or patch package of the current version. You can download the package or patch package or deploy it in other environments.

Feedback
Was this page helpful?
Provide feedbackThank you very much for your feedback. We will continue working to improve the documentation.See the reply and handling status in My Cloud VOC.
For any further questions, feel free to contact us through the chatbot.
Chatbot


