
Using a Connector to Call a Foundation Model
To connect to an external foundation model, configure a foundation model connector and use scripts and flows to call it. This integrates the model into the platform quickly, helping you build intelligent applications faster.
Prerequisites
- You have obtained the API address and key needed to access the external foundation model.
- The external foundation model's request and response formats must adhere to the OpenAI standard; otherwise, errors might arise during streaming calls and response rendering.
Creating a Foundation Model Connector
This section uses the custom foundation model as an example to describe how to create a foundation model connector.
- Log in to the application designer by referring to Logging In to the Application Designer.
- In the navigation pane, choose Integrations.
- Click Connector Instance under Connector.
- In the navigation pane, choose Foundation Model > Custom Model.
- In the right pane, click + and set the parameters. Figure 1 Setting foundation model interconnection parameters

- Save the settings.
- Test the connectivity of the foundation model connector.
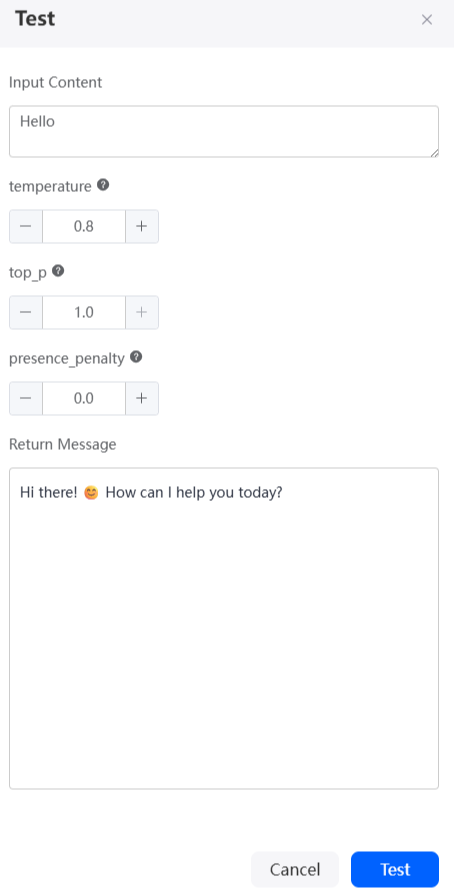
- On the custom foundation model details page, click Test. On the displayed dialog box, click Test. The foundation model connector test page is displayed.
- In the Input Content text box, enter the dialog content (for example, "Hello"), and click Test. Check whether the returned message is correct. If the returned message contains the streaming response packet, the foundation model connector is configured successfully. Otherwise, check whether the foundation model connector information is correct.Figure 2 Foundation model connector test page
Using a Script to Call the Foundation Model Connector
After a connector is created, you can call the foundation model connector in a script to quickly integrate the connector into intelligent applications.
- Create an empty script by referring to Creating a Blank Script.
- In the script editor, enter the following code:
import * as llm from 'llm'; /* * The input parameter is defined by `@action.param()`. */ export class Input { @action.param({ type: "String", required: true, description: "the chat message" }) inputParam: string; } /* * The output parameter is defined by `@action.param()`. */ export class Output { } /* * Define the main service class. * * - The service entry function is defined by `@action.method()`. * - All dependent objects should be defined via `@useObject([])` (for objects) or `@useBo([])` (for business objects). */ export class LLMConnectorScript { @action.method({ input: "Input", output: "Output", description: "invoke LLM connector" }) run(input: Input): Output { let output = new Output(); // Create a foundation model connector client. The first parameter is the name of the created foundation model connector, and the second parameter is the foundation model type. let client = llm.newClient("Namespace__selfHostDeepSeekR1", "custom_llm"); let message = [{ "role": "system", "content": "You are a helpful assistant." }, { "role": "user", "content": input.inputParam }]; let resp = client.chat(message, { "temperature": 0.8, "top_p": 1.0, "presence_penalty": 0.0 }); return output; } }Namespace__selfHostDeepSeekR1 is the name of the connector created in Creating a Foundation Model Connector, and custom_llm is the type of the foundation model. Table 2 shows the mapping between foundation model types and foundation model API providers.
Table 2 Mapping between foundation model types in a script and foundation model API providers Foundation Model Provider
Foundation Model Type
DeepSeek
deepseek
Qwen
qwen
MaaS cloud platform
maas
Pangu
pangu
Hunyuan
hunyuan
Doubao
doubao
ERNIE Bot
qianfan
chatGLM
glm
Kimi
kimi
Ollama
ollama
Xinference
xinference
Custom model
custom_llm
- Click
 in the upper part of the script editor to save the script.
 - Click
 to execute the script.
 - On the input parameter tab page at the bottom of the page, enter request parameters and click
 in the upper right corner of the test window.
 { "inputParam": "Hello" }On the output parameter tab page, you can check the streaming response result of the foundation model.Hello! How can I help you?
- Click
 in the upper part of the script editor to activate the script.
Using a Flow to Call the Foundation Model Connector
After a connector is created, you can call the foundation model connector in a flow to quickly integrate the connector into intelligent applications.
- Create a blank flow by referring to Creating a Blank Flow.
- Create the input and output parameters of the flow. The flow calls the foundation model API. Therefore, the flow's input and output parameters must be defined and match the API's parameter types.
- On the right of the flow designer, click
 .
. - On the Context page, click + next to Variable to create a variable.
- Click
 next to the variable, change the variable name to inputMessages, set the data type to Any, set the description to "Dialog content", and click Save.
 - Repeat the preceding operations to create the inputConfig variable in Table 3.
- Select the start diagram element
 and click
  to set the input parameters of the flow. Figure 3 Setting the input parameters of the flow
- On the right of the flow designer, click
- On the left of the flow design page, choose Connector > Connector Instance > Foundation Model, and drag the custom foundation model diagram element to the canvas.
The custom foundation model connector is a preset API for interconnecting with the custom foundation model connector.
- Select the custom foundation model connector diagram element and select the connector Namespace__selfHostDeepSeekR1 created in Creating a Foundation Model Connector in the basic information. Figure 4 Associating the diagram element with the foundation model connector

- Click
 and set the action and parameters. Figure 5 Configuring the action and parameters
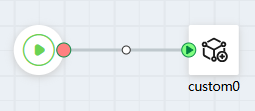
- Connect the start diagram element and the custom foundation model connector diagram element. Figure 6 Connecting diagram elements
- Click
 to save the flow.
 - Click
 to activate the flow.
 - Set input parameters and click the run button.
{ "inputMessages": [ { "role": "user", "content": "Who are you" } ], "inputConfig": { "temperature": 0.8, "top_p": 1.0, "presence_penalty": 0.0 } } - Click
 in the upper part of the editor to activate the flow.
Feedback
Was this page helpful?
Provide feedbackThank you very much for your feedback. We will continue working to improve the documentation.See the reply and handling status in My Cloud VOC.
For any further questions, feel free to contact us through the chatbot.
Chatbot


