
Help Center/
Huawei Cloud Astro Canvas/
User Guide/
Widget Management/
Customizing Interactive Actions for ECharts Widgets
Updated on 2025-03-24 GMT+08:00
Customizing Interactive Actions for ECharts Widgets
When an ECharts widget is used as the action of the responder, you can customize interactive actions in the custom action settings.
Customizing Interactive Actions
- Select an ECharts widget and click
 .
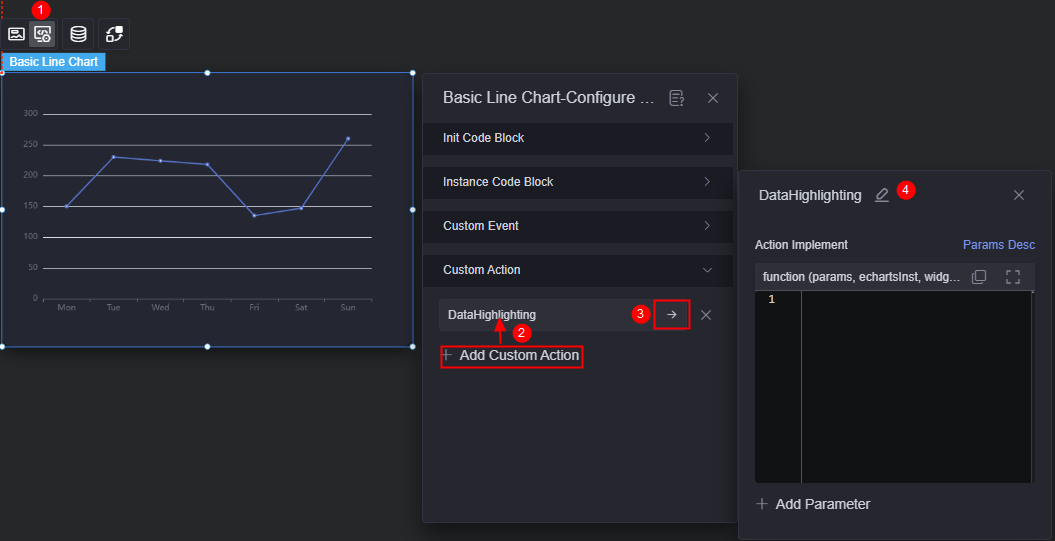
. - Expand Custom Actions, click Add Custom Actions, and change the action name to HighlightingData.
Figure 1 Creating a custom action
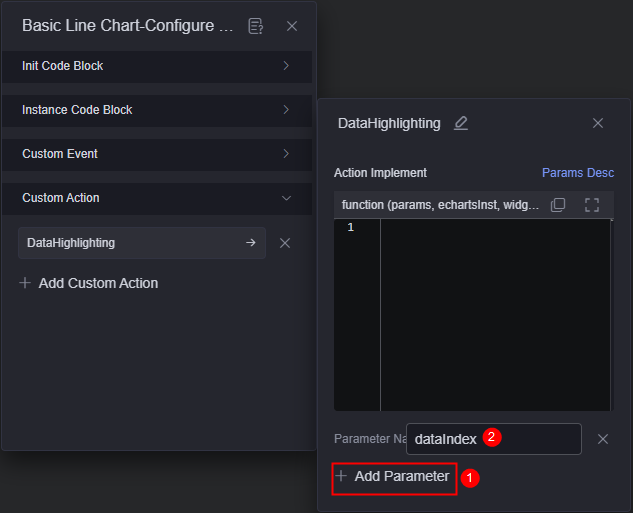
- In the action implementation, enter the following code to call the ECharts action API:
echartsInst.dispatchAction({ type: 'highlight', dataIndex: params.dataIndex, }); - Click the button to add parameters and set the parameter name to dataIndex.
Figure 2 Adding the dataIndex field
- Select the ECharts widget and click
 to access the widget interaction page.
 - In As Responder, click Interaction Event and select the widget loading event.
- In Response Actions, click Response Actions and select Widget Action.
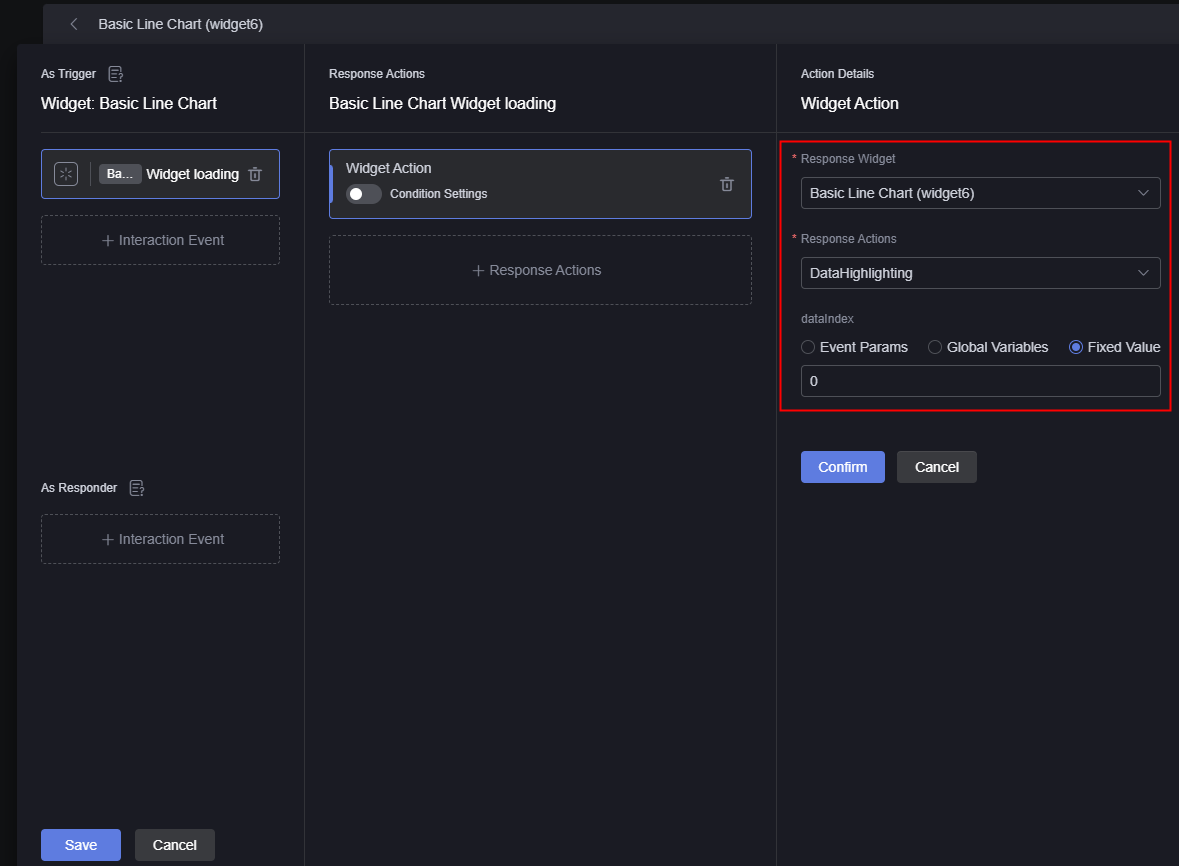
- In the action details, select the ECharts widget as the response widget, select HighlightingData as the response action, and set dataIndex to 0.
Figure 3 Setting the action details
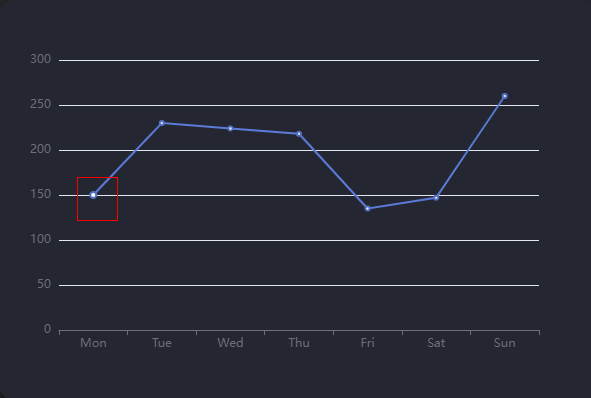
- Save the interaction settings and preview the page. The ECharts widget renders the first data to obtain the highlight effect.
Figure 4 Viewing the rendering effect
Parent topic: Widget Management
Feedback
Was this page helpful?
Provide feedbackThank you very much for your feedback. We will continue working to improve the documentation.See the reply and handling status in My Cloud VOC.
The system is busy. Please try again later.
For any further questions, feel free to contact us through the chatbot.
Chatbot


