
Registering a Private Image Using an ISO File
Scenarios
This section describes how to create a Windows private image.
Prerequisites
- You have obtained the username and password for logging in to the console.
- You have prepared the OS ISO file. For details, see Table 1.

The name of the ISO image file can contain only letters, digits, hyphens (-), and underscores (_).
Procedure
Integrating the VirtIO driver into an ISO file using AnyBurn
- Install AnyBurn on the local PC.
- Download the VirtIO driver package and decompress it to your local PC.
- Use AnyBurn to open the ISO file.
Open the AnyBurn software and select Edit image file, as shown in Figure 1.
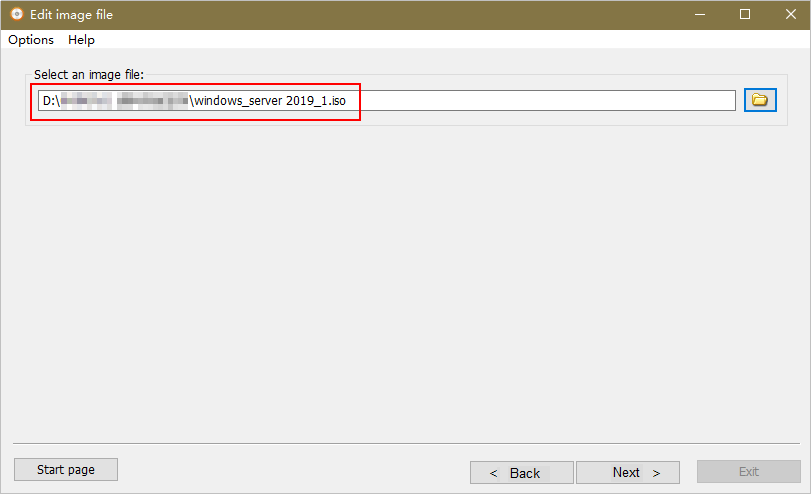
Select the ISO file and click Next, as shown in Figure 2.
- Edit the ISO file to integrate the VirtIO driver.
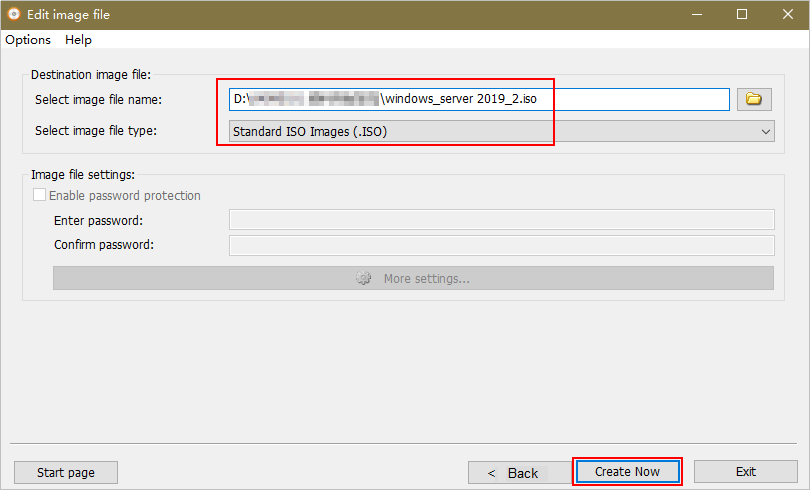
- Click Add to add all files in the virtio-win.iso file downloaded in 2 to the parent node of the ISO file, and click Next.
- Specify the path for saving the file and the ISO file name, select the ISO format, and click Create Now.
After the ISO file is generated, view the ISO file integrated with the VirtIO driver, as shown in Figure 3.

Registering a private image
- Log in to Huawei Cloud management console.
- Upload an image file.
You are advised to use OBS Browser+ to upload external image files to a personal OBS bucket. For details, see OBS Browser+ Best Practices.
For details about how to download, install, and log in to OBS Browser+, see "OBS Browser+" in the Tools Guide of OBS.
- If no OBS bucket is available, create one by referring to "Creating a Bucket" in the Getting Started of OBS.
- The bucket file and the image to be registered must in the same region.
- Only unencrypted external image files or those encrypted using SSE-KMS can be uploaded to the OBS bucket.
- The storage class of the OBS bucket and the image file must be Standard.
- Click Service List. Under Compute, click Image Management Service.
The IMS console is displayed.
- Click Create Image in the upper right corner of the page.
- In the Image Type and Source area, select Import Image for Type and ISO image for Image Type.
- In the image file list, select the bucket in 6 and then the ISO file.
- On the Image Information page, configure basic information about the image according to Table 1. Retain the default values for the parameters that are not listed below.
Table 1 Image parameters Parameter
Description
Architecture
Select x86.
Boot Mode
Select BIOS.
OS
Configure this parameter based on the OS version, for example, Windows Server 2016 Standard 64bit.
System Disk (GiB)
Configure this parameter based on the OS requirements, for example, 60 GB.
Name
Enter the image name, for example, WindowsXXX-Template_ISO.
Enterprise Project
Select the enterprise project to which the resource belongs, for example, default.
NOTE:This parameter is mandatory if the enterprise project has been enabled.
- Confirm the image parameters, select I have read and agree to the Statement of Commitment to Image Creation and Image Disclaimer., and click Next.
- Click Submit.
View the image status on the displayed private image list.
When the image status becomes Normal, the image has been created.
Feedback
Was this page helpful?
Provide feedbackThank you very much for your feedback. We will continue working to improve the documentation.See the reply and handling status in My Cloud VOC.
For any further questions, feel free to contact us through the chatbot.
Chatbot


