
Step 3: Connect to the DCS Redis Instance
This section describes how to access a single-node DCS Redis instance through redis-cli on an ECS within a VPC.

To access a DCS Redis instance through other clients, see Access in Different Languages. To access an instance through the Web CLI on the console, see Connecting to Redis on the Console.
Prerequisites
- A DCS Redis instance has been created and is in the Running state.
- An ECS has been created and is in the same region and VPC as the DCS Redis instance. For details about how to create an ECS, see Purchasing an ECS.
- If the ECS runs the Linux OS, ensure that the GCC compilation environment has been installed on the ECS.
- If you have configured an IP whitelist for the DCS Redis instance, add the IP address of the ECS to the whitelist. For details, see Managing IP Address Whitelist.
Procedure (Linux)
- Obtain the IP address or domain name and port number of the DCS Redis instance.
- Log in to the DCS console.
- Click
 in the upper left corner of the management console and select the region where your instance is located.
 - In the navigation pane of the DCS console, choose Cache Manager.
- Click the instance you want to view.
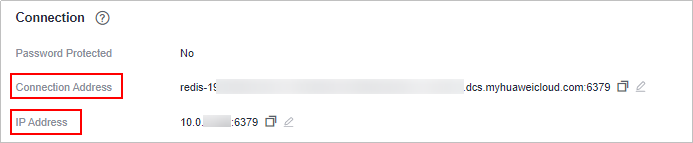
- Check Connection Address and IP Address in the Connection area.
Figure 1 Connection information
- Install redis-cli.
The following steps assume that your client is installed on the Linux OS.
- Log in to the ECS.
- Run the following command to download the source code package of your Redis client from https://download.redis.io/releases/redis-6.2.13.tar.gz:
wget http://download.redis.io/releases/redis-6.2.13.tar.gz
- Run the following command to decompress the source code package of your Redis client:
- Run the following commands to go to the Redis directory and compile the source code of your Redis client:
make
cd src
- Access the DCS Redis instance.
- Run the following command to access the chosen DCS Redis instance:
./redis-cli -h {dcs_instance_address} -p 6379
{dcs_instance_address} indicates the IP address/domain name of the DCS instance and 6379 is the port used for accessing the instance. To obtain the IP address/domain name and the port, see 1.
The following uses a domain name as an example. Change the address and port as required.
[root@ecs-redis redis-5.0.8]# cd src
[root@ecs-redis src]# ./redis-cli -h redis-xxxxxx.dcs.huaweicloud.com -p 6379
redis-xxxxxx.dcs.huaweicloud.com:6379>
- If you have set a password for the DCS instance, enter the password in this step. You can read and write cached data only after the password is verified. Skip this step if the instance is not password-protected.
{password} indicates the password used for logging in to the chosen DCS Redis instance. This password is defined during DCS Redis instance creation.
The command output is as follows:
redis-xxxxxx.dcs.huaweicloud.com:6379> auth *******
OK
redis-xxxxxx.dcs.huaweicloud.com:6379>
- Run the following command to access the chosen DCS Redis instance:
Procedure (Windows)
Click here to download the Redis client installation package for Windows. Decompress the package in any directory, run the command prompt cmd.exe in Windows and go to the directory. Then, run the following command to access the DCS Redis instance:
redis-cli.exe -h XXX -p 6379
XXX indicates the IP address/domain name of the DCS instance and 6379 is an example port used for accessing the DCS instance. For details about how to obtain the IP address/domain name and port, see 1. Change the IP address/domain name and port as required.
Feedback
Was this page helpful?
Provide feedbackThank you very much for your feedback. We will continue working to improve the documentation.See the reply and handling status in My Cloud VOC.
For any further questions, feel free to contact us through the chatbot.
Chatbot


