Help Center/
FunctionGraph/
Developer Guide/
Automated Deployment/
Hosting Function Code with CodeArts/
Step 5: Set Up a Function Update Pipeline
Updated on 2025-12-10 GMT+08:00
Step 5: Set Up a Function Update Pipeline
The pipeline allows you to release and update the helloworld function code in the functions repository to FunctionGraph.
Creating a Build Task
- Choose Build & CloudArtifact > CloudBuild, and click Create Task.
- Select functions for Source Code Repository and Blank Template for the template.
- Add these three actions: Run Shell Commands, Upload Files to OBS, and Upload Deployment Package to CloudRelease.
- Configure the Run Shell Commands action.
# Build a function deployment package.
cd helloworld
zip helloworld_deploy.zip cam.yaml
# Build a function code package.
cd code
zip -rp helloworld.zip *
Figure 1 Run Shell Commands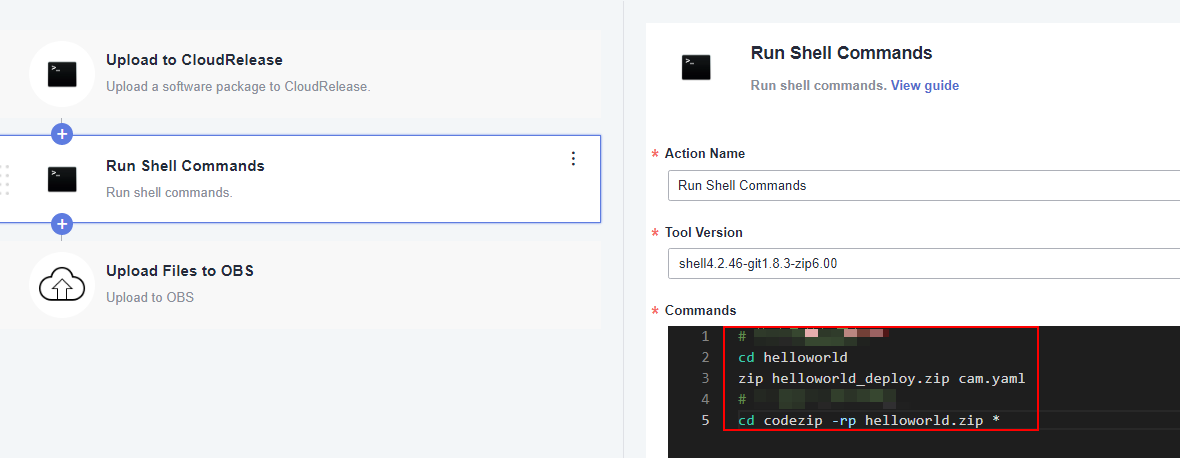
- Configure the Upload Files to OBS action.
Figure 2 Upload Files to OBS
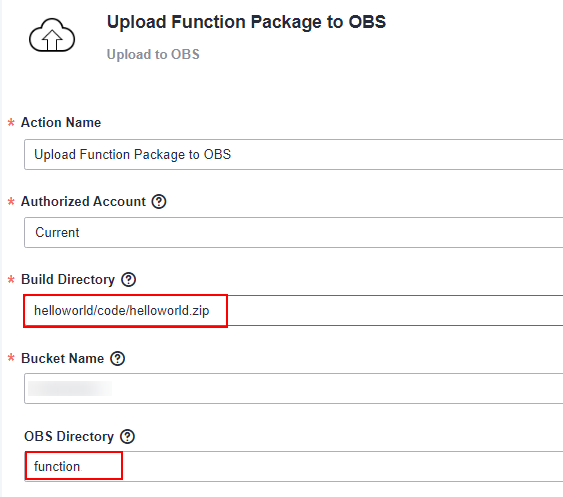
- Action Name: Enter Upload Function Package to OBS.
- Build Directory: Enter helloworld/code/helloworld.zip.
- Bucket Name: Specify a private bucket to store the function code ZIP package.
- OBS Directory: Enter function.
- Configure the Upload Deployment Package to CloudRelease action.
Figure 3 Upload Deployment Package to CloudRelease
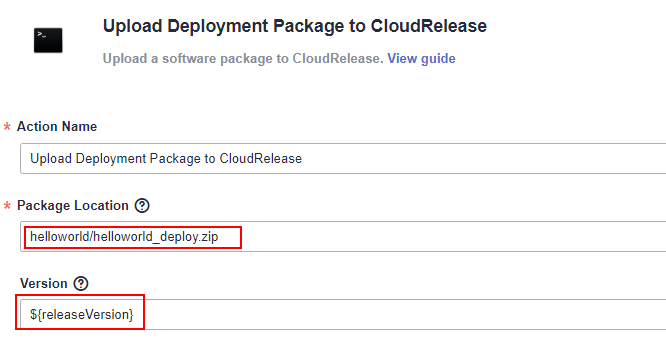
- Action Name: Enter Upload Deployment Package to CloudRelease.
- Package Location: Enter helloworld/helloworld_deploy.zip.
- Version: Enter ${releaseVersion}.
- Configure the Run Shell Commands action.
- On the Parameters tab page, add releaseVersion and enable Runtime Settings.
Figure 4 Setting parameters

- On the Basic Information tab page, change the task name to pipeline-update-function-deploy and click Save.
Creating a Deployment Task
- Choose Build & CloudArtifact > CloudDeploy, and click Create Task.
- Select Blank Template and click Next.
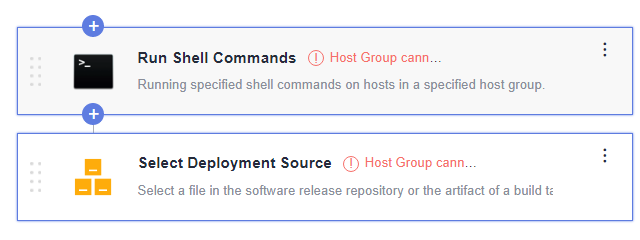
- Add the actions Select Deployment Source and Run Shell Commands.
Figure 5 Adding deployment actions
- Configure the Select Deployment Source action.
Figure 6 Setting action name to "Download Function Deployment Package to Deployment Host"
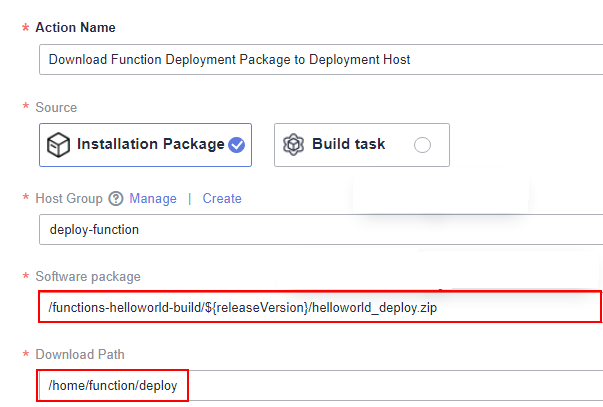
- Action Name: Enter Download Function Deployment Package to Deployment Host.
- Host Group: Select deploy-function.
- Software package: Select /functions-helloworld-build/${releaseVersion}/helloworld_deploy.zip.
- Download Path: Enter /home/function/deploy.
- Configure the Run Shell Commands action.
Figure 7 Setting action name to "Deploy Function"

- Action Name: Enter Deploy Function.
- Host Group: Select deploy-function.
- Shell Commands:
cd /home/function/deploy
unzip -o helloworld_deploy.zip -d helloworld_deploy
python3 deploy.py helloworld_deploy "${key}"
- Configure the Select Deployment Source action.
- Add two parameters.
- releaseVersion: Use the default value 1.0.0 and enable Runtime Settings.
- key: Enter a password and enable Private Parameter.
Figure 8 Setting parameters

- On the Basic Information tab page, change the task name to update-function-deploy and click Save.
Configuring a Pipeline
- Choose Build & CloudArtifact > CloudPipeline, and click Create Pipeline.
- Select functions for Source Code Repository and Blank Template for the template.
- Configure Build and Check.
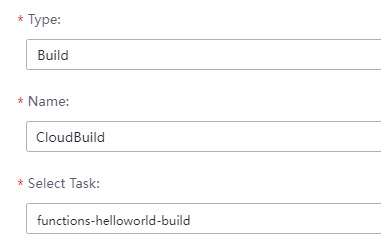
- Add a build task, and select the functions-helloworld-build task.
Figure 9 Adding a task
- Set releaseVersion as a pipeline parameter.
Figure 10 Setting releaseVersion

- Click Save.
- Add a build task, and select the functions-helloworld-build task.
- Configure a deployment task.
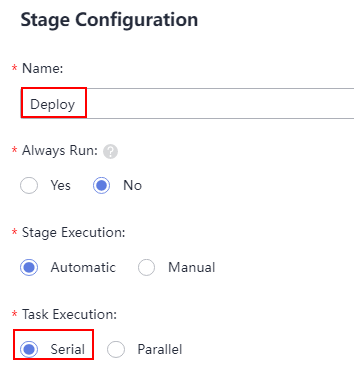
- Add a stage named Deploy after Build_and_Check, set Task Execution to Serial, and click Save.
Figure 11 Configuring the stage
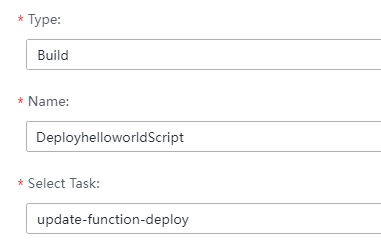
- Click Add Task to add a deployment task named DeployhelloworldScript, and select the update-function-deploy task.
Figure 12 Adding a task
- Set releaseVersion as a pipeline parameter.
Figure 13 Setting releaseVersion

- Click Save.
- Add a stage named Deploy after Build_and_Check, set Task Execution to Serial, and click Save.
- On the Basic Information tab page, change the pipeline task name to pipeline-update-function-helloworld and click Save.
- Execute the pipeline.
Set the runtime parameter releaseVersion to 1.0.0 and click Execute.
Parent topic: Hosting Function Code with CodeArts
Feedback
Was this page helpful?
Provide feedbackThank you very much for your feedback. We will continue working to improve the documentation.See the reply and handling status in My Cloud VOC.
The system is busy. Please try again later.
For any further questions, feel free to contact us through the chatbot.
Chatbot


