
Getting Started
(Optional) Modifying Security Group Rules

By default, this solution creates the security group rule that uses the ping command to test ECS connectivity. To remotely log in to an ECS in the security group, you need to add an inbound rule, for example, by setting the login port to 3389 and adding a whitelist IP address.
A security group is a collection of access control rules for cloud resources, such as cloud servers, containers, and databases, to control inbound and outbound traffic. Cloud resources associated with the same security group have the same security requirements and are mutually trusted within a VPC.
You can modify security group rules, for example, by adding, modifying, or deleting a TCP port.
- Adding a security group rule: Add an inbound rule and enable a TCP port if needed.
- Modifying a security group rule: Inappropriate security group settings can be a serious security risk. You can modify security group rules to improve the network security of ECSs.
- Deleting a security group rule: If the source or destination IP address of an inbound or outbound security group rule changes, or a port needs to be disabled, you can delete the security group rule.
(Optional) Configuring a Domain Name for an Application
Configure domain name resolution to resolve the website domain name to the IP address displayed in the figure in 9. In this way, the website can be accessed over its domain name. For details about DNS resolution, see Public Domain Name Resolution.
Using the AIGC Web UI Application
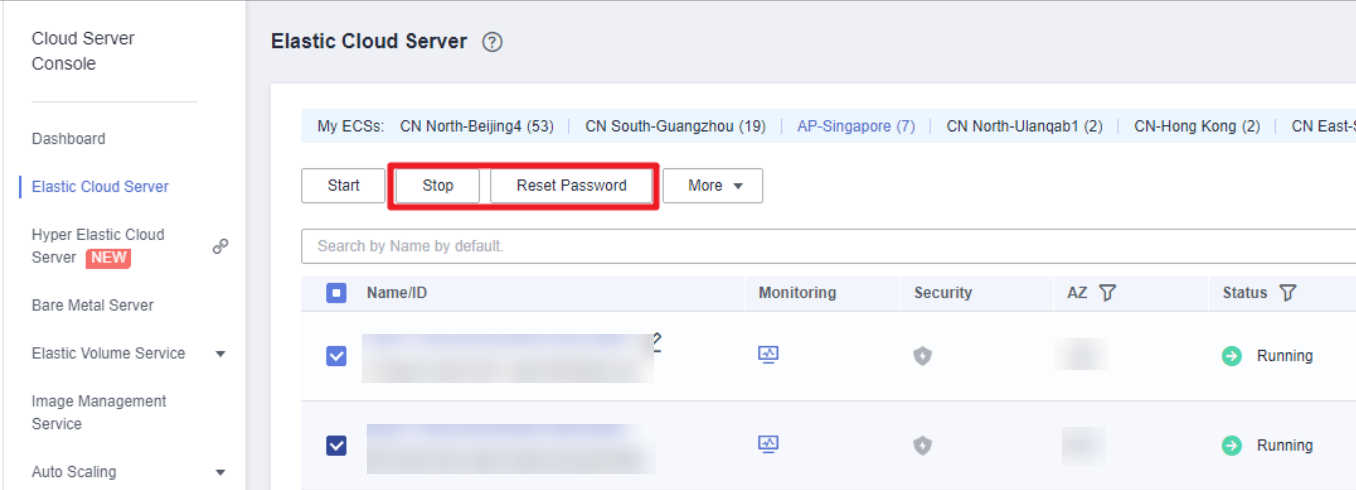
- (Optional) Log in to the ECS console, select the created ECSs and click Stop above the ECS list. After the ECSs are stopped, click Reset Password, enter a new password, and click OK. The new password will take effect after the ECSs are started.
Figure 1 Resetting the password
- Log in to the ELB console and choose Backend Server Groups from the left navigation pane. Click the target backend server group name to view its details. On the Backend Servers tab, check whether servers are in the Healthy state. (Service initialization will be completed 20 minutes after this solution is deployed based on default settings. All backend servers will be healthy on port 7860 then.)
Figure 2 Backend Server Groups
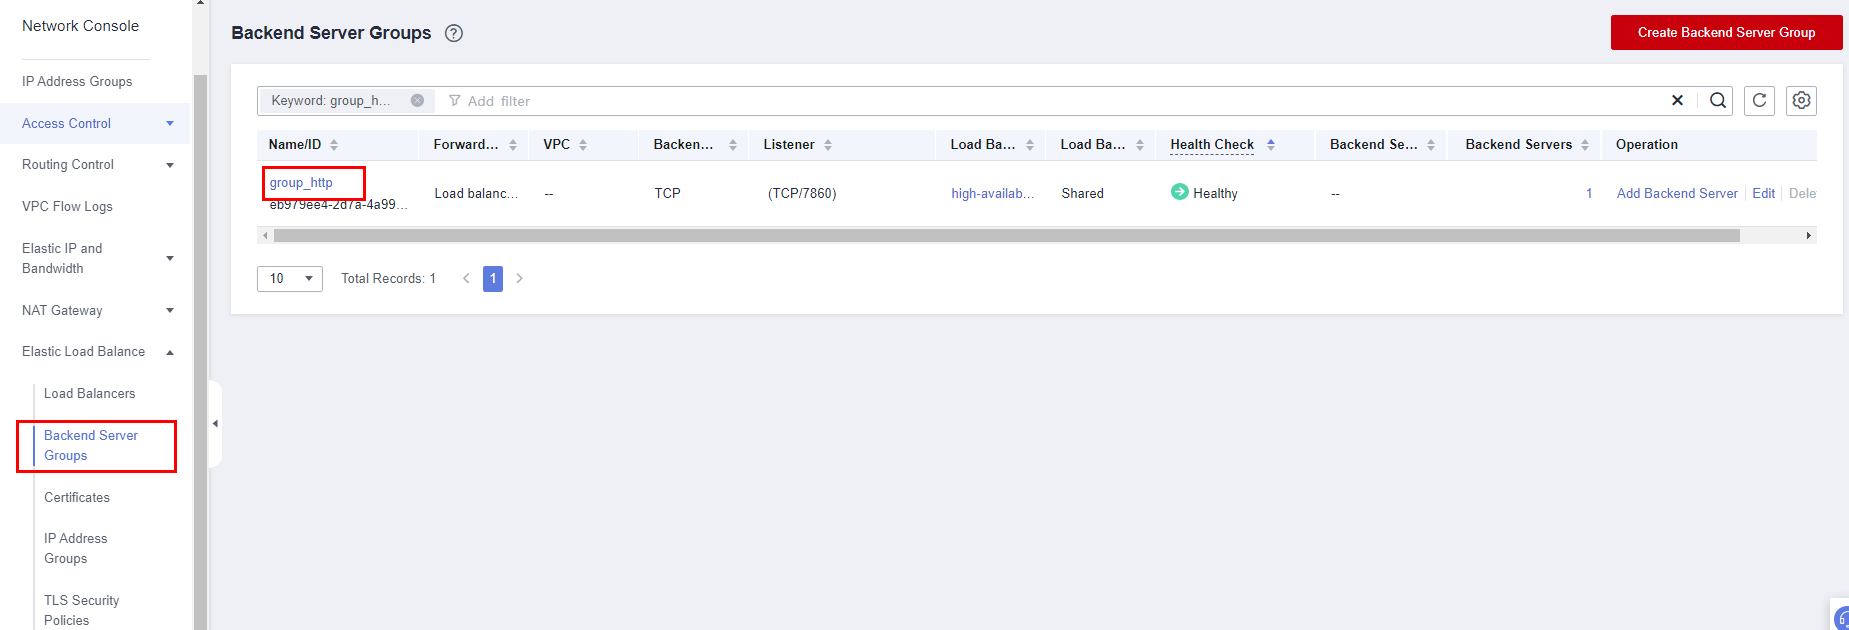 Figure 3 Backend server status
- Use the URL in 9 to access the AIGC web UI. Click txt2img, input text in the box, and click Generate. After the image is generated, click Save. For details about how to use the Stable Diffusion web UI, see stable-diffusion-webui or search for tutorials on the Internet. This solution creates the user aigc with the default password aigc@123.
Figure 4 AIGC web UI
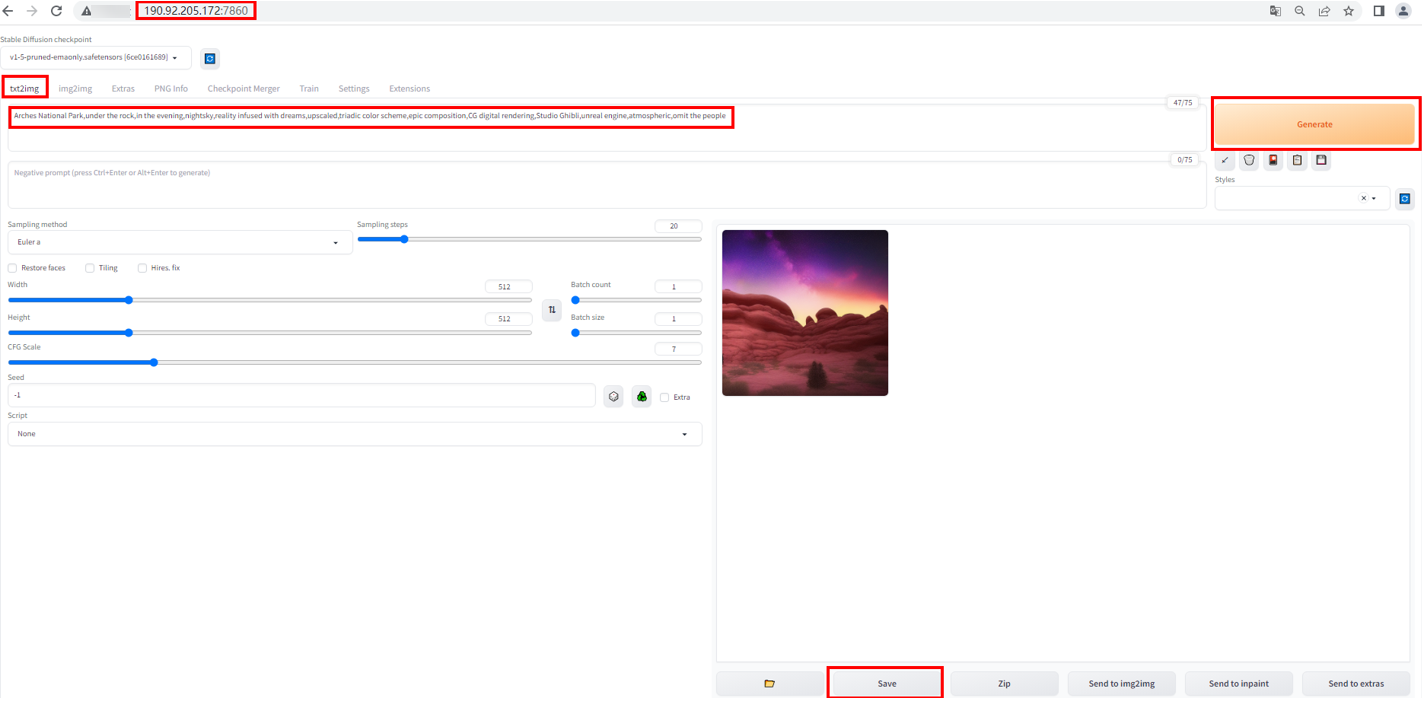
Example text prompt:
Arches National Park,under the rock,in the evening,nightsky,reality infused with dreams,upscaled,triadic color scheme,epic composition,CG digital rendering,Studio Ghibli,unreal engine,atmospheric,omit the people
- On the OBS console, click the OBS bucket created in 3 to view the saved images. You can also click Share to share the images. For more OBS functions, see Object Management.
Figure 5 OBS bucket list
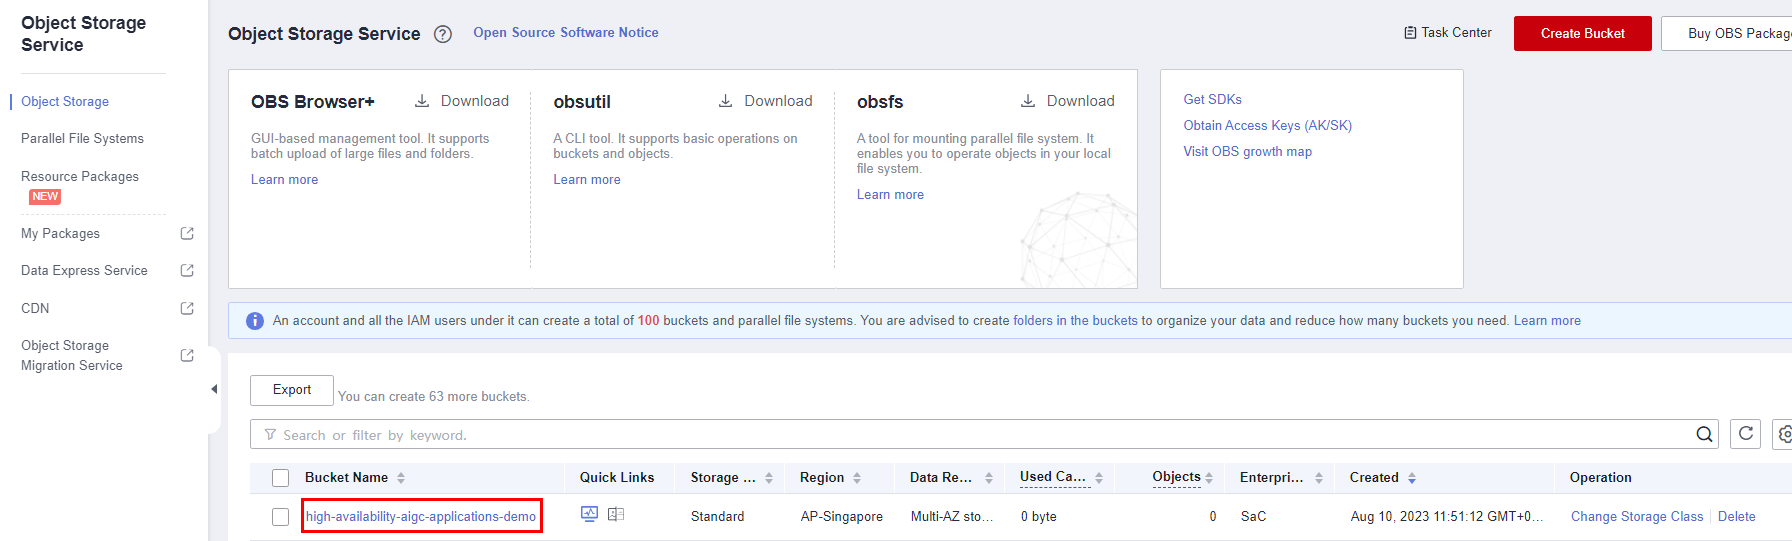 Figure 6 Viewing the saved images
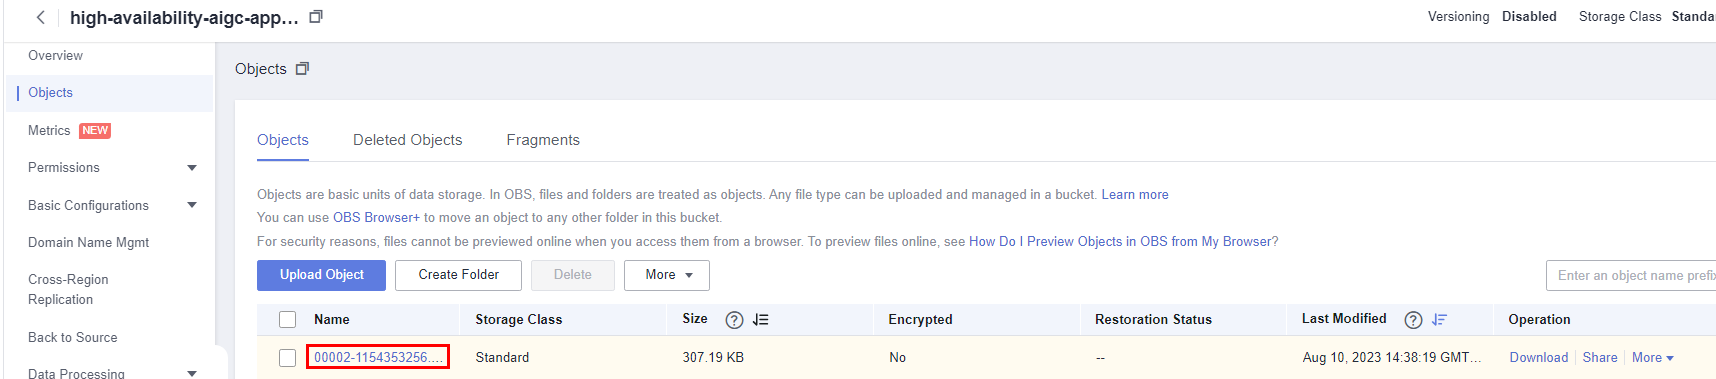
 This solution has added inotify-tools and OBS obsutil to run automatically at startup in ECSs, so the images you saved on the web UI can be automatically uploaded to the OBS bucket. You can also right-click on the web UI and choose Save as to save the images locally. AIGC can run automatically at ECS startup.
Example command for starting AIGC:
Start in the foreground:
cd /home/aigc && sudo -u aigc bash -c "source /home/aigc/webui.sh --listen --port 7860 --api --enable-insecure-extension-access"
Start in the background:
cd /home/aigc && sudo -u aigc bash -c "source /home/aigc/webui.sh --listen --port 7860 --api --enable-insecure-extension-access &">> /home/aigc/aigc-applications.log (change the storage path as needed)
Feedback
Was this page helpful?
Provide feedbackThank you very much for your feedback. We will continue working to improve the documentation.See the reply and handling status in My Cloud VOC.
For any further questions, feel free to contact us through the chatbot.
Chatbot


