
Quick Deployment
This section describes how to quickly deploy this solution.
|
Parameter |
Type |
Mandatory |
Description |
Default Value |
|---|---|---|---|---|
|
vpc_name |
String |
Yes |
Virtual Private Cloud (VPC) name. This template uses a newly created VPC and the VPC name must be unique. The value can contain 1 to 54 characters, including letters, digits, underscores (_), hyphens (-). and periods (.). |
high-availability-aigc-applications-demo |
|
security_group_name |
String |
Yes |
Security group name. This template uses a newly created security group. The value can contain 1 to 64 characters, including letters, digits, underscores (_), hyphens (-), and periods (.). |
high-availability-aigc-applications-demo |
|
ecs_name |
String |
Yes |
ECS name, which must be unique. The name format is {ecs_name}-digit. It can contain 1 to 60 characters, including letters, digits, underscores (_), hyphens (-). and periods (.). |
high-availability-aigc-applications-demo |
|
image_bucket_name |
String |
Yes |
OBS bucket name, which is globally unique. The bucket is used to store automatically uploaded images saved on the web UI. The bucket name can contain 3 to 63 characters, including lowercase letters, digits, hyphens (-), and periods (.). Do not start or end with a hyphen (-) or a period (.). |
None |
|
ecs_count |
String |
Yes |
Number of ECSs, which is greater than or equal to 1. The maximum number of ECSs is determined by the user quota listed in My Quotas. |
2 |
|
ecs_flavor |
String |
Yes |
ECS flavor. This template uses a GPU-accelerated flavor. For details about flavors, see A Summary List of x86 ECS Specifications. |
pi2.2xlarge.4 |
|
ecs_password |
String |
Yes |
Initial password of the ECS. After the ECS is created, reset the password by referring to 1. It can contain 8 to 26 characters, including at least three of the following character types: uppercase letters, lowercase letters, digits, and special characters (!@$%^-_=+[{()}]:,./?~#*). For Windows ECSs, the password cannot contain the username, the username spelled backwards, or more than two consecutive characters in the username. The default administrator account is root. |
None |
|
elb_name |
String |
Yes |
ELB name, which can contain 1 to 64 characters, including letters, digits, underscores (_), hyphens (-), and periods (.). |
high-availability-aigc-applications-demo |
|
eip_bandwidth_size |
Number |
Yes |
EIP bandwidth, which is billed by traffic. Value range: 1-300 Mbit/s |
300 Mbit/s |
|
charging_mode |
String |
Yes |
Billing mode. By default, expenses are automatically deducted. The value can be prePaid (yearly/monthly) or postPaid (pay-per-use). |
postPaid |
|
charge_period_unit |
String |
Yes |
Unit of a subscription period. This parameter is valid and mandatory only when charging_mode is set to prePaid. The value can be month or year. |
month |
|
charge_period |
Number |
Yes |
Subscription period. This parameter is valid and mandatory only when charging_mode is set to prePaid. Value range: If charge_period_unit is set to month, the value range is from 1 to 9. If charge_period_unit is set to year, the value range is from 1 to 3. |
1 |
|
access_key_id |
String |
Yes |
Access Key ID (AK), which is used to verify the identity of a user attempting to upload generated images to the OBS bucket. For details about how to obtain the AK, see Obtaining an Access Key (AK/SK). |
None |
|
secret_access_key |
String |
Yes |
Secret Access Key (SK), which is used to sign requests. It must be used together with the AK to authenticate image upload requests. For details about how to obtain the SK, see Obtaining an Access Key (AK/SK). |
None |
- Log in to Practical Application of Huawei Cloud Solutions and select Building High-Availability AIGC Applications Based on Open-Source Models.
Figure 1 Selecting a solution
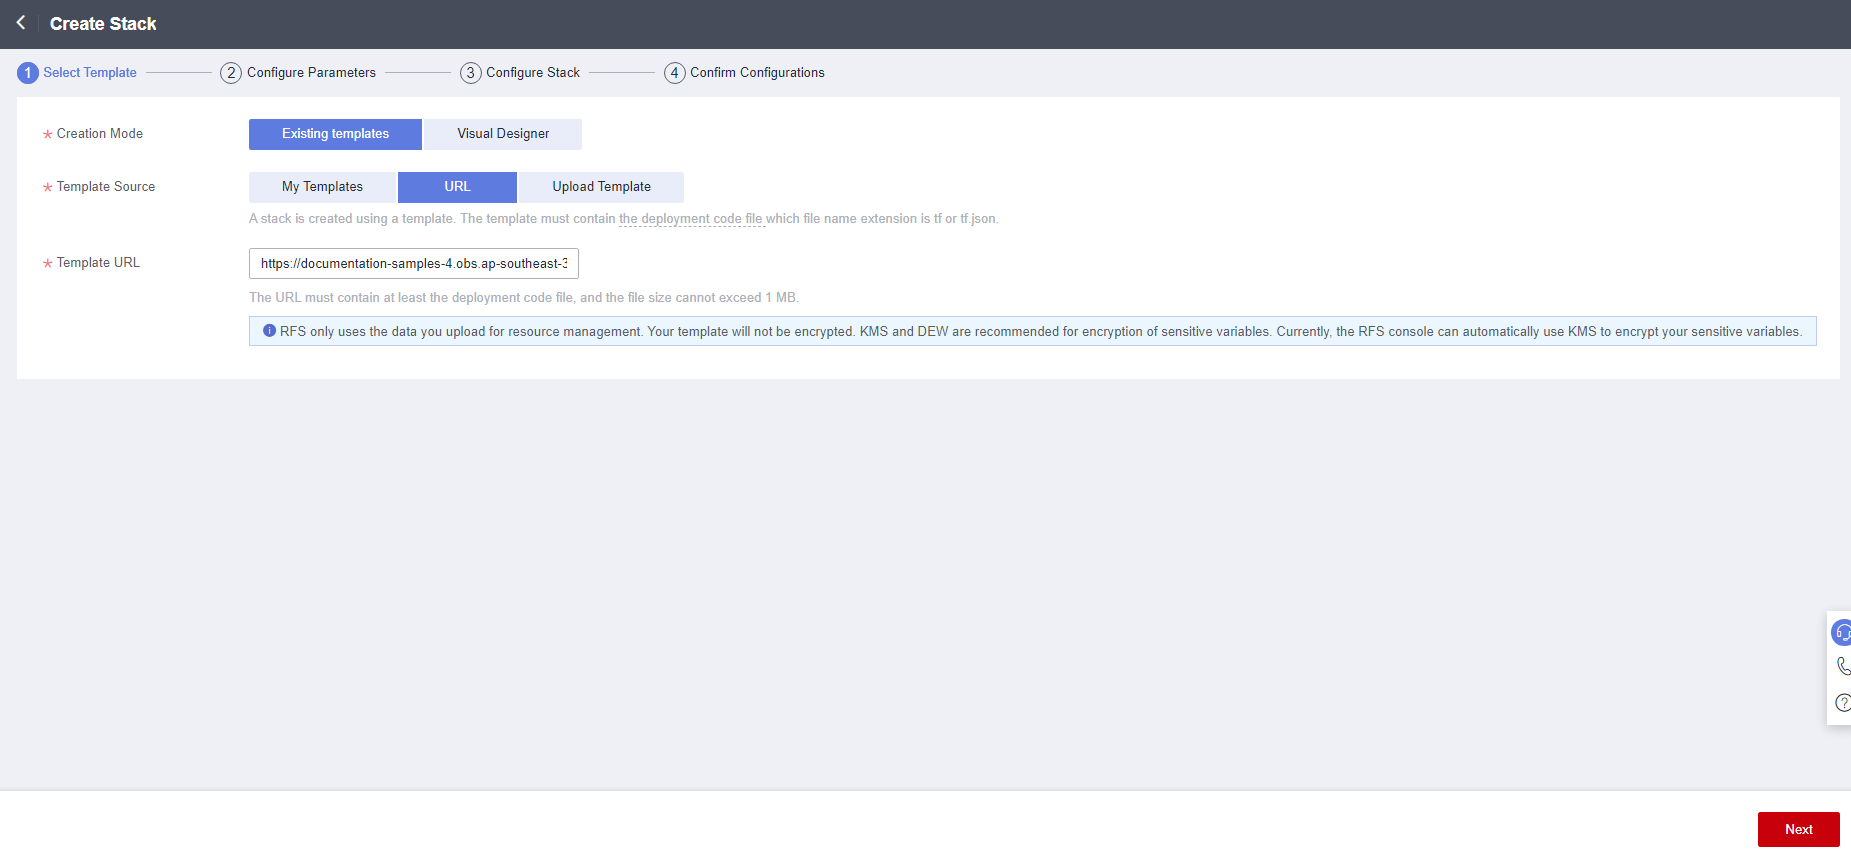
- Click Deploy to switch to the Create Stack page.
Figure 2 Creating a stack
- Click Next. On the displayed page, set parameters by referring to Table 1 and click Next.
Figure 3 Configuring parameters

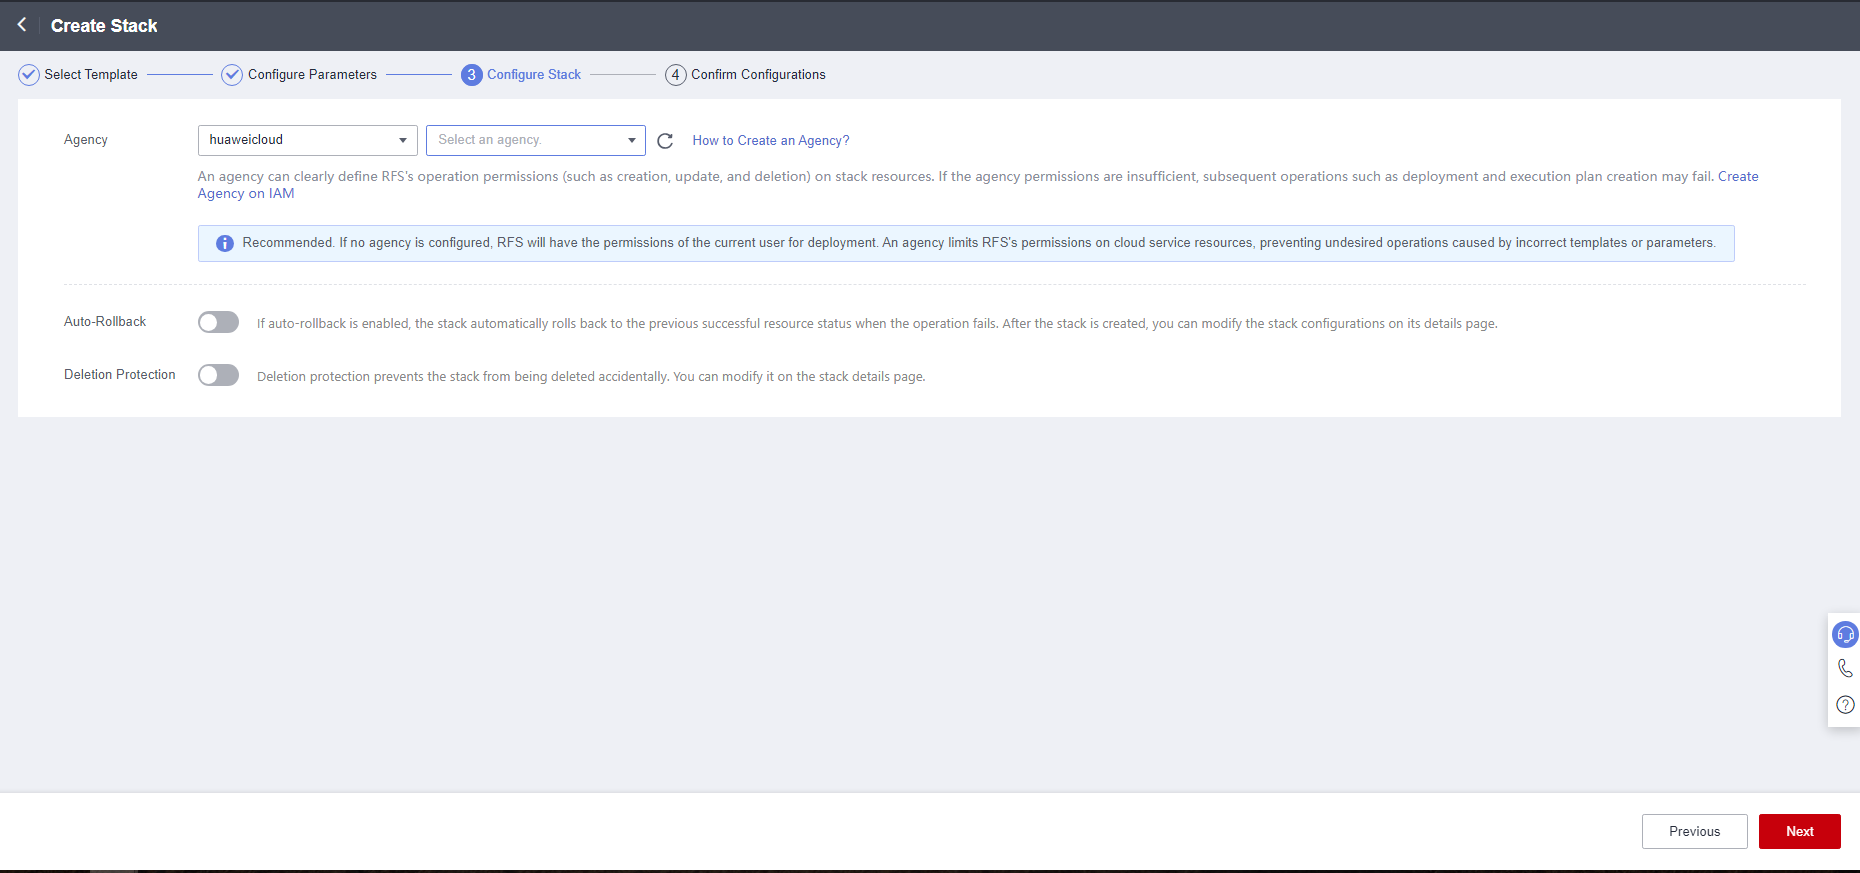
- (Optional) On the Configure Stack page, select rf_admin_trust from the agency drop-down list and click Next.
Figure 4 Configuring a stack
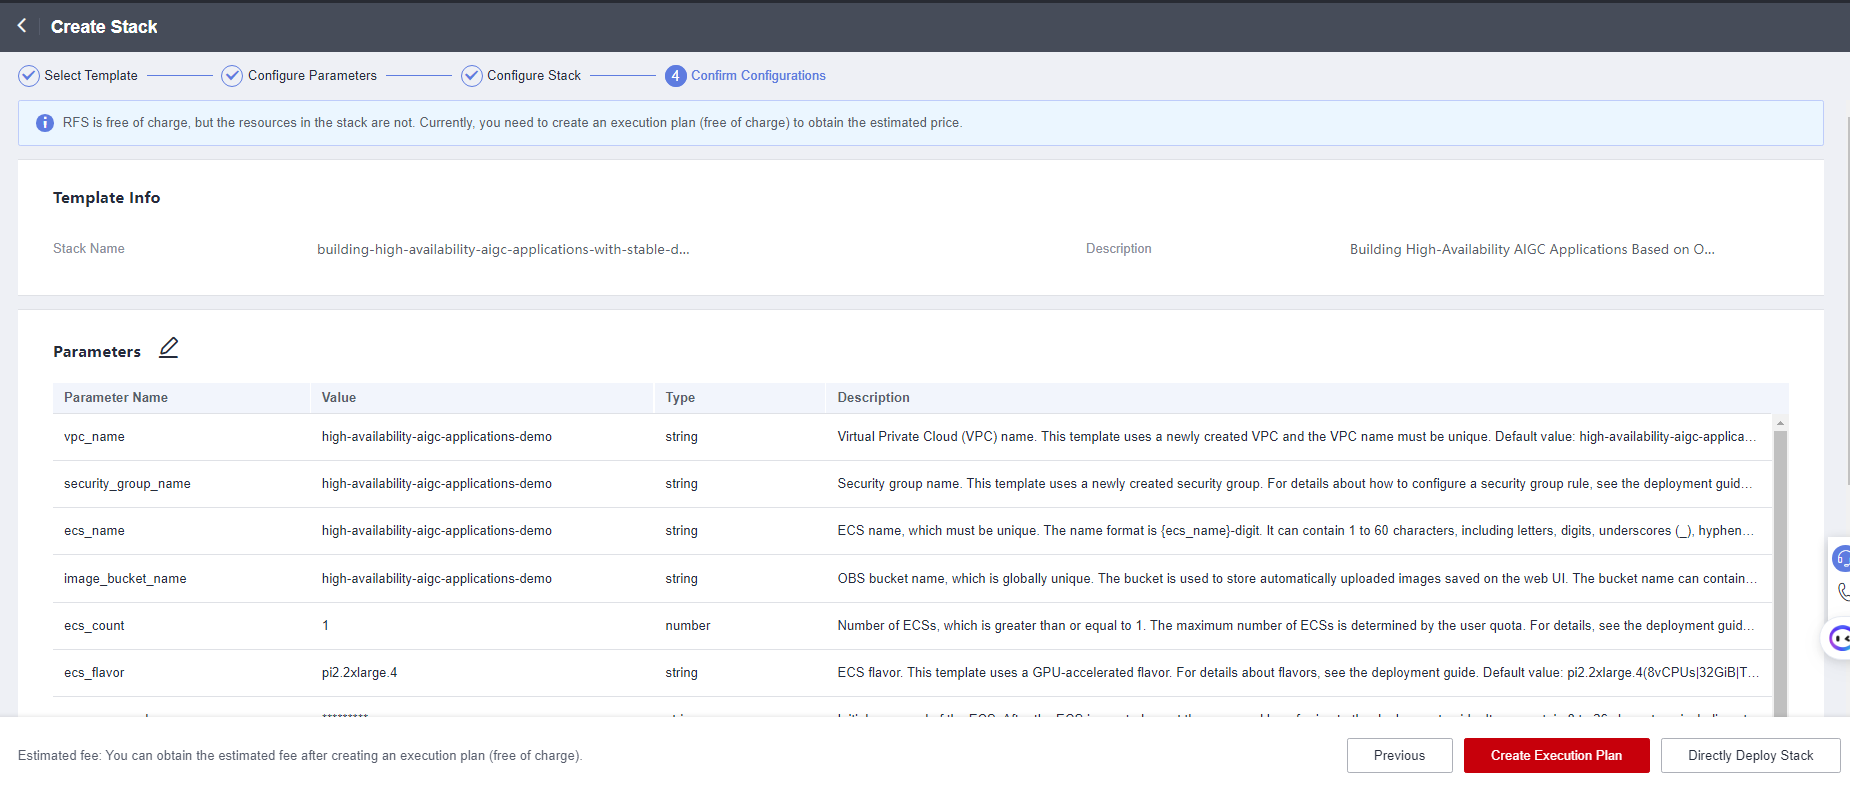
- On the Confirm Configurations page, click Create Execution Plan.
Figure 5 Creating an execution plan
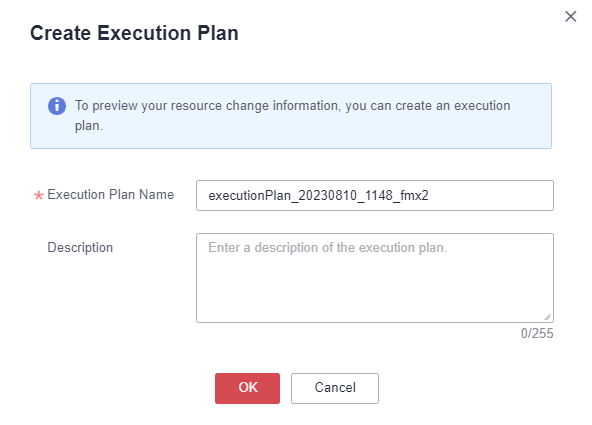
- In the displayed Create Execution Plan dialog box, enter an execution plan name and click OK.
Figure 6 Creating an execution plan
- On the Execution Plans tab, click Deploy. In the displayed dialog box, click Execute.
Figure 7 Deploying the execution plan
 Figure 8 Confirming the deployment
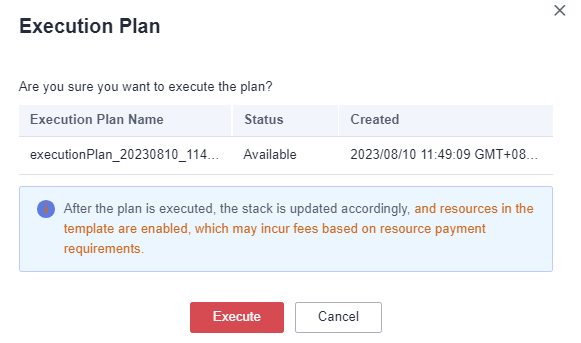
- Wait until the deployment is successful and click the Events tab to view details.
Figure 9 Successful deployment

- Refresh the page and view the web UI access description on the Outputs tab.
Figure 10 Outputs

Feedback
Was this page helpful?
Provide feedbackThank you very much for your feedback. We will continue working to improve the documentation.See the reply and handling status in My Cloud VOC.
For any further questions, feel free to contact us through the chatbot.
Chatbot


