
Using a Custom Authorizer
Creating a Custom Authentication API
Create an API that uses a custom authorizer in ROMA Connect.
- In the left navigation pane on the instance console, choose API Connect > APIs. In the upper right corner, click Create API.
- On the page displayed, configure the frontend definition of the API.
Figure 1 Frontend configuration
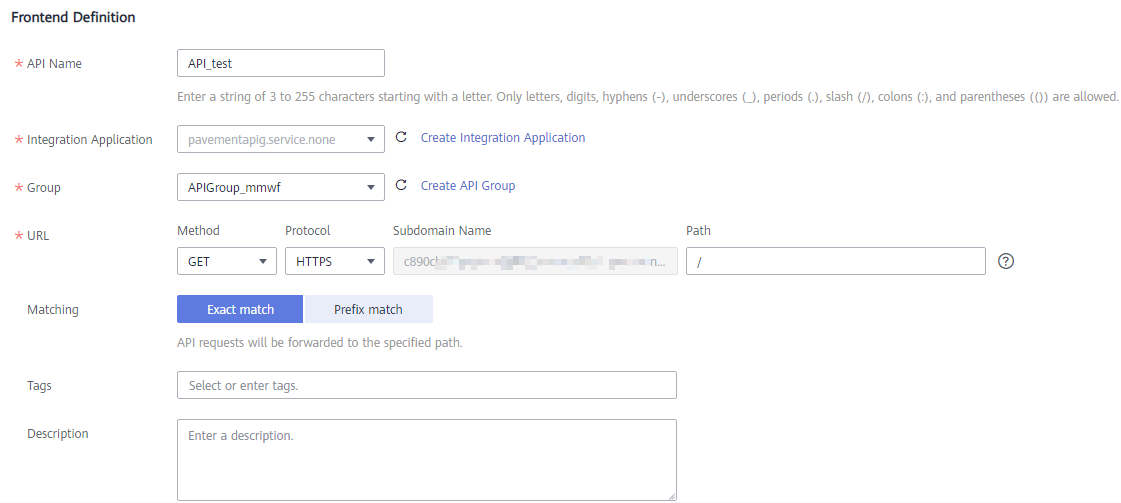
Table 1 Frontend configuration Parameter
Description
API Name
Enter an API name.
Integration Application
Select the integration application created in Creating a Function Backend for Frontend Authentication.
Group
Select an API group for the frontend API. If no API group is available, click Create API Group on the right to create one.
URL
Configure the API access address.
- Method: request method of the API. Set this parameter to GET here.
- Protocol: request protocol of the API. Set this parameter to HTTPS here.
- Path: request path of the API, in /getUserInfo/{userId} format. Set this parameter to /test here.
Matching
Matching mode of the API request path. Set this parameter to Exact match here.
Tags
Retain the default settings.
Description
Retain the default settings.
- Configure API security information.
Figure 2 Security configuration
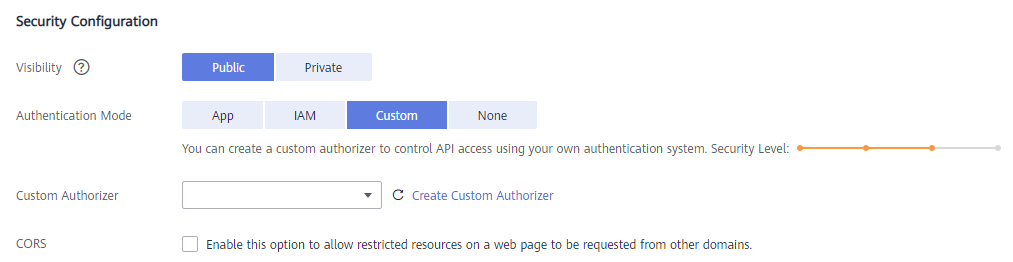
Table 2 Security configuration Parameter
Description
Visibility
Whether the API can be released to the marketplace. Retain the default value Public, which indicates that the API can be released to the marketplace.
Authentication Mode
Select Custom.
Custom Authorizer
Select the custom authorizer created in Creating a Frontend Custom Authorizer.
CORS
Retain the default setting to disable CORS.
- Configure the request parameters of the API. Or skip this step and click Next.
- Set the backend type. In this example, select Mock to return specified response.
- Configure API backend information.
Figure 3 Backend configuration
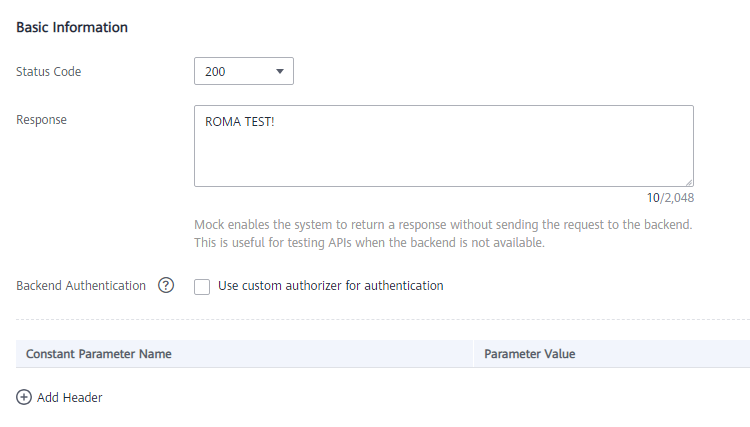
Table 3 Backend configuration Parameter
Description
Status Code
Select the HTTP status code returned by the API. Use 200 here.
Response
Enter the response result of the API. In this example, set this parameter to ROMA TEST!. Once you call the API, ROMA TEST! is returned.
Backend Authentication
Retain the default setting to disable backend authentication.
Add Header
Retain the default settings.
- Configure the response example. Retain the default settings.
- Click Finish.
After the API is created, the API details page is displayed.
Debugging an API
- On the details page of the API created in Creating a Custom Authentication API, click Debug in the upper right corner.
- On the page displayed, click the Headers tab, and click Add Request Parameter.
- Set Parameter name to x-auth and Parameter value to user1:xxxx.
Figure 4 API debugging
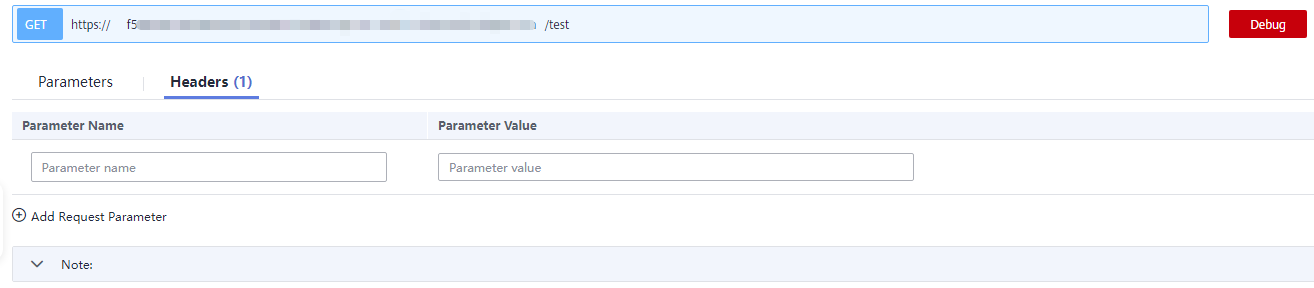
- Click Debug on the right of the URL. The request sent when you call the API and the response received are displayed in the lower part of the page.
The message ROMA TEST! is displayed, indicating that the API is successfully called.
HTTP/1.1 200 OK
Transfer-Encoding: chunked
Connection: keep-alive
Content-Type: application/json
...

ROMA TEST!
- Delete the request parameter x-auth added in 3 and click Debug again.
The response indicates that the API fails to be called, and the error message indicates that the authentication information is incorrect.
HTTP/1.1 401 Unauthorized
Transfer-Encoding: chunked
Connection: keep-alive
Content-Type: application/json
...

{"error_msg":"Incorrect authentication information: frontend authorizer","error_code":"APIC.0305","request_id":"56b2c6ae4a49f44b88670201eade9e05"}
Feedback
Was this page helpful?
Provide feedbackThank you very much for your feedback. We will continue working to improve the documentation.See the reply and handling status in My Cloud VOC.
For any further questions, feel free to contact us through the chatbot.
Chatbot


