
Separately Assigning Permissions to Administrators and Developers
In small- and medium-sized teams, administrators need to globally control ModelArts resources, and developers only need to focus on their own instances. Generally, the te_admin permission of a developer account must be configured by the tenant account. This section uses notebook as an example to describe how to assign different permissions to administrators and developers through custom policies.
Scenarios
To develop a project using notebook, administrators need full control permissions for using ModelArts dedicated resource pools, and access and operation permissions on all notebook instances.
To use development environments, developers only need operation permissions for using their own instances and dependent services. They do not need to perform operations on ModelArts dedicated resource pools or view notebook instances of other users.

Configuring Permissions for an Administrator
Assign full control permissions to administrators for using ModelArts dedicated resource pools and all notebook instances. The procedure is as follows:
- Use a tenant account to create an administrator user group ModelArts_admin_group and add administrator accounts to ModelArts_admin_group. For details, see Step 1 Creating a User Group and Adding Users to the User Group.
- Create a custom policy.
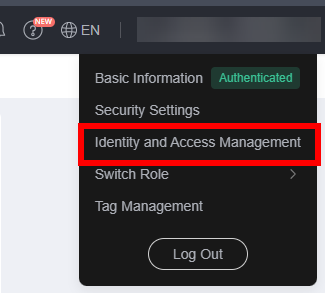
- Log in to the management console using an administrator account, hover over your username in the upper right corner, and click Identity and Access Management from the drop-down list to switch to the IAM management console.
Figure 2 Identity and Access Management

- Create custom policy 1 and assign IAM and OBS permissions to the user. In the navigation pane of the IAM console, choose Permissions > Policies/Roles. Click Create Custom Policy in the upper right corner. On the displayed page, enter Policy1_IAM_OBS for Policy Name, select JSON for Policy View, configure the policy content, and click OK.
The custom policy Policy1_IAM_OBS is as follows, which grants IAM and OBS operation permissions to the user. You can directly copy and paste the content.
{ "Version": "1.1", "Statement": [ { "Effect": "Allow", "Action": [ "iam:users:listUsers", "iam:projects:listProjects", "obs:object:PutObject", "obs:object:GetObject", "obs:object:GetObjectVersion", "obs:bucket:HeadBucket", "obs:object:DeleteObject", "obs:bucket:CreateBucket", "obs:bucket:ListBucket" ] } ] } - Repeat 2.b to create custom policy 2 and grant the user the permissions to perform operations on dependent services ECS, SWR, MRS, and SMN as well as ModelArts. Set Policy Name to Policy2_AllowOperation and Policy View to JSON, configure the policy content, and click OK.
The custom policy Policy2_AllowOperation is as follows, which grants the user the permissions to perform operations on dependent services ECS, SWR, MRS, and SMN as well as ModelArts. You can directly copy and paste the content.
{
    "Version": "1.1",
    "Statement": [
        {
            "Effect": "Allow",
            "Action": [
                "ecs:serverKeypairs:list",
                "ecs:serverKeypairs:get",
                "ecs:serverKeypairs:delete",
                "ecs:serverKeypairs:create",
                "swr:repository:getNamespace",
                "swr:repository:listNamespaces",
                "swr:repository:deleteTag",
                "swr:repository:getRepository",
                "swr:repository:listTags",
                "swr:instance:createTempCredential",
                "mrs:cluster:get",
                "modelarts:*:*"
            ]
        }
    ]
}
- Log in to the management console using an administrator account, hover over your username in the upper right corner, and click Identity and Access Management from the drop-down list to switch to the IAM management console.
- Grant the policy created in 2 to the administrator group ModelArts_admin_group.
- In the navigation pane of the IAM console, choose User Groups. On the User Groups page, locate the row that contains ModelArts_admin_group, click Authorize in the Operation column, and select Policy1_IAM_OBS and Policy2_AllowOperation. Click Next.
- Specify the scope as All resources and click OK.
- Configure agent-based ModelArts access authorization for an administrator to allow ModelArts to access dependent services such as OBS.
- Log in to the ModelArts console. In the navigation pane on the left, choose Permission Management.
- Click Add Authorization. On the Add Authorization page, set Authorized User to IAM user, select an administrator account for Authorized To, select Add agency, and select Common User for Permissions. Permissions control is not required for administrators, so use default setting Common User.
- Select I have read and agree to the ModelArts Service Statement. Click Create.
- Test administrator permissions.
- Log in to the ModelArts management console as the administrator. On the login page, ensure that IAM User Login is selected.
Change the password as prompted upon the first login.
- In the navigation pane of the ModelArts management console, choose Dedicated Resource Pools and click Create. If the console does not display a message indicating insufficient permissions, the permissions have been assigned to the administrator.
- Log in to the ModelArts management console as the administrator. On the login page, ensure that IAM User Login is selected.
Configuring Permissions for a Developer
Use IAM for fine-grained control of developer permissions. The procedure is as follows:
- Use a tenant account to create a developer user group user_group and add developer accounts to user_group. For details, see Step 1 Creating a User Group and Adding Users to the User Group.
- Create a custom policy.
- Log in to the management console using a tenant account, hover over your username in the upper right corner, and click Identity and Access Management from the drop-down list to switch to the IAM management console.
Figure 3 Identity and Access Management
- Create custom policy 3 to prevent users from performing operations on ModelArts dedicated resource pools and viewing notebook instances of other users.
In the navigation pane of the IAM console, choose Permissions > Policies/Roles. Click Create Custom Policy in the upper right corner. On the displayed page, enter Policy3_DenyOperation for Policy Name, select JSON for Policy View, configure the policy content, and click OK.
The custom policy Policy3_DenyOperation is as follows. You can copy and paste the content.{ "Version": "1.1", "Statement": [ { "Effect": "deny", "Action": [ "modelarts:pool:create", "modelarts:pool:update", "modelarts:pool:delete", "modelarts:notebook:listAllNotebooks" ] } ] }
- Log in to the management console using a tenant account, hover over your username in the upper right corner, and click Identity and Access Management from the drop-down list to switch to the IAM management console.
- Grant the custom policy to the developer user group user_group.
- In the navigation pane of the IAM console, choose User Groups. On the User Groups page, locate the row that contains user_group, click Authorize in the Operation column, and select Policy1_IAM_OBS, Policy2_AllowOperation, and Policy3_DenyOperation. Click Next.
- Specify the scope as All resources and click OK.
- Configure agent-based ModelArts access authorization for a developer to allow ModelArts to access dependent services such as OBS.
- Log in to the ModelArts console. In the navigation pane on the left, choose Permission Management.
- Click Add Authorization. On the Add Authorization page, set Authorized User to IAM user, select a developer account for Authorized To, add an agency ma_agency_develop_user, set Permissions to Custom, and select OBS Administrator. Developers only need OBS authorization to allow developers to access OBS when using notebook.
- Click Create.
- On the Permission Management page, click Add Authorization again. On the Add Authorization page that is displayed, configure an agency for other developer users.
On the Add Authorization page, set Authorized User to IAM user, select a developer account for Authorized To, and select the existing agency ma_agency_develop_user created before.
- Test developer permissions.
- Log in to the ModelArts management console as an IAM user in user_group. On the login page, ensure that IAM User Login is selected.
Change the password as prompted upon the first login.
- In the navigation pane of the ModelArts management console, choose Dedicated Resource Pools and click Create. If the console does not display a message indicating insufficient permissions, the permissions have been assigned to the developer.
- Log in to the ModelArts management console as an IAM user in user_group. On the login page, ensure that IAM User Login is selected.
Feedback
Was this page helpful?
Provide feedbackThank you very much for your feedback. We will continue working to improve the documentation.See the reply and handling status in My Cloud VOC.
For any further questions, feel free to contact us through the chatbot.
Chatbot


