Enabling a ModelArts Standard Inference Service to Access the Internet
This section describes how to enable an inference service to access the Internet.
Applications
An inference service accesses the Internet in the following scenarios:
- After an image is input, the inference service calls OCR on the Internet and then processes data using NLP.
- The inference service downloads files from the Internet and analyzes the files.
- The inference service sends back the analysis result to the terminal on the Internet.
Solution Design
Use the algorithm on the instance where the inference service is deployed to access the Internet.

Step 1: Interconnecting a ModelArts Dedicated Resource Pool to a VPC
- Create a VPC and subnet first. For details, see Creating a VPC and Subnet.
- Create a ModelArts dedicated resource pool network.
- Log in to the ModelArts console. In the navigation pane on the left, choose Network under Resource Management.
- Click Create Network.
- In the displayed Create Network dialog box, configure the parameters.
- Confirm the settings and click OK.
- Interconnect the dedicated resource pool to the VPC.
- On the ModelArts console, choose Network under Resource Management from the navigation pane.
- Locate the created network and click Interconnect VPC in the Operation column.
Figure 2 Interconnecting the VPC

- In the displayed dialog box, enable Interconnect VPC, and choose the created VPC and subnet from the drop-down lists.

The peer network to be interconnected cannot overlap with the current CIDR block.
- Create a ModelArts dedicated resource pool.
- On the ModelArts console, choose Standard Cluster under Resource Management from the navigation pane.
- Click Buy Standard Cluster and configure the parameters on the displayed page.
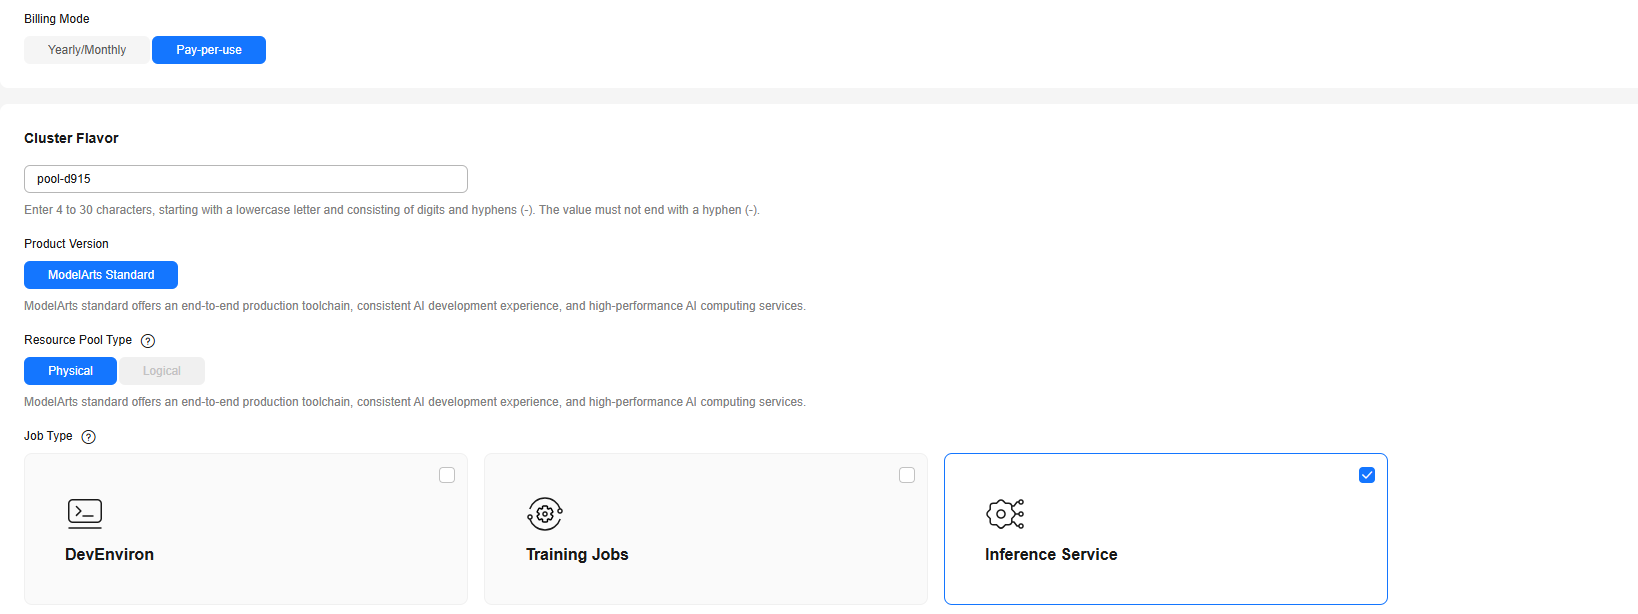
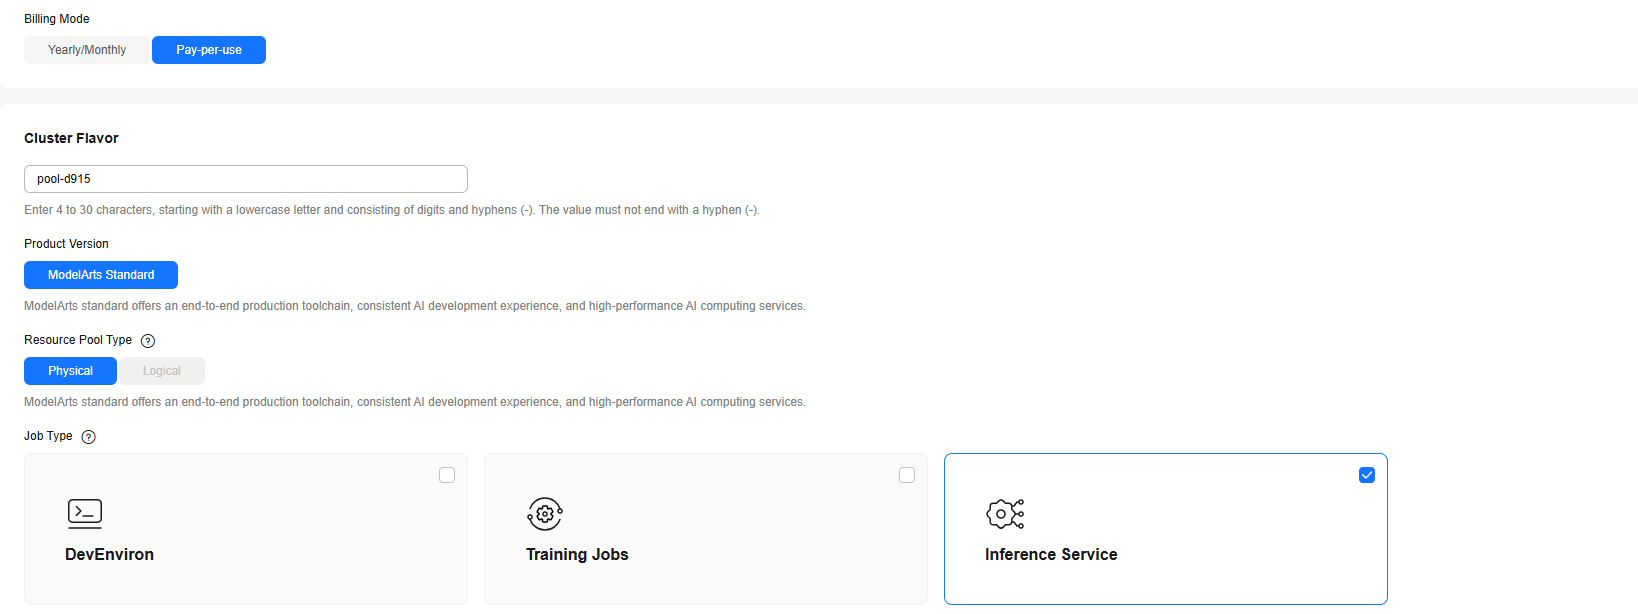
Job Type includes Inference Service. For Network, choose the network that has been interconnected to the VPC.
Figure 3 Job types

- Click Buy Now. Confirm the information and click Submit.
Step 2: Using Docker to Install and Configure a Forward Proxy
- Purchase an ECS. For details, see Purchasing an ECS. You can select the latest Ubuntu image and the created VPC.
- Assign an EIP. For details, see Assigning an EIP.
- Bind the EIP to the ECS. For details, see Binding an EIP to an Instance.
- Log in to the ECS and run the following command to install Docker. If it has been installed, skip this step.
curl -sSL https://get.daocloud.io/docker | sh
- Install the Squid container.
docker pull ubuntu/squid
- Create a host directory.
mkdir –p /etc/squid/
- Open and configure the whitelist.conf file.
vim whitelist.conf
The configuration content is the addresses that can be accessed by security control. Wildcard characters can be configured. For example:
.apig.cn-east-3.huaweicloudapis.com

If the address cannot be accessed, configure the access domain name in the browser.
- Open and configure the squid.conf file.
vim squid.conf
The configuration details are as follows:
# An ACL named 'whitelist'
acl whitelist dstdomain '/etc/squid/whitelist.conf'

# Allow whitelisted URLs through
http_access allow whitelist

# Block the rest
http_access deny all

# Default port
http_port 3128
- Set the permissions on the host directory and configuration files as follows:
chmod 640 -R /etc/squid
- Start the Squid instance.
docker run -d --name squid -e TZ=UTC -v /etc/squid:/etc/squid -p 3128:3128 ubuntu/squid:latest
- Go to Docker and refresh Squid.
docker exec –it squid bash
root@{container_id}:/# squid -k reconfigure
Step 3: Setting the DNS Proxy and Calling a Public IP Address
- When you customize a model image, set the proxy to the private IP address and port of the proxy server.
proxies = {
  "http": "http://{proxy_server_private_ip}:3128",
  "https": "http://{proxy_server_private_ip}:3128"
}
The IP address of the proxy service is the private IP address of the ECS created in Step 2: Using Docker to Install and Configure a Forward Proxy. For details about how to obtain the IP address, see Viewing ECS Details (List View).
Figure 4 Private IP address
- When you call the public IP address, use the service URL to send the service request. For example:
https://e8a048ce25136addbbac23ce6132a.apig.cn-east-3.huaweicloudapis.com
Feedback
Was this page helpful?
Provide feedbackThank you very much for your feedback. We will continue working to improve the documentation.See the reply and handling status in My Cloud VOC.
For any further questions, feel free to contact us through the chatbot.
Chatbot


