
Migrating the Database
This section describes how to create a DRS instance and migrate test_info in the Oracle database to test_database_info in the GaussDB instance.
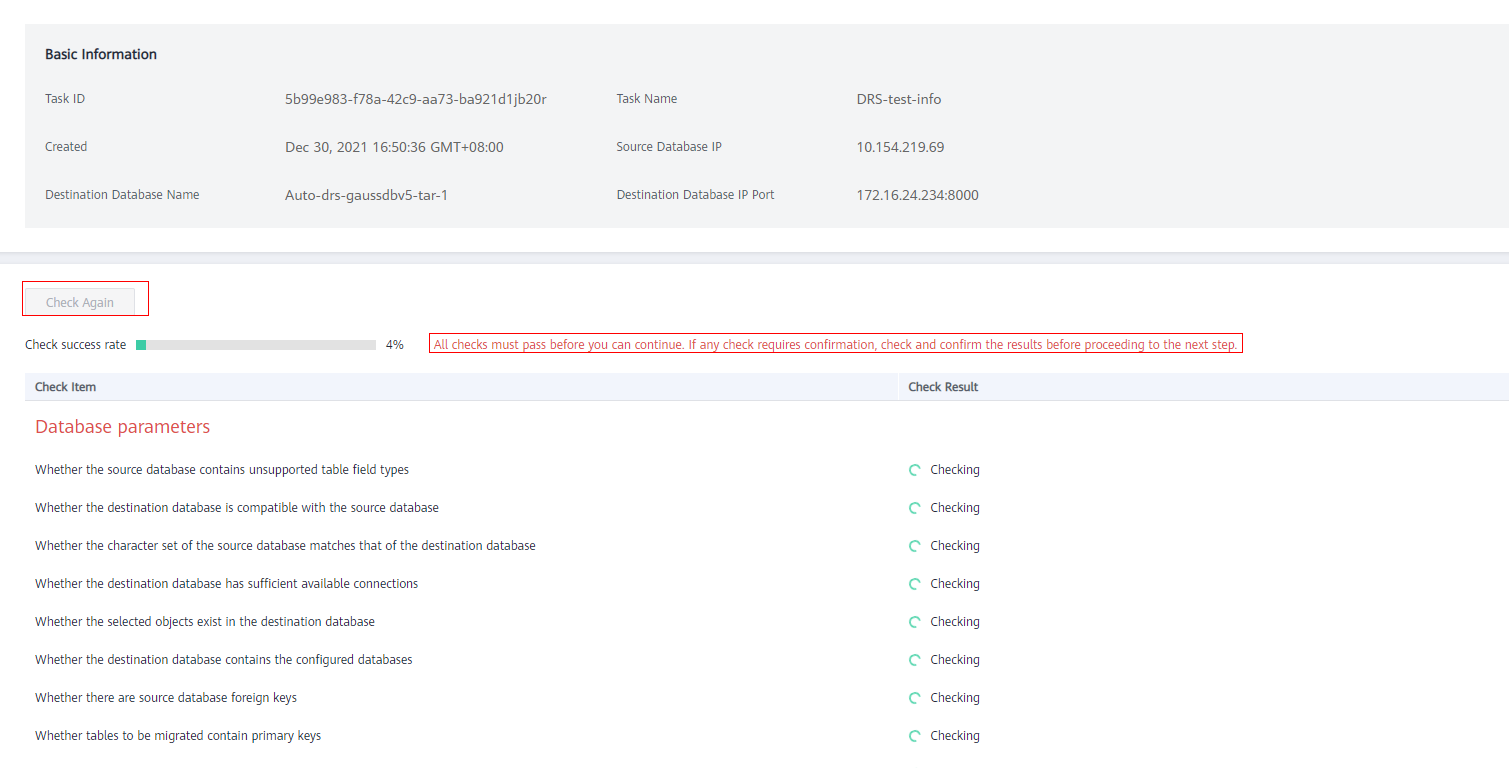
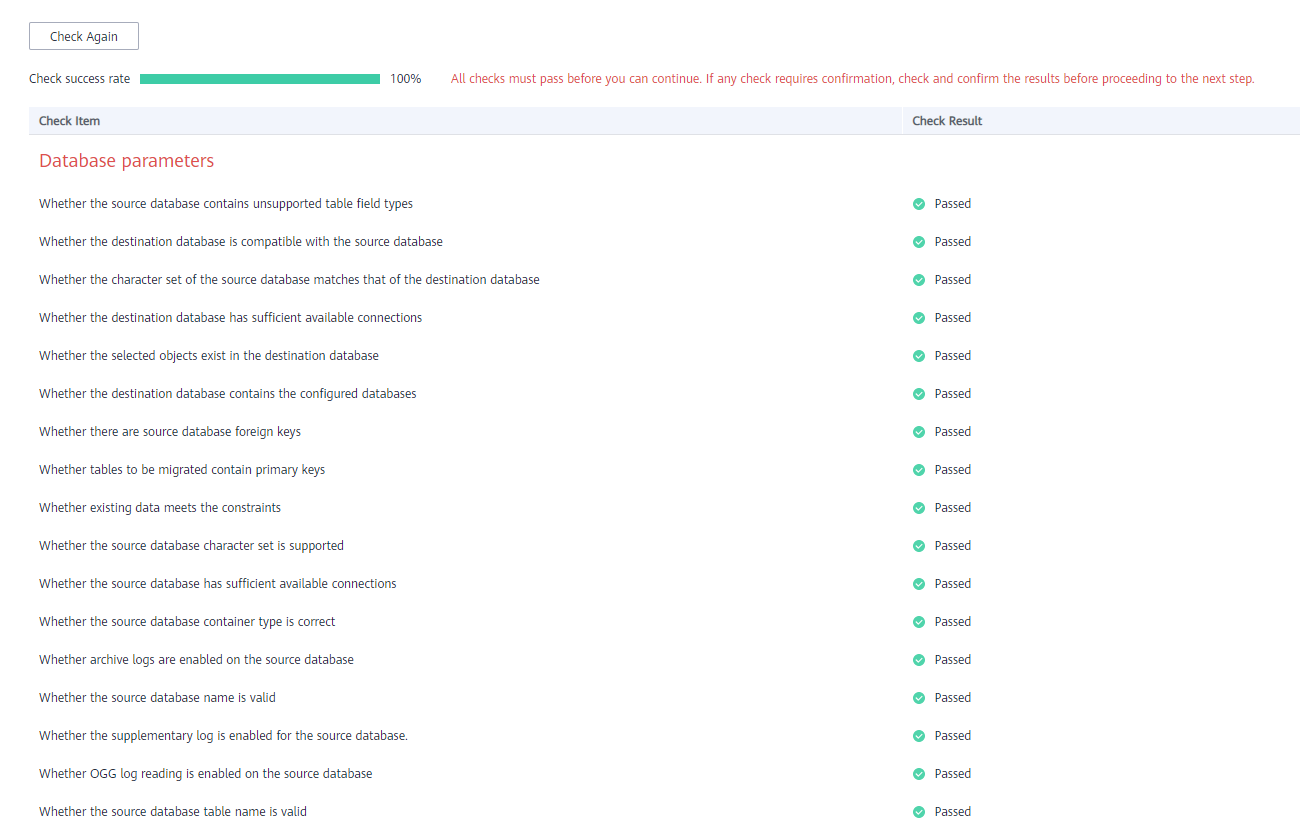
Pre-migration Check
Before creating a migration task, you need to manually check the migration conditions for smooth migration.
Before the migration, you need to obtain notes on migration to the cloud.
Creating a Migration Task
- Log in to the Huawei Cloud console.
- Click
 in the upper left corner and select a region.
Select the region in which the destination instance is located.
- Click
 in the upper left corner of the page and choose Databases > Data Replication Service.
 - In the navigation pane on the left, choose Data Synchronization Management. On the displayed page, click Create Synchronization Task.
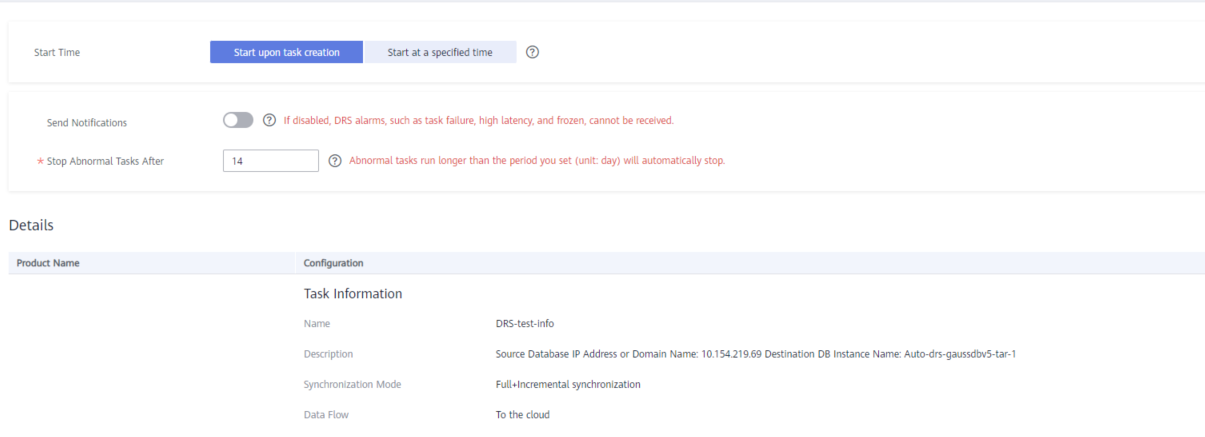
- Configure synchronization instance information.
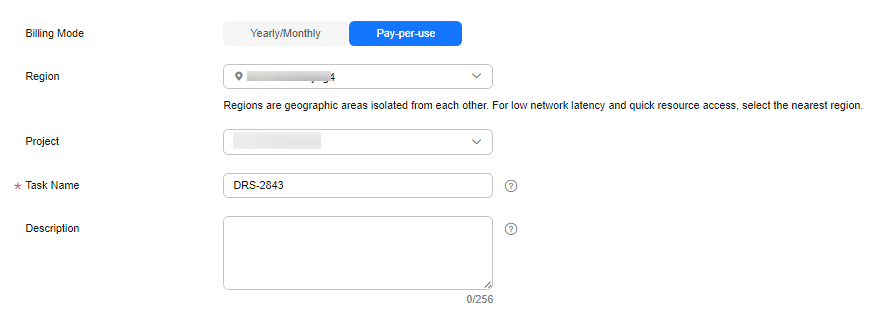
- Select a region, billing mode, and project, and enter a task name.
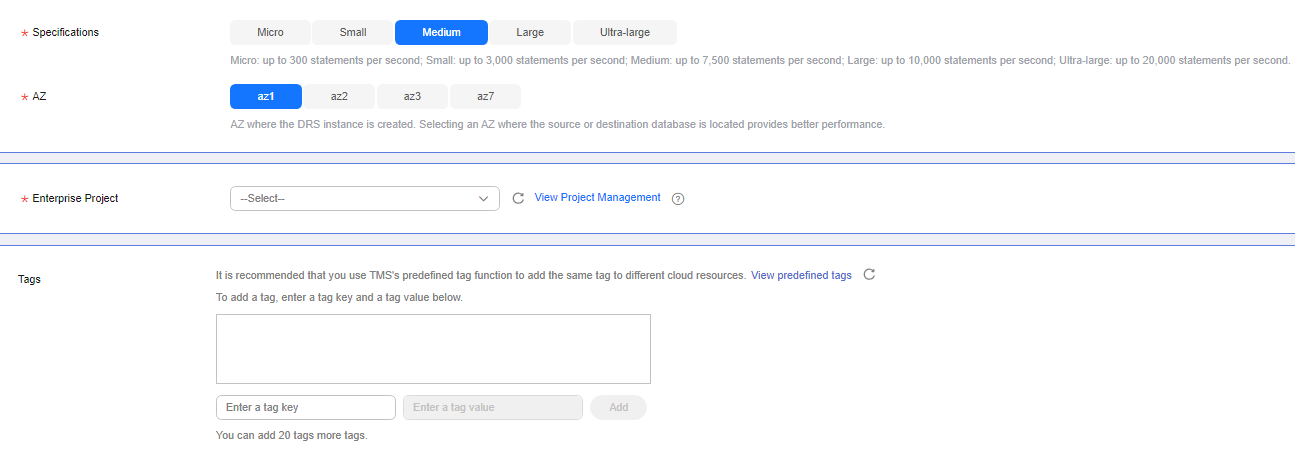
- Configure synchronization instance details. Specifically, specify Data Flow, Source DB Engine, Destination DB Engine, Network Type, DRS Task Type, Destination DB Instance, Synchronization Instance Subnet, Synchronization Mode, Specify EIP (mandatory when Network Type is set to Public Network), Specifications, AZ, Enterprise Project, and Tags (optional).
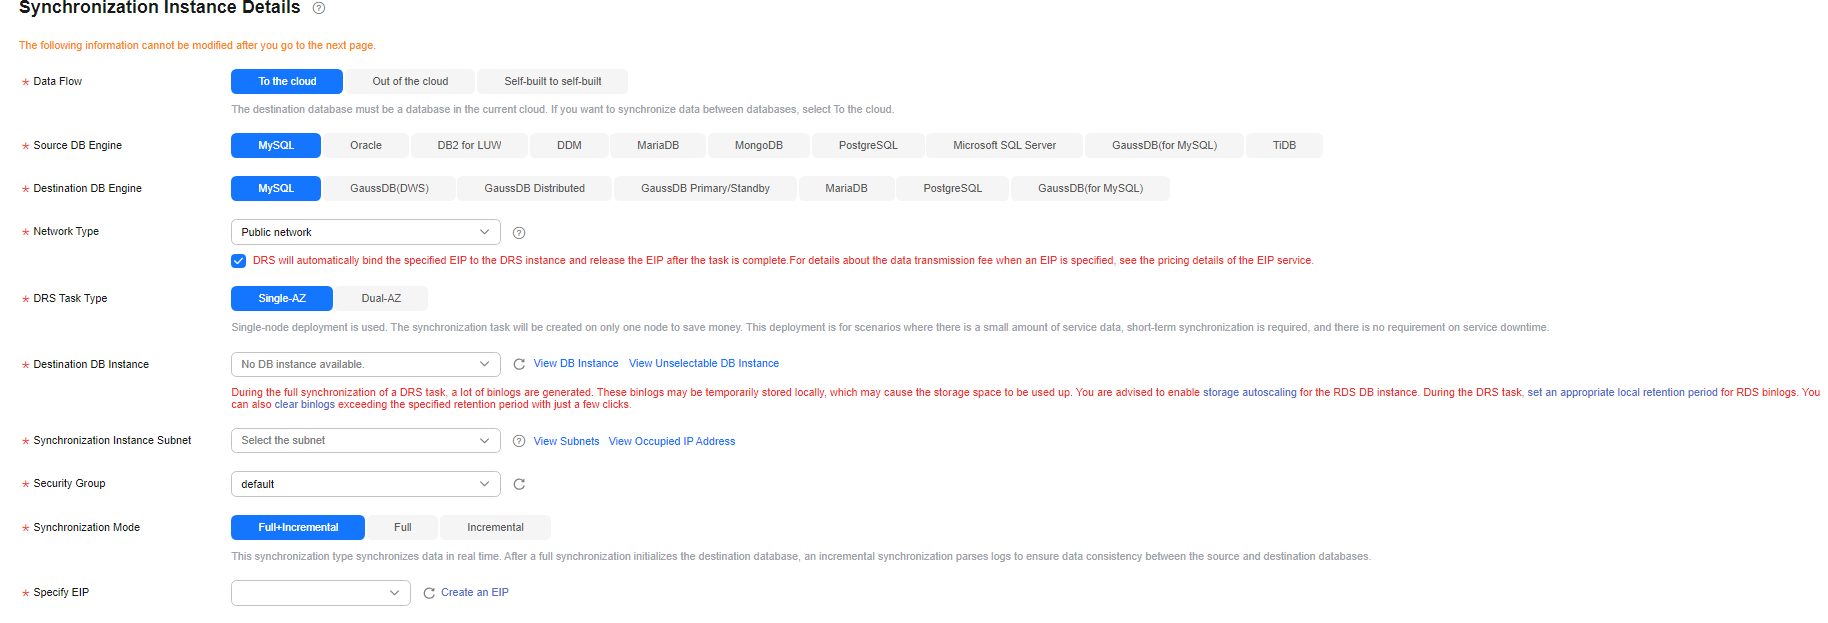
- Click Create Now.
- Configure the source and destination database information.
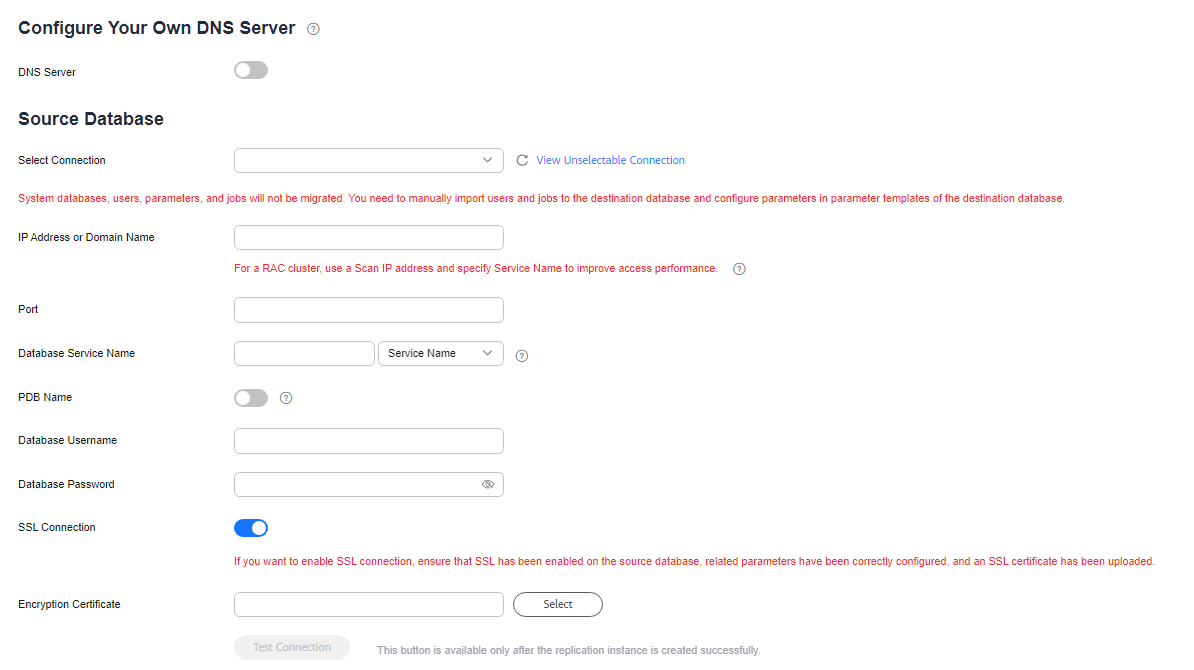
- Configure DNS Server as required. Specify connection information about the source database, including the IP address, port, username, and password.
Click Test Connection.
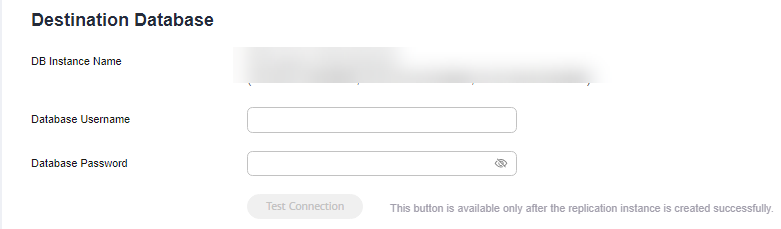
- Enter the username and password of the destination database.
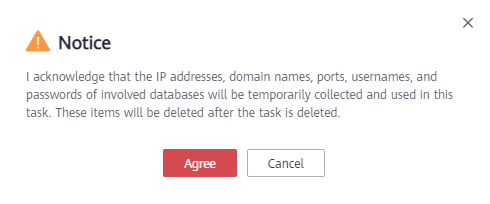
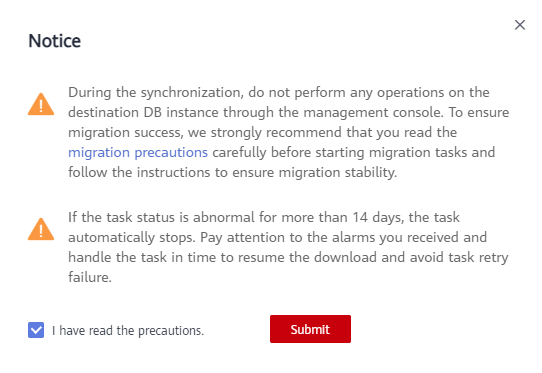
- Click Next. In the displayed box, read the message carefully and click Agree.
- Configure DNS Server as required. Specify connection information about the source database, including the IP address, port, username, and password.
- Set the synchronization task.
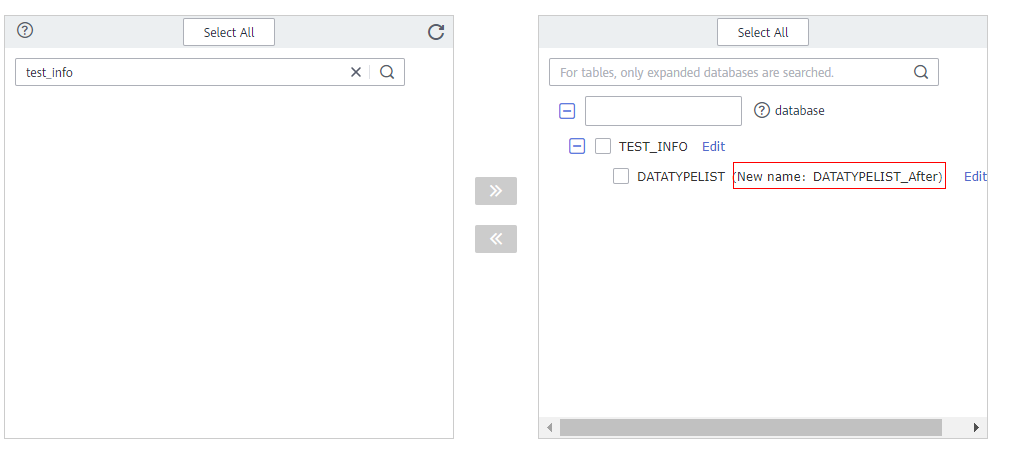
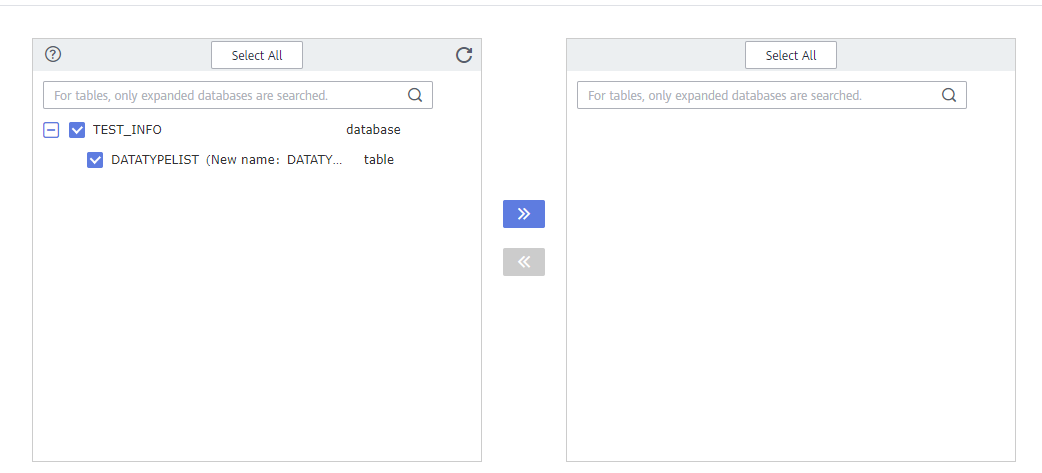
- Select the databases and tables of the source database to be migrated. For example, select the DATATYPELIST table from the test_info database.

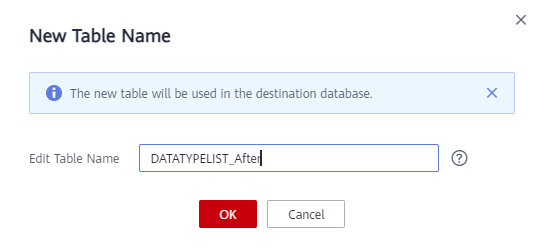
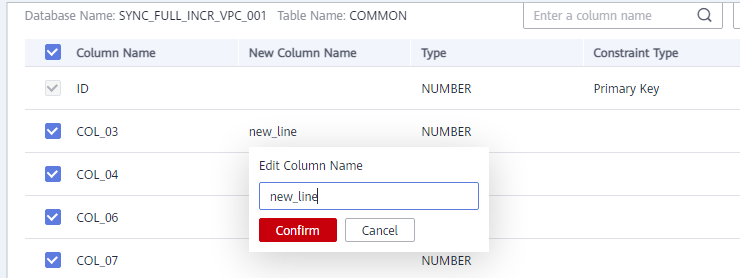
- Locate the database and table, respectively, and click Edit to change the database name and table name.

- On the displayed box, enter the new name, for example, enter DATATYPELIST_After as the new table name.
The name cannot include special characters. Otherwise, an error will be reported during SQL statement execution after the migration.
- Confirm the settings and click Next.
- Select the databases and tables of the source database to be migrated. For example, select the DATATYPELIST table from the test_info database.
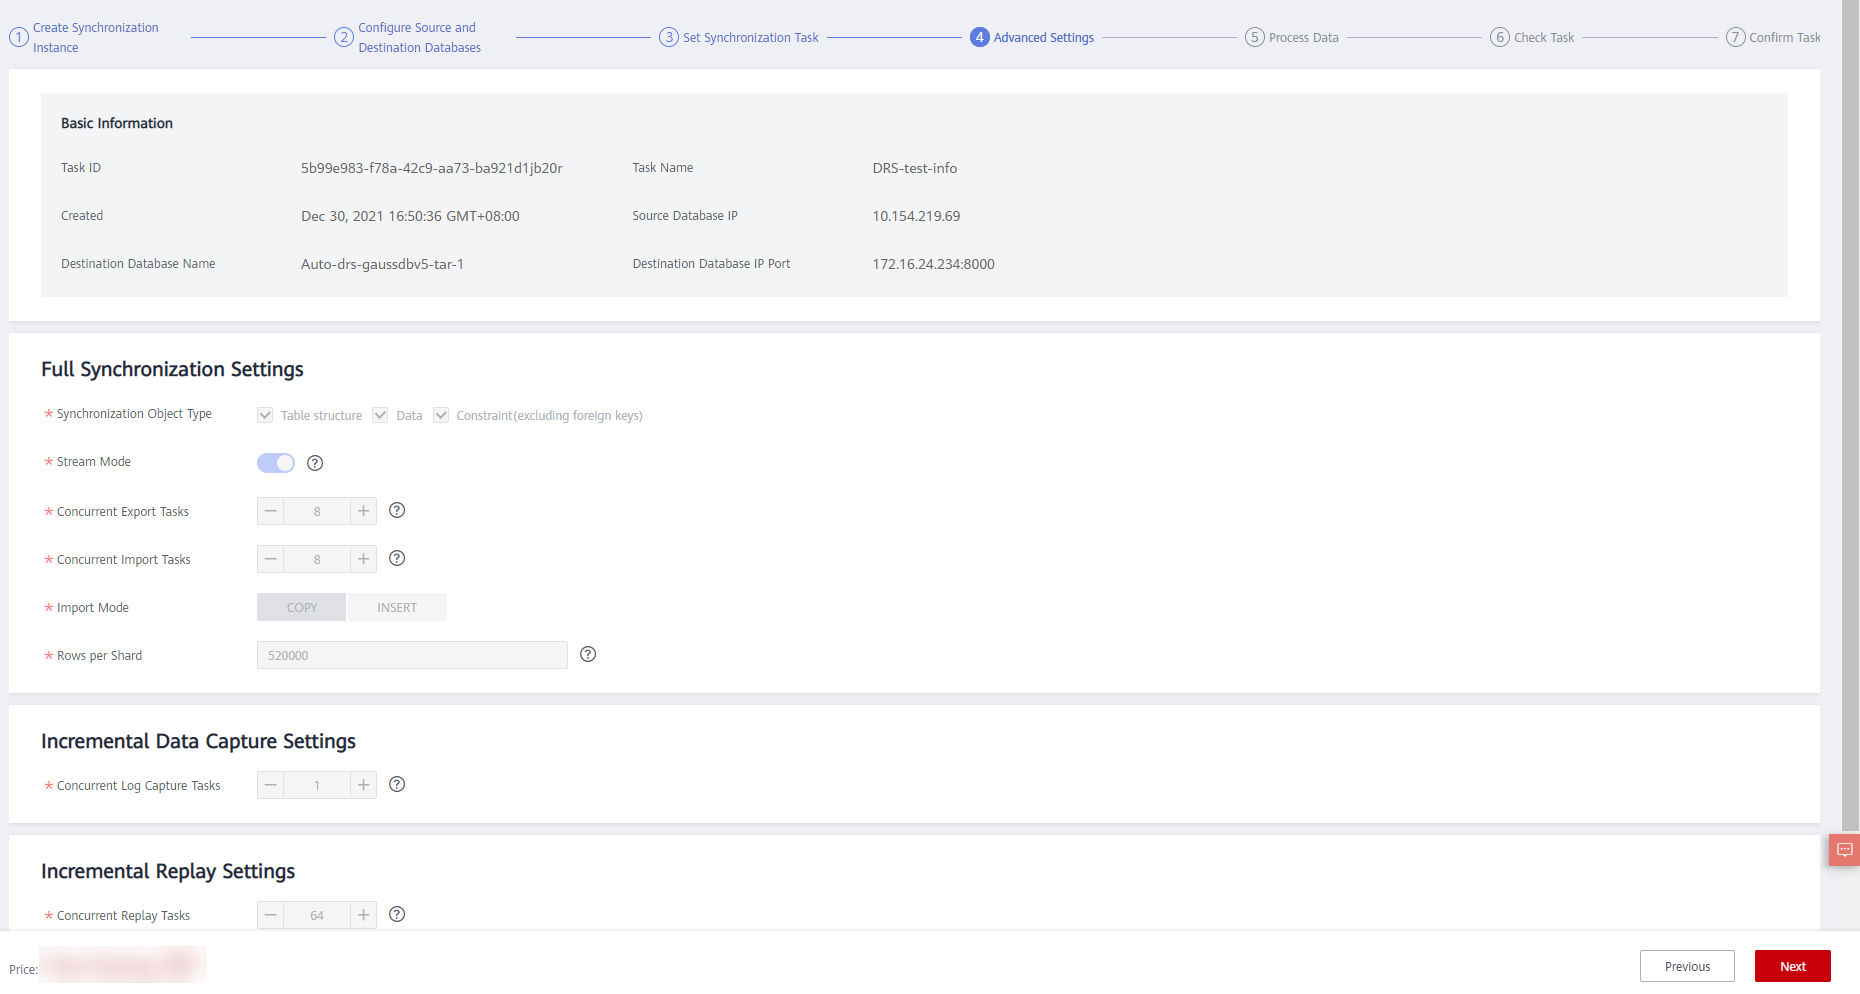
- Confirm advanced settings.
The information on the Advanced Settings page is for confirmation only and cannot be modified. After confirming the information, click Next.
- Process data.
- Perform a pre-check.
- Confirm the task.
- After the task is submitted, view and manage it.
After the task is created, return to the task list to view the status of the created task.

Feedback
Was this page helpful?
Provide feedbackThank you very much for your feedback. We will continue working to improve the documentation.See the reply and handling status in My Cloud VOC.
For any further questions, feel free to contact us through the chatbot.
Chatbot


