Deploying Django Using Nginx and uWSGI
Django is a comprehensive, efficient, and secure web framework. It is designed to help developers quickly build high-performance, secure, and maintainable web applications. This practice describes how to use Nginx and uWSGI to deploy Django on a Linux ECS.
Prerequisites
- You have purchased an ECS and bound an EIP to it.
- The OS must be CentOS 7/8, Ubuntu 22/10/18, or Huawei Cloud EulerOS 2.0.
- The rules listed in the table below have been added to the security group that the target ECS belongs to. For details, see Adding a Security Group Rule.
Table 1 Security group rules Direction
Priority
Action
Type
Protocol & Port
Source
Inbound
1
Allow
IPv4
TCP: 22
0.0.0.0/0
Inbound
1
Allow
IPv4
TCP: 80
0.0.0.0/0
Inbound
1
Allow
IPv4
TCP: 8001
0.0.0.0/0
Inbound
1
Allow
IPv4
TCP: 8002
0.0.0.0/0
Inbound
1
Allow
IPv4
TCP: 8003
0.0.0.0/0
Procedure
- Log in to the ECS.
- Set up a Python environment. For details, see Setting Up a Python Environment.
- Install Nginx. For details, see Setting Up an LNMP Environment.
- Deploy uWSGI.
- Run the following command to install uWSGI:
sudo pip3 install uwsgi
If information similar to the following is displayed, uWSGI has been installed.

- Create a test directory.
This example uses the /home/myblog directory as an example. You can specify a file path as needed.
sudo mkdir /home/myblog
- Run the following commands to create and edit test.py:
cd /home/myblog
sudo vim test.py
- Press i to enter insert mode and add the following content to the file:
def application(env,start_response): start_response('200 ok',[('Content-Type','text/html')]) return [b"Hello World"] - Press Esc, type :wq, and press Enter to save the file and exit.
- Test the environment.
- CentOS 7/8
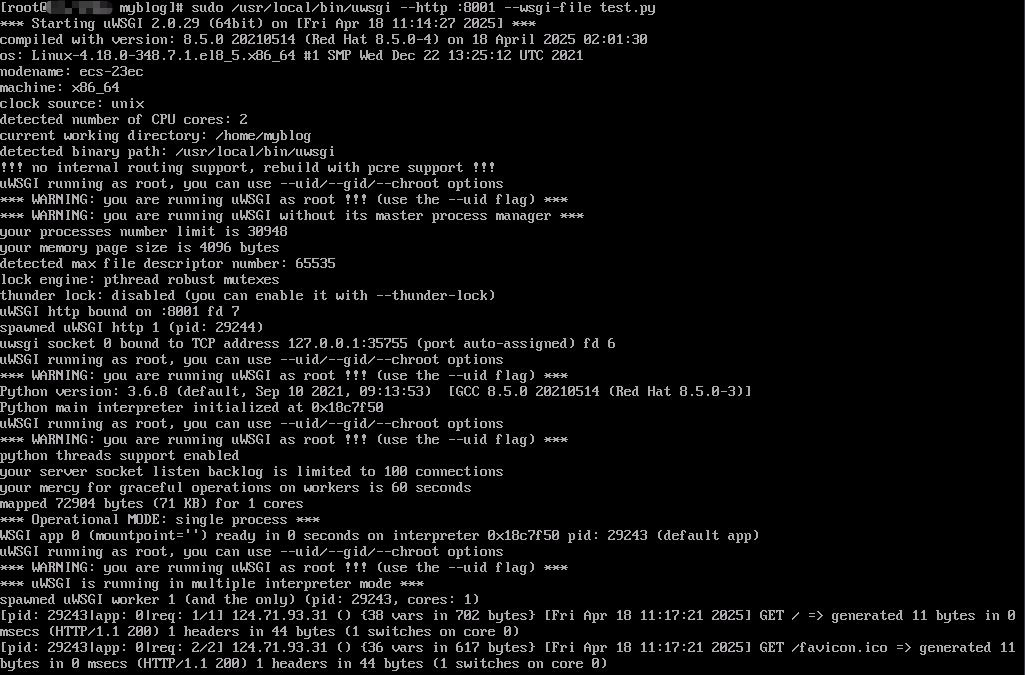
sudo /usr/local/bin/uwsgi --http :8001 --wsgi-file test.py
- Ubuntu 18/20/22
sudo uwsgi --http :8001 --wsgi-file test.py
Information similar to the following is displayed.
- CentOS 7/8
- Enter http://Server IP address:8001 in the address bar. If the following page is displayed, the environment has been set up.


You can access the content through port 8001 only when the test.py command is being executed. The following information is displayed during the access:

- Run the following command to install uWSGI:
- Deploy Django.
- Run the following command to install Django:
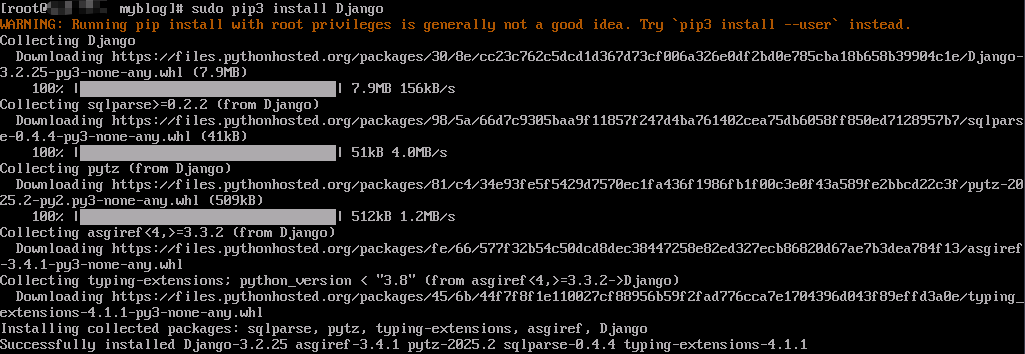
sudo pip3 install Django
Information similar to the following is displayed.
- Create a project.
This example uses the project file django_project as an example. You can specify the folder as needed.
sudo /usr/local/bin/django-admin startproject django_project
- Run the following command to edit the settings.py file:
sudo vim /home/myblog/django_project/django_project/settings.py
- Press i to enter insert mode.
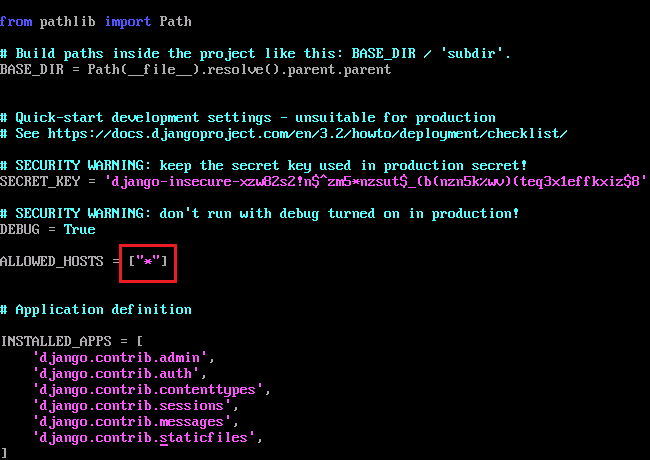
- Change ALLOWED_HOSTS = [ ] to the following:
ALLOWED_HOSTS = ["*"]
This indicates that any IP address can be accessed. Set it based on the actual environment.
- Comment out the content in DATABASES.


DATABASE specifies the database settings of the Django project. No database is used in this case, so comment it out. Set this parameter based on the site requirements.
- Press Esc and enter :wq to save the file and exit.
- Run the following commands to start Django:
cd /home/myblog/django_project
sudo python3 manage.py runserver 0.0.0.0:8003
The port number can be configured as required. It will be used for accessing the Django page in the next step.
- Enter http://Server IP address:8003 in the address bar of a browser to access the Django page.
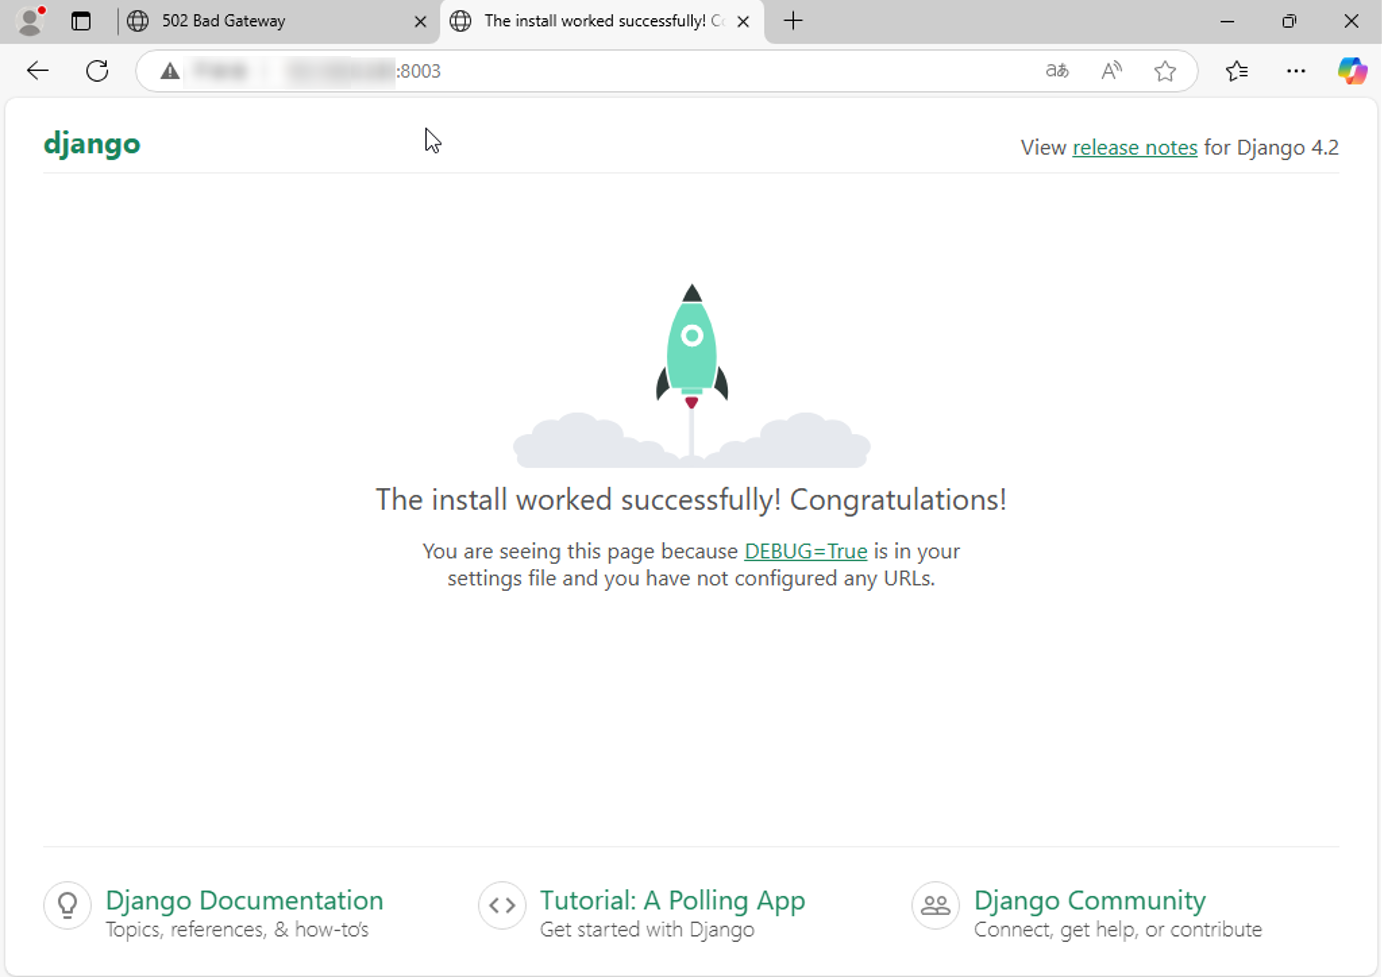

The content can be accessed through 8003 only when the Django environment is started.
- Run the following command to install Django:
- Configure Nginx, Django, and Django for application integration.
- Open the Nginx configuration file.
- CentOS 7/8
sudo vim /etc/nginx/nginx.conf
- Ubuntu 22/20/18
sudo vim /etc/nginx/sites-enabled/default
- CentOS 7/8
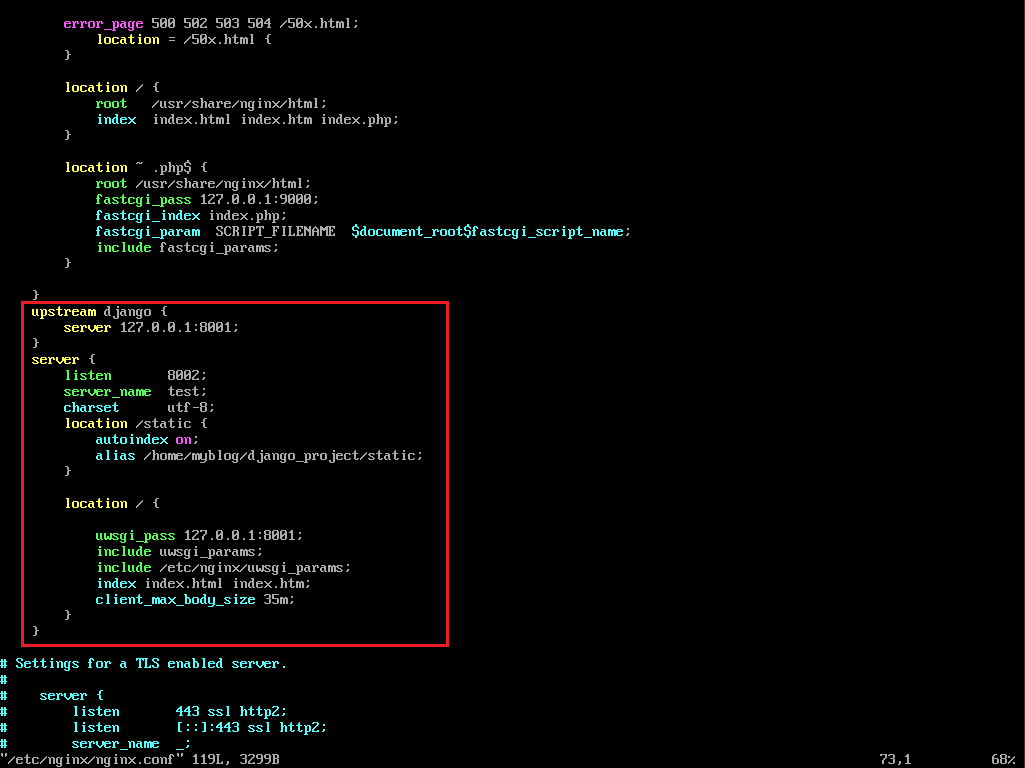
- Press i to enter insert mode and modify or add the following parameters in server:
    upstream django {
        server 127.0.0.1:8001;   #The port must be the same as that defined in the uWSGI configuration file.
    }
    server {
        listen       8002;    #Access port
        server_name  test;
        charset      utf-8;
        location /static {
            autoindex on;     # Enable directory listing.
            alias /home/myblog/django_project/static; # Absolute path of the static file. Change the path based on the site requirements.
        }

        location / {

            uwsgi_pass 127.0.0.1:8001;  # Pass requests to the uWSGI server. The address here must be the same as that defined in upstream.
            include uwsgi_params;   # Include the uWSGI parameter configuration.
            include /etc/nginx/uwsgi_params;  # uWSGI parameter file provided by Nginx. Change the directory based on the site requirements.
            index index.html index.htm;   # Specify the default index file.
            client_max_body_size 35m;
        }
    }
- Press Esc and enter :wq to save the file and exit.
- Create a log directory. uWSGI runs as a daemon process in the background and redirects its output to the log file.
sudo mkdir -p /var/log/uwsgi/
- Create the uWSGI configuration file uwsgi_config.ini.
sudo vim uwsgi_config.ini
- Press i to enter insert mode and set the following parameters in the file:
[uwsgi]
socket = 127.0.0.1:8001  # The port must be the same as the uwsgi_pass port defined in the Nginx configuration file.
chdir = /home/myblog/django_project/  # The project directory. Change it based on your project.
wsgi-file = django_project/wsgi.py   # The wsgi file of Django. Change it based on project requirements.
processes = 4  # The maximum number of processes.
threads = 2  # The number of threads enabled after each process is started.
vacuum = true # Automatic cleanup upon environment exit.
buffer-size = 65536  # Set the size of the internal buffer for parsing uwsgi packets to 64 KB. The default value is 4 KB.
daemonize = /var/log/uwsgi/uwsgi_project.log  # The log file path. Ensure that the path is writable. Change the path based on your project.
enable-threads = true  # Ensure that thread support has been enabled.
- Press Esc and enter :wq to save the file and exit.
- Open the Nginx configuration file.
- Verify that the Django page can be accessed.
- Run the following command to restart the Nginx service:
sudo systemctl restart nginx
- Run the following command to start uWSGI.
- CentOS 7/8
uwsgi --ini uwsgi_config.ini
- Ubuntu 22/20/18
sudo uwsgi --ini uwsgi_config.ini
The command output is shown in the following figure.

You can run the netstat -tuln| grep 8002 command to check whether the system is listening on port 8002.
sudo netstat -tuln | grep 8002

- CentOS 7/8
- Enter http://Server IP address:8002 in the address bar of a browser to access the Django page.
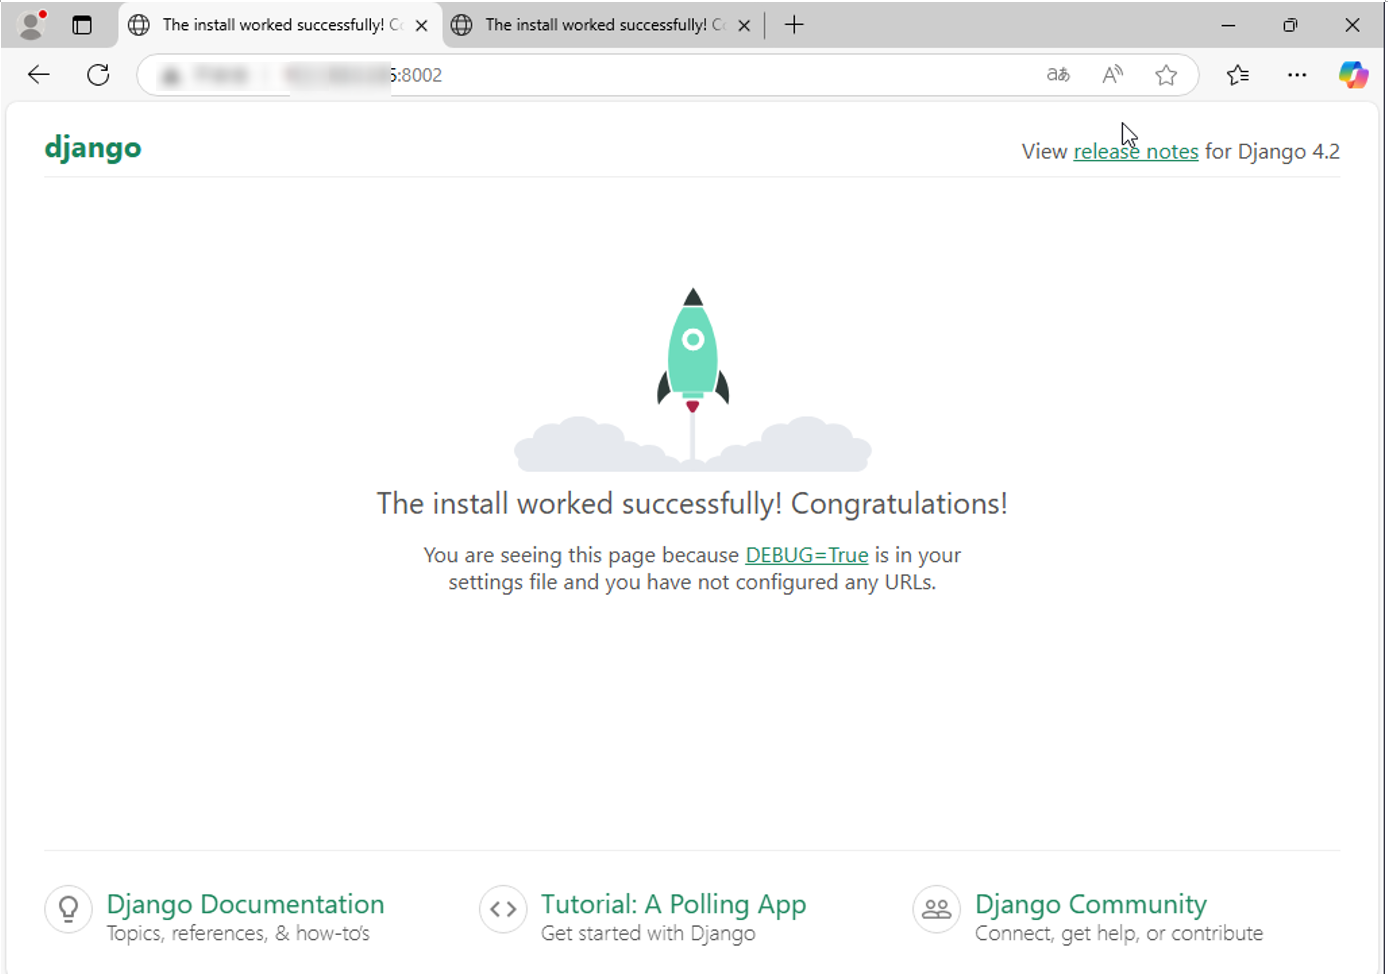

The preceding configuration is used only for tests. Exercise caution when using the configuration in the service environment.
- Run the following command to restart the Nginx service:
Feedback
Was this page helpful?
Provide feedbackThank you very much for your feedback. We will continue working to improve the documentation.See the reply and handling status in My Cloud VOC.
For any further questions, feel free to contact us through the chatbot.
Chatbot


