CodeArts Deploy Permission Management Best Practices
Overview
The CodeArts Deploy permission management mainly involves the management of these three parts: application, host cluster, and environment. Application permissions are divided into project-level application permissions and application-level permissions.
Project-level application permissions serve as templates for all applications within a project. These permissions are applied by default when creating a new application. If you need to modify the permissions for a specific application, you can cancel the project-level configurations in the application's permission management and make the necessary adjustments.
Preparations
- You have enabled and authorized CodeArts Deploy.
- You have created a project (select the Scrum template and name it Project_Test).
Accessing CodeArts Deploy in a Project
- Log in to the Huawei Cloud console.
- Click
 in the upper-left corner of the page and choose Developer Services > CodeArts.
 - Click Go to Workspace. The CodeArts homepage is displayed.
- Go to the Project_Test project page created in the preparation.
- In the navigation pane, choose CICD > Deploy.
Editing Project-Level Application Permissions
- Access CodeArts Deploy in a Project.
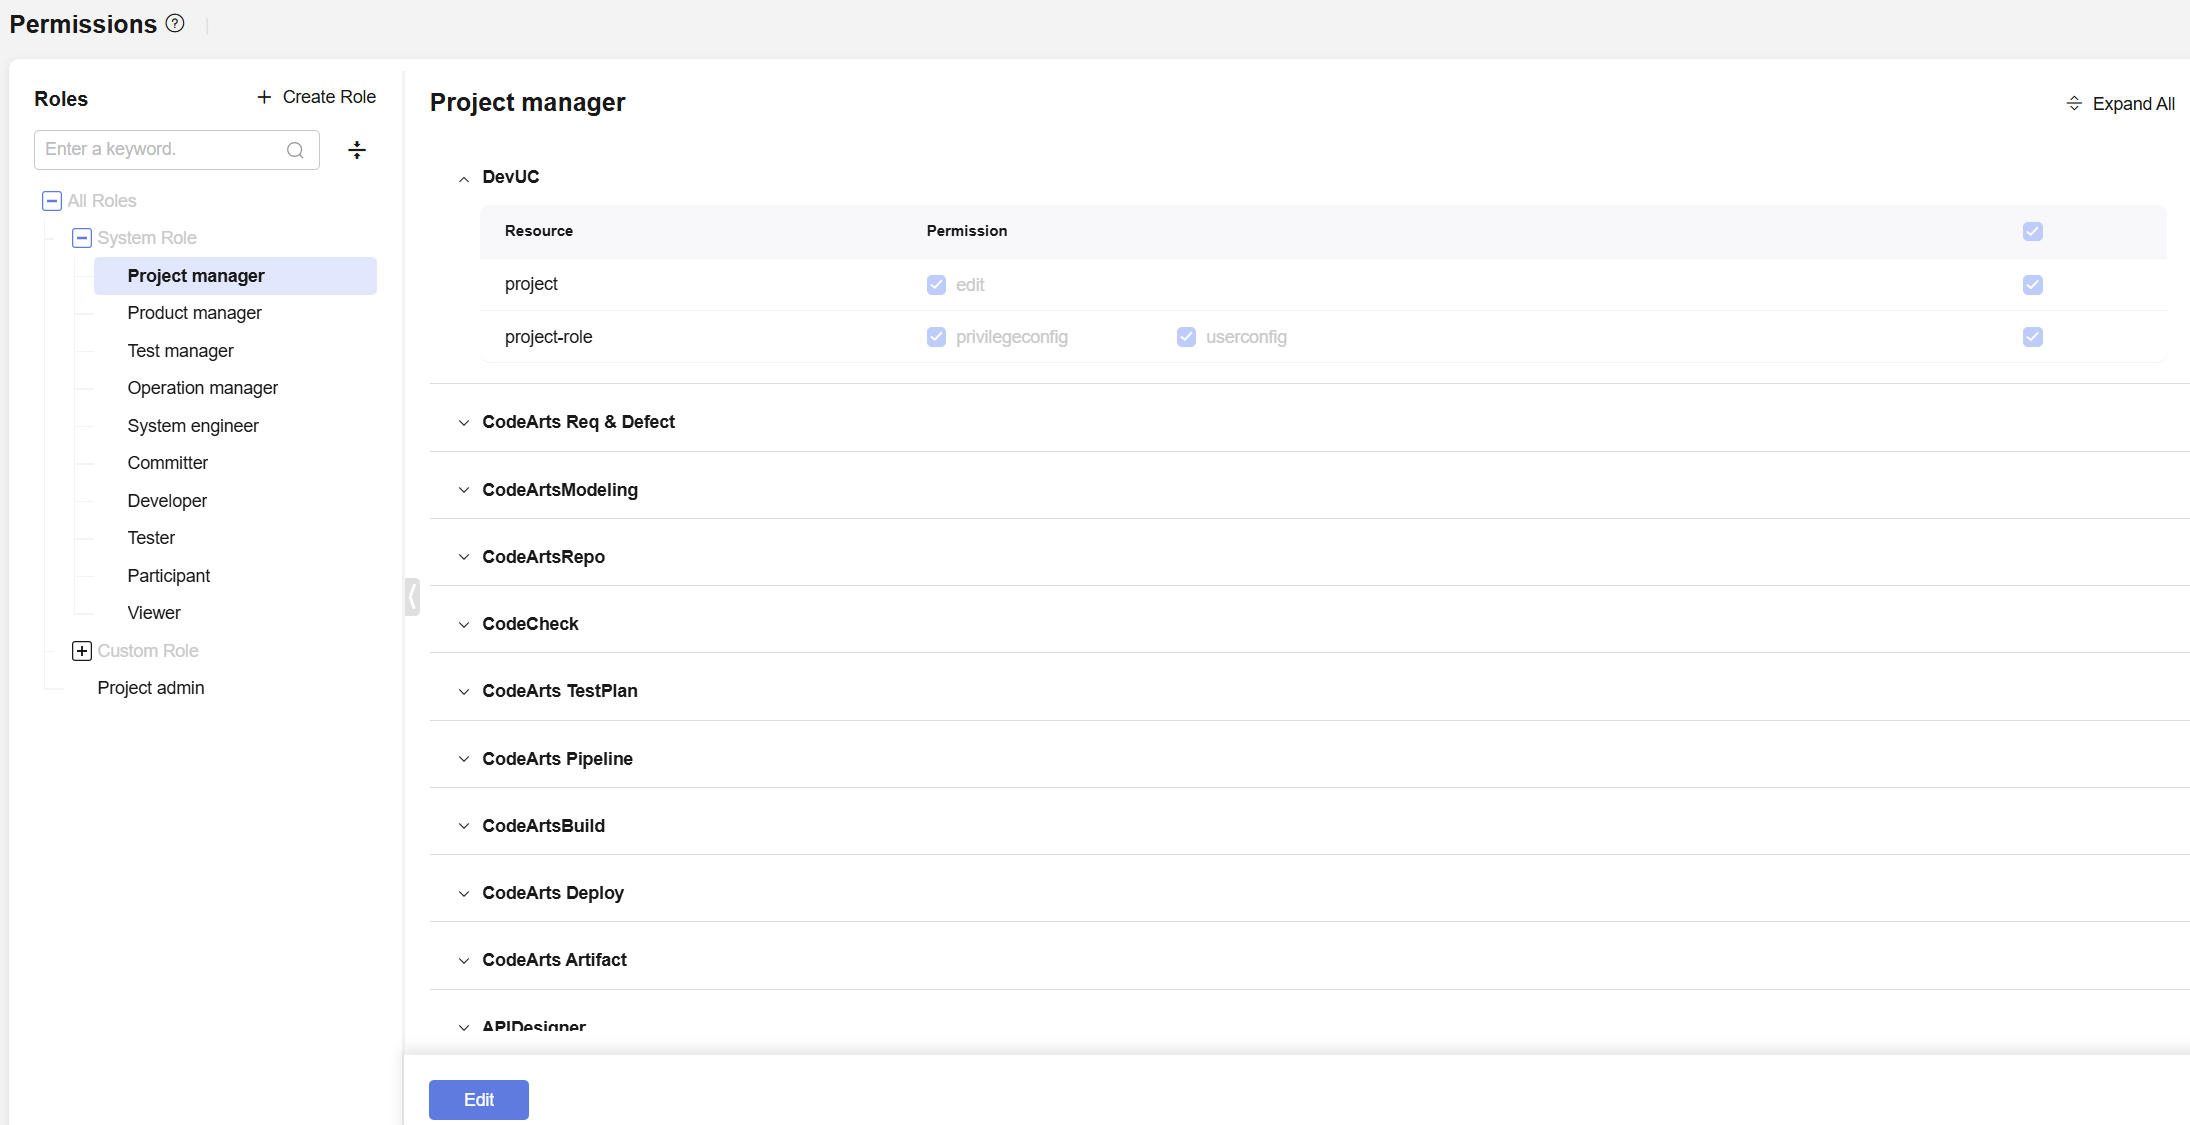
- In the navigation pane, choose Settings > Permissions. The project-level permission management page is displayed, as shown in Project-level permission management.
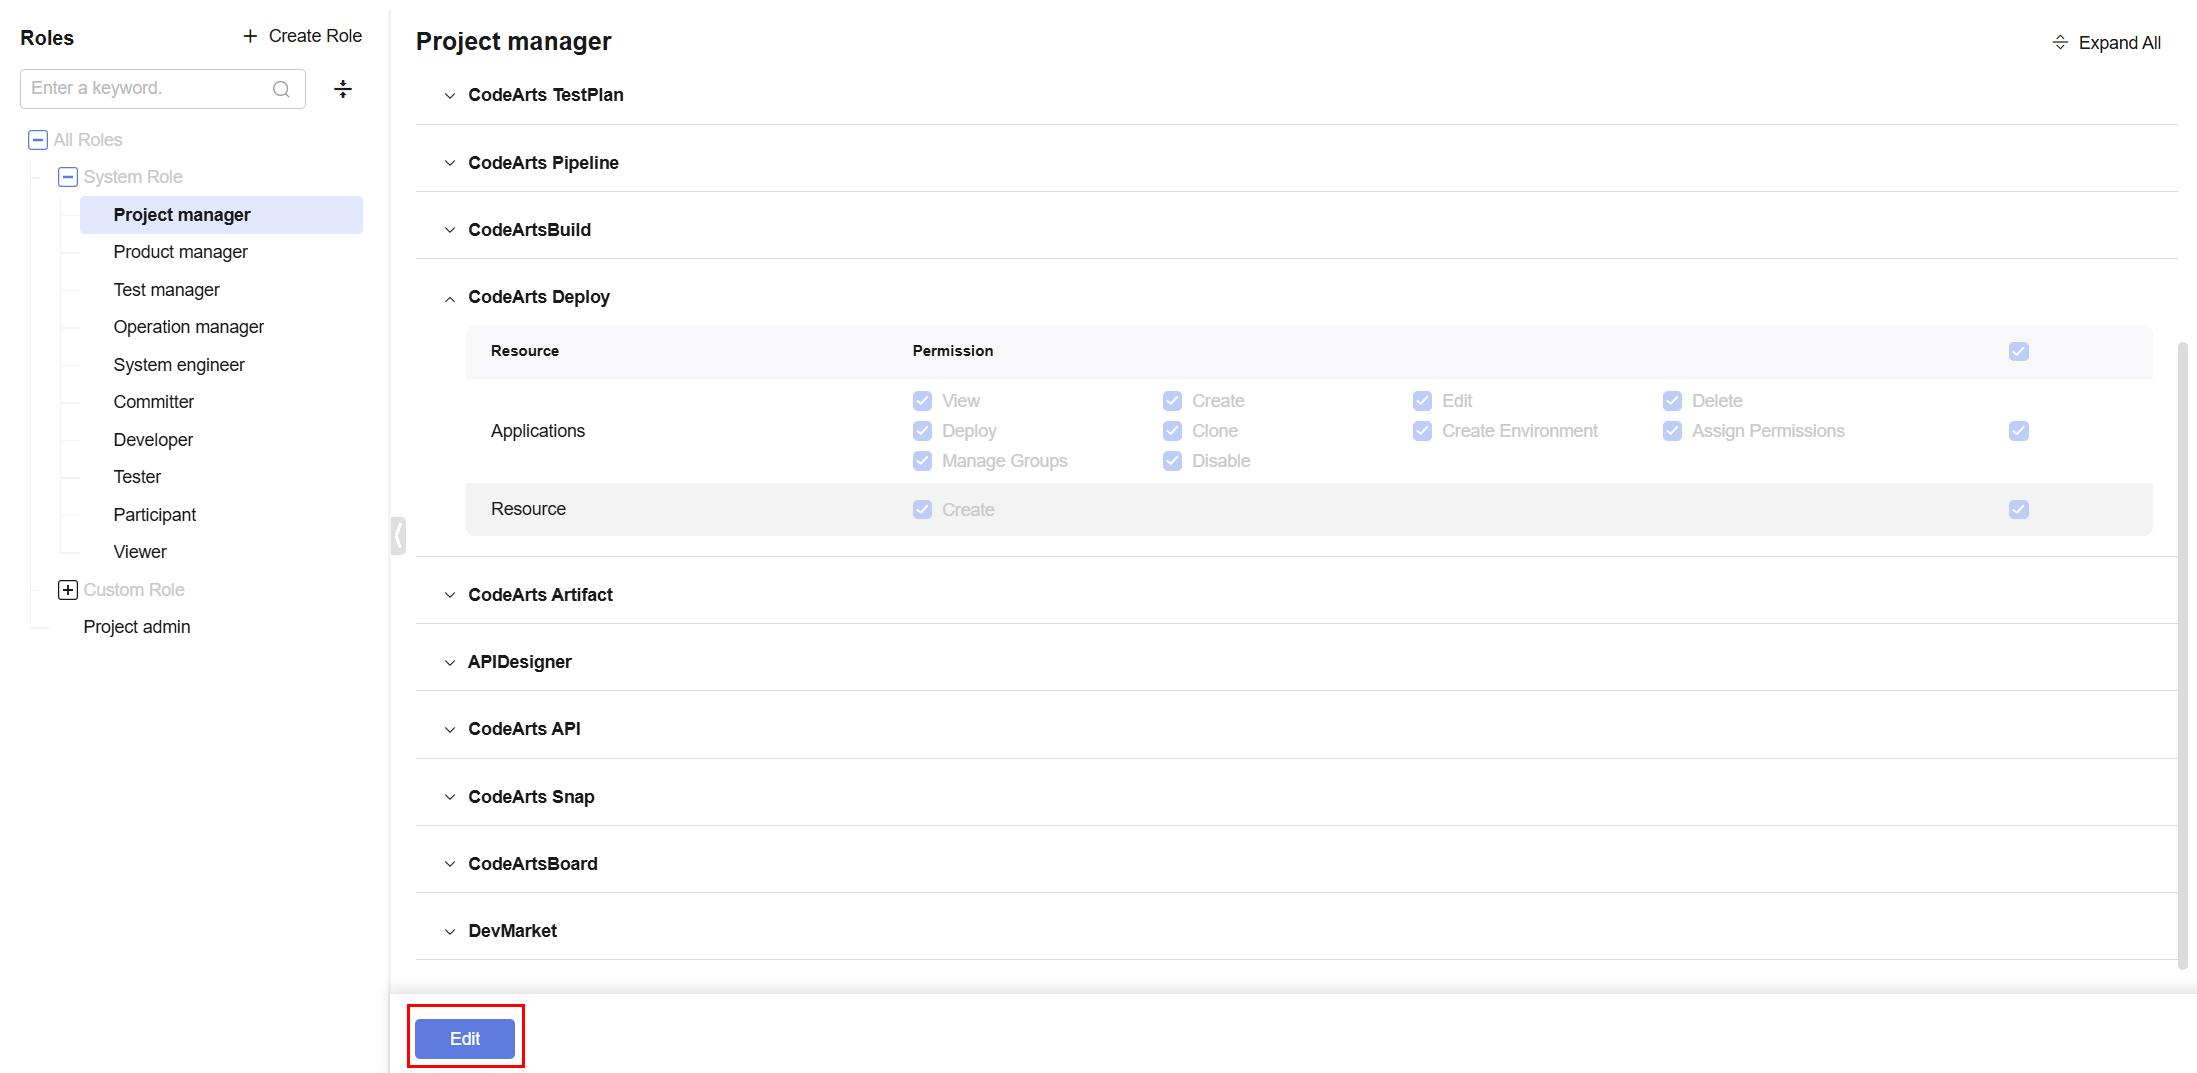
- On the role list page on the left, select the role whose permissions you want to edit and expand the Deploy service tab page on the right. Click Edit in the lower-left corner to edit the project-level deployment application permissions, as shown in Figure 2.
- After the editing is complete, click Save to save the project-level deployment application permissions of the corresponding role, as shown in Saving project-level deployment application permissions.
Editing Application Permissions
- Deploy a Service in a Project.
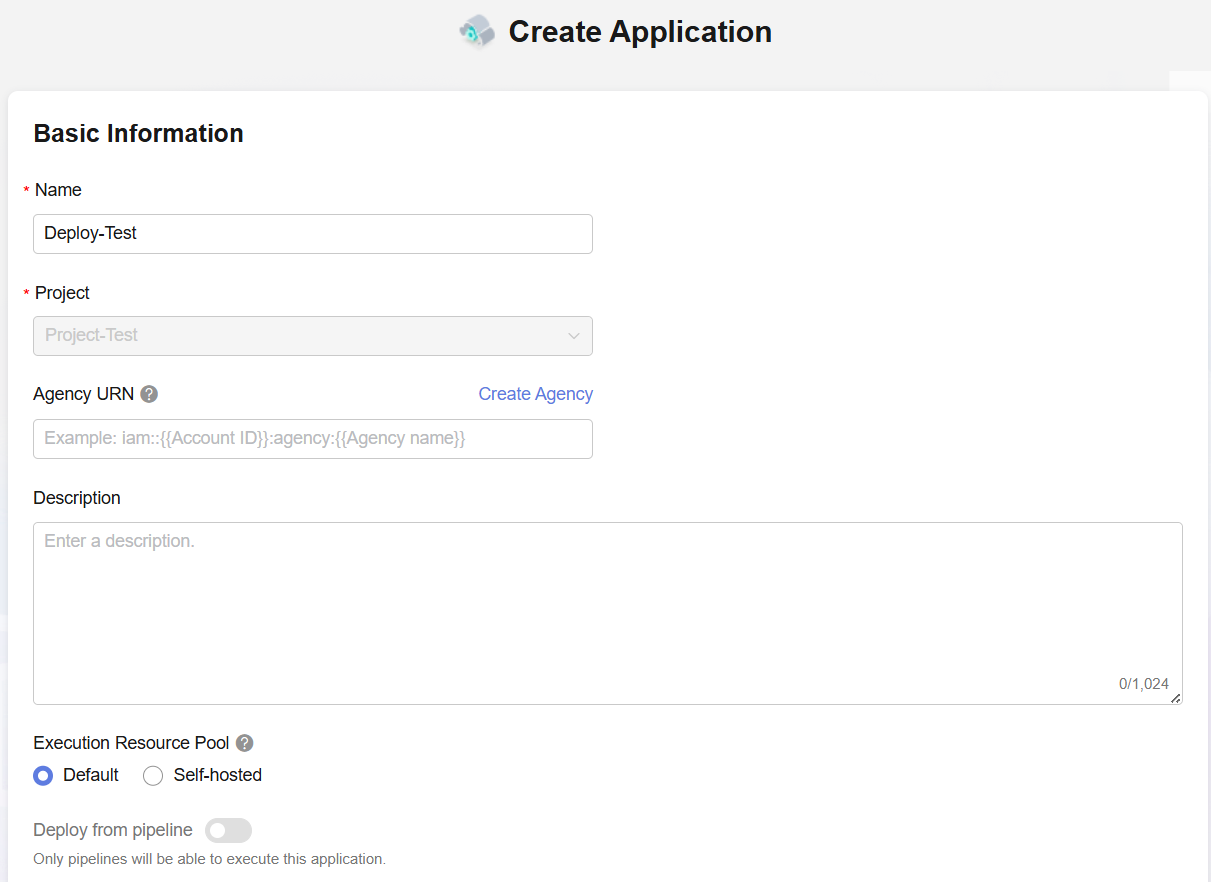
- Click Create Application. On the displayed Basic Information page, as shown in Basic Information, configure the basic information about the deployment application by referring to Application basic information.
Table 1 Basic application parameters Parameter
Description
Name
Application name. Enter Deploy-Test.
Enter 3 to 128 characters, including letters, digits, hyphens (-), and underscores (_).
Project
Project where the deployment application is located. Select the created project Project_Test.
Description
Enter an application description with a maximum of 1,024 characters.
Execution Agent Pool
Select Default.
Deploy from pipeline
Deselect this parameter.
- After configuring the basic information, click Next. On the displayed Select Template page, select the Deploy a General Application template and click OK.
- Switch to the Permissions page. By default, Use Project Permissions is enabled, and the Project-level permission management change is synchronized.
- Click Use Project Permissions to disable the synchronization of project-level permission changes and modify role permissions at the application level.
Figure 5 Disabling the functions of using project permission configuration and customizing permissions

- Customize and adjust the role permissions of the application as required. After the adjustment is complete, click Save to save the application information.
Editing Application Permissions in Batches
- Deploy a Service in a Project.
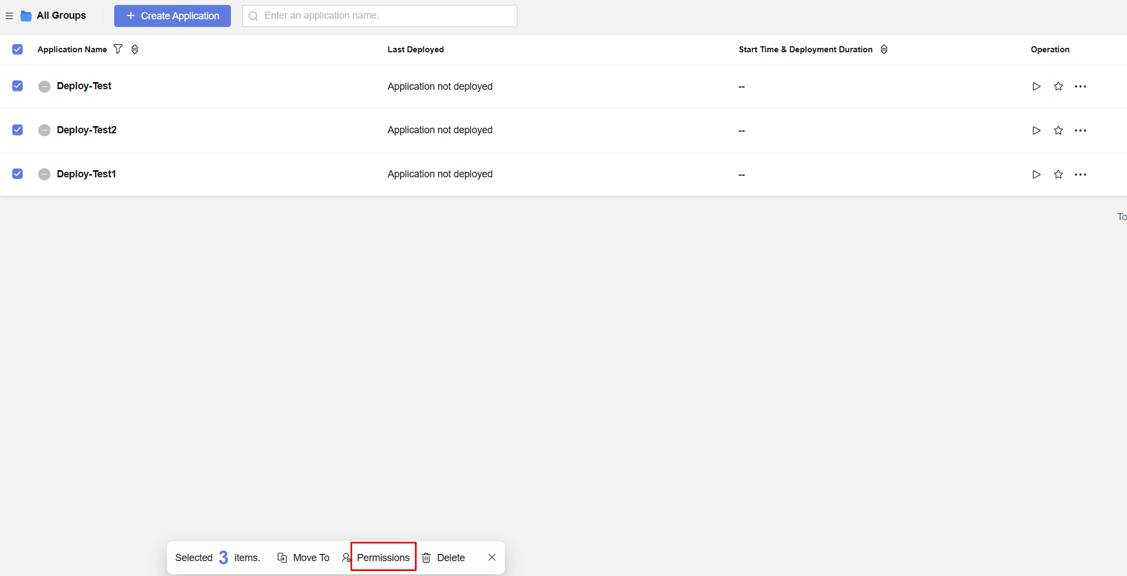
- You can select multiple applications at a time.
- Click Permissions in the batch operation area in the lower part of the page. The Permissions dialog box is displayed.
Figure 6 Application permission management
- Enable or disable Use Project Permissions as required. If it is disabled, you can set permissions for selected applications in batches.
Figure 7 Setting role permissions for multiple applications in batches
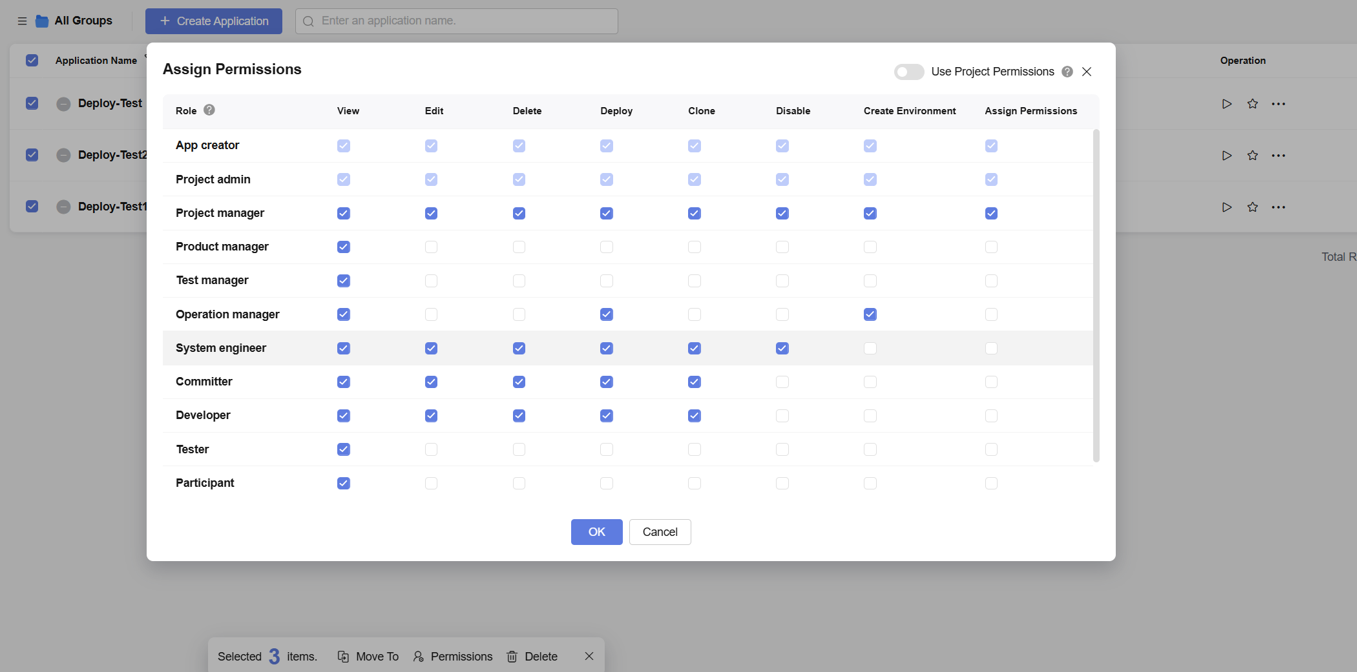
- Click OK to save the permission settings.
Editing Host Cluster Permissions
- Deploy a Service in a Project.
- Click Basic Resources to switch to the Basic Resources page.
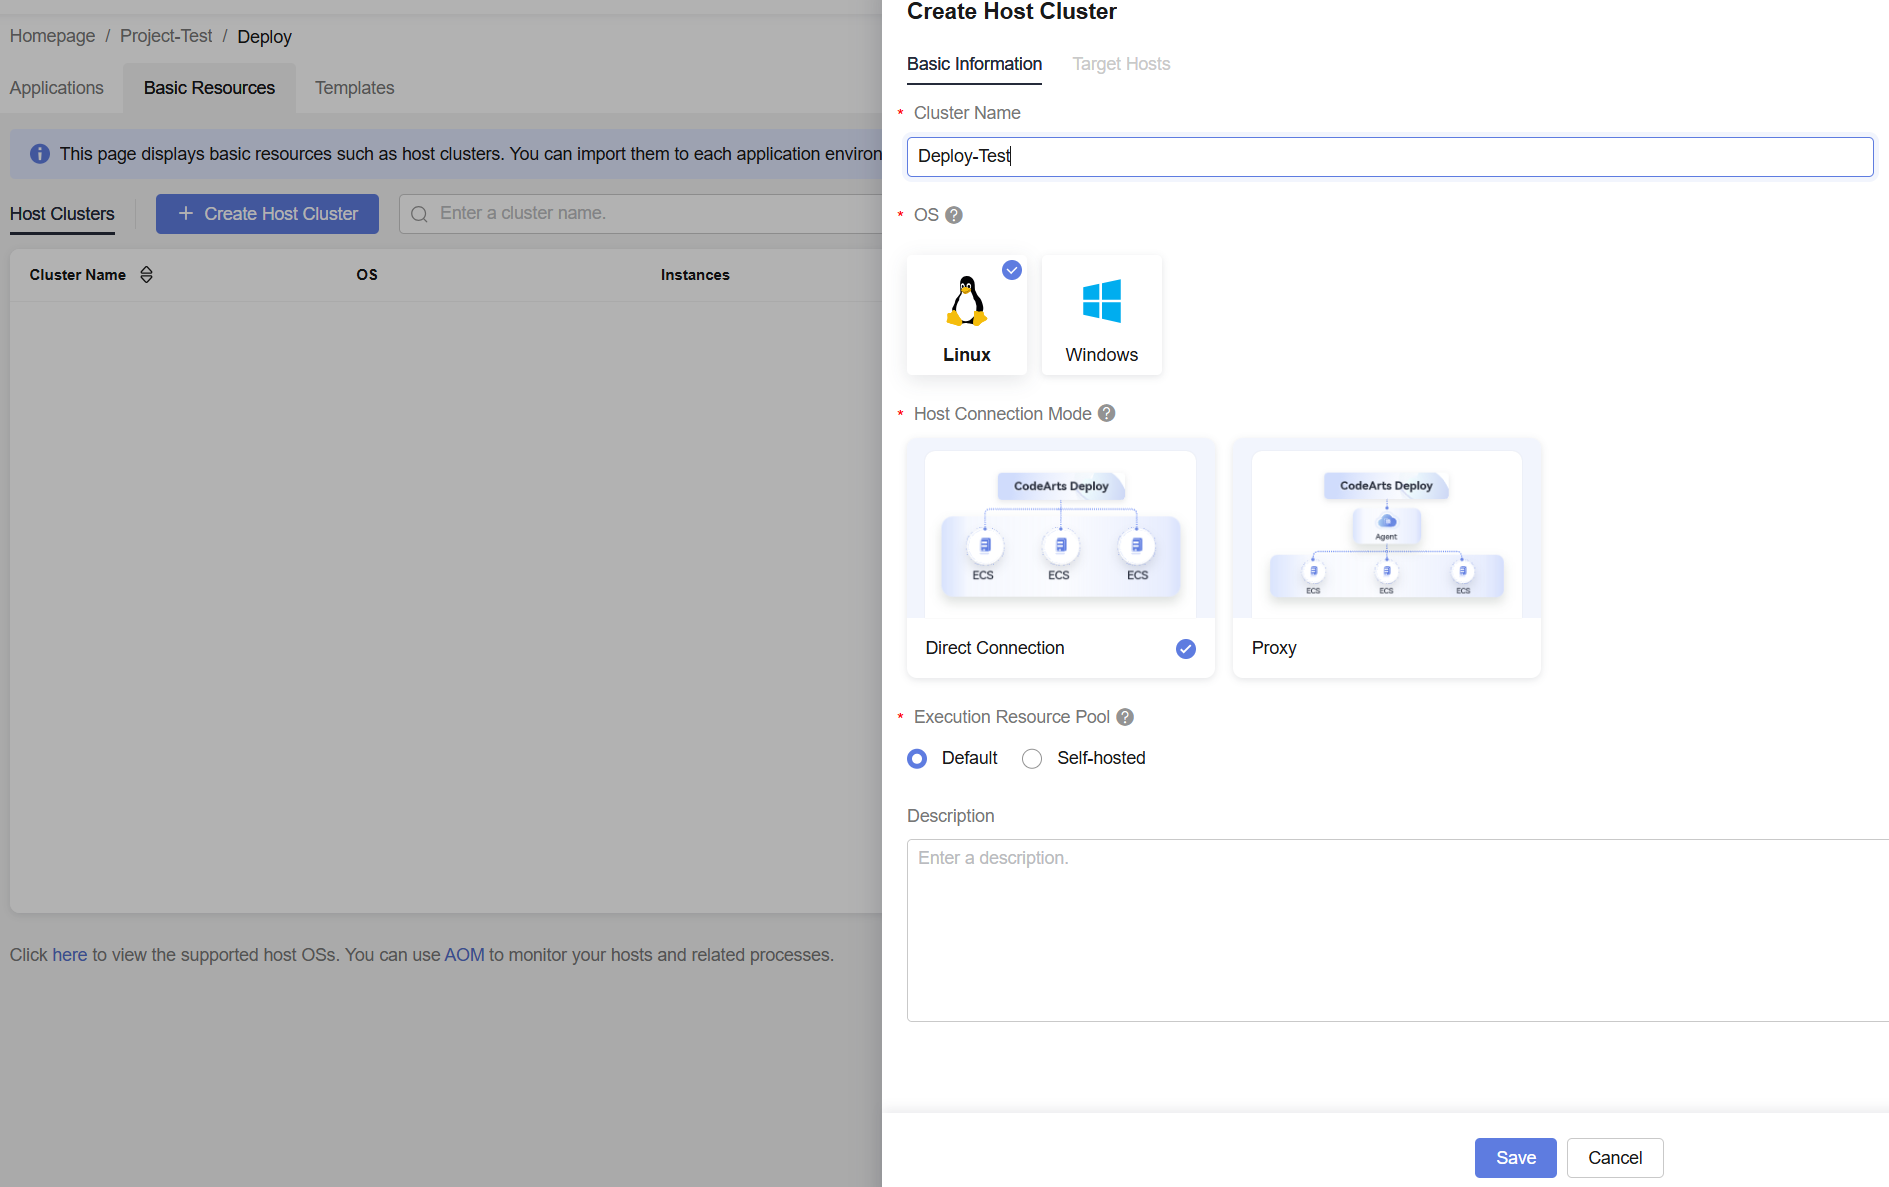
- Click Create Host Cluster. For details, see Creating a Host Cluster. Configure the basic information about the host cluster by referring to Basic information about the host cluster.
Table 2 Basic information about the host cluster Parameter
Description
Cluster Name
Cluster name. Enter Deploy-Test.
Enter 3 to 128 characters, including letters, digits, hyphens (-), and underscores (_).
OS
Select Linux.
Host Connection Mode
Select Direct Connection.
Execution Agent Pool
Select Default.
Description
Enter the description of the host cluster. Enter 0 to 500 characters.
- Click Save to complete the creation of basic information about the host cluster. Close the dialog box to return to the host cluster list page.
- Click
 in the Operation column of the corresponding cluster and choose Assign Permissions.
Figure 9 Cluster permissions management
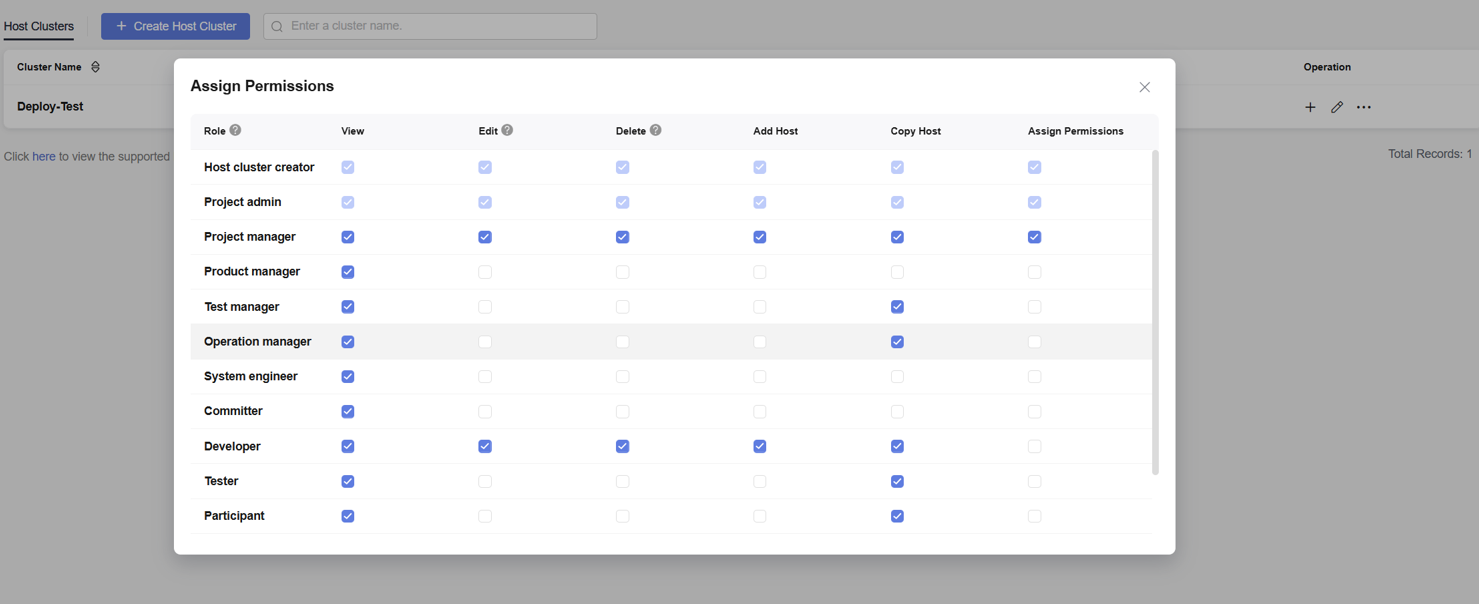
- In the Assign Permissions dialog box, set host cluster permissions by selecting or deselecting role permissions.
Figure 10 Setting host cluster permissions
- Close the dialog box.
Editing Environment Permissions
- Deploy a Service in a Project.
- Click the name of the created Deploy-Test application. The application details page is displayed.
- Click Environment Management to switch to the environment management page.
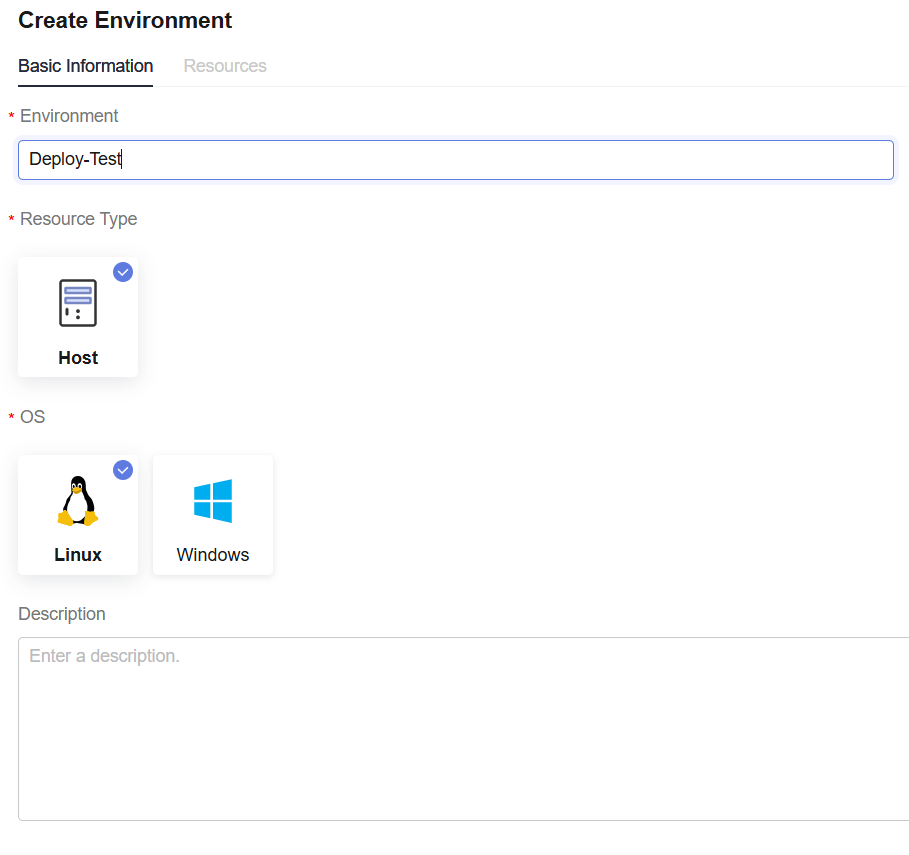
- Click Create Environment. The Create Environment dialog box is displayed, as shown in Creating an Environment.
- Configure basic environment information by referring to the following table.
Table 3 Basic host cluster information Parameter
Parameter Description
Environment
Environment name. Enter Deploy-Test.
Resource Type
Select Host.
OS
Select Linux.
Description
Enter the description of the environment. Max. 500 characters.
- Click Save to complete the environment creation and close the dialog box to return to the environment list page.
- Click the
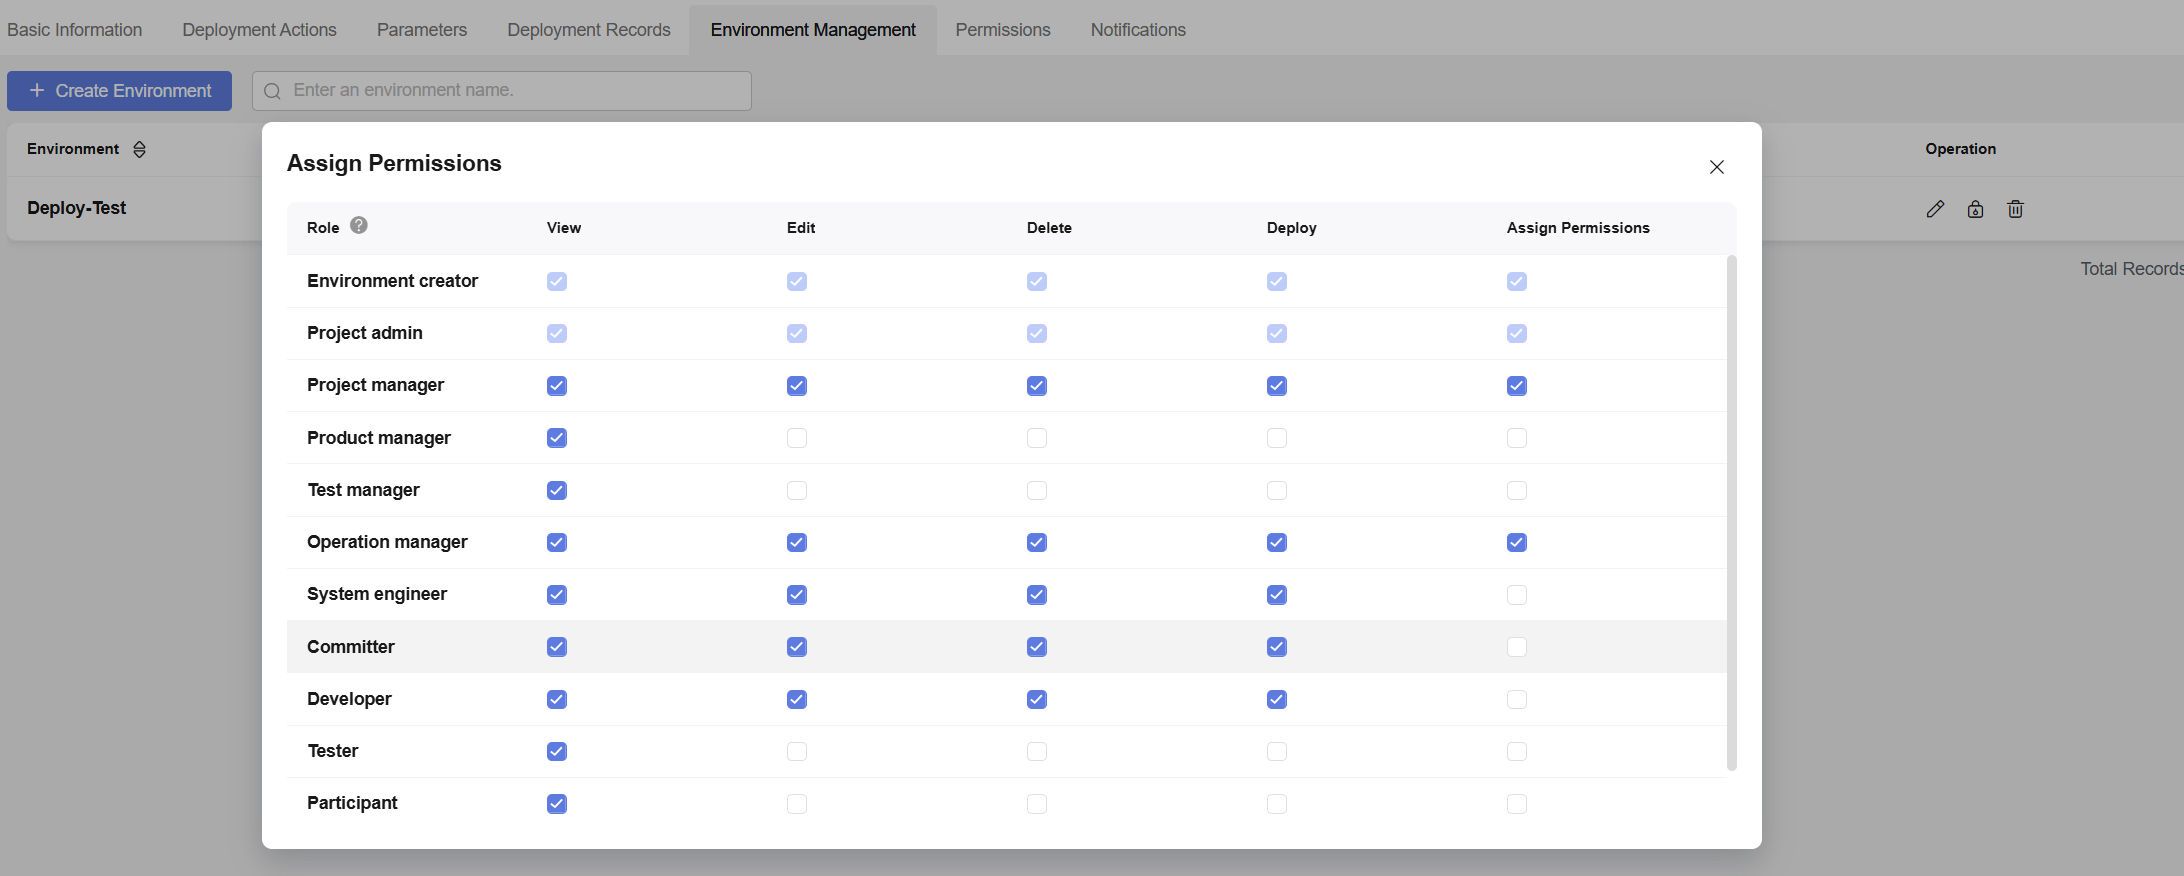
 icon in the Operation column. The Permissions dialog box is displayed, as shown in Environment permission management.
- Select or deselect role permissions based on service requirements.
Figure 13 Setting environment permissions
- Close the dialog box.
Feedback
Was this page helpful?
Provide feedbackThank you very much for your feedback. We will continue working to improve the documentation.See the reply and handling status in My Cloud VOC.
For any further questions, feel free to contact us through the chatbot.
Chatbot

