Controlling Dataset Permissions Using User Tags
By setting user tags and column-level permissions, you can ensure that only authorized users can access specific data fields, thereby reducing the risk of data breaches. This article demonstrates how to set user tags for user1, ensuring that user1 can only access authorized data, thereby guaranteeing data security.
Step 1: Create a User Tag
- Log in to the DataArts Insight console.
- Click
 in the upper left corner of the management console to select a region and select an enterprise project from Enterprise Project in the lower left corner of the Workspace page.
 - Click the name of the desired project in the My Projects area in the right pane.
- In the navigation pane on the left, choose Data Management > Datasets.
- Locate your desired dataset and access its editing page.
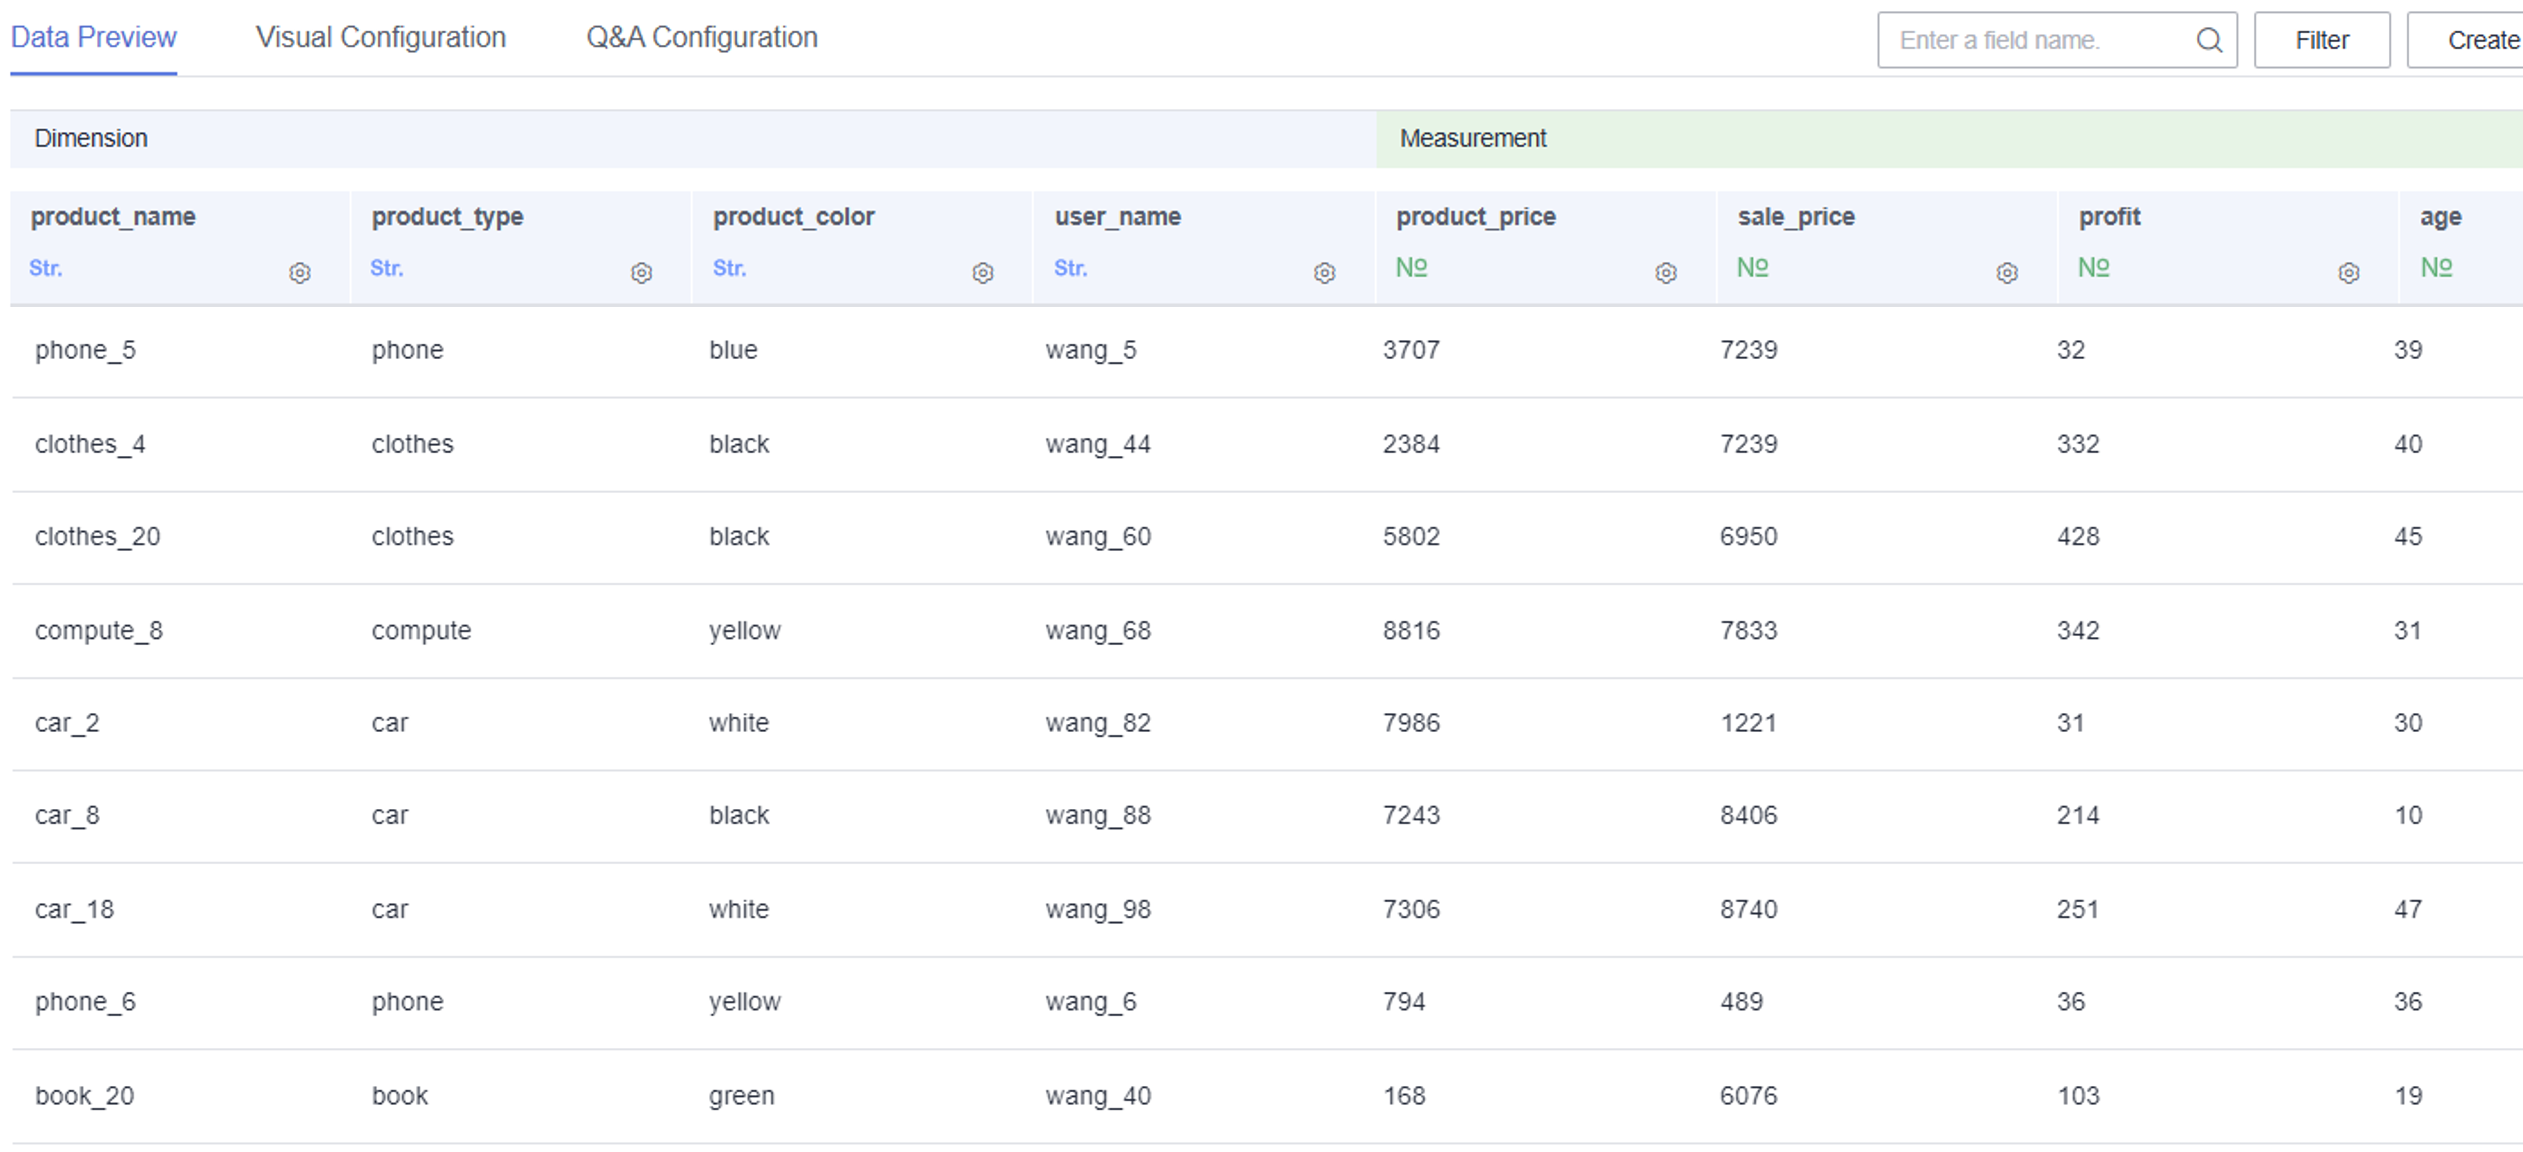
- On the displayed page, click the name of the desired dataset. If you have not set row permissions, all data for the product_type and product_color fields is displayed on the Data Preview tab.
- In the navigation pane on the left, choose System Settings.
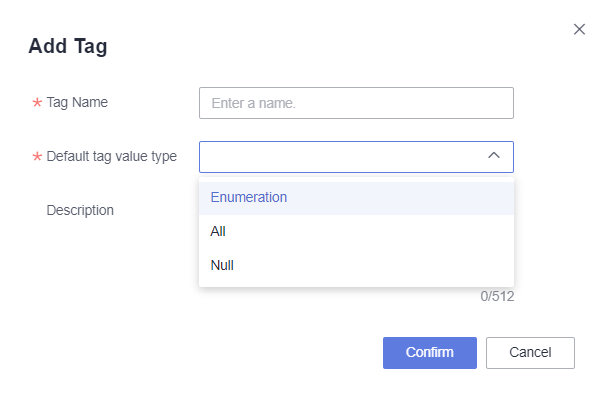
- Choose Tag Management. On the displayed User Tags tab page, click Add Tag in the upper right corner. This example adds the tag_product_type and tag_product_color tags.
- After the tags are created, the tag value of each user is default, and the default tag value can be selected when creating a tag (Figure 2). If you want specific users to see specific data, you need to configure it separately, that is, perform the next step.
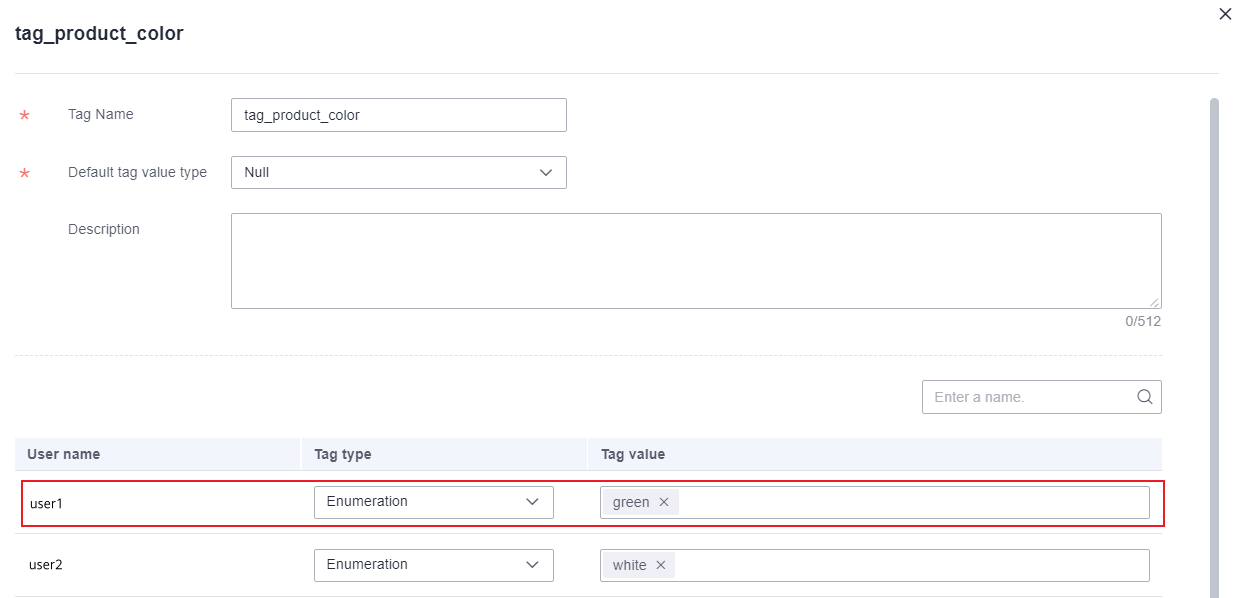
- Set the tag type of user1's tag_product_type and tag_product_color to Enumeration, and set the tag values to book and green.
By setting row-level permissions, user1 can only view data with product_type = book and product_color = green in the dataset in Figure 1.
Figure 3 Creating the tag_product_type user tag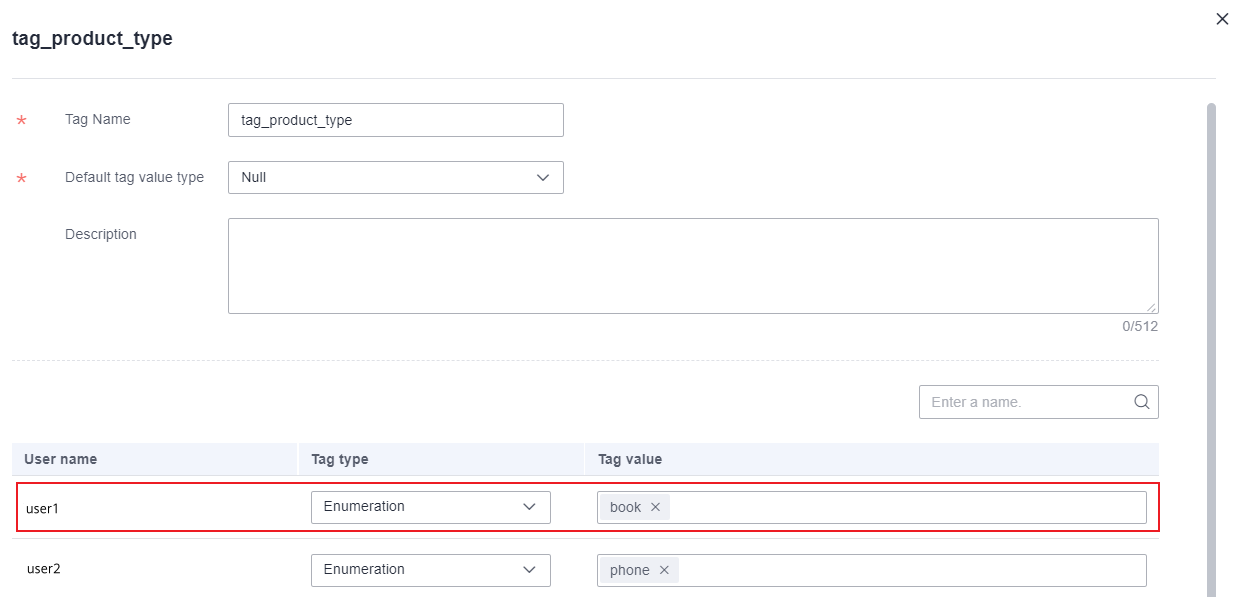 Figure 4 Creating the tag_product_color user tag
Step 2: Set Row-Level Permissions
- In the navigation pane on the left, choose Data Management > Datasets.
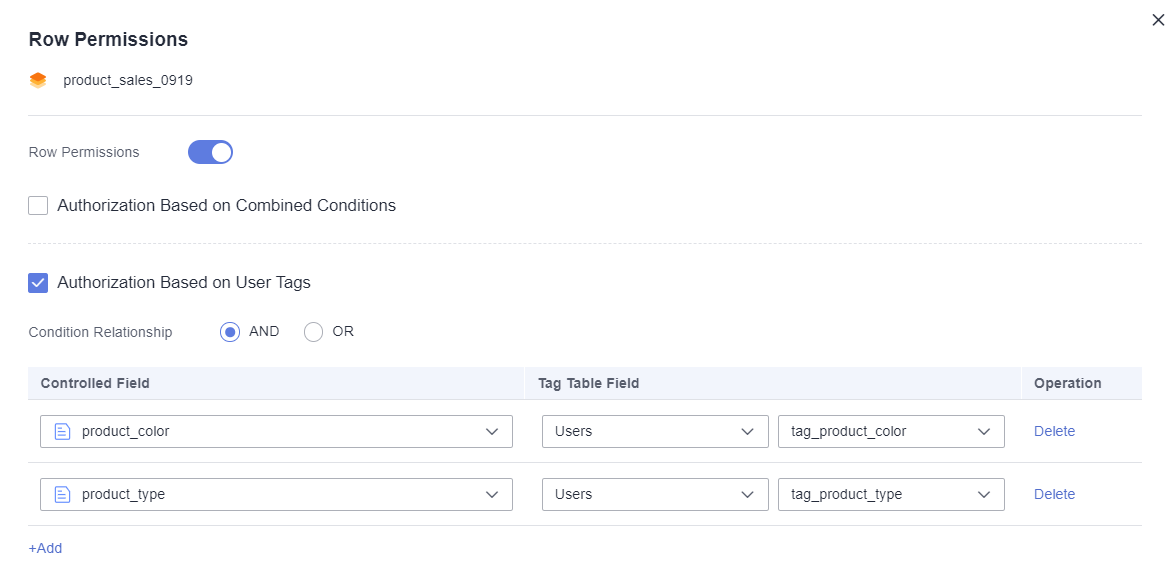
- Locate your desired dataset, click More in the Operation column, and select Row Permissions. In the displayed slide-out panel, enable Row Permissions and select Authorization Based on User Tags.
- Select a condition relationship and click Add to add a controlled field. Set Controlled Field to product_type and product_color, and set Tag Table Field to tag_product_type and tag_product_color (Figure 5).
In this example, set Condition Relationship to AND. This means user1 can view only the data whose product_type is book and product_color is green.
- View the dataset as user user1. Choose Data Management > Datasets in the navigation pane on the left to access the dataset page (Figure 6). user1 can view only the data whose product_type is book and product_color is green.
Feedback
Was this page helpful?
Provide feedbackThank you very much for your feedback. We will continue working to improve the documentation.See the reply and handling status in My Cloud VOC.
For any further questions, feel free to contact us through the chatbot.
Chatbot

