Adding Calculating Capabilities, Such as Summation, to Standard Page Tables
Expected Results
On a standard page, calculation capabilities such as summation and multiplication can be added to tables to improve data processing efficiency. For example, set the value of the productCost column in a table to productNum x productPrice + cost.

Procedure
- Create a low-code application.
- Apply for a free trial or purchase a commercial instance by referring to Authorization of Users for Huawei Cloud Astro Zero Usage and Instance Purchases.
- After the instance is purchased, click Access Homepage on Homepage. The application development page is displayed.
- In the navigation pane, choose Applications. On the displayed page, click Low-Code or
 .
.
When you create an application for the first time, create a namespace as prompted. Once it is created, you cannot change or delete it, so check the details carefully. Use your company or team's abbreviation for the namespace.
- In the displayed dialog box, choose Standard Applications and click Confirm.
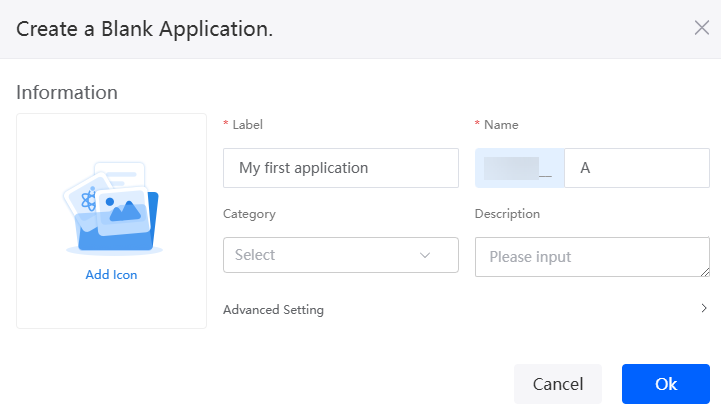
- Enter a label and name of the application, and click the confirm button. The application designer is displayed.
Figure 2 Creating a blank application
- Create an object named ProductList and add fields and data to the object.
- In the navigation pane, choose Data, and click + next to Object.
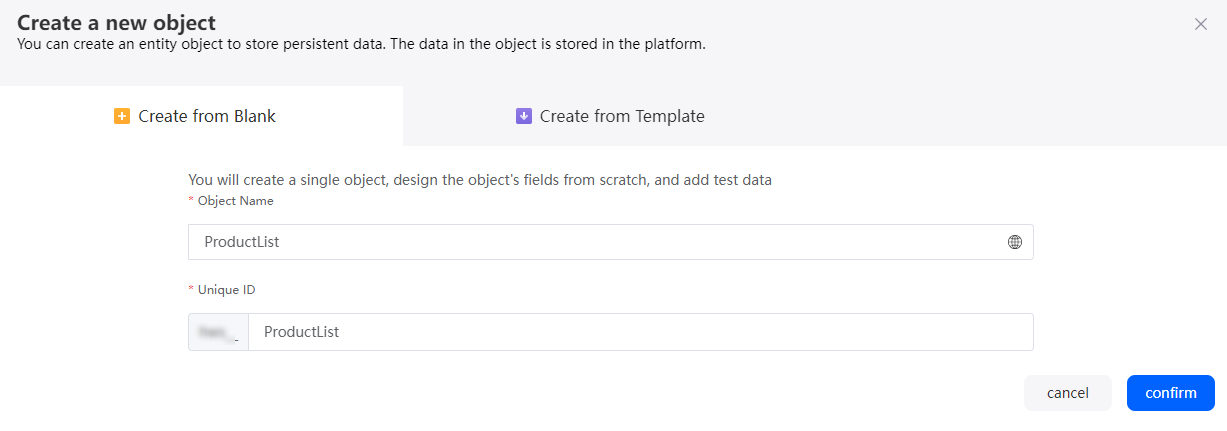
- Set Object Name and Unique ID of the object to ProductList and click the confirm button.
Figure 3 Creating the object ProductList
- Click
 to go to the object details page.
 - On the Fields tab page, click Add and add the productName field to the object.
Figure 4 Adding the productName field
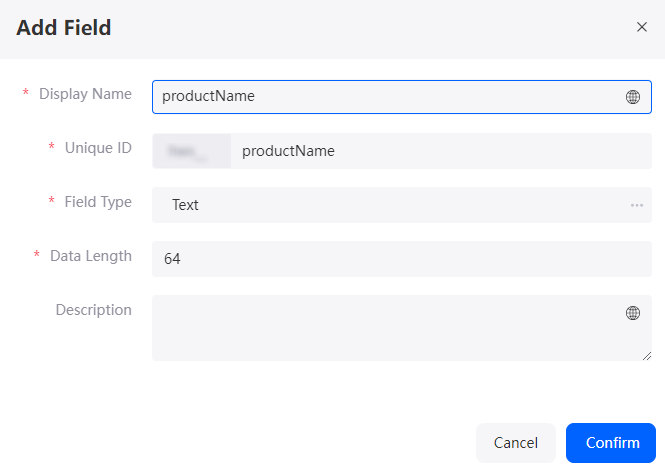
Table 3 Parameters for adding the cost field Parameter
Description
Example
Display Name
Name of the new field, which can be changed after the field is created.
Value: 1–63 characters.
Product name
Unique ID
ID of a new field in the system. The value cannot be changed after the field is created. Naming rules:
- Max. 63 characters, including the prefix namespace.
- Start with a letter and use only letters, digits, and an underscore (_). Do not end with an underscore (_).
productName
Field Type
Click
 . On the page that is displayed, select the type of the new field based on the parameter description.
Text
- Repeat the preceding operations to add the fields in Table 4 to the object.
Table 4 Adding other fields Display Name
Unique ID
Field Type
Product quantity
productNum
Number
Product price
productPrice
Number
Other costs
cost
Number
Figure 5 Viewing the added fields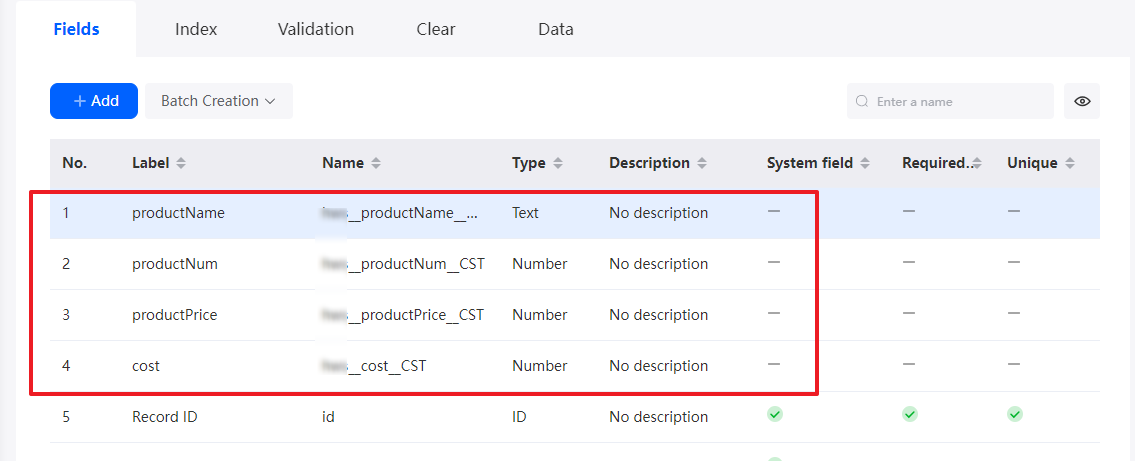
- On the Data tab, click Add to add data in Figure 6 to the object.
- Create an object model.
- In the navigation pane, choose Page, and click + next to Standard Page.
- Enter the label and name of the page and click Add to create a standard page.
- At the bottom of the standard page, click Model View.
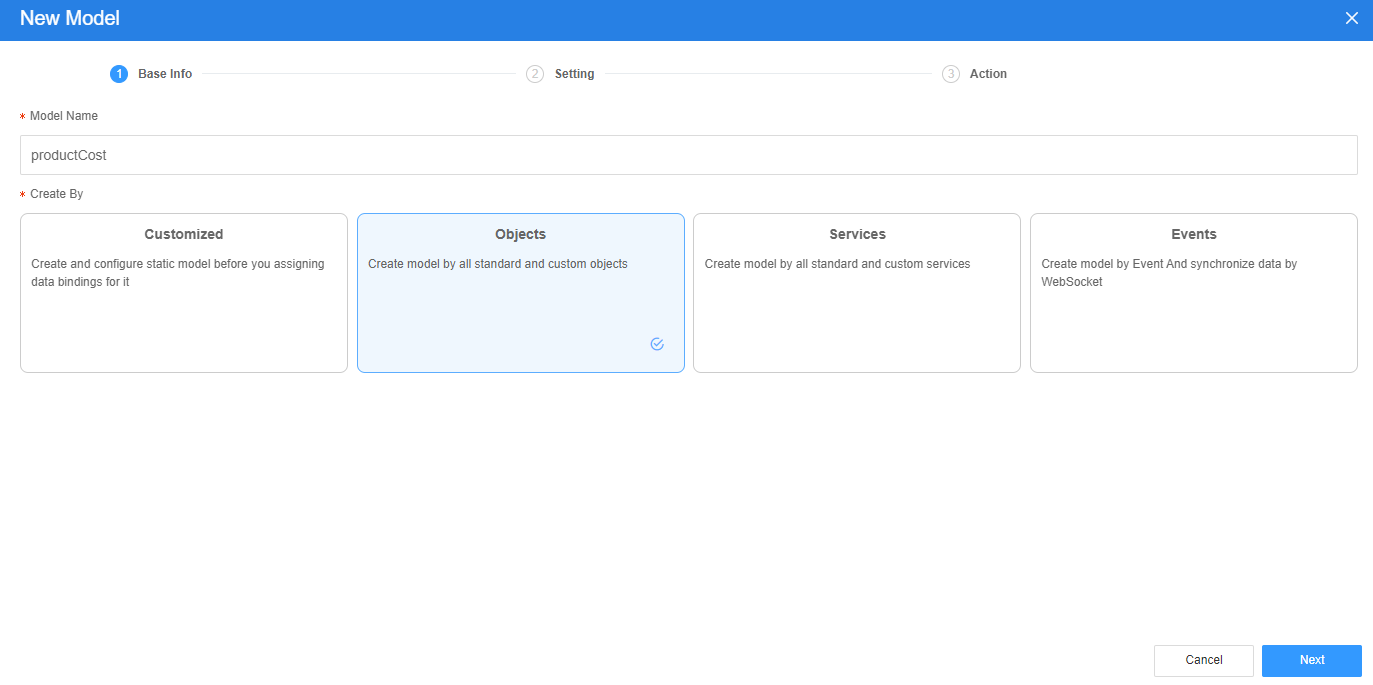
- Click New, specify Model Name (for example, productCost), select Objects for Source, and click Next.
Figure 7 Creating a model
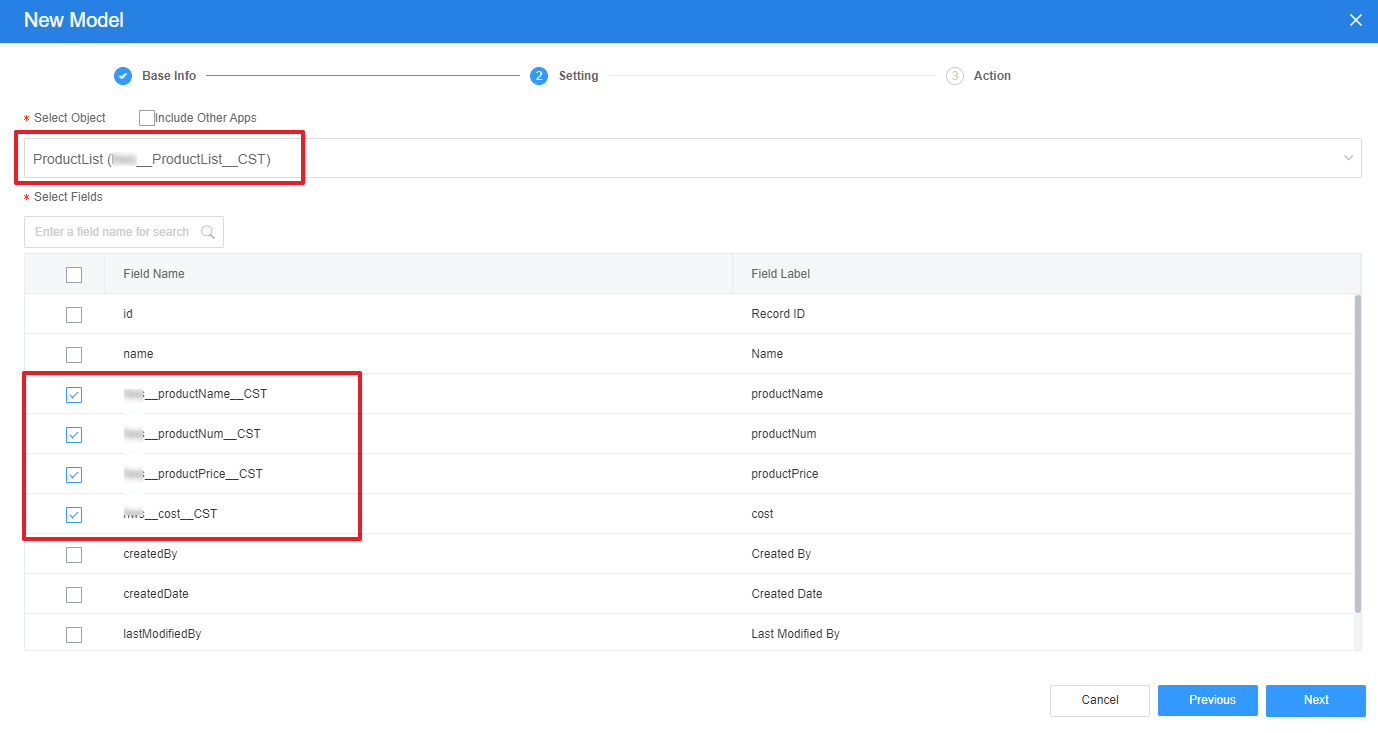
- Select the object created and the fields added in 3, click Next, and click OK.
Figure 8 Selecting objects and fields
- Return to the Designer View page and bind the model with the widgets.
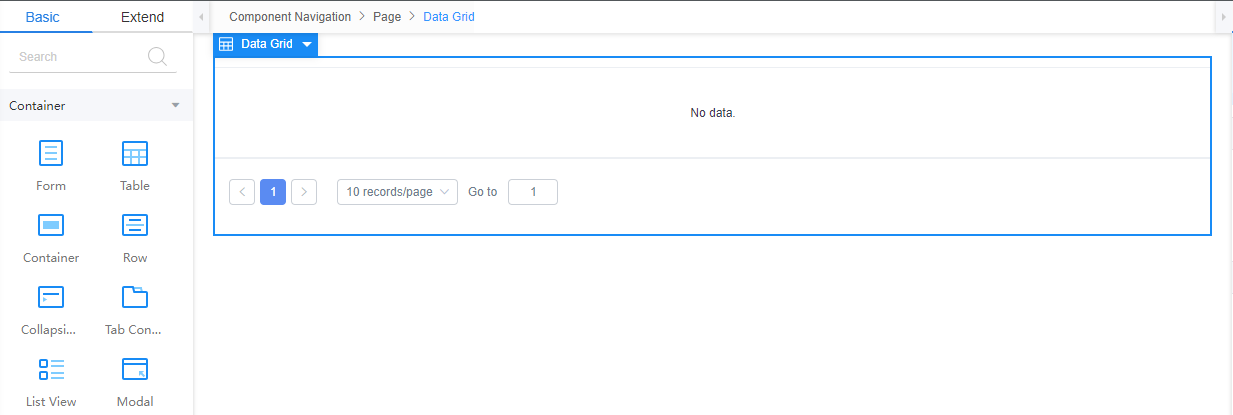
- Drag a table widget to the standard page.
Figure 9 Dragging a table widget
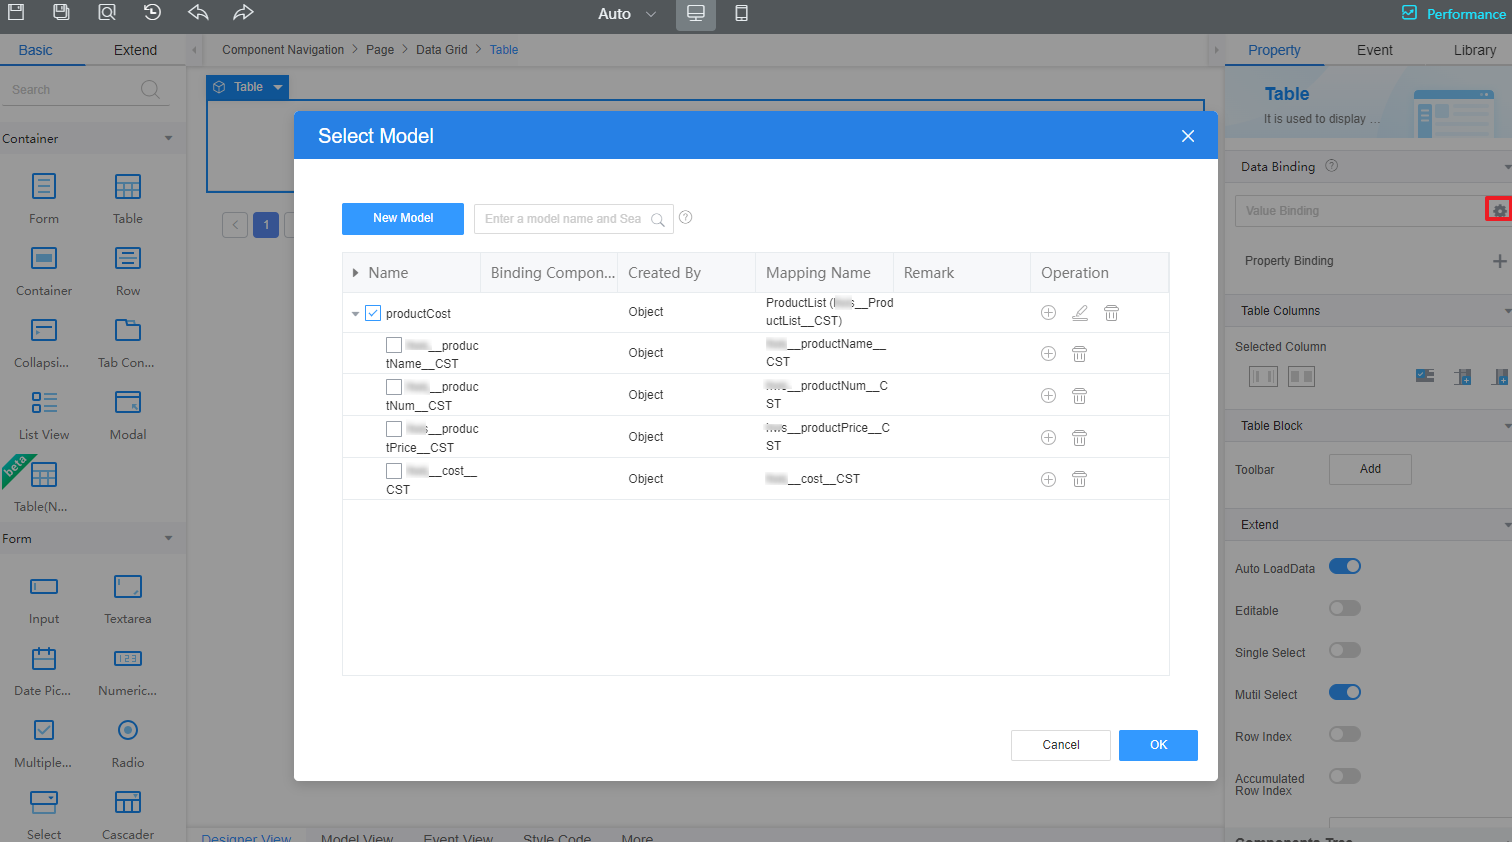
- Select the table widget, choose Properties > Data Binding and click
 next to Value Binding.
 - Select the model created in 3 and click the confirm button.
Figure 10 Selecting the model
- Drag a table widget to the standard page.
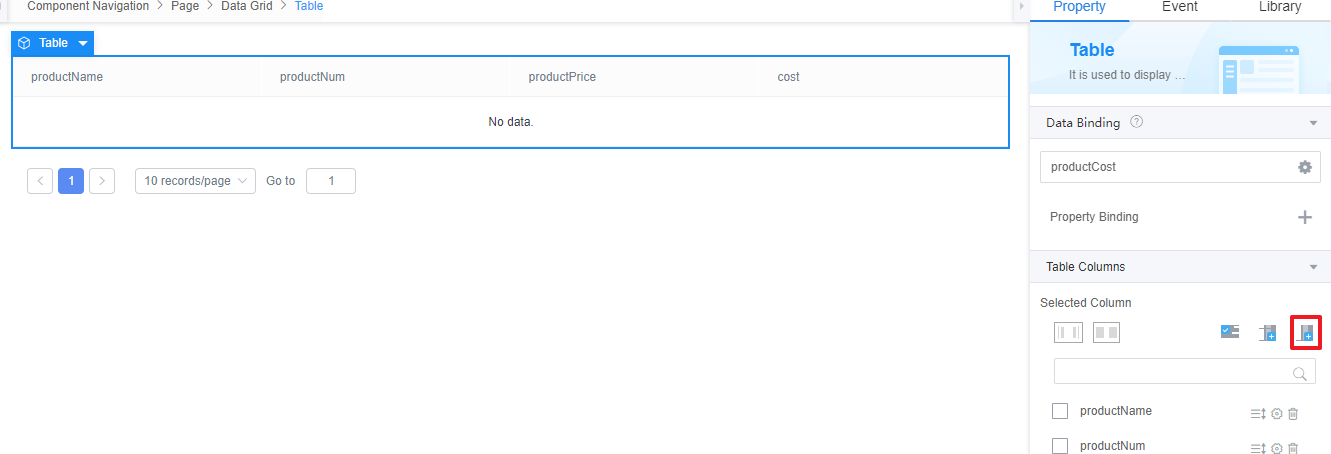
- Select a table, choose Properties > Table Columns > Added Column, and click
 to add a blank column.
Figure 11 Adding a blank column
- Click
 next to the new blank column, change the value of Column Title to productCost, set Show Type to Custom, and enter the custom code.
Figure 12 Changing the column title to productCost
 Figure 13 Setting Show Type to Custom and entering the custom code
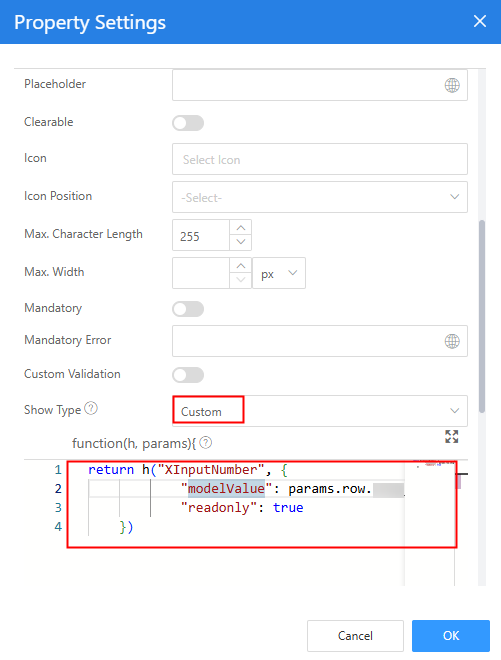
The custom code is as follows:
return h("XInputNumber", { "modelValue": params.row.Namespace__productPrice__CST * params.row.Namespace__productNum__CST + params.row.Namespace__cost__CST, "readonly": true }) - Click
 in the upper part of the page to save the page settings.
 - After the settings are saved, click
 in the upper part of the page to preview.
Feedback
Was this page helpful?
Provide feedbackThank you very much for your feedback. We will continue working to improve the documentation.See the reply and handling status in My Cloud VOC.
For any further questions, feel free to contact us through the chatbot.
Chatbot


