Connecting to Third-Party Databases with a Connector
Application Scenarios
A connector is an integration tool for calling third-party services. With connectors, developers do not need to pay attention to the implementation code. They only need to configure the service address and authentication information to quickly integrate third-party systems in applications, reducing development costs and improving efficiency.
This practice describes how to use a custom connector to integrate third-party databases into Huawei Cloud Astro Zero.
Advantages
Users can define database operations and authentication APIs to independently control the network of third-party databases.
Procedure
Figure 1 illustrates the process of connecting to a third-party database through a connector in Huawei Cloud Astro Zero.
Prerequisites
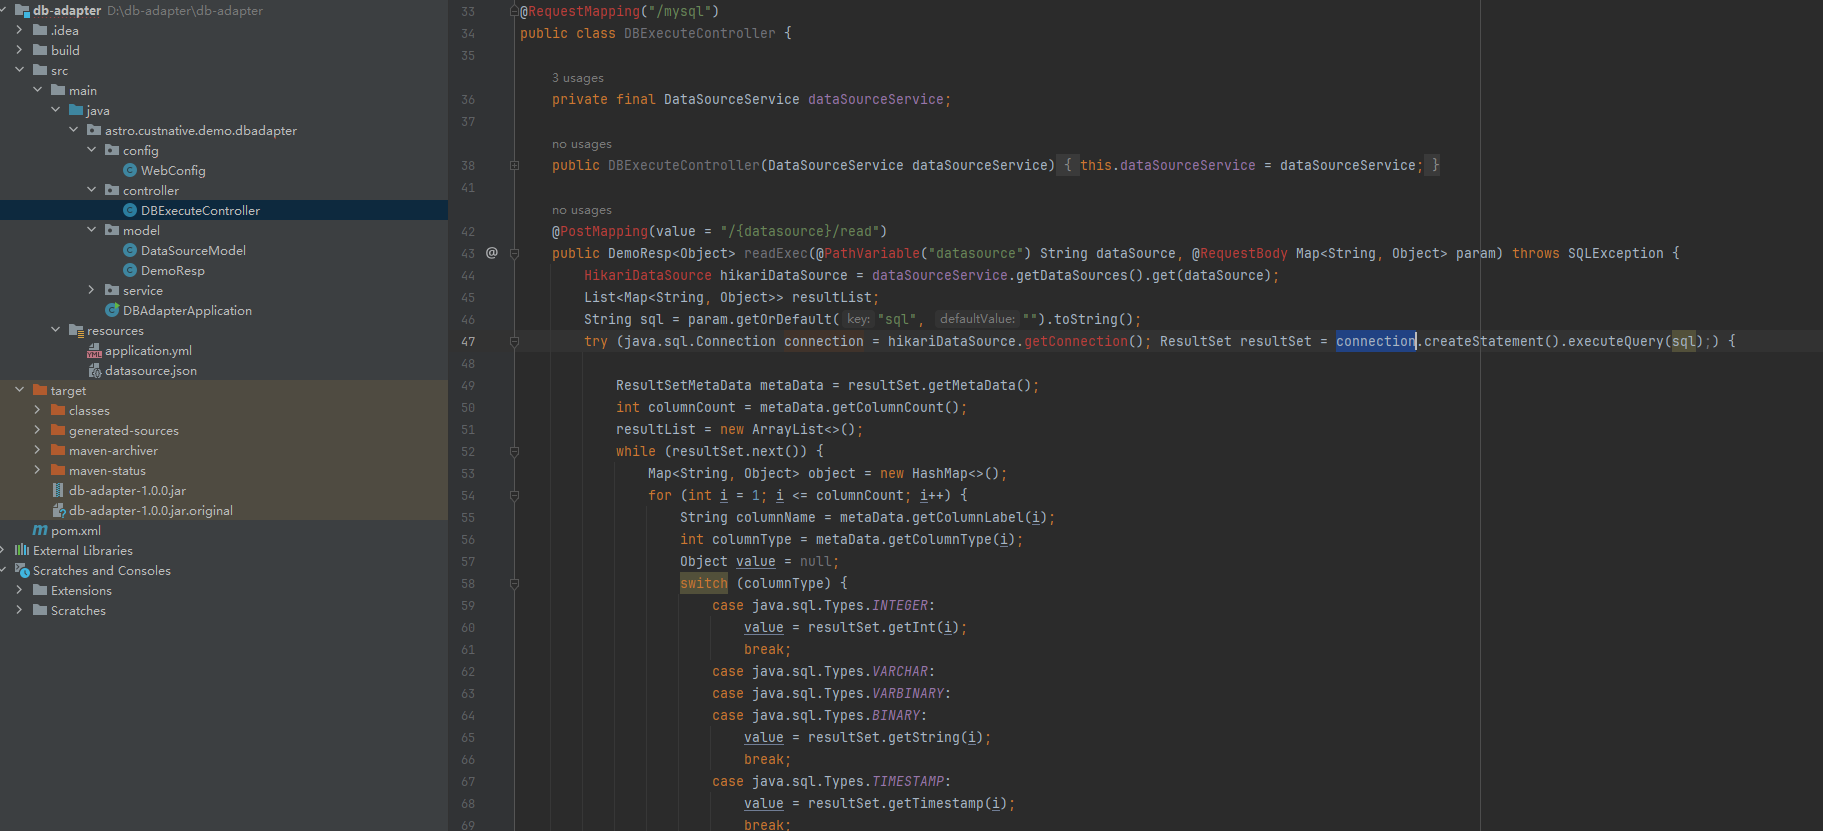
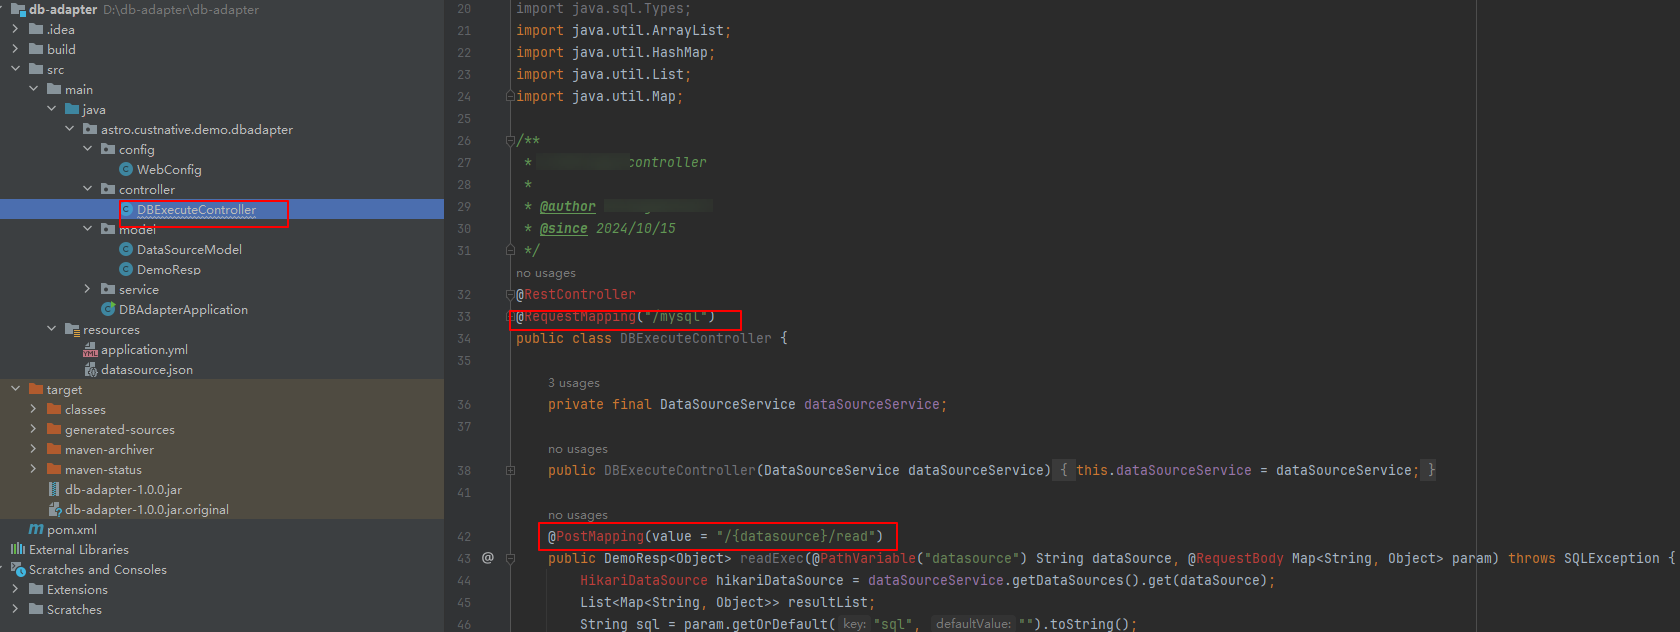
- db-adapter is the backend Java demo code used to operate the third-party database. The datasource.json file in the resources directory is used to configure the URL, username, and password of the database. The DBExecuteController.java file is used to connect to the database, process external requests, and return database data.
Figure 2 datasource.json
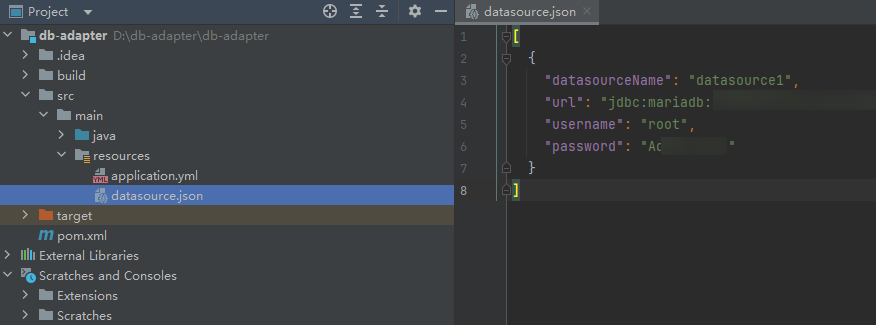 Figure 3 DBExecuteController.java
- Generate a JAR package based on db-adapter, place the compiled JAR package in the build directory, and build a Docker image. Upload the created image package to SWR. For details about how to upload image packages, see Uploading an Image Through SWR Console.
When using docker save to create an image package, use the {image}:{tag} command instead of image id. Otherwise, the package cannot be uploaded on the SWR console. If an image fails to be uploaded, see Why Does an Image Fail to Be Uploaded on the SWR Console.
Figure 4 Using the maven install command to pack the db-adapter folder into a JAR package Figure 5 Building an image
Creating a Deployment Using an Image Package
- Log in to the CCE console and buy a cluster by referring to Buying a CCE Standard/Turbo Cluster.
- After the cluster is purchased, add a node to the cluster by referring to Creating a Node.
- Create a deployment.
- After a node is added, choose in the navigation pane on the left.
- Click Create Workload.
Figure 6 Creating a deployment
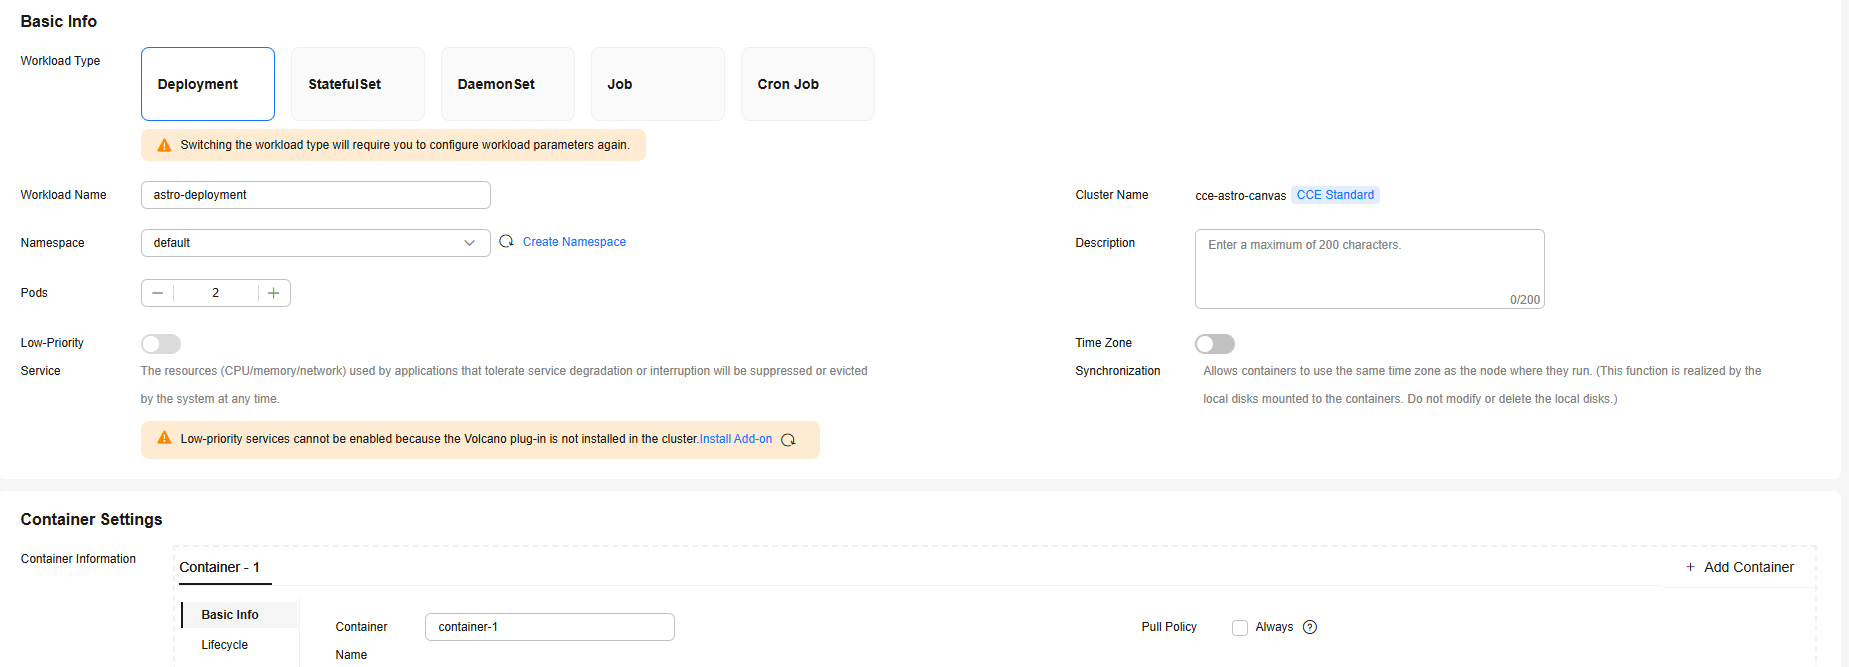 Figure 7 Selecting an image
Table 1 describes only parameters used in this practice. For details about other parameters, see Creating a Deployment .
Table 1 Deployment parameters Parameter
Description
Example
Workload Type
Set the workload type.
Deployment
Workload Name
Name of the workload to be created. Naming rules:
- Max. 63 characters.
- Start with a letter and end with a letter or digit. Use only lowercase letters, digits, and hyphens (-).
astro-deployment
Pods
Enter the number of pods of the workload.
1
Container Name
Enter the name of the container.
astro-container
Image Name
Click Select Image and select the image uploaded in Prerequisites.
db_adapter
- Add a service for the workload.
- On the Deployments tab page, click the workload name to go to the details page.
Figure 8 Clicking the workload name

- On the access mode tab page, click Create Service to create a service and configure an access API.
Figure 9 Creating a service

Table 2 Service parameters Parameter
Description
Example
Service Name
Enter the name of the new service or retain the default value.
astro-deployment-service
Service Type
Select the access type of the service.
NodePort
Ports > Protocol
Select the protocol used by the service.
TCP
Ports > Container Port
Specify the port used by the Service. The port number ranges from 1 to 65535.
8086
Ports > Service Port
Specify the port used by the service. The port number ranges from 1 to 65535.
8086
Ports > Node Port
Select Auto or specify a port. The default port ranges from 30000 to 32767.
30280
- On the Deployments tab page, click the workload name to go to the details page.
- Test the API connectivity.
Combine the IP address of the node in 2 and the node port configured in 4.b to form a complete access address. The access address consists of the IP address and port number of the CCE node, context-path in db-adapter, and the REST API, for example, http://10.10.10.1:30280/astro/native/demo/dbadapter/mysql/datasource1/read.
Figure 10 context-path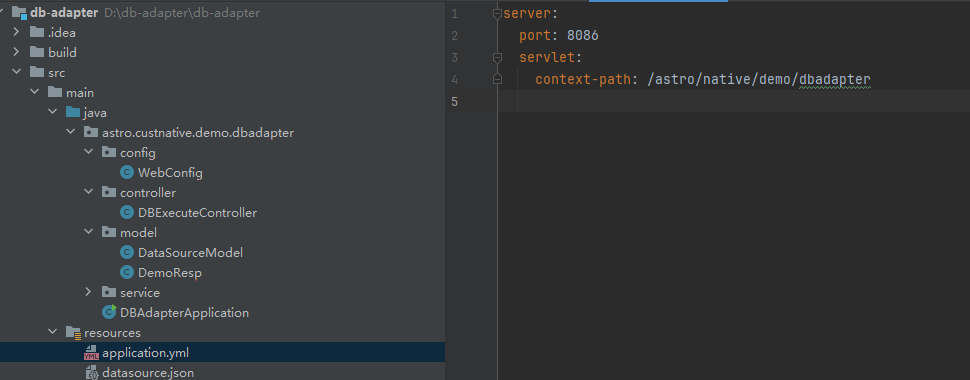 Figure 11 context-path and the REST API
On the Body tab page, enter SQL statements, click Send, and check the API status. If the status is 200 OK, the API debugging is successful.
Figure 12 Testing API connectivity
Connecting to Third-party Databases with a Connector
- Create a low-code application.
- Apply for a free trial or purchase a commercial instance by referring to Authorization of Users for Huawei Cloud Astro Zero Usage and Instance Purchases.
- After the instance is purchased, click Access Homepage on Homepage. The application development page is displayed.
- In the navigation pane, choose Applications. On the displayed page, click Low-Code or
 .
.
When you create an application for the first time, create a namespace as prompted. Once it is created, you cannot change or delete it, so check the details carefully. Use your company or team's abbreviation for the namespace.
- In the displayed dialog box, choose Standard Applications and click Confirm.
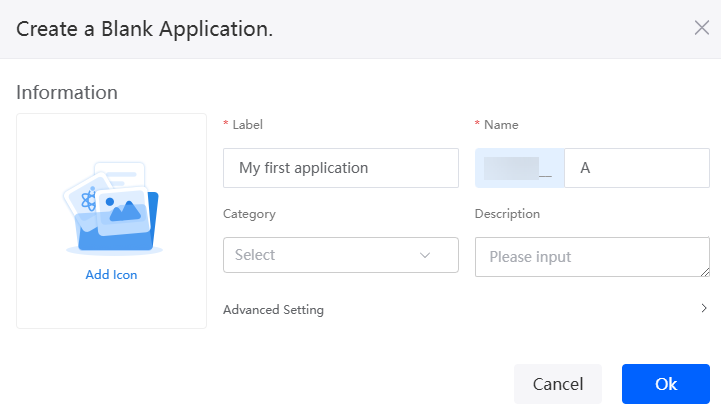
- Enter a label and name of the application, and click the confirm button. The application designer is displayed.
Figure 13 Creating a blank application
- In the application designer, choose Integrations > Connector > Connector Instance.
- In the Type area, select Custom Connector.
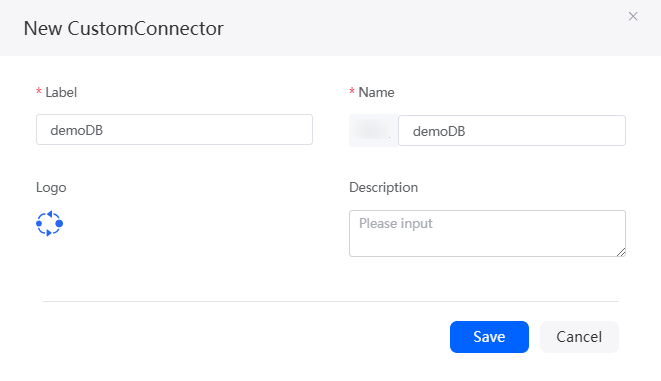
- Click +, configure the connector information, and click Save.
Figure 14 Creating a custom connector
- Create authentication information for the custom connector.
- On the Authentication Information tab page, click New.
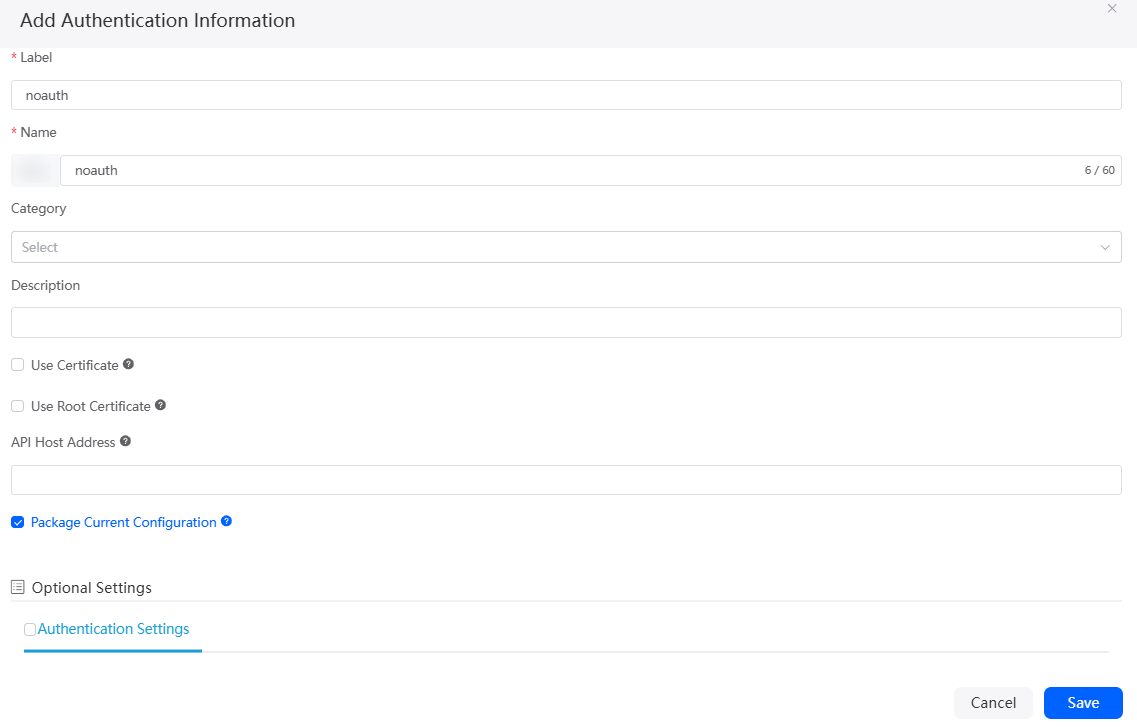
- Set authentication information and click Save.
Figure 15 Adding authentication information
- Add an action to the custom connector.
- On the Action tab page, click New.
- After setting the information, click Next.
Figure 16 Setting basic information
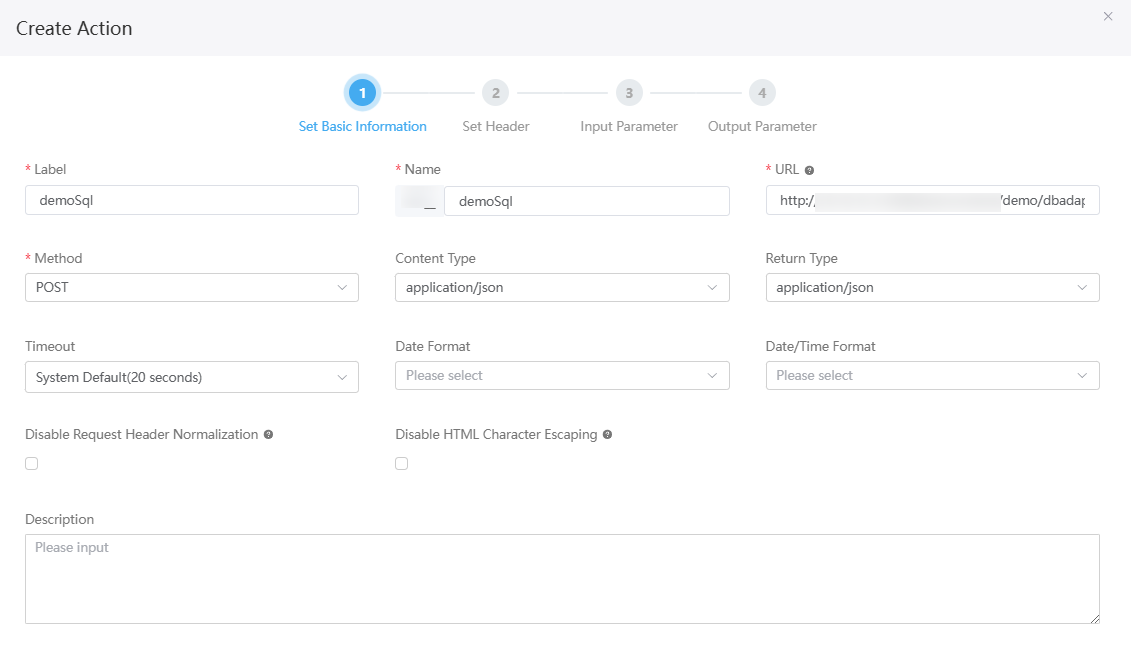
Table 6 Parameters for creating an action Parameter
Description
Example
Label
Action label, which is displayed on the page.
Value: 1–64 characters.
demoSql
Name
Action name, which uniquely identifies the action in the system. Naming rules:
- Max. 64 characters, including the prefix namespace.
The content that is blurred in front of the ID is a namespace. To prevent duplicate data names among different tenants in Huawei Cloud Astro Zero, each tenant must define a unique namespace when first creating an application. A tenant can only create one namespace, and once it is created, it cannot be modified.
- Start with a letter and can contain only letters, digits, and underscores (_). It cannot end with an underscore (_).
demoSql
URL
URL of the RESTful service provided by the third-party system (the address successfully debugged in 5).
http://10.10.10.1:30280/astro/native/demo/dbadapter/mysql/datasource1/read
Method
Select a request method.
POST
Content Type
The value depends on the content type supported by the third-party system and is defined in HTTP.
application/json
Return Type
Select a return type.
If the value is application/json, the content-type configured by the third-party system rather than that returned by it will be used to parse the returned content.
If this parameter is left blank, content-type returned in the HTTP response will be used to parse the content.
application/json
- Max. 64 characters, including the prefix namespace.
- In this example, you do not need to set the message header input parameters. Click
 to delete the parameters in the first row and click Next.
 - Set input parameters and click Next.
Figure 17 Setting input parameters
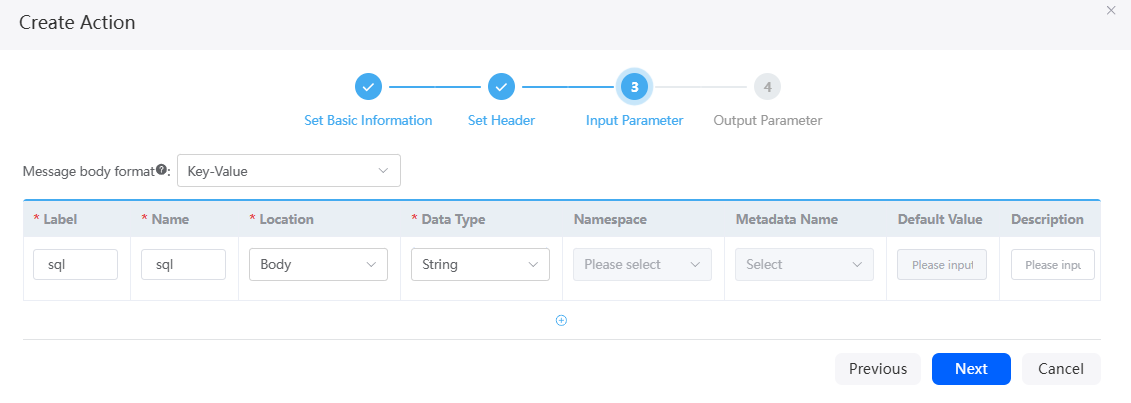
Table 7 Description of input parameters Parameter
Description
Example
Label
Label of an input parameter, which is displayed on the page.
sql
Name
Name of an input parameter, which uniquely identifies the input parameter in the system.
sql
Location
Position of the input parameter.
Body
Data Type
Data type of the input parameter. Select a value from the drop-down list.
String
- In this example, you do not need to set output parameters. Click
 to delete the parameters in the first row, and then click Save.
 - On the Action tab page, click
 in the row where the action is located to enable the action.
Obtaining Data from a Third-Party Database
- On the Action tab page of the custom connector, click the action added in 6.
Figure 18 Clicking the action name

- In the upper right corner of the page, click Test.
- Set Authentication Information to noauth created in 5, set input parameters, and click Test.
Figure 19 Testing the action
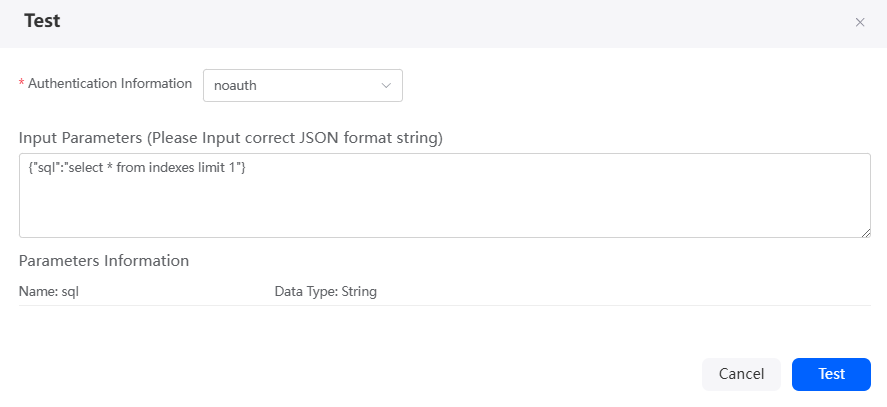
For example, obtaining one record from the indexes table in the third-party database. sql is the input parameter added in 8, and indexes is the name of a table in the third-party database. Click Test. The following data is returned:
{
    "result": {
        "content": [
            {
                "created_by": "10gd000000bHFh7DZ9iS",
                "created_date": "2021-04-09T00:59:20.000+00:00",
                "description": null,
                "field_id1": "cust000000hDkpq2Puy0",
                "field_id2": null,
                "index_id": "cust000000inMlDAbr6X",
                "index_name": "HWAC__applicationId__CST",
                "index_type": 3,
                "label": null,
                "last_modified_by": null,
                "last_modified_date": "2021-04-09T00:59:20.000+00:00",
                "obj_id": "cust000000hBjuCHLJom",
                "status": 0,
                "tenant_id": "0000000000bHFh7DZ9iT"
            }
        ]
    },
    "dataForm": "2006-01-02",
    "dataTimeFormat": "2006-01-02 15:04:05",
    "reqMsg": "",
    "respMsg": "{\"url\":\"http://10.10.10.1:30280/astro/native/demo/dbadapter/mysql/datasource1/read\",\"method\":\"POST\",\"parameters\":{\"content\":\"******\"},\"tenantID\":\"000000000142c5UhjFvk\",\"statusCode\":200}",
    "timeElapsed": 207722711,
    "statusCode": 200,
    "headers": {
        "Connection": "keep-alive",
        "Content-Type": "application/json",
        "Date": "Fri, 13 Dec 2024 08:55:24 GMT",
        "Server": "nginx"
    }
}
Using a Script to Call the Connector to Obtain Data
- In the navigation pane, choose Logic and click + next to Script.
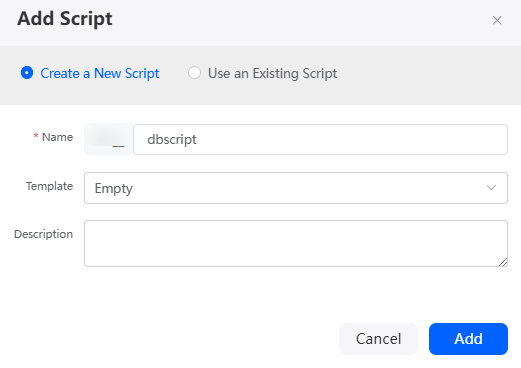
- Create a script, set the name to dbscript, and click Add.
Figure 20 Creating dbscript
- In the script editor, enter the sample code.
In the sample code, Namespace__demoDB is the connector name defined in 4, Namespace__noauth is the authentication information added in 3, and Namespace__demoSql is the action added in 6.
import * as connector from 'connector'; import * as context from 'context';//Import the standard library related to the context. //Define the input parameter structure. @action.object({ type: "param" }) export class ActionInput { @action.param({ type: 'String', required: false, label: 'String' }) sql: string; } //Define the output parameter structure. @action.object({ type: "param" }) export class ActionOutput { @action.param({ type: 'any' }) res: any; } @action.object({ type: "method" }) export class CreateWorkOrder { //Define the API class. The input parameter of the API is ActionInput, and the output parameter is ActionOutput. @action.method({ input: 'ActionInput', output: 'ActionOutput' }) public createWorkOrder(input: ActionInput): ActionOutput { let out = new ActionOutput(); //Create an instance of the ActionOutput type as the return value. let error = new Error(); //Create an instance of the error type to save the error information when an error occurs. try { // Method for calling the created custom connector. The first parameter is the name of the custom connector, and the second parameter is the authentication information name. let client = connector.newClient("Namespace__demoDB", "Namespace__noauth"); //Input parameters let input = { "sql": "select * from flowinstance limit 1" }; // The first input parameter is the action name, and the second parameter is the input parameter. let resp = client.invoke(" Namespace__demoSql," input); // Print the output result. console.log(resp); out.res = resp; } catch (error) { console.error(error.name, error.message); context.setError(error.name, error.message); } return out; } } - Click
 in the upper part of the page to save the script.
 - Click
 in the upper part of the editor to run the script.
 - Click the
 in the upper right corner of the test window at the bottom of the page and check the returned database data on the output parameter tab page.
Figure 21 Checking the returned data
Feedback
Was this page helpful?
Provide feedbackThank you very much for your feedback. We will continue working to improve the documentation.See the reply and handling status in My Cloud VOC.
For any further questions, feel free to contact us through the chatbot.
Chatbot


