
Selectively Exposing CCE Workloads
Overview
You can use APIG to selectively expose your workloads and microservices in Cloud Container Engine (CCE). Using APIG to expose containerized applications has the following benefits:
- You do not need to set elastic IP addresses, and this reduces network bandwidth costs.
- You can choose an authentication mode from multiple options to ensure access security.
- You can configure a request throttling policy to ensure secure access to your backend service.
- You can configure multiple pods for each workload for load balancing, optimizing resource utilization and increasing system reliability.

Preparing CCE Workloads
Create a cluster and workload in CCE, and add pods and containers to the workload. For more information, see CCE User Guide.
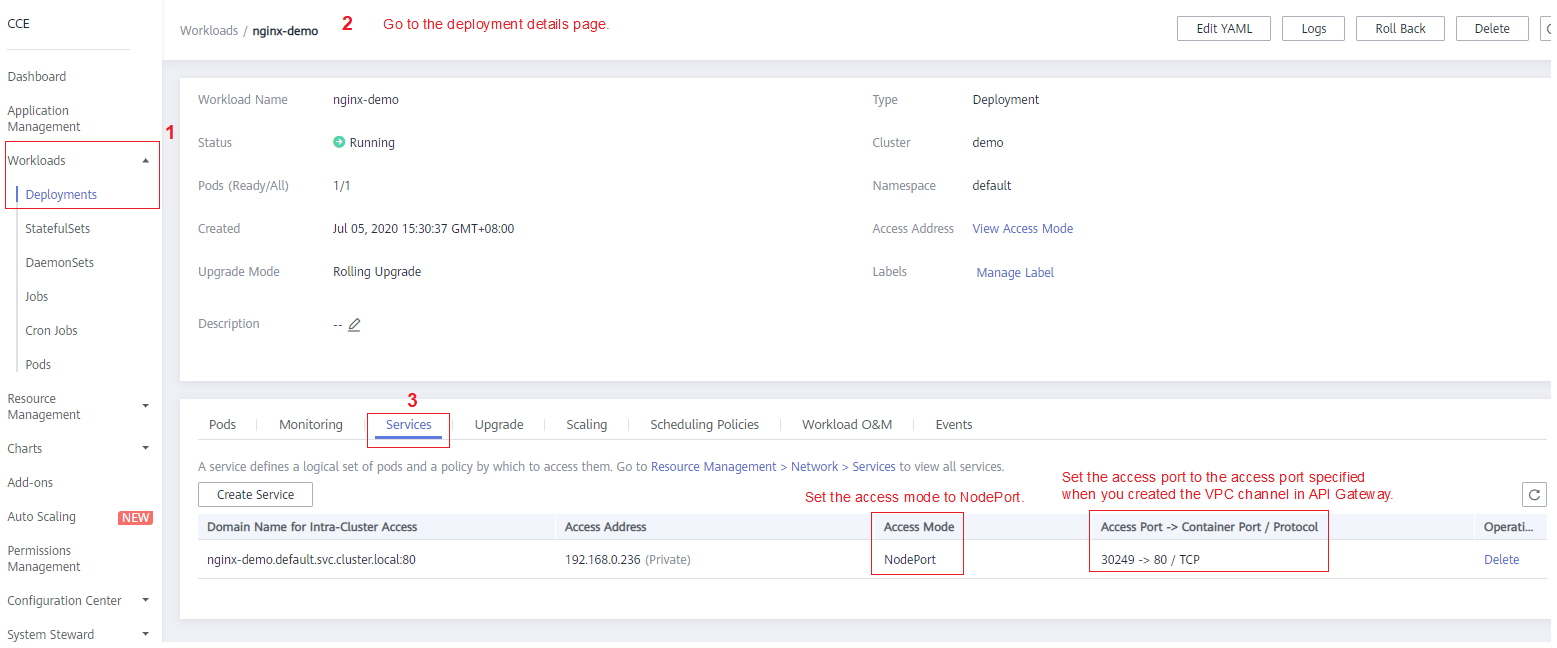
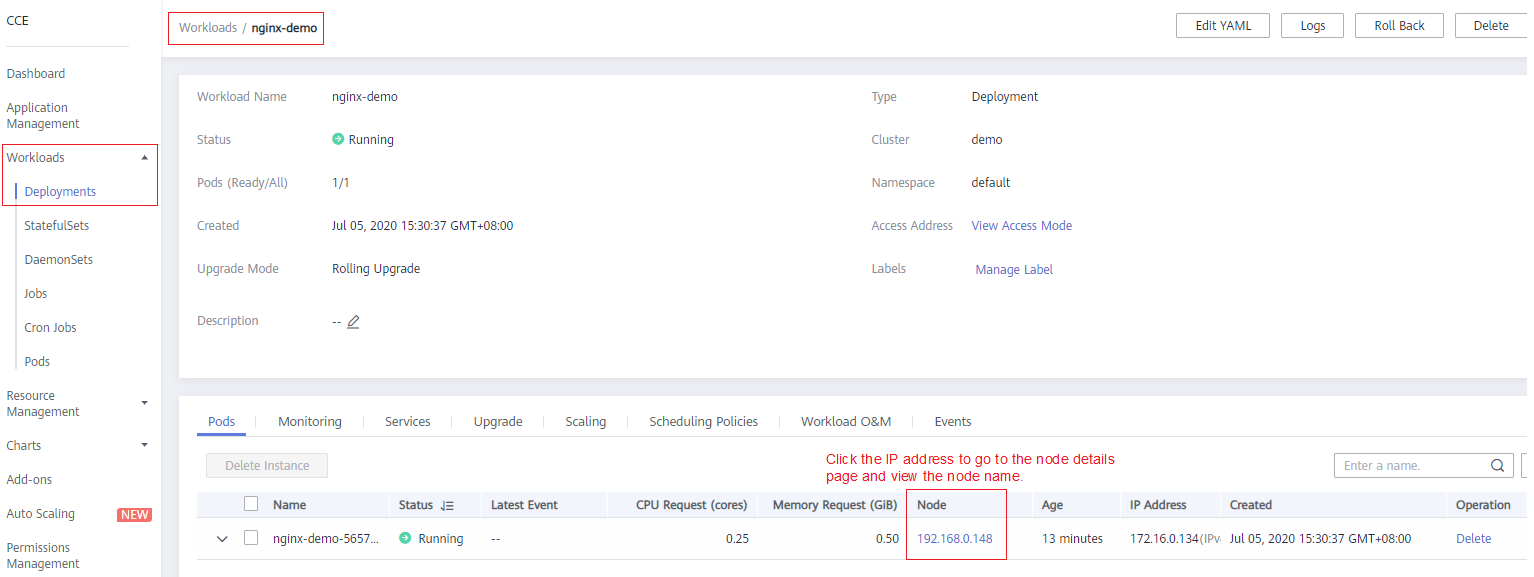
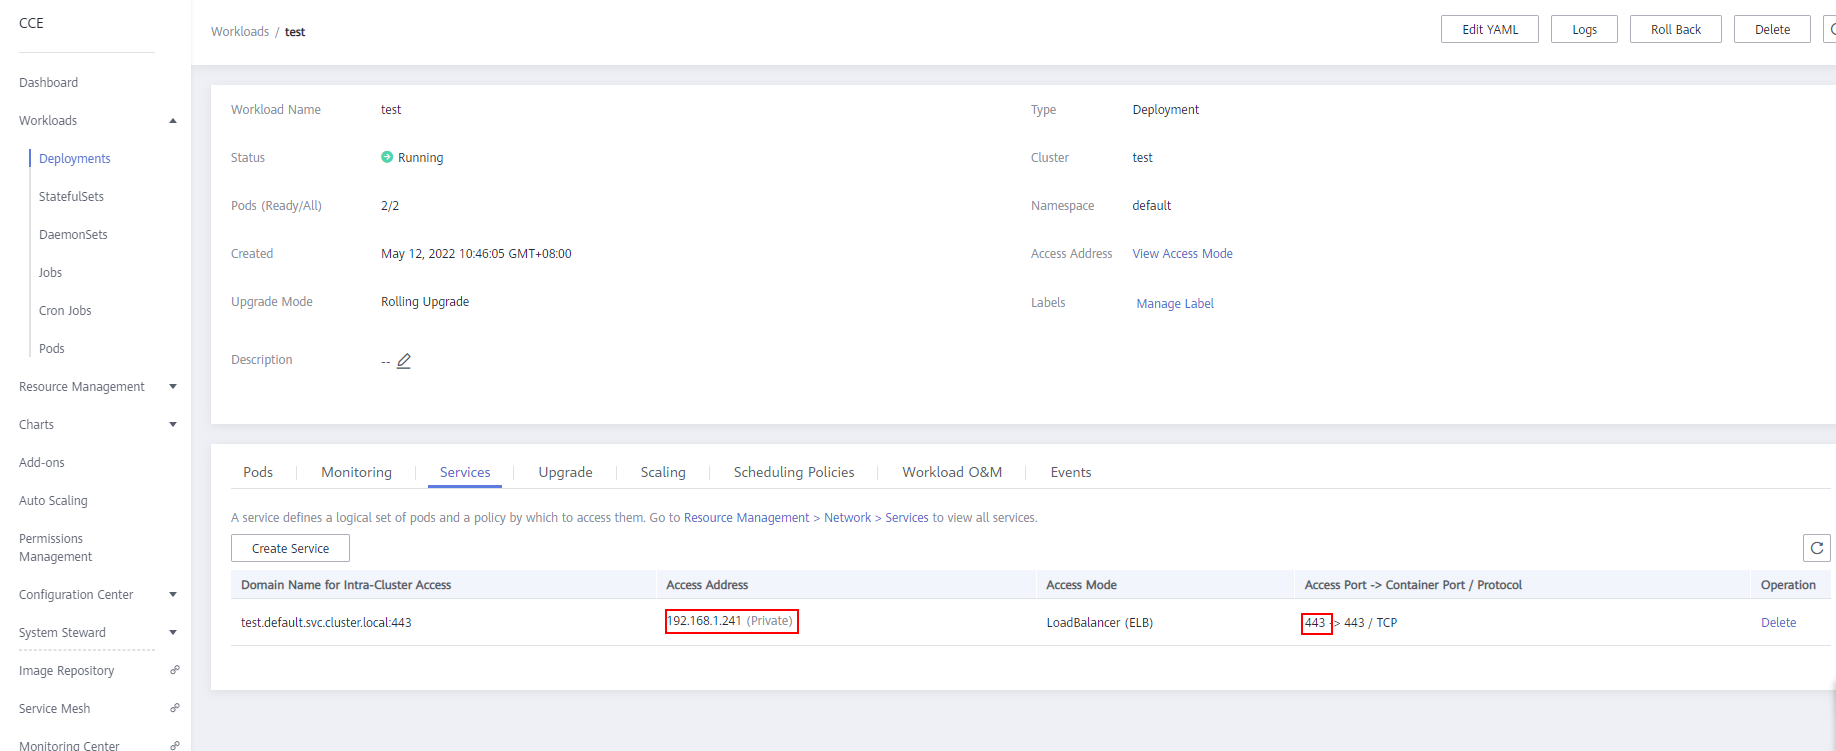
View the workload details on the CCE console, and ensure that the service access mode is NodePort or LoadBalancer. For details, see section "NodePort" or section "LoadBalancer".
Creating a VPC Channel
If the access mode of the target CCE workload is LoadBalancer, skip this procedure and go to Opening an API.
- Log in to the management console, select a region in the upper left corner, and choose Service List > Application > API Gateway.
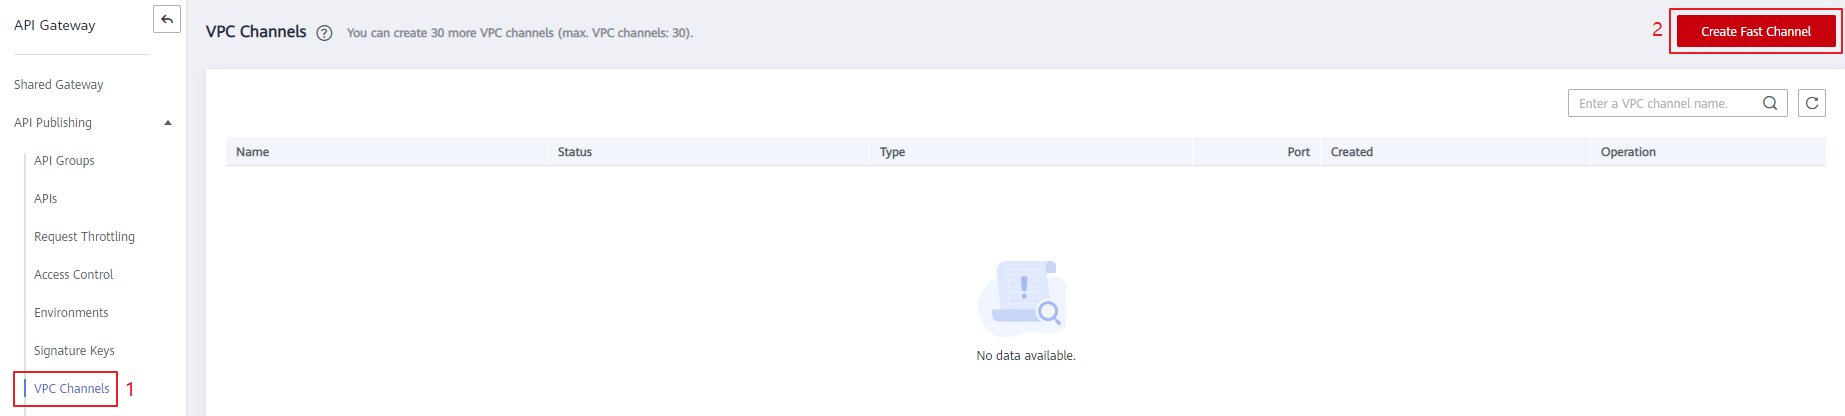
- Create a VPC channel.
- On the VPC Channels page, click Create Fast Channel.
Figure 4 VPC channel list
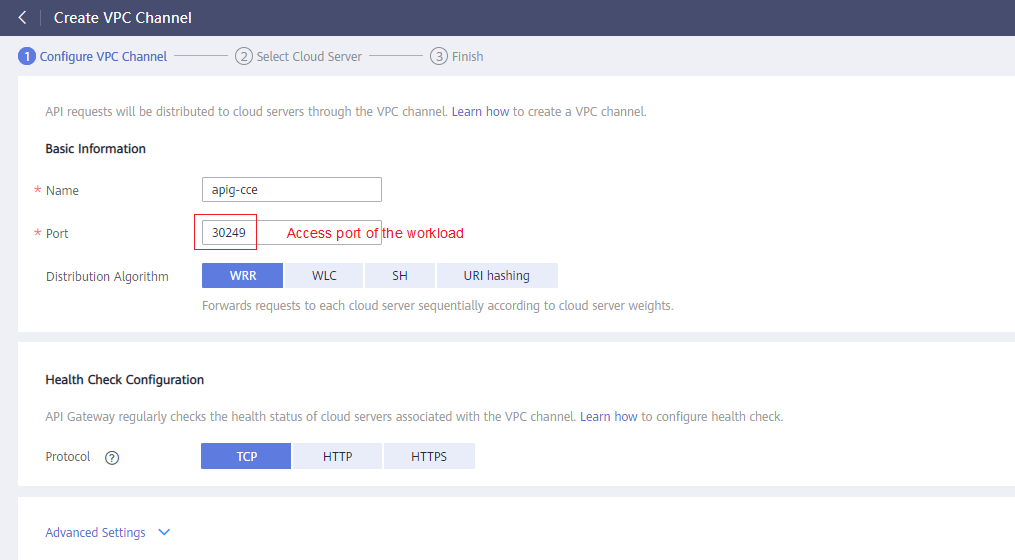
- Set the parameters according to the following figure and retain the default values for other parameters.
- On the VPC Channels page, click Create Fast Channel.
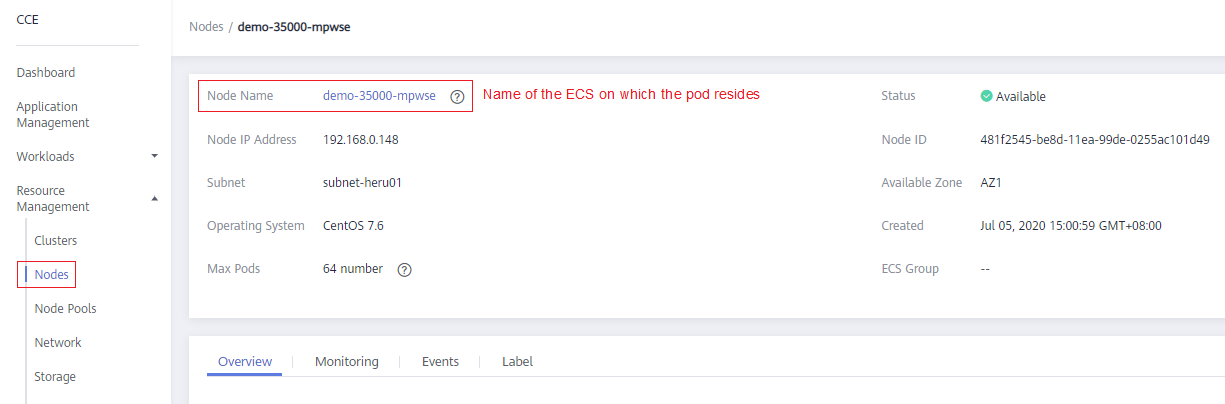
- Add the node that contains the CCE workload you want to access through APIG.
You can add multiple nodes for load balancing.
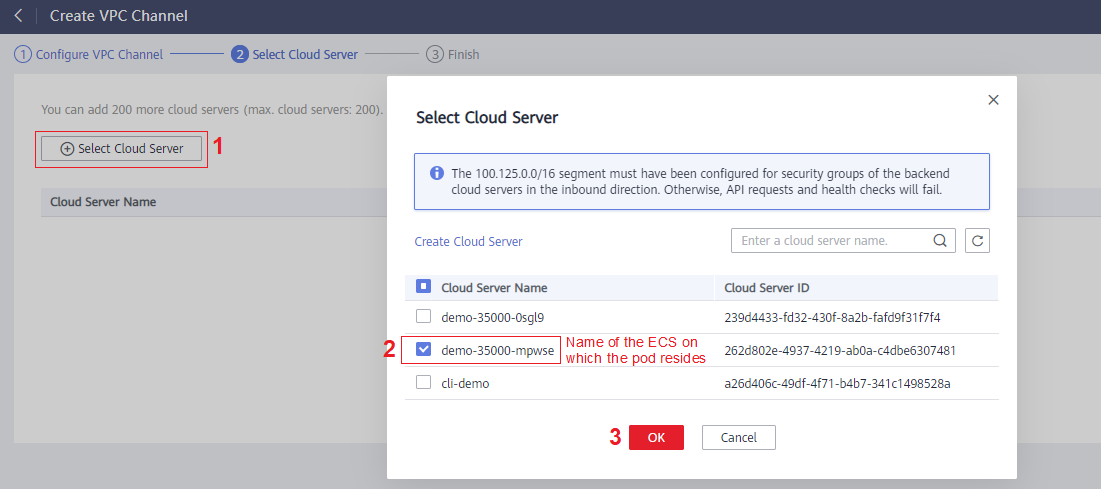
- Click Finish.

Opening an API
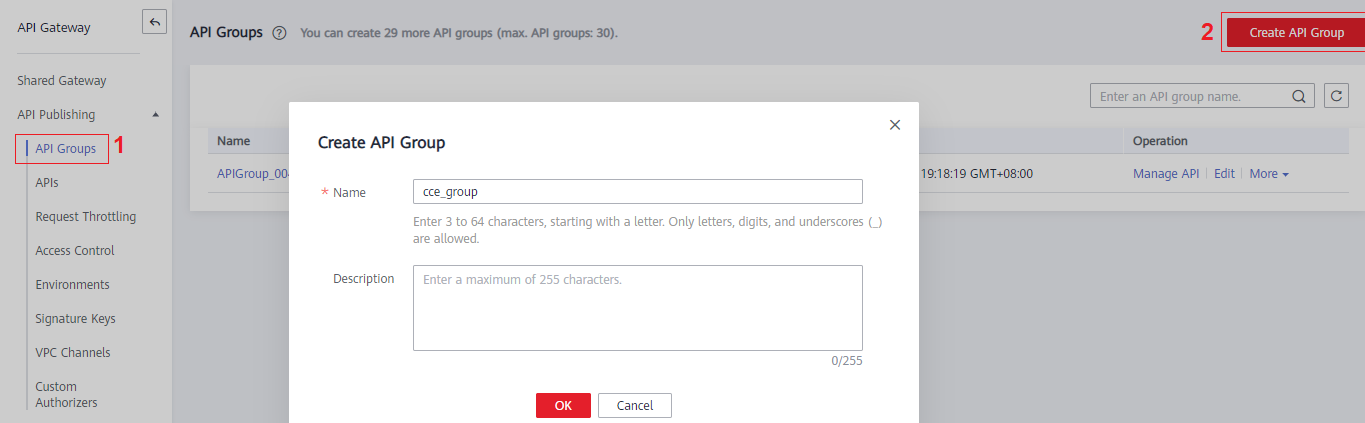
- Create an API group, as shown in Figure 6.
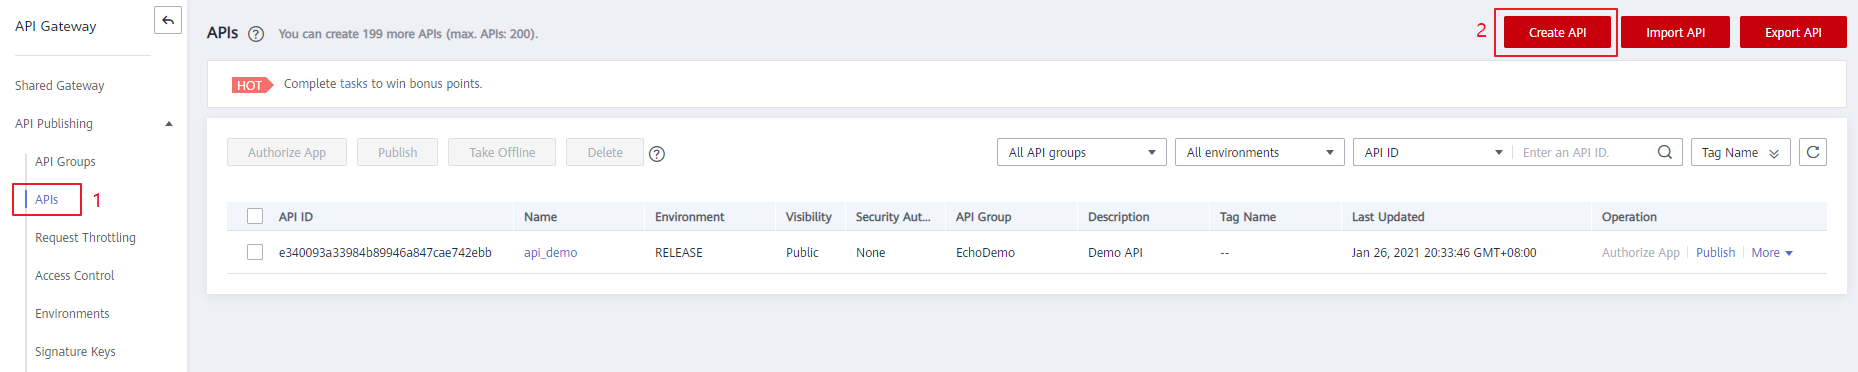
- Create an API.
For details, see API Gateway User Guide.
- Click Create API.
Figure 7 API list
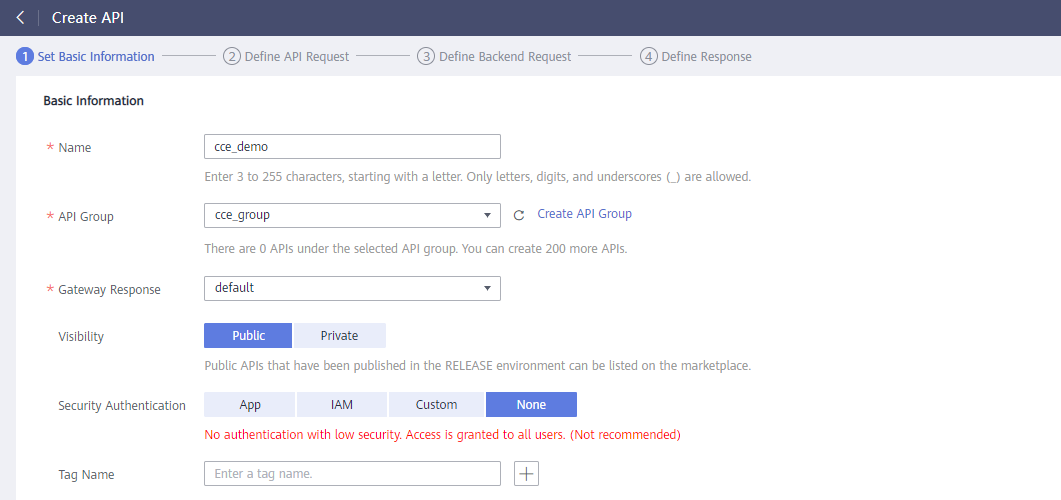
- Set the basic information of the API.
Figure 8 Setting the basic API information
- On the Define API Request page, set the API request information.

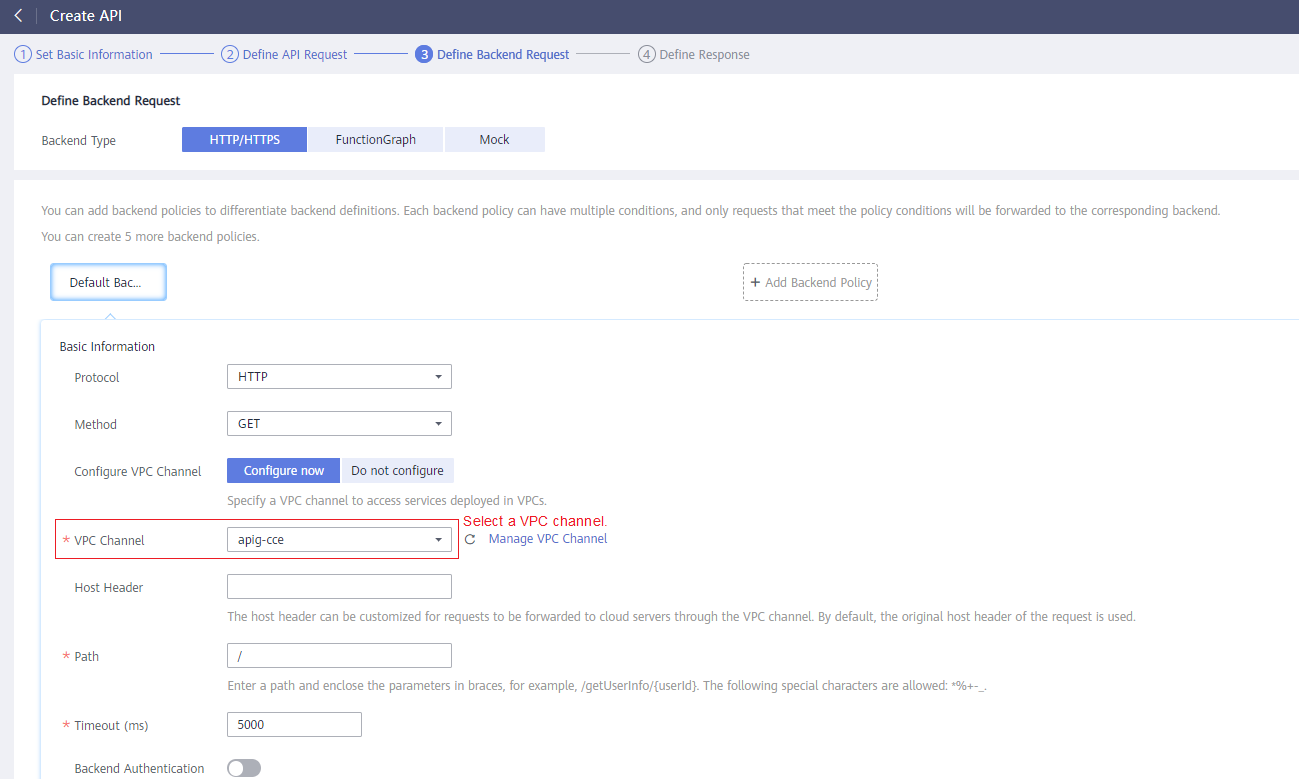
- On the Define Backend Request page, set the backend request information.
If the access mode of the target CCE workload is NodePort, select Configure now, and select the VPC channel created in Creating a VPC Channel. If the access mode is LoadBalancer, select Do not configure, and enter the access address and port of the load balancer. This step uses NodePort as an example.
- On the Define Response page, enter an example success response.
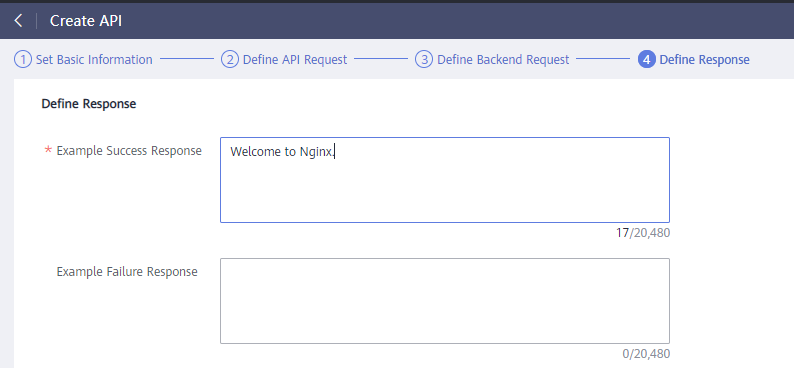
- Click Finish.
- Click Create API.
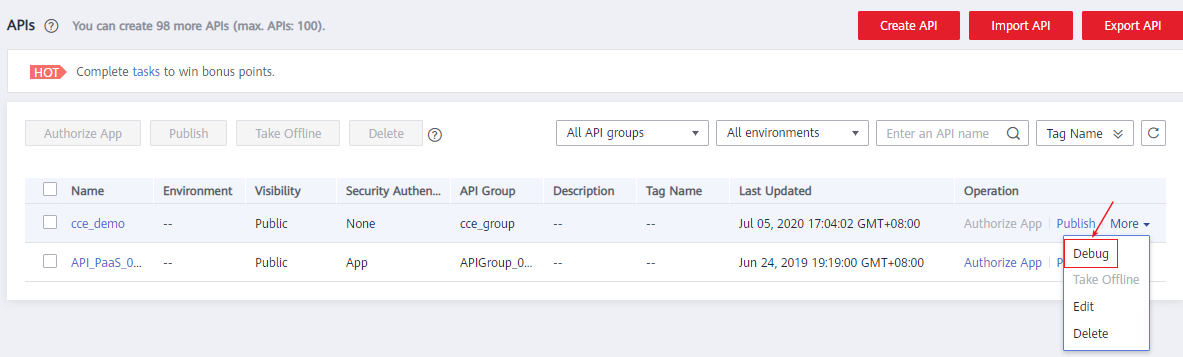
- Debug the API.
- Click Debug.
Figure 9 API list
- Debug the API.
Figure 10 Debugging the API ("200" indicates that the API is called successfully.)
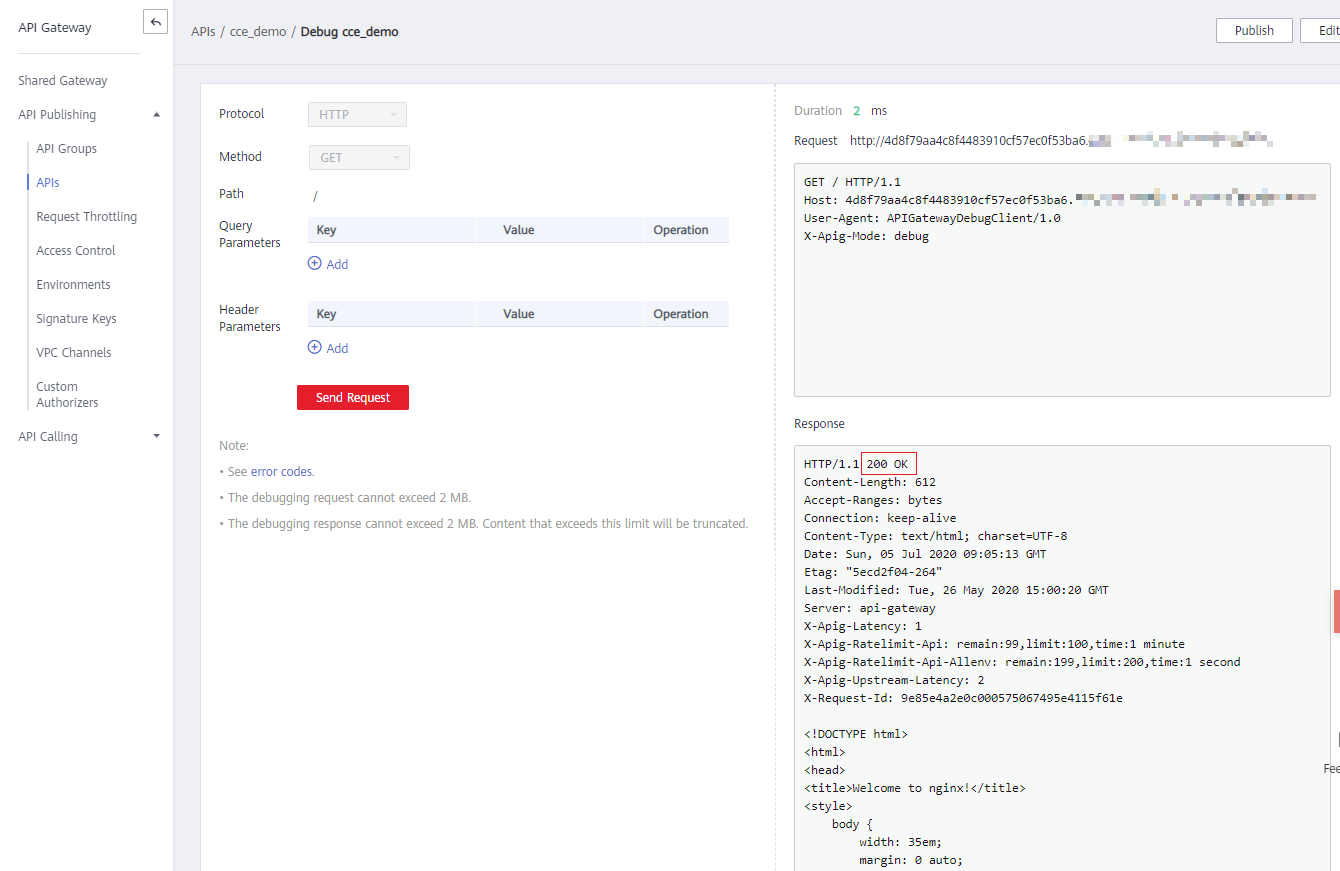
- Click Debug.
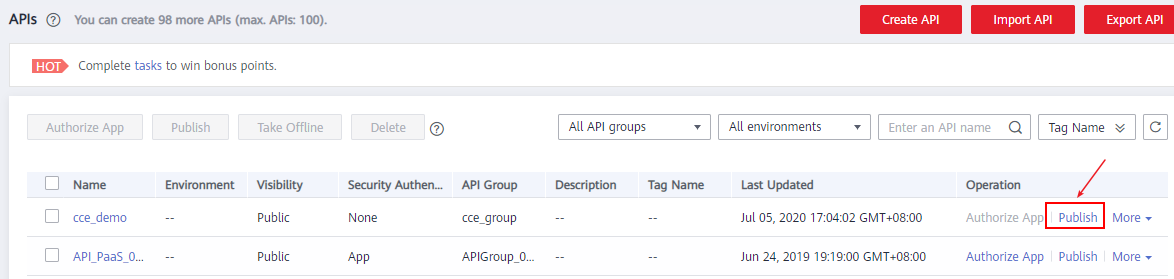
- Publish the API.
- Click Publish.
Figure 11 API list
- Enter a description.
Figure 12 Publishing an API
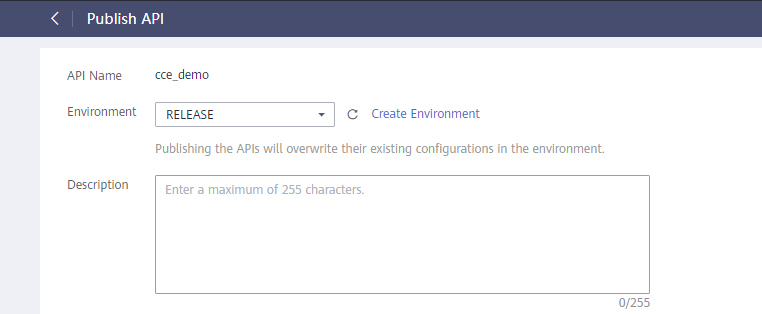
- Click Publish.
Calling the API
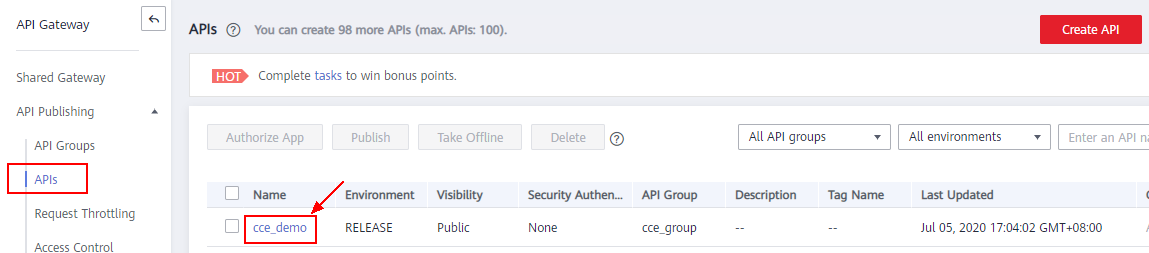
- In the API list, click the API you created, and copy the URL on the displayed API details page.
- Go to the API details page.
Figure 13 Clicking the name of an API
- Copy the URL on the displayed API details page.
Figure 14 Copying the URL
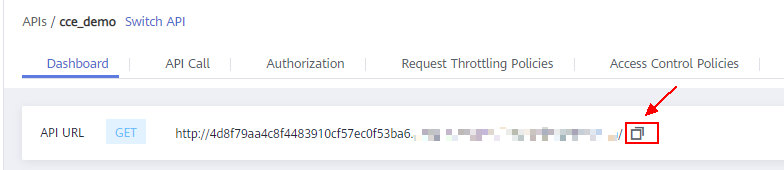
- Go to the API details page.
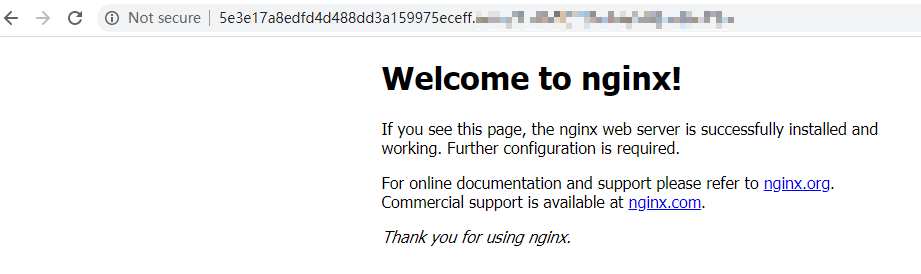
- Paste the URL to the address bar of a browser. The following page will be displayed if the API request is successful.
To limit the number of API calls that will be received within a specific period, create a request throttling policy and bind it to the API. For more information, see API Gateway User Guide.
Feedback
Was this page helpful?
Provide feedbackThank you very much for your feedback. We will continue working to improve the documentation.See the reply and handling status in My Cloud VOC.
For any further questions, feel free to contact us through the chatbot.
Chatbot


