
Managing Data Reports
Modifying the Name of a Data Report
You can change the data report name. For example, if the data report's purpose changes, update the name to help users understand it better.
- Log in to the no-code workbench by referring to Logging In to the No-Code Workbench.
- In All Apps, hover over the target application's … and choose Edit.
- Click Check Statistics in the upper right corner of the page.
- Click
 next to the existing statistics page and choose Edit Name. Figure 1 Modifying the name of a data report
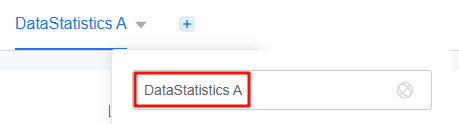
- Enter the new report name and click anywhere blank to update it. Figure 2 Entering the new report name
Editing a Data Report
After a data report is created, you can modify the data report if the service requirements change.
- Log in to the no-code workbench by referring to Logging In to the No-Code Workbench.
- In All Apps, hover over the target application's … and choose Edit.
- Click Check Statistics in the upper right corner of the page. The statistics page is displayed.
- Click
 next to the statistics page name and choose Edit Chart to perform secondary development. Figure 3 Editing the data report
Sharing a Data Report
After the data report is created, you can share it with other users.
- Log in to the no-code workbench by referring to Logging In to the No-Code Workbench.
- In All Apps, click the target application. The application development page is displayed.
- Click Check Statistics in the upper right corner of the page.
- Click
 next to the data report and choose Share Statistics. Figure 4 Sharing a data report (runtime)
You can also click the edit button in the upper right corner of the application development page to go to the page for editing the application. Click
 next to the data report to be shared and choose Share Statistics.Figure 5 Sharing a data report (development)
- Click
 next to the link and share the address with other users. Figure 6 Sharing statistics results
- Other users can enter the obtained address in the browser, enter the username and password, and view the report data. Figure 7 Entering the username and password

Deleting a Data Report
Deleting a data report will permanently delete the chart data, which cannot be restored. Exercise caution when performing this operation.
- Log in to the no-code workbench by referring to Logging In to the No-Code Workbench.
- In All Apps, hover over the target application's … and choose Edit.
- Click Check Statistics in the upper right corner of the page.
- Click
 next to the data report and choose Delete. Figure 8 Deleting a data report
- In the displayed dialog box, confirm the deletion.
Cloning a Data Report
If the service scenarios are similar, you can clone a data report to create a new one quickly.
- Log in to the no-code workbench by referring to Logging In to the No-Code Workbench.
- In All Apps, hover over the target application's … and choose Edit.
- Click Check Statistics in the upper right corner of the page.
- Click
 next to the data report and choose to clone the data report. Figure 9 Cloning a data report
After the cloning is successful, the system shows the page of the cloned data report.
Figure 10 Page of the cloned data report
Exporting a Data Report
You can export a data report as a PNG image in both development and runtime environments.
- Log in to the no-code workbench by referring to Logging In to the No-Code Workbench.
- In All Apps, click the target application. The application development page is displayed.
- Click Check Statistics in the upper right corner of the page.
- Click
 next to the data report and choose to export the data report.
 The exported data report is a PNG image.
Figure 11 Exporting a data report (runtime)
You can also click the edit button in the upper right corner of the application development page to go to the page for editing the application. Click
 next to the data report and choose to export the data report.Figure 12 Exporting a data report (development)
Feedback
Was this page helpful?
Provide feedbackThank you very much for your feedback. We will continue working to improve the documentation.See the reply and handling status in My Cloud VOC.
For any further questions, feel free to contact us through the chatbot.
Chatbot


