
Purchasing and Using iMetal Servers
Scenarios
Cloud Data Center (CloudDC) enables rapid transformation of traditional data centers into cloud environments. It allows you to deploy servers in Huawei Cloud equipment rooms and take advantages of advanced Huawei Cloud capabilities like infrastructure management, cloud-based networks, bare metal server management, and deterministic O&M.
This section uses the cloud adoption of a DC as an example to describe how to purchase an intelligent rack and deploy an iMetal server into it.
Procedure
|
Step |
Description |
|---|---|
|
Sign up for a HUAWEI ID and make sure you have a valid payment method configured. |
|
|
Before using CloudDC, you need to apply for the access permissions. After the approval, you can use CloudDC. |
|
|
CloudDC works closely with other cloud services, such as compute and networking services. When you log in to the CloudDC console for the first time, CloudDC automatically requests permissions to access those cloud services in the region where you are. |
|
|
For the cloud adoption of a DC, you need to purchase iRack, iMetal, and CloudDCN resources. |
|
|
After receiving a server sent from you, Huawei Cloud O&M personnel install the server into an intelligent rack, connect cables, and import the server information to CloudDC. Then, you can log in to the CloudDC console to test and accept this iMetal server. |
|
|
Remotely start the iMetal server from the CloudDC console. |
|
|
Only a private image can be used to install an iMetal server OS. You need to create a private image. |
|
|
Create a CloudDCN subnet in a Virtual Private Cloud (VPC) to quickly set up an isolated, private, and high-performance virtual network environment for the iMetal server. |
|
|
Use a private image to install an OS on the iMetal server. |
|
|
Remotely access and manage the iMetal server from the CloudDC console. |
Preparations
- Sign up for a HUAWEI ID and complete real-name authentication. For details, see Signing Up for a HUAWEI ID and Enabling Huawei Cloud Services and Individual Real-Name Authentication.
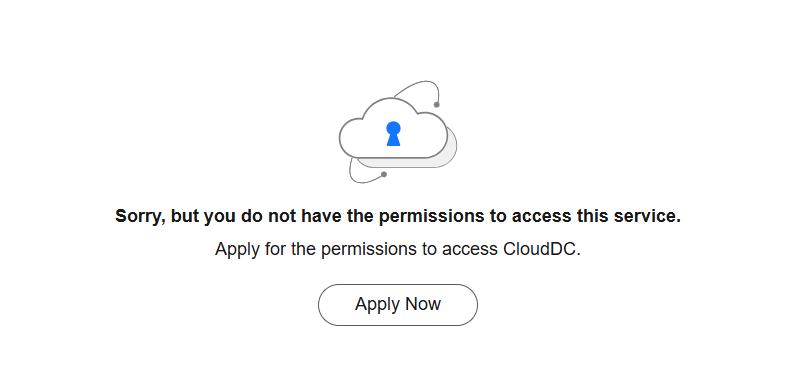
Applying for the Permissions to Access CloudDC
Before using CloudDC, you need to apply for the access permissions. After the approval, you can use CloudDC.
- Log in to the CloudDC console.
- Click Apply Now. The Create Service Ticket is displayed.
- Select the region where you need to enable CloudDC, enter the problem description, provide your contact information, and select I have read and agree to the user need to know. On the user need to know page, click Agree.
- Click Submit. You can view the ticket status on the Support Center > My Service Tickets page. You can access CloudDC after the request is approved.
Authorize the Use of Other Cloud Services
CloudDC works closely with other cloud services, such as compute and network services. When you log in to the CloudDC console for the first time, CloudDC automatically requests permission to access those cloud services in the region where you are. If you have been authorized in that region, skip this step.
- Log in to the CloudDC console.
- In the upper left corner, click
 to select a region.
 - If it is the first time for you to log in to the CloudDC console, the Authorization dialog box will be displayed. Read the information and click Authorize.
After you agree to the authorization, CloudDC creates an agency named imetal_trust in IAM to authorize access to resources of other cloud services. You can go to the IAM console and choose Agencies in the navigation pane. Click the imetal_trust agency to check the authorization records of each region. For details, see Cloud Service Agency.
Purchase iRack, iMetal, and CloudDCN Resources
For the cloud adoption of a DC, you need to purchase iRack, iMetal, and CloudDCN resources.
- Log in to the CloudDC console.
- In the upper left corner, click
 to select a region.
 - On the Overview page, click Buy Resources in the upper right corner. The Buy CloudDC page is displayed.
- Set parameters for iRack, iMetal, and CloudDCN. Click Add to add this set of settings to the resource package list.
Specifications
iRack
iMetal
CloudDCN
Billing Mode
Yearly/Monthly
Yearly/Monthly
Yearly/Monthly
Region
CN South-Guangzhou
CN South-Guangzhou
CN South-Guangzhou
Package specifications
clouddc.irack.8kw
clouddc.imetal.host
CloudDCN.GeneralNetwork.25G
Purchase Duration
1 month
1 month
1 month
Auto-renew
Enable
Enable
Enable
Quantity
1
1
1
NOTE:The number of CloudDCN subnets must be the same as that of intelligent racks.
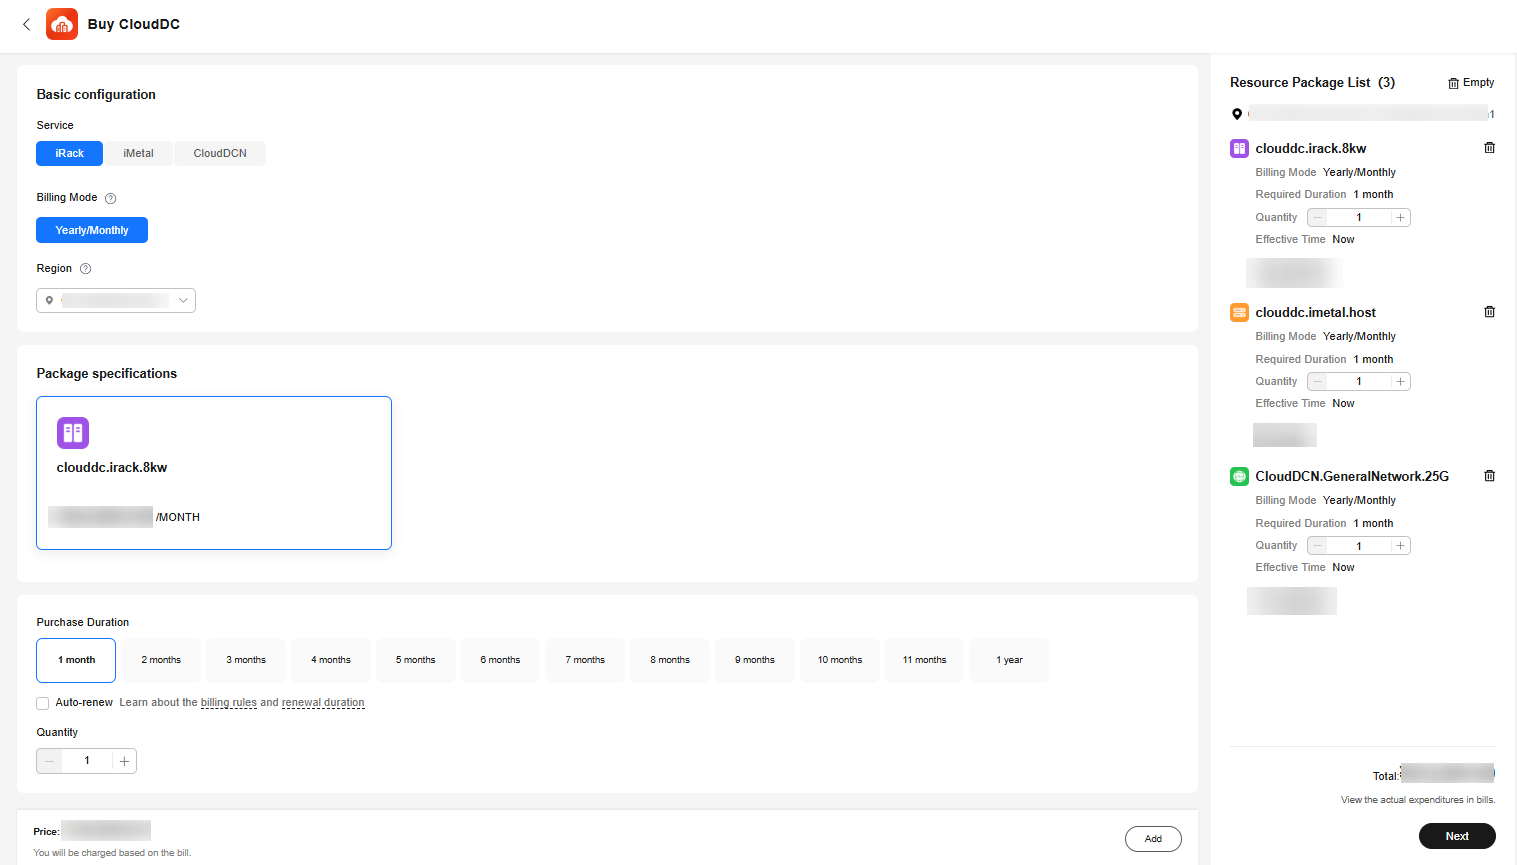
- Click Next. Check the settings in the Details area and click Pay.
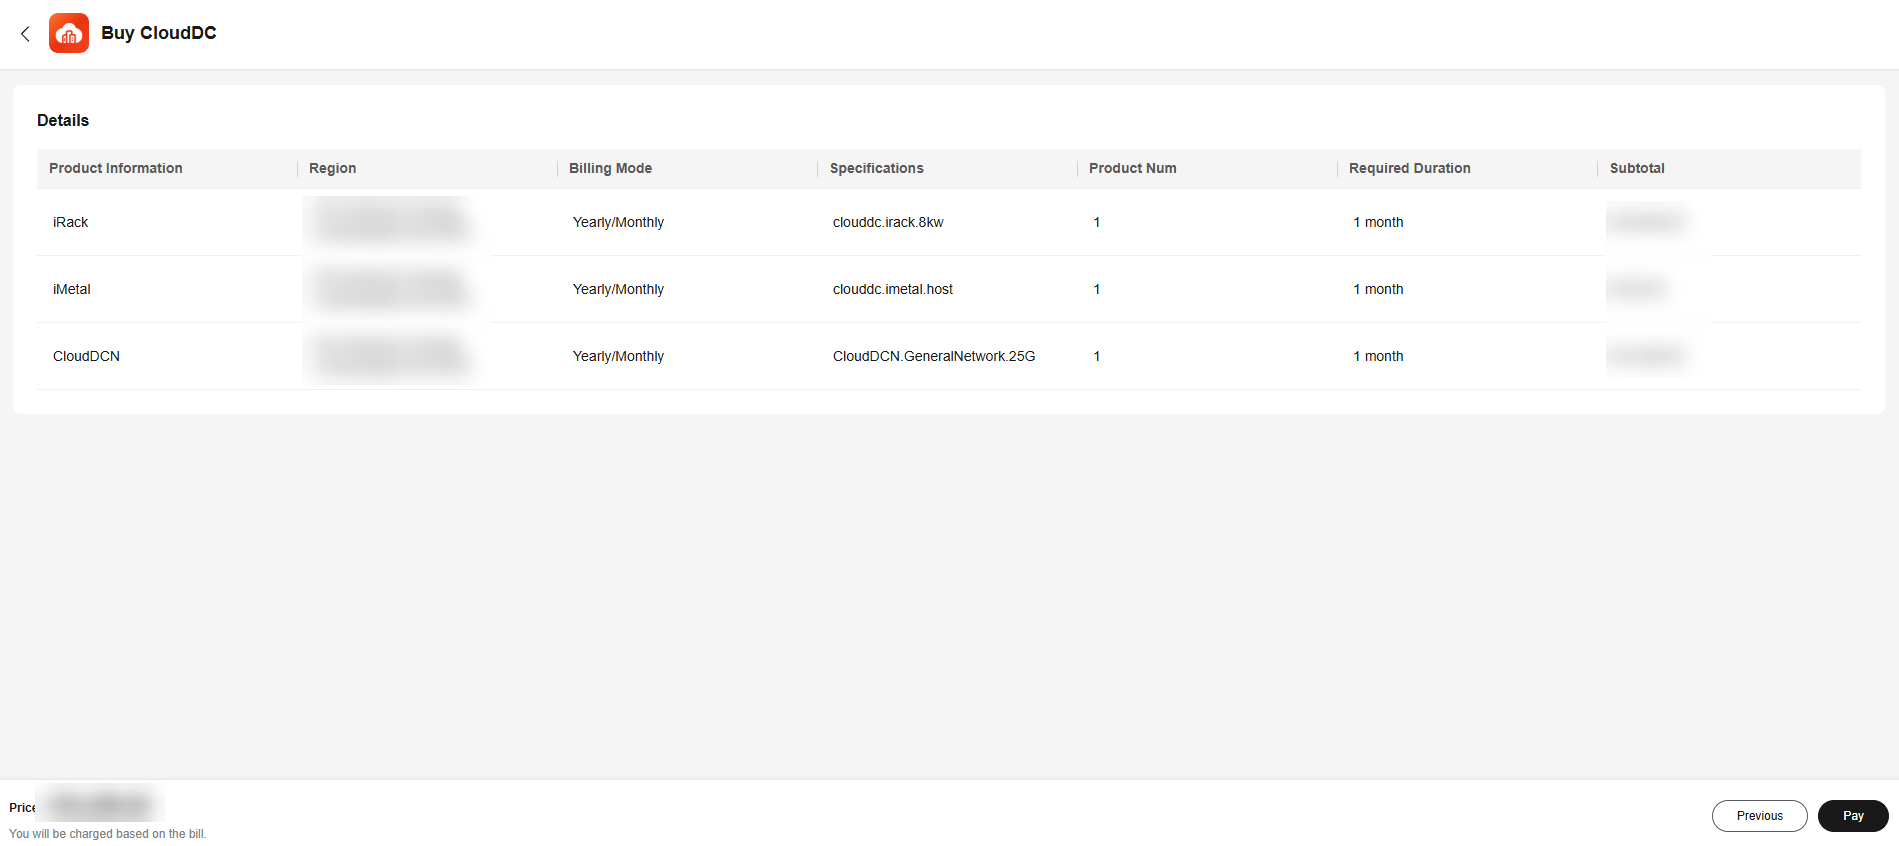
The Approval Required dialog box is displayed. You can pay for the order only after it is approved.
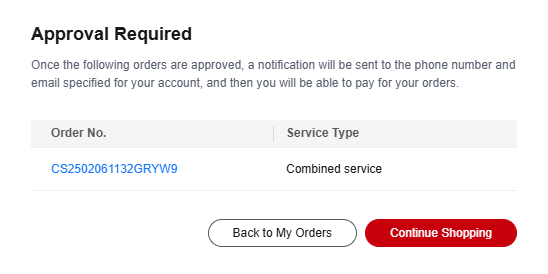
- Click Back to My Orders. In the order list, the Order Status of your order is Pending approval.

- Wait until your order is approved. The Order Status changes to Pending payment.
- Click Pay on the right of the order to pay for it.
Send, Install, and Accept a Server
- Send the server to the address specified by Huawei Cloud based on the contract.
- Huawei Cloud O&M personnel install the server into the intelligent rack and connect cables in the Huawei Cloud equipment room.
- Huawei Cloud O&M personnel help you import the iMetal server information.
- Test the iMetal server and send an acceptance letter to Huawei Cloud. The billing starts.
Start the iMetal Server
- Log in to the CloudDC console.
- In the navigation pane, choose Servers > iMetal Servers.
- In the iMetal server list, locate your iMetal server and choose More > Start in the Operation column.
- In the Start dialog box, confirm the information and click OK.
The Power Status of this iMetal server will change to Started.
Create a Private Image
Only a private image can be used to install an iMetal server OS. For details, see Creating a Private Image for iMetal Servers.
Create a CloudDCN Subnet
- Log in to the CloudDC console.
- In the upper left corner, click
 to select a region.
 - In the navigation pane on the left, choose Network > CloudDCN.
- Click Create CloudDCN Subnet.
- Set the parameters based on the table below.
Table 1 Parameters Parameter
Description
Example Value
VPC
VPC where you want to create a CloudDCN subnet. If there is no VPC available, create one. For details see Creating a VPC and Subnet.
vpc-test
Subnet Name
CloudDCN subnet name.- The name can contain 1 to 64 characters.
- Only letters, digits, underscores (_), hyphens (-), and periods (.) are allowed.
subnet-clouddcn-01
AZ
An availability zone (AZ) is a geographic location with independent power supply and network facilities in a region. AZs are physically isolated, and AZs in the same VPC are interconnected through an internal network.
Each region contains multiple AZs. If one AZ is faulty, other AZs in the same region continue to provide services.- By default, all instances in different subnets of the same VPC can communicate with each other and the subnets can be in different AZs. For example, if you have a VPC with two subnets, subnet A01 in AZ 1 and CloudDCN subnet A02 in AZ 2. A01 and A02 can communicate with each other by default.
- A cloud resource can be in a different AZ from its subnet. For example, a physical server in AZ 1 can use a subnet in AZ 3. If AZ 3 is faulty, the server in AZ 1 can still use the subnet in AZ3, and the services are not interrupted.
For details, see Region and AZ.
AZ 1
IPv4 CIDR Block
IPv4 CIDR block of the CloudDCN subnet. A CloudDCN subnet is a unique CIDR block with a range of IP addresses in a VPC.
A subnet mask can be between the netmask of its VPC CIDR block and /28 netmask. If a VPC CIDR block is 10.0.0.0/16, its subnet mask can be between 16 to 28.
If the VPC has a secondary CIDR block, you can select the primary or the secondary CIDR block that the subnet will belong to based on service requirements.
10.0.0.0/24
Associated Route Table
A route table contains a set of routes that are used to control traffic routing for your subnets in a VPC. Each VPC comes with a default route table that will be automatically associated with CloudDCN subnets. This allows CloudDCN subnets in a VPC to communicate with each other.
-
Gateway
Click
 next to Advanced Settings (Optional) to set this parameter.
Retain the default value unless there are special requirements.
10.0.0.1
DNS Server Address
Click
 next to Advanced Settings (Optional) to set this parameter.
A DNS server is used for domain name resolution. Servers can use private domain names to access each other in a VPC, and access cloud services with no need to connect to the Internet.
A DNS server address is preset by default. You can change the default DNS server address if needed. This may interrupt your access to cloud services.
You can click Reset on the right to restore the DNS server address to the default value.
A maximum of two DNS server IP addresses are allowed. Separate them by commas (,).
100.125.x.x
Tag
Click
 next to Advanced Settings (Optional) to set this parameter.
Add tags to help you quickly identify, classify, and search for your CloudDCN subnets.
- Key: test
- Value: 01
Description
Click
 next to Advanced Settings (Optional) to set this parameter.
Describe the CloudDCN subnet as needed.
You can enter a maximum of 255 characters. Angle brackets (< or >) are not allowed.
-
- Click Create Now.
Go back to the CloudDCN subnet list and check the new subnet.
Install an OS on the iMetal Server
- Log in to the CloudDC console.
- In the navigation pane, choose Servers > iMetal Servers.
- In the iMetal server list, select your iMetal server.
- Click Install OS above the server list.
A page is displayed for you to set parameters for installing an OS.Figure 1 Installing an OS

- Set the parameters as follows:
Table 2 OS parameters Parameter
Description
OS
Image
Only private images are available.
A private image is created by a user and is only available to the user who created it. A private image contains an OS, preinstalled public applications, and a user's personal applications.
Network
VPC
In a VPC, you can create a CloudDCN subnet to quickly set up an isolated, private, and high-performance virtual network environment for your iMetal servers.
Select an available VPC from the drop-down list or create one.
CloudDCN subnet
After you select a VPC, the system does not automatically associate a primary NIC for you. You need to select a CloudDCN subnet and specify how private IP addresses are allocated.
Login
Login Credentials
Select what kind of credentials you want to use to log in to the iMetal server.
- Password: You can use a username and a password you set to log in to the iMetal server.
- Key pair: You can use a key pair to log in to the iMetal server.
Currently, only Password is available.
Username and Password
Set a password and confirm it. You need to enter the same password twice, exactly the same both times. The password must comply with the rules listed in Table 3.
Table 3 Password complexity requirements Parameter
Rule
Password
- Consists of 8 to 26 characters.
- Contain only uppercase letters, lowercase letters, digits, and special characters !@$%^-_=+{}:,./?
- Cannot be the username or the username spelled backwards.
- Cannot contain the username or the username spelled backwards.
- Click Install OS.
When the Management Status of the iMetal server changes to Running, the OS is installed successfully.
Log In to the iMetal Server
- Log in to the CloudDC console.
- In the navigation pane, choose Servers > iMetal Servers.
The iMetal Servers page is displayed.
Figure 2 iMetal server list
- In the iMetal server list, locate your iMetal server and click Remote Login in the Operation column.
After about one minute, the login page is displayed. Press Enter and enter username root and password to log in.

- If you do not log in within 10 minutes, the login page becomes invalid. You need to click Remote Login again.
- If you do not perform any operation for 10 minutes after you log in, the page will expire, and you need to log in again.
Feedback
Was this page helpful?
Provide feedbackThank you very much for your feedback. We will continue working to improve the documentation.See the reply and handling status in My Cloud VOC.
For any further questions, feel free to contact us through the chatbot.
Chatbot


