
Collecting Data
Scenario
This section describes how to collect data.
Step 1: Buy an ECS
For details, see Purchasing an ECS.

Currently, the data collection agent can run only on Linux ECSs on x86_64 architecture. ECSs support the following OSs: Huawei Cloud EulerOS 2.5, Huawei Cloud EulerOS 2.9, EulerOS 2.5, EulerOS 2.9, and CentOS 7.9.
Note that you need to select the proper OSs and versions when you make a purchase.

Step 2: Install an Agent
- Pre-check before installing an agent.
- Run the ps -ef | grep salt command to check whether the salt-minion process exists on the host.
- If yes, stop it first.
- If no, go to 1.b.
Figure 2 Checking processes

- Before installing Logstash, run the df -h command to check whether there are at least 50 GB of disk space reserved for the root directory disk or opt disk, two CPU cores, and 4 GB of memory.
Figure 3 Disks
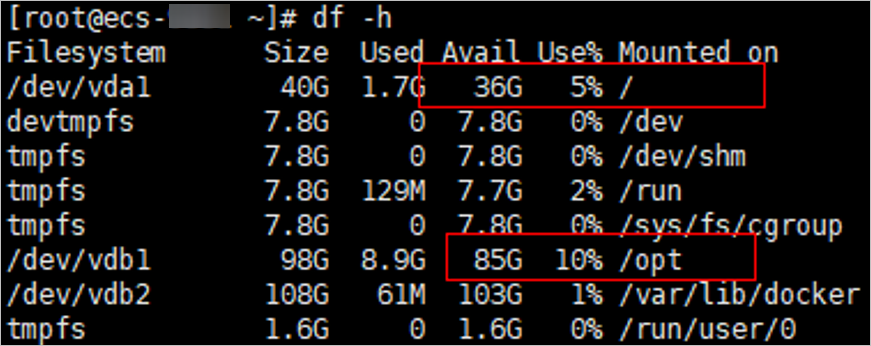
If the memory is insufficient, stop some applications with high memory usage or expand the memory capacity before the installation. For details about capacity expansion, see Modifying ECS Specifications.
- Run the ps -ef | grep salt command to check whether the salt-minion process exists on the host.
- Log in to the management console.
- Click
 in the upper left corner of the page and choose Security & Compliance > SecMaster.
 - In the navigation pane, choose Workspaces > Management. In the workspace list, click the name of the target workspace.
Figure 4 Workspace management page

- In the navigation tree on the left, choose .
Figure 5 Accessing the node management page

- On the Node Management tab page, click Create.
- On the Create Node page, set parameters.
Figure 6 Create Node
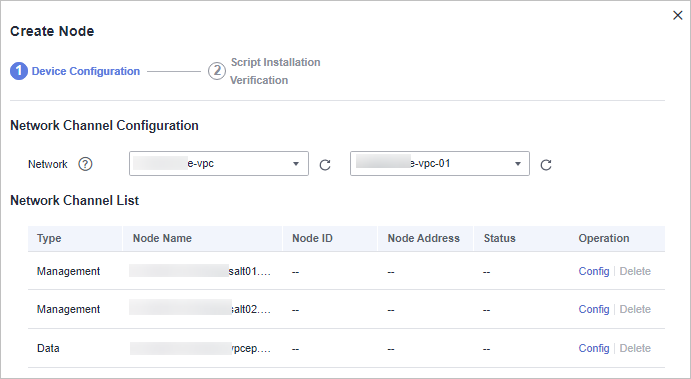
- In the Network Channel Configuration area, select the VPC and subnet the network channel belongs to.
- In the network channel list, locate the row that contains the target channel and click Config in the Operation column. In the displayed confirmation dialog box, click OK.
- Click Next in the lower right corner of the page. On the page for verifying the script installation, click
 to copy the command for installing the Agent.
 - Remotely log in to the ECS where you want to install the agent.
- Huawei Cloud servers
- Log in to the ECS console, locate the target server, and click Remote Login in the Operation column to log in to the server. For details, see Login Using VNC.
- If your server has an EIP bound, you can also use a remote management tool, such as PuTTY or Xshell, to log in to the server and install the agent on the server as user root.
- Non-Huawei Cloud servers
Use a remote management tool (such as PuTTY or Xshell) to connect to the EIP of your server and remotely log in to your server.
- Huawei Cloud servers
- Run the cd /opt/cloud command to go to the installation directory.
The recommended installation path is /opt/cloud. This section also uses this path as an example. If you want to install the Agent in another path, change the path based on site requirements.
- Run the command copied in 8 as user root to install the Agent on the ECS.
- Enter the IAM username and password for logging in to the console when prompted.
- If information similar to the following is displayed, the agent is successfully installed:
install isap-agent successfully
Step 3: Create a Node
- In the navigation tree on the left, choose .
Figure 7 Accessing the node management page
- On the Node Management tab page, click Create.
- On the Create Node page, set parameters.
Figure 8 Create Node
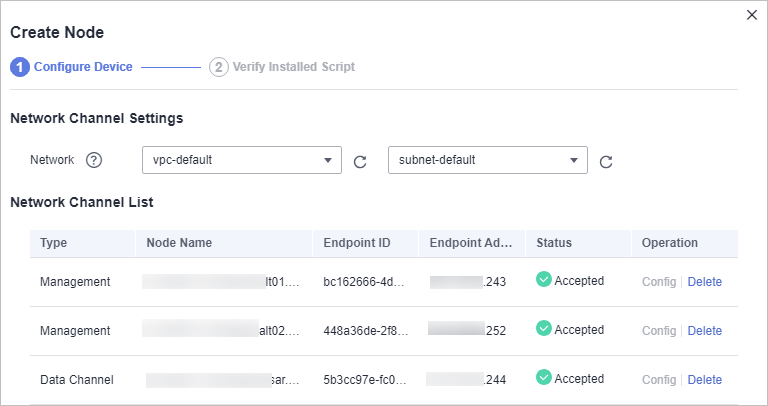
- In the Network Channel Configuration area, select the VPC and subnet the network channel belongs to.
- In the network channel list, locate the row that contains the target channel and click Config in the Operation column. In the displayed confirmation dialog box, click OK.
- Click Next in the lower right corner of the page to go to the Script Installation Verification page.
- After confirming that the installation is complete, click Confirm in the lower right corner of the page.
Step 4: Configure Components
- In the navigation pane on the left, choose Settings > Components and click the Components tab.
- On the Components tab page, click Edit Configuration in the upper right corner of the component to be viewed. The configuration management page of the component is displayed on the right.
- In the Node Configuration area, click Add in the upper left corner of the node list. In the Add Node dialog box displayed, select a node and click OK.
- Click Save and Apply in the lower right corner of the page.
Step 5: Add a Data Connection
- In the navigation pane on the left, choose .
Figure 09 Accessing the collections page
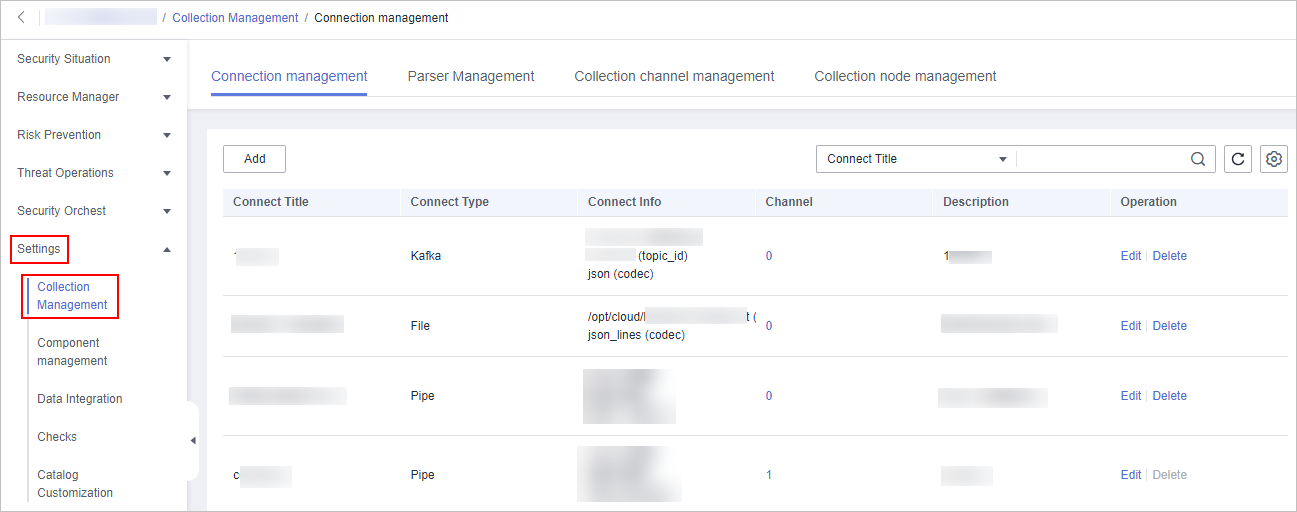
- On the Connection Management tab page, click Add.
- Add a data connection source.
In the Source column, select the source of the data source type and set parameters based on the selected type.
The following data source types are supported: Transmission Control Protocol (TCP), File, User Data Protocol (UDP), Object Storage Service (OBS), Message Queue (Kafka), and SecMaster Pipeline.
- Add a data source connection destination.
Click the Target tab, select the destination of the data source type, and then set the parameters according to the selected type.
The following data source types are supported: File, Transmission Control Protocol (TCP), User Data Protocol (UDP), Message Queue (Kafka), Object Storage Service (OBS), and SecMaster Pipeline.
- After the setting is complete, click OK in the lower right corner of the page to confirm the setting.
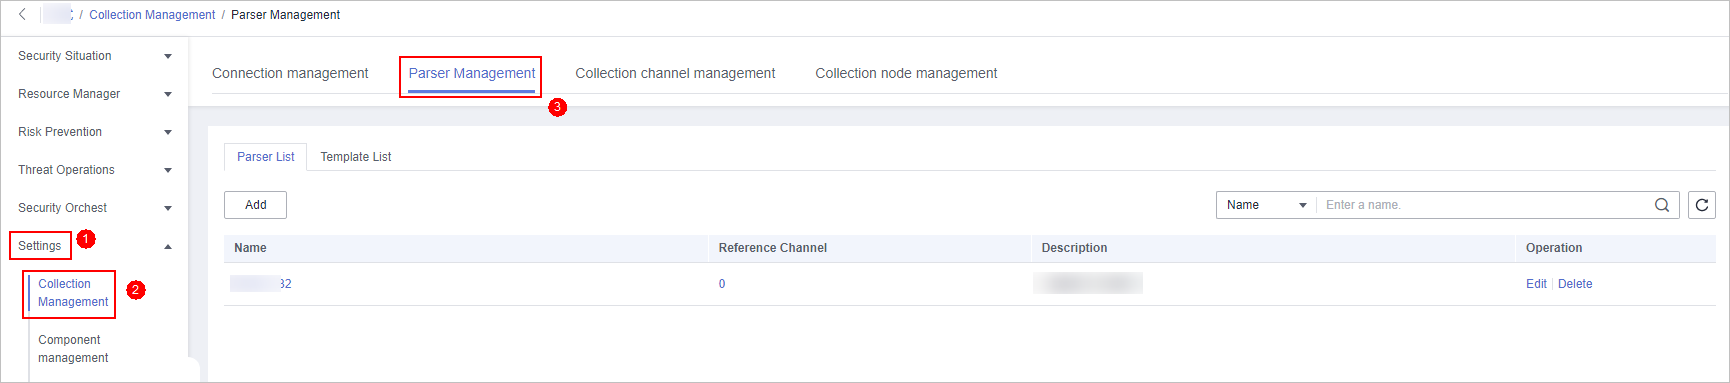
(Optional) Step 6: Configure the Parser
- In the navigation pane on the left, choose . On the displayed page, click the Parsers tab.
Figure 10 Accessing the Parsers tab page
- Customize a parser or create a parser from a template.
- Customizing a parser
- On the Parsers tab page, click Add.
- On the Parsers tab page, set parameters.
Table 1 Parameters for adding a parser Parameter
Description
Basic Information
Parser Name
Set a parser name.
Description
Enter the parser description.
Rule list
Set the parsing rule of the parser. Perform the following steps:
- Click Add and select a rule type.
- Parsing rules: Select the parsing rule of the parser. You can select UUID, kv, mutate, grok, date, drop, prune, CSV, or JSON rules.
- Conditional control: Select the conditions for the parser. You can select If, Else, or Else if.
- Set parameters based on the selected rule.
- Click Add and select a rule type.
- After the setting is complete, click OK in the lower right corner of the page to confirm the setting.
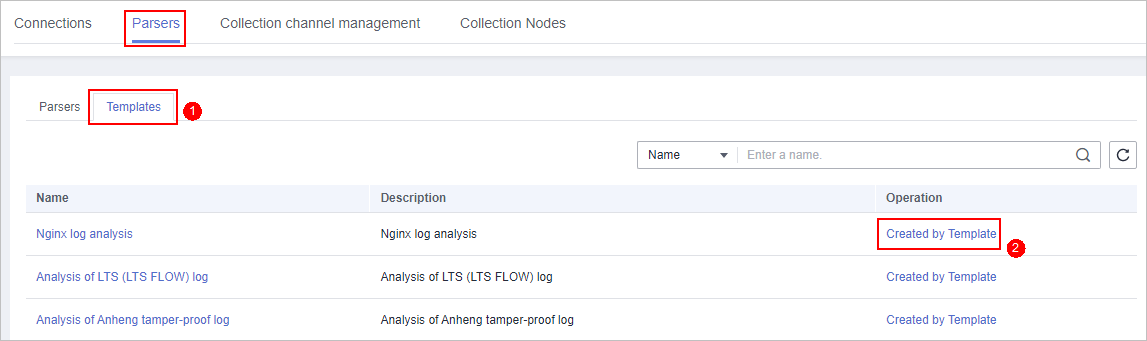
- Creating a parser from a template
- On the Parsers tab page, click the Templates tab.
- On the displayed page, locate the row that contains the target template, click Created by Template in the Operation column.
Figure 11 Creating a parser from a template
- On the Parsers tab page, set parameters.
Table 2 Parameters for adding a parser Parameter
Description
Basic Information
Parser Name
Parser name, which is automatically generated by the system based on the template and can be changed.
Description
Parser description, which is automatically generated by the system based on the template and can be modified.
Rule list
Parsing rule, which is automatically generated by the system based on the template and can be modified.
To add a rule, click Add, select a rule type, and set parameters based on the selected rule.
- Parsing rules: Select the parsing rule of the parser. You can select UUID, kv, mutate, grok, date, drop, prune, CSV, or JSON rules.
- Conditional control: Select the conditions for the parser. You can select If, Else, or Else if.
- After the setting is complete, click OK in the lower right corner of the page to confirm the setting.
- Customizing a parser
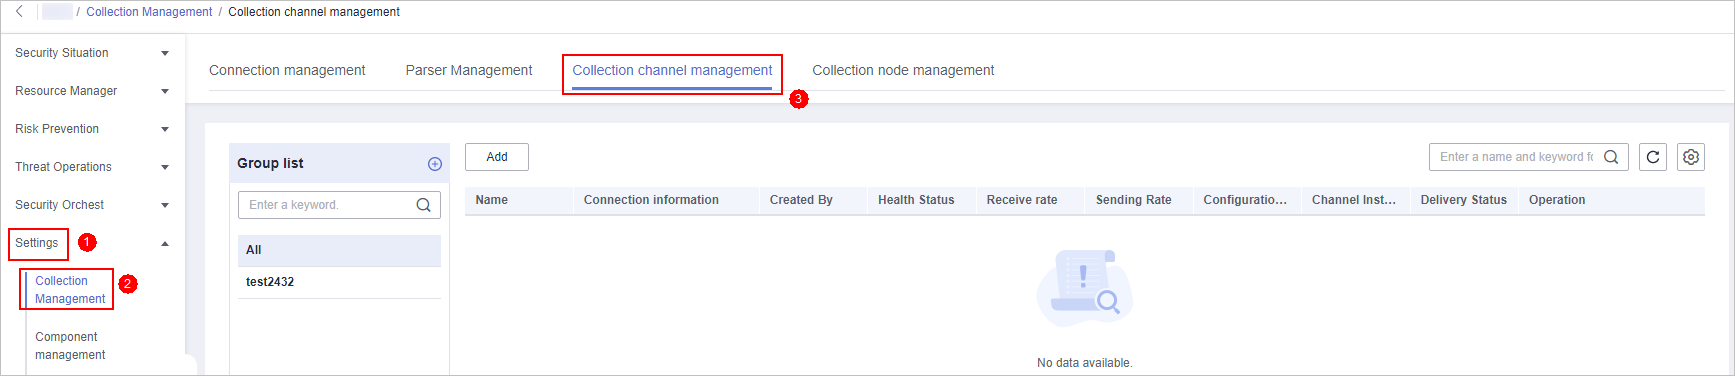
Step 7: Add a Collection Channel
- In the navigation pane on the left, choose . On the Collection Management page, click the Collection Channels tab.
Figure 12 Collection channel management tab page
- Add a channel group.
- On the collection channel management page, click
 next to Group list.
 - Enter a group name and click
 .
.
To edit or delete a group, hover the cursor over the group name and click the edit or deletion icon.
- On the collection channel management page, click
- On the right of the group list, click Add.
- On the displayed page, in the Basic Configuration phase, configure basic information.
Table 3 Basic configuration parameters Parameter
Description
Basic Information
Name
User-defined collection channel name.
Channel grouping
Select the group the collection channel belongs to.
(Optional) Description
(Optional) Enter the description of the collection channel.
Source Configuration
Source Name
Select the source name of the collection channel.
After you select a source, the system automatically generates the information about the selected source.
Destination
Destination Name
Select the destination name of the collection channel.
After you select a source, the system automatically generates the information about the selected source.
- After the basic configuration is complete, click Next in the lower right corner of the page.
- On the parser configuration page, select a parser to view its details.
If no parser is available or you want to create a parser, choose Create to create a parser. For details, see Managing Parsers.
Figure 13 Parser configuration
- After the parser is configured, click Next in the lower right corner of the page.
- On the Select Node page, click Add. In the Add Node dialog box displayed, select a node and click OK.
- Running parameters: After a node is added, if you want to configure parameters for the added node, perform the following steps:
- In the node list, locate the row that contains the target node, and click Running Parameters in the Operation column.
- Click Add Configuration and set Key and Value.
- Removing a node: To remove an added node, locate the row that contains the target node, click Remove in the Operation column.
- Running parameters: After a node is added, if you want to configure parameters for the added node, perform the following steps:
- After the running node is selected, click Next in the lower right corner of the page.
- On the Channel Details Preview page, confirm the configuration and click OK.
Related Operations
Feedback
Was this page helpful?
Provide feedbackThank you very much for your feedback. We will continue working to improve the documentation.


