Managing Security Policies
Scenarios
This topic describes how to manage emergency policies, including Viewing a Security Policy, Editing a Security Policy, and Deleting a Security Policy.
Viewing a Security Policy
- Log in to the SecMaster console.
- Click
 in the upper left corner of the management console and select a region or project.
 - Click
 in the upper left corner of the page and choose Security & Compliance > SecMaster.
 - In the navigation pane on the left, choose Workspaces > Management. In the workspace list, click the name of the target workspace.
Figure 1 Workspace management page

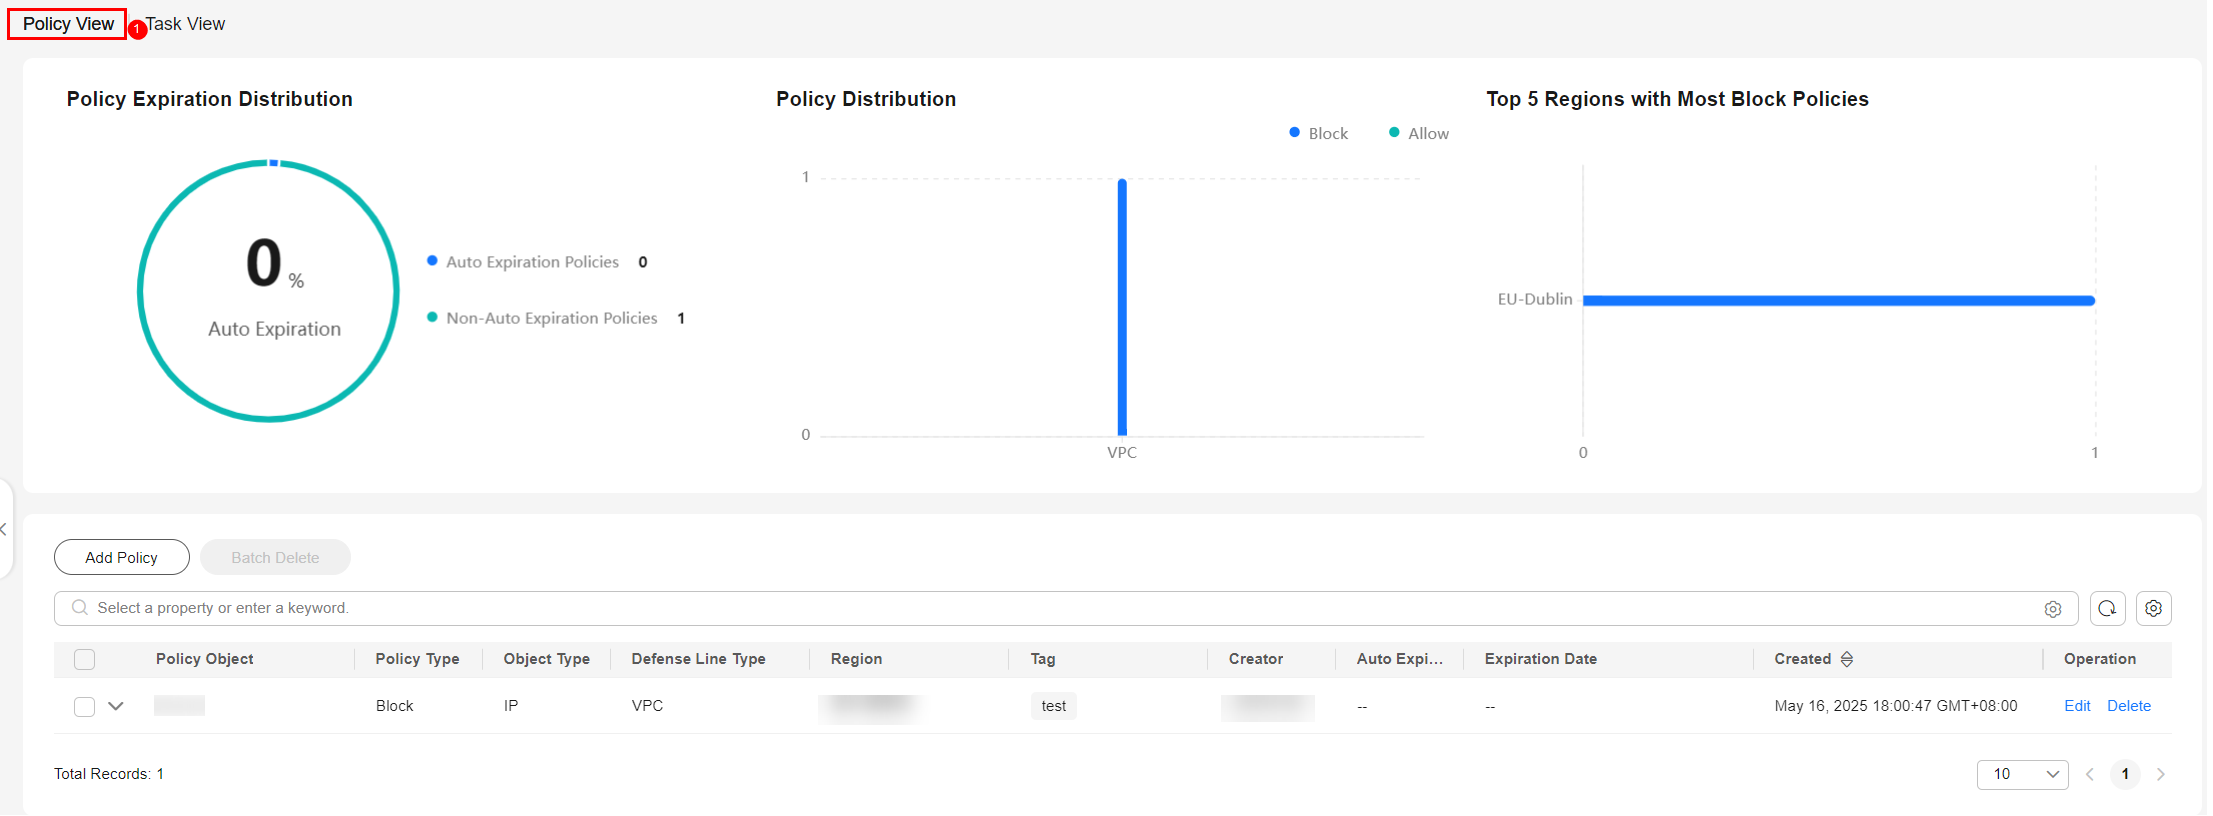
- In the navigation pane on the left, choose Risk Prevention > Security Policies. On the displayed page, click the Policy View tab.
Figure 2 Accessing the policy management page

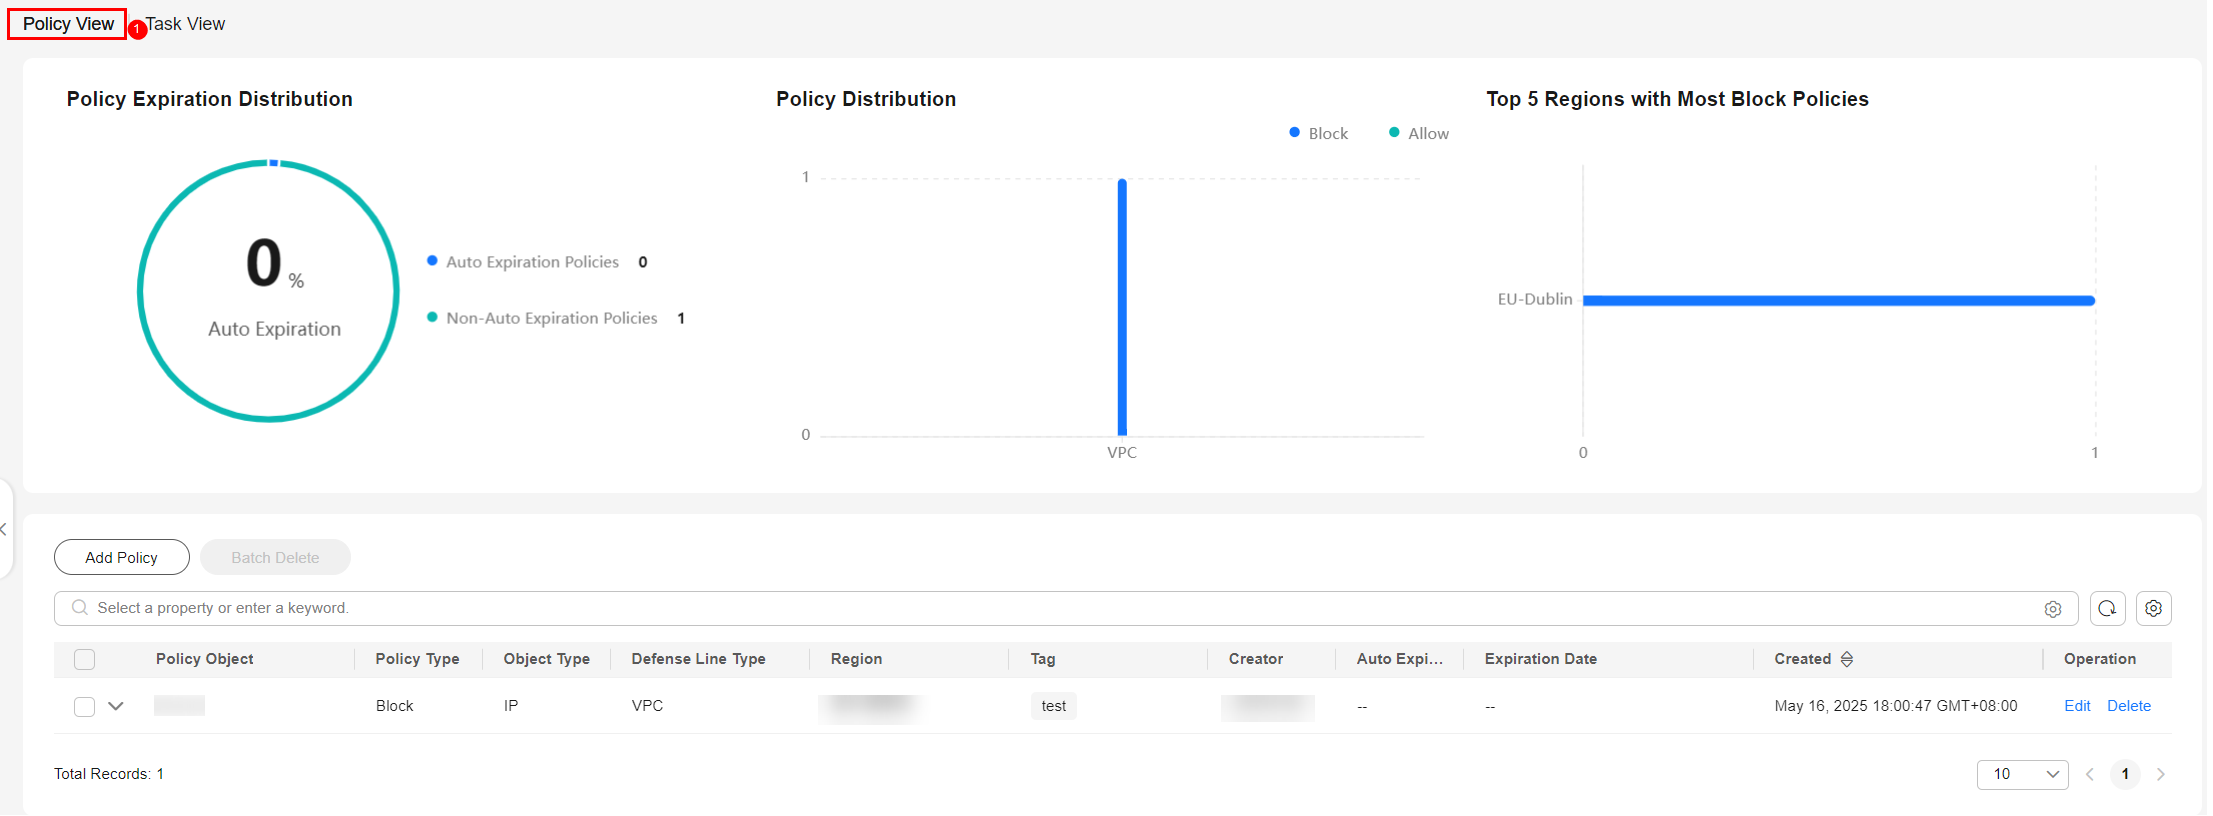
- On the Policy View tab displayed by default, view the statistics of emergency policies that have been successfully delivered.
Figure 3 Viewing a policy

- Policy Expiration Distribution: displays the proportion of automatically expired policies in a pie chart and collects statistics on the number of auto expiration policies and non-auto expiration policies.
- Policy Distribution: displays the number of Block and Allow policies of each defense layer in a bar chart. For details about the defense layer types supported by emergency policies, see Limitations and Constraints.
- Top 5 Regions with Most Block Policies: displays the five regions with most policy objects in a bar chart.
- Emergency policy list: displays basic information about emergency policies in a list. Parameters in the policy list are described as follows:
Table 1 Parameters in the emergency policy list Parameter
Description
Policy Object
Policy Object. A policy object is displayed in a separate row.
- If Object Type is set to IP, an IP address is displayed.
- If Object Type is set to Domain name, a domain name is displayed.
- If Object Type is set to Account, the cloud service account (IAM username) is displayed.
Policy Type
Policy Type. The value can be Block or Allow.
- Block: The access from the policy object will be denied.
- Allow: The access from the policy object will be allowed.
Object Type
Object type of the policy.
If Policy Type is set to Block, Object Type can be set to IP, Account, or Domain name.
If Policy Type is set to Allow, Object Type can be set to IP or Domain name.
Defense Layer Type
Defense line type of the policy.
- Emergency policies support CFW, WAF, VPC, and IAM.
Region
Region of operation connections configured in the policy.
Tag
Tag of the policy.
Created By
Creator of the policy.
Auto Expiration
How long the policy will expire automatically.
Expiration Date
Time the policy expires automatically.
Description
Policy description. This parameter is hidden by default. Click
 on the right of the search box above the emergency policy list to set the emergency policy list as follows:
- Basic Settings:
Table Text Wrapping: If you enable this function, excess text will move down to the next line; otherwise, the text will be truncated.
Operation Column: If you enable this function, the Operation column is always fixed at the rightmost position of the table.
- Custom Columns: Columns you want to display in the emergency policy list. If you select
 before a column name, the column will be displayed on the table. If you deselect
  before a column name, the column will not be displayed on the table.
Created
Time the policy was created.
Operation
You can edit or delete a policy. For details, see Editing a Security Policy and Deleting a Security Policy.
Click
 before a policy object to expand the list of all operation connections related to the policy object. Click View History in the Operation column of the operation connection list to view the historical records of the operation connection.
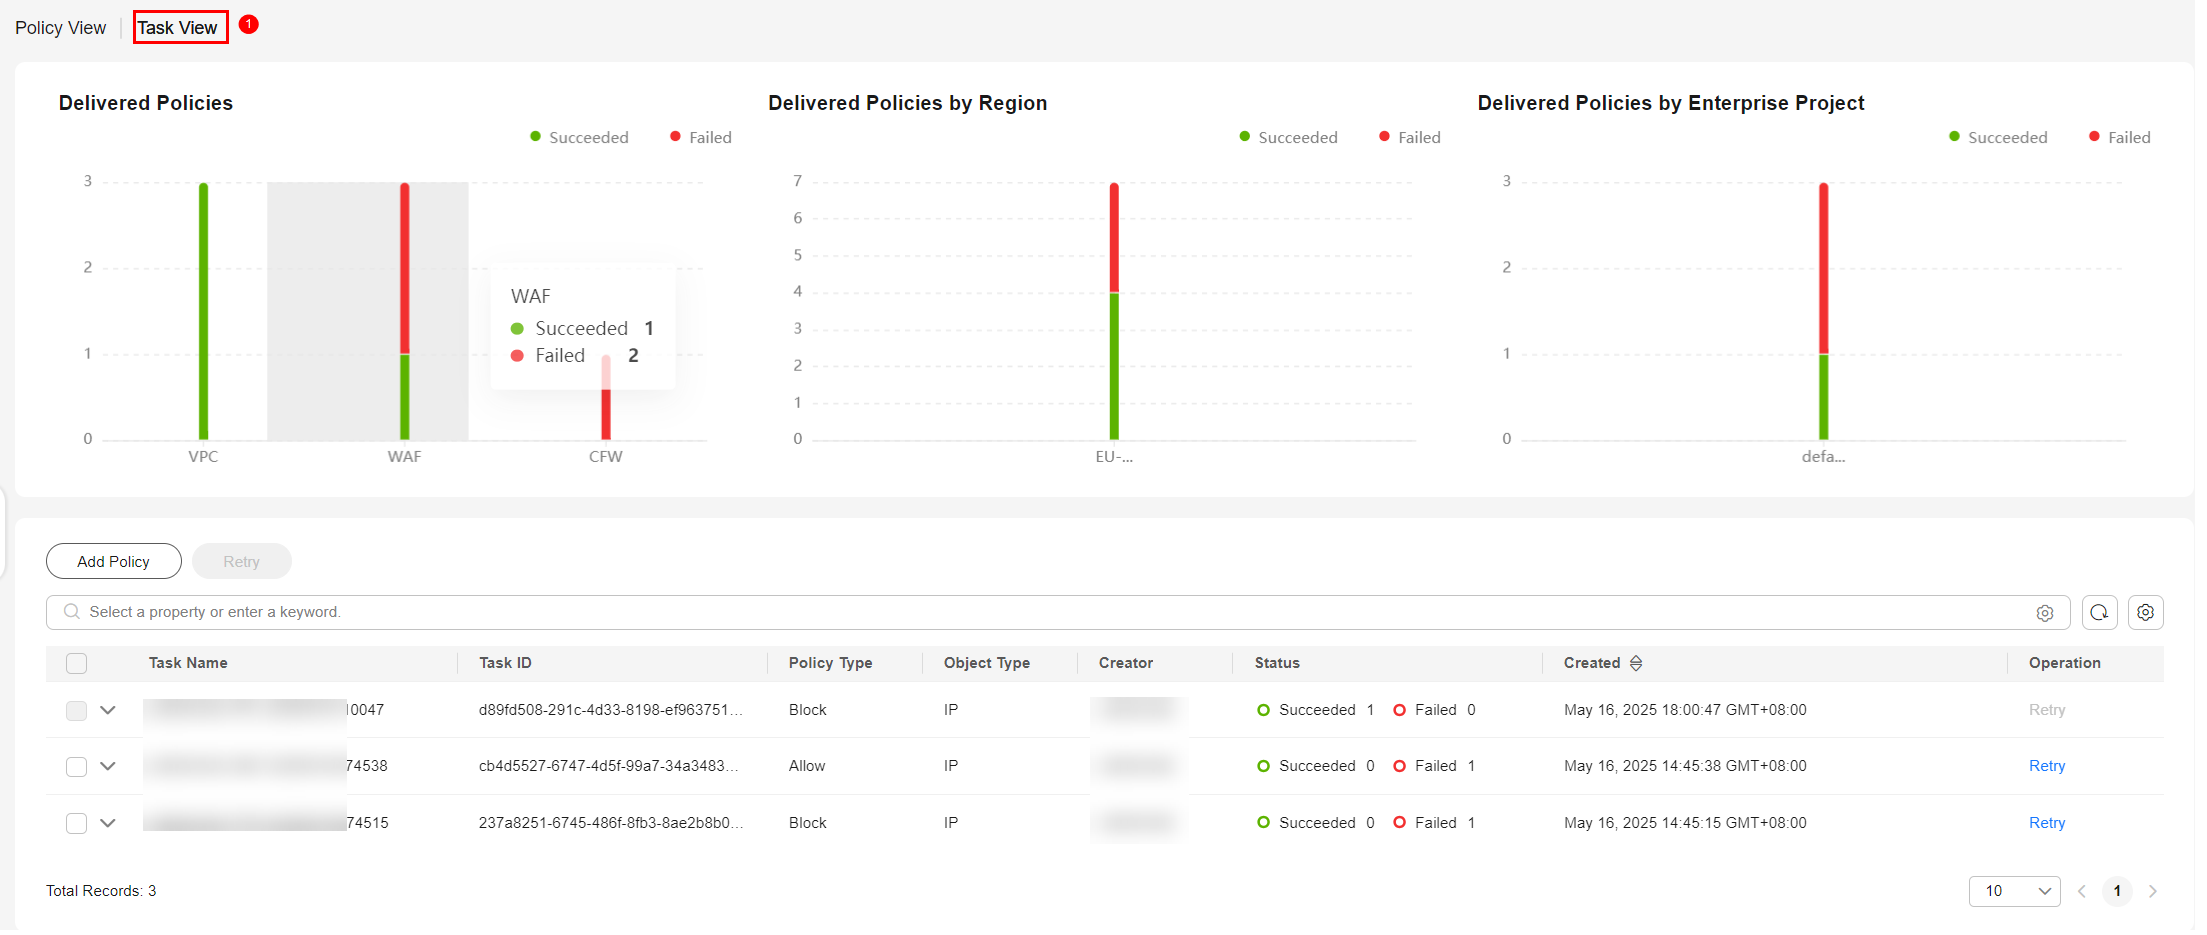
- Click the Task View tab on the Security Policies page and view the statistics of emergency policy tasks. Tasks are generated when emergency policies are added or deleted.
Figure 4 Viewing a policy task
 The Task View page displays the following information:
- Delivered Policies: This chart displays the number of succeeded and failed emergency policy tasks by defense layer type. For details about the defense layer types supported by emergency policies, see Limitations and Constraints.
- Delivered Policies by Region: This chart displays the number of succeeded and failed emergency policy tasks by region.
- Delivered Policies by Enterprise Project: This chart displays the number of succeeded and failed emergency policy tasks by enterprise project.
- Task list: displays basic information about emergency policy tasks. The parameters in the task list are as follows:
Table 2 Parameters in the emergency policy task list Parameter
Description
Task Name
The task name, which is automatically generated by the system when the task is generated.
Task ID
The task ID, which is automatically generated by the system when the task is generated.
Policy Type
The policy type of an emergency policy task. The value can be Block or Allow.
- Block: The access from the policy object will be denied.
- Allow: The access from the policy object will be allowed.
Object Type
Object type of the emergency policy task. The value can be IP, Account, or Domain name.
Creator
Creator of the policy.
Status
The status of the task.
- Executing task: the progress of the task.
- Succeeded: the number of policy objects that are successfully executed in the task.
- Failed: the number of policy objects that failed to be executed in the task.
Created
Time the emergency policy task was created.
Operation
You can retry an emergency policy task. This operation can be performed when some or all policy objects in the emergency policy task fail to be delivered.
To retry a failed task, click Retry in the Operation column of the task.
To retry a batch of failed tasks, select them all and click Retry above the task list.
Editing a Security Policy

After a policy is added, the policy object, policy type, object type, and selected operation connections cannot be modified.
- Log in to the SecMaster console.
- Click
 in the upper left corner of the management console and select a region or project.
 - Click
 in the upper left corner of the page and choose Security & Compliance > SecMaster.
 - In the navigation pane on the left, choose Workspaces > Management. In the workspace list, click the name of the target workspace.
Figure 5 Workspace management page

- In the navigation pane on the left, choose Risk Prevention > Security Policies. On the displayed page, click the Policy View tab.
Figure 6 Accessing the policy management page

- On the Policy View tab, locate the row that contains the policy you want to edit and click Edit in the Operation column.
- On the page for editing a policy, you can modify the tag and description of the emergency policy, modify the automatic expiration settings, and add operation connections.
Table 3 Parameters for editing an emergency policy Parameter
Description
Policy Object
Policy objects. Settings for this parameter cannot be modified.
Policy Type
Type of the policy. Settings for this parameter cannot be modified.
Object Type
Object type of the policy. Settings for this parameter cannot be modified.
Policy Application Scope
Scope on which the policy works. You can modify the settings.
Operation Connection
Operation connections for the policy. When you edit a policy, the operation connections that have been selected for the policy cannot be deselected. You can select other operation connections for the policy.
Auto Expiration
Auto expiration configured for the policy. You can modify the settings.
- If you select Yes, set the policy expiration time.
- If you select No, the policy is always valid.
Tag (Optional)
Tag of the emergency policy. You can modify the settings.
Policy Description (Optional)
Description of the emergency policy. You can modify the settings.
If you need to delete an operation connection of a policy object, click
 in front of the row where the policy object resides in the emergency policy list on the Policy View tab to expand all related operation connections, and click Delete in the Operation column of the row that contains the target operation connection. In the displayed confirmation dialog box, confirm the information and click OK.
 - Click OK. After the modification is complete, you can check the modified policy information by referring to Viewing a Security Policy.
Deleting a Security Policy
- Log in to the SecMaster console.
- Click
 in the upper left corner of the management console and select a region or project.
 - Click
 in the upper left corner of the page and choose Security & Compliance > SecMaster.
 - In the navigation pane on the left, choose Workspaces > Management. In the workspace list, click the name of the target workspace.
Figure 7 Workspace management page

- In the navigation pane on the left, choose Risk Prevention > Security Policies. On the displayed page, click the Policy View tab.
Figure 8 Accessing the policy management page

- On the Policy View tab under Emergency Policies, locate the row that contains the policy you want to delete and click Delete in the Operation column.
To delete multiple policies, select the target policies and click Batch Delete above the list.
- In the displayed confirmation dialog box, click Confirm. After the operation is complete, check whether the policy has been deleted by referring to Viewing a Security Policy. If no information about the deleted policy is displayed on the page, the policy has been deleted successfully.
Feedback
Was this page helpful?
Provide feedbackThank you very much for your feedback. We will continue working to improve the documentation.


