Updated on 2024-09-25 GMT+08:00

Upgrading Protection Quotas

You can upgrade to a higher edition and enjoy stronger security features.

Precautions

  • Premium, Web Tamper Protection, and Container are high-configuration editions and cannot be upgraded. You can purchase these quotas separately.
  • Basic, Professional, and Enterprise can be upgraded to a higher quota edition.
    • Basic: can be upgraded to Professional, Enterprise, or Premium.
    • Professional: can be upgraded to Enterprise or Premium.
    • Enterprise: can be upgraded to Premium.

Prerequisites

  • The Usage Status of a quota must be Idle.
  • The Quota Status of a quota must be Normal.

Upgrading to the Professional/Enterprise/Premium Edition

To upgrade a quota that is being used to protect a server, unbind it from the server first.

  1. Log in to the management console.
  2. In the upper left corner of the page, select a region, click , and choose Security & Compliance > HSS.
  3. In the navigation pane on the left, choose Asset Management > Servers & Quota. On the displayed page, click the Quotas tab. On the Quotas page, click the different option buttons to filter and view the target quota list.

    If your servers are managed by enterprise projects, you can select the target enterprise project to view or operate the asset and detection information.

  4. In the quota list, filter the idle quotas of the basic or enterprise edition. Select a quota and click Upgrade.

    • Before upgrading a quota in use, unbind it from the server it protects.
    • Unbinding does not affect services.

  5. Configure upgrade information.

    The basic edition can be upgraded to the enterprise or premium edition. The enterprise edition is upgraded to the premium edition by default.

    Figure 1 Confirming upgrade information
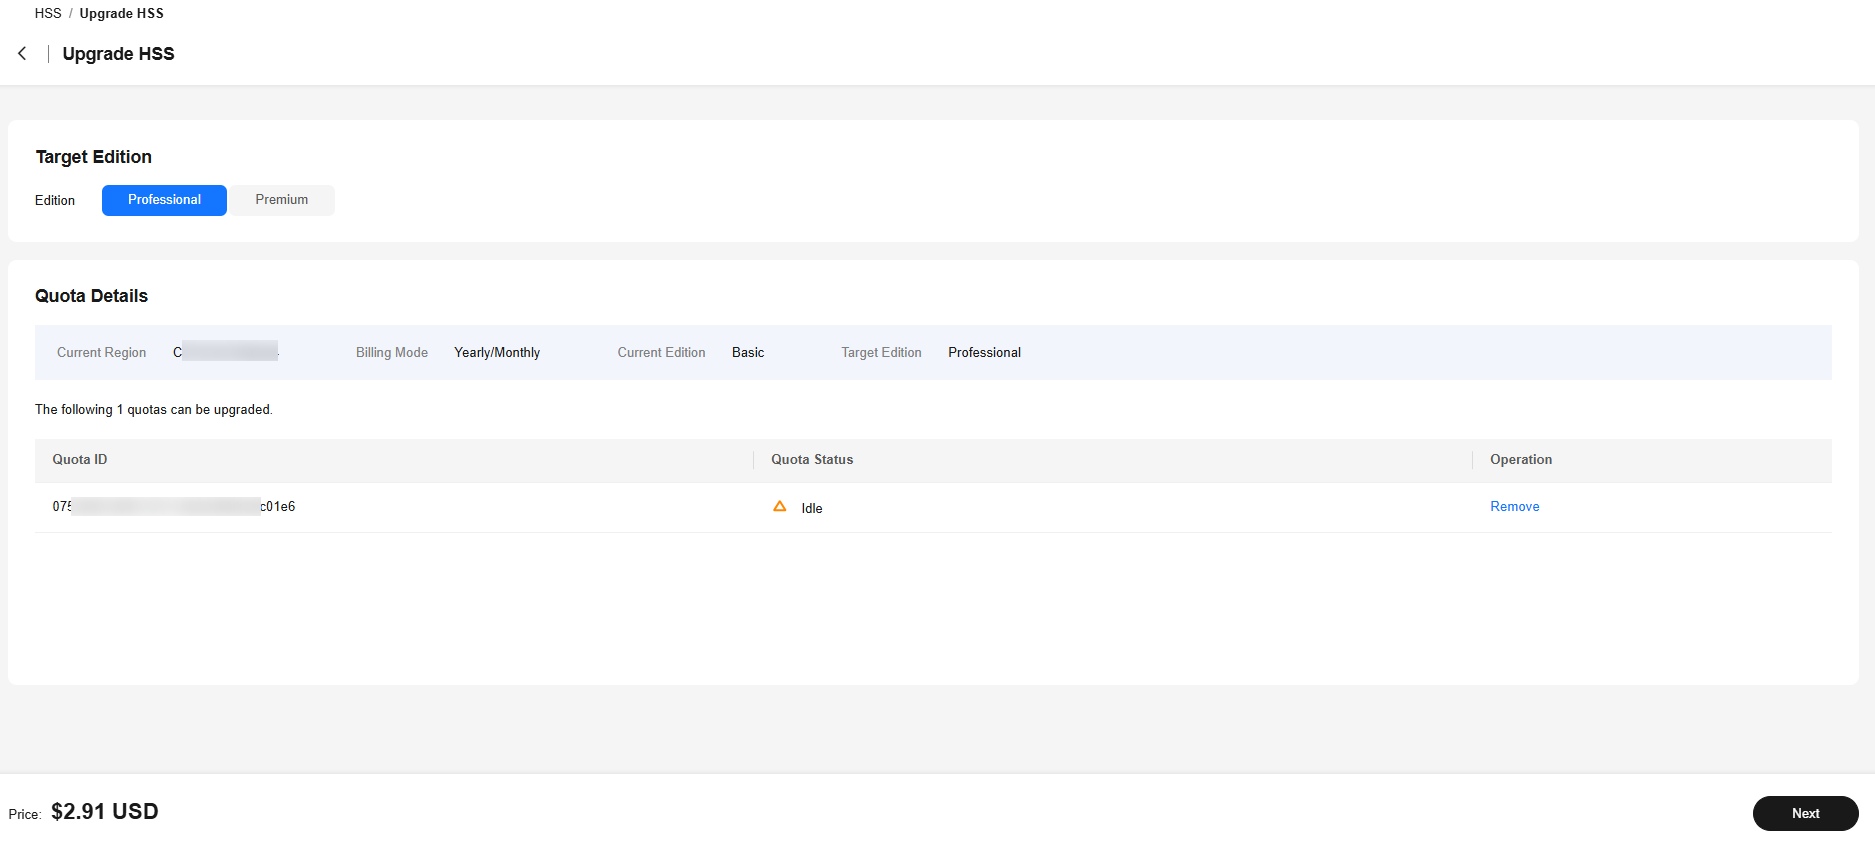
  6. Confirm the upgrade version and click Next.

    When you pay for the upgrade, you only need to make up the difference.

  7. Confirm the purchase information, select I have read and agree to the Host Security Service Disclaimer, and click Pay Now.
  8. Wait until the payment is complete. Return to the quota list. Locate the quota by its ID and check its edition.
  9. Bind the quota to a server and enable protection.

Upgrading to the WTP Edition

The WTP edition cannot be directly upgraded from a lower edition and needs to be purchased separately. Before protecting a server with WTP, ensure the server is not bound to any quota.

  1. Log in to the management console.
  2. In the upper left corner of the page, select a region, click , and choose Security & Compliance > HSS.
  3. In the upper right corner of the Dashboard page, click Buy HSS.
  4. On the Buy HSS page, select the WTP edition. For more information, see Table 1.

    Table 1 Parameters for purchasing HSS

    Parameter

    Description

    Example Value

    Billing Mode

    Select Yearly/Monthly or Pay-per-use billing mode based on your requirements.

    • Yearly/Monthly: You can select the basic, professional, enterprise, premium, WTP, or container edition.
    • Pay-per-use: You can select the enterprise edition on the purchase page. Protection needs to be enabled on the server list page. You pay for the duration you use the resources. Prices are calculated by hour, and no minimum fee is required.
      NOTE:

      Procedure for enabling pay-per-use quota:

      1. On the purchase page, select Pay-per-use. In the lower right corner, click Enable Now. You will be redirected to the server list.
      2. In the Operation column of a server, click Enable. Set Billing Mode to Pay-per-use and select an edition.
      3. After confirming the information, select I have read and agree to the Host Security Service Disclaimer.
      4. Click OK.

    Yearly/Monthly

    Region

    • To minimize connection issues, purchase quota in the region of your servers.

    -

    Edition

    The basic, professional, enterprise,premium,WTP, and container editions are supported. For details about the differences between editions, see "Editions".

    NOTICE:
    • If you enable the HSS basic edition for the first time, you can enjoy the free trial for 30 days and purchase it after the trial.
    • If you purchase the basic, enterprise, or premium edition, choose Asset Management > Servers & Quota and enable HSS on the Servers tab.
    • To enable the WTP edition, choose Server Protection > Web Tamper Protection and click the Servers tab.
    • If you purchased the container edition, choose Asset Management > Containers & Quota and enable protection on the Container Nodes tab.

    Enterprise

    Enterprise Project

    This option is only available when you are logged in using an enterprise account, or when you have enabled enterprise projects. To enable this function, contact your customer manager.

    An enterprise project provides a cloud resource management mode, in which cloud resources and members are centrally managed by project.

    Select an enterprise project from the drop-down list.

    NOTE:
    • Resources and incurred expenses are managed under the enterprise project you selected.
    • Value default indicates the default enterprise project. Resources that are not allocated to any enterprise projects under your account are displayed in the default enterprise project.
    • The default option is available in the Enterprise Project drop-down list only after you purchased HSS under your Huawei account.

    default

    Tag

    Tags are used to identify cloud resources. When you have many cloud resources of the same type, you can use tags to classify cloud resources by dimension (for example, by usage, owner, or environment).

    To use this function, your account must have the TMS administrator permission. Without this permission, you cannot add tags to protection quotas, and the error message "permission error" will be displayed.

    You do not need to set this parameter in pay-per-use mode.

    data

    Quota Management

    After automatic quota binding is enabled, HSS automatically binds available quotas to new servers or container nodes after the agent is installed for the first time. Only the yearly/monthly quotas that you have purchased can be automatically bound. No new order or fee is generated.

    • Servers: Available yearly/monthly quotas are automatically bound in the following sequence: Premium Edition > Enterprise Edition > Professional Edition > Basic Edition.
    • Container nodes: Available yearly/monthly quotas are automatically bound in the following sequence: Container Edition > Premium Edition > Enterprise Edition > Professional Edition > Basic Edition.

    If you use enterprise projects, the automatic quota binding function of the enterprise project you selected will be enabled for this configuration. To make the binding function take effect, choose Asset Management > Servers & Quota and click the Servers tab. Select All projects from the Enterprise Project drop-down list and confirm that Auto Bind Quota is enabled. The binding function takes effect in an enterprise project only if it is enabled both for this project and for All projects.

    Selected

    Required Duration

    • Select a duration based on your requirements. In Pay-per-use mode, you do not need to select a duration.
    • You are advised to select Auto-renew to ensure your servers are always protected.
    • If you select Auto-renew, the system will automatically renew your subscription as long as your account balance is sufficient. The renewal period is the same as the required duration.
    • If you do not select Auto-renew, manually renew the service before it expires.

    1 year

    Quantity

    Enter the number of HSS quotas to be purchased. In Pay-per-use mode, you do not need to configure this option.

    NOTICE:

    All your servers should be protected, so that if a virus (such as ransomware or a mining program) infects one of them, it will not be able to spread to others and damage your entire network.

    20

  5. In the lower right corner of the page, click Next.

    For details about pricing, see Product Pricing Details.

  6. After confirming that the order, select I have read and agree to the Host Security Service Disclaimer and click Pay Now.
  7. In the dialog box that is displayed, select a verification mode, click Send Code, enter the verification code you receive, and click OK.
  8. In the navigation pane, choose Server Protection > Web Tamper Protection. On the Servers tab, click Add Server.

    • Ensure the server to be protected by WTP is not bound to other quotas. Choose Asset Management > Servers & Quota and click the Servers tab. If the protection status of the server is Protected, it indicates the server is bound to another quota. In this case, click Disable in the Operation column.
    • Unbinding a server from a quota does not affect services.

  9. Click Add Server, select a server, and click Add and Enable Protection.

    Figure 2 Selecting a server

  10. Verify WTP configurations. Choose Asset Management > Servers & Quota and click the Servers tab. If WTP is displayed in the Edition/Expiration Date column, the WTP edition has been enabled.

    If you do not need the quota replaced by WTP, you can unsubscribe from it. Choose Asset Management > Servers & Quota and click the Quotas tab. In the Operation column of the quota, choose More > Unsubscribe.