What Are the Troubleshooting Methods for Host and Proxy Connectivity Verification Failures
This section describes the troubleshooting of host connectivity verification failures. The possible causes are as follows:
Linux Hosts
Perform the following steps to locate the issue:
- Verify whether the IP address, username, and password are correct.
- Check whether the port enabled on the target host is an SSH port (port 22 by default).
If not, perform the following steps to enable the port:
- Enable the firewall.
systemctl start firewalld.service
systemctl stop firewalld.service #Disable the firewall.
- Enable the port.
firewall-cmd --zone=public --add-port=22/tcp --permanent
Note:
--zone #Application zone.
--add-port=22/tcp #Port, in the format of port number/communication protocol.
--permanent #Takes effect permanently. If this parameter does not exist, it becomes invalid after the system is restarted.
- Restart the firewall.
firewall-cmd --reload
- Enable the firewall.
- Check the network status.
- Run the tcpdump command to check the network connection.
tcpdump -n "tcp port 22" | grep -v "xxx.xxx.xxx.xxx"
#This command is executed on the local PC to check whether the host is connected. xxx.xxx.xxx.xxx indicates the IP address of the target host.
If no command output is displayed as shown in the following figure, the network connection is normal.

- Alternatively, run the following command. For Linux hosts, enable port 22 in the inbound rule when adding the target host or proxy host. Set the remote end to 0.0.0.0/0 (open the preceding ports for all IP addresses).
tcpdump -n "tcp port 22 and host xxx.xxx.xxx.xxx"
#This command is executed on the local PC to check whether the execution host is connected. xxx.xxx.xxx.xxx indicates the public IP address of CodeArts Deploy.
The public IP addresses of CodeArts Deploy are as follows:
Dublin:
101.46.143.79
- Run the tcpdump command to check the network connection.
- Choose Settings > General > Basic Resources and click the cluster name to go to the details page.
Verify the target host connectivity and check whether the service has established SSH connections to this host. The following information indicates that the server has established SSH connections to this host.
 Otherwise, perform the following analysis:
- SSH connections exist between the server and the target host.
The target host is not configured properly or tcpdump is not installed.
Perform the following operations to check the host configurations:
- For details, see Configuring the Firewall in the User Guide.
- Run the following command to check whether a firewall is configured (iptables is used as an example):
iptables -L
- No SSH connections exist between the server and the target host.
The target host is unreachable because the network may have access restrictions.
Check whether the source and destination IP addresses are restricted by the firewall, and check the SSH protocol configurations.
- SSH connections exist between the server and the target host.
- Check permissions on the SSH key file.
Log in to the host as the root user and run the following commands to check permissions on the SSH key file:
cd /root/.ssh
ll
Check whether the file permission is rw.

If the file permission is incorrect, run the following command to modify it:
chmod 600 File name
- Check the operations on the ${HOME} directory. If the user who carries the host connectivity verification fails to operate the ${HOME} directory, do as follows:
- Check whether the disk where the ${HOME} directory of the host is located is full.
- Run the df -h command to check whether the disk where the ${HOME} directory is located is full.
- Run the ll -ld ${HOME} and lsattr -d ${HOME} commands to check the permission setting and hidden attributes of the ${HOME} directory of the user.
- Check whether the user has the read and write permissions on the ${HOME} directory.
Run the chmod and chattr commands to add the read and write permissions to modify the ${HOME} directory.
- Check whether the user's default shell is set to nologin mode.
- Run the grep username /etc/passwd command. Replace "username" with the actual username to be checked.
- In the file, if /usr/sbin/nologin or /sbin/nologin is displayed in the shell column of a user, the user is set to the nologin mode.
- If the user is in nologin mode, run the sudo usermod -s /bin/bash username command to allow the user to log in. Replace "username" with the actual username.
- Check whether the disk where the ${HOME} directory of the host is located is full.
- If the connectivity test of a proxy associated with a host fails or an error message indicating that the host connection timed out displays, locate the issue by performing the following operations.
- Test the connectivity of the proxy host.
- Run the following command to check whether AllowTcpForwarding has been enabled for SSH on the proxy host:
grep "AllowTcpForwarding" /etc/ssh/sshd_config

If the value is no, set it to yes and run the following command to restart the sshd service:
service sshd restart
Self-hosted Resource Pool
- Check whether the agent pool of the host cluster to which the host belongs is available.
- Click the name of the host cluster. On the host cluster details page that is displayed, click Manage Resource Pools.

- Go to the Agent Pool page and check the status.
- If the status is Offline, delete the agent and reinstall it.

- If the status is Disabled, enable the agent in the Operation column and verify the connectivity again.

- If the status is Offline, delete the agent and reinstall it.
- Click the name of the host cluster. On the host cluster details page that is displayed, click Manage Resource Pools.
- Click Connectivity Verification Result. If a script execution error is displayed, perform the following operations to troubleshoot it. (If no script execution error is displayed, skip this step.)
Cause analysis:
The self-hosted resource pool needs to use Docker to pull images. The script execution error occurs because Docker is not installed in the self-hosted resource pool or cannot be used properly. You can perform the following operations to troubleshoot the error:
Troubleshooting method:
- Run the following command to check whether Docker is installed:
docker --version

If the version number is displayed in the command output, Docker has been installed.
If no version number is displayed in the command output, Docker is not installed.
 If Docker is not installed, install it by referring to "Installing/Uninstalling Docker", and then perform the following operations to verify the connectivity:
- Log in to the service homepage, and click the target project name to access the project details page.
- Choose Settings > General > Basic Resources. The Host Clusters page is displayed by default.
- Click the name of the target cluster. On the cluster details page that is displayed, click Proxy Hosts or Target Host.
- Click
 in the same row as the host, and modify the host information to verify the host again in the dialog box displayed.
- Run the following command to check whether Docker can be used properly:
docker images

If the preceding information is displayed, Docker can be used properly. Otherwise, you need to uninstall Docker, and reinstall it by referring to ."Installing/Uninstalling Docker."
- Run the following command to check whether Docker is installed:
Windows Hosts
Perform the following steps to locate the issue:
- Verify whether the IP address, username, and password are correct.
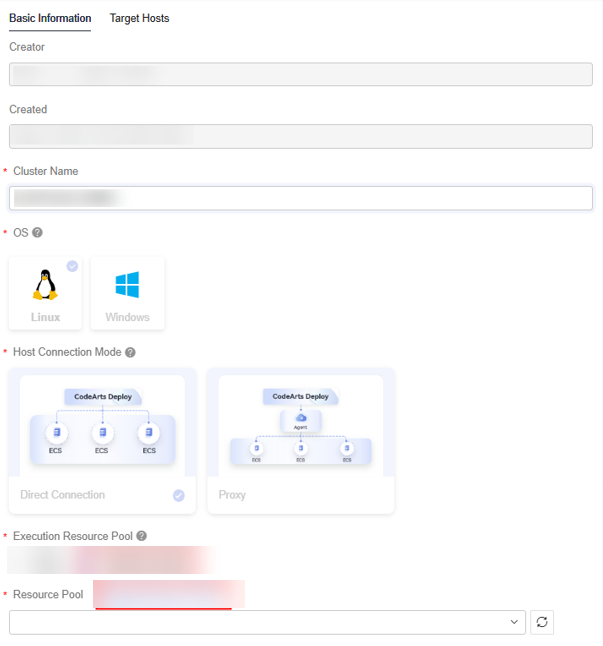
- Configure a proxy host. For details, see Configuring a Windows Proxy.
-
Enable WinRM. For details, see Configuring the Host Running Windows in the User Guide.
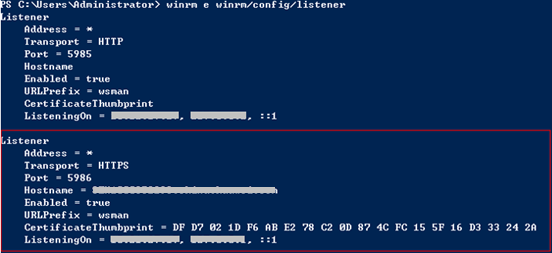
- Run the following command on PowerShell to check whether the WinRM function has been enabled..
winrm e winrm/config/listener
If the output contains HTTPS and Hostname is not left blank, the listening is successful. The Windows Server 2012 deployment environment is automatically configured.


If Hostname is left blank in the command output, the host does not have IIS or signature certificate information. In this case, run the following script:
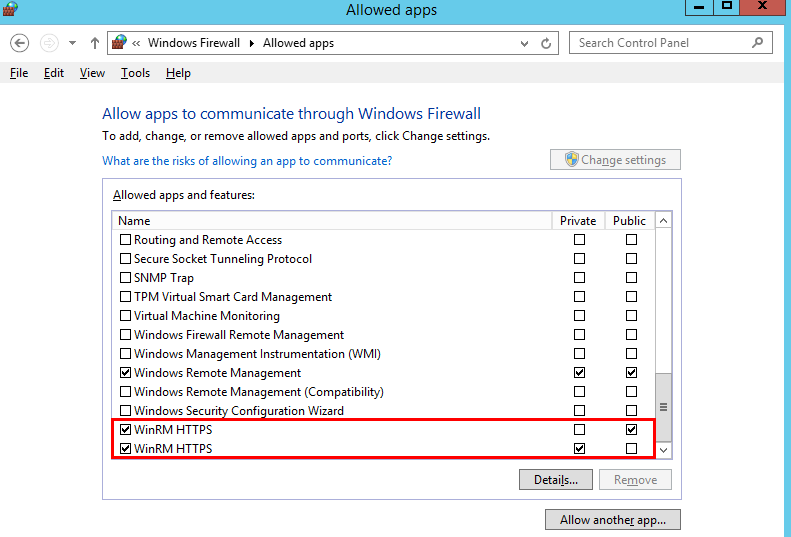
# Configure WinRM. winrm enumerate winrm/config/listener winrm quickconfig winrm set winrm/config/service/auth '@{Basic="true"}' winrm set winrm/config/service/auth '@{CredSSP="true"}' winrm set winrm/config/service '@{AllowUnencrypted="true"}' # Install IIS. Import-Module servermanager Add-windowsfeature Web-Server,Web-WebServer,Web-Common-Http,Web-Static-Content,Web-Default-Doc,Web-Dir-Browsing,Web-Http-Errors,Web-App-Dev,Web-ASP,Web-ISAPI-Ext,Web-Health,Web-Http-Logging,Web-Log-Libraries,Web-Request-Monitor,Web-Security,Web-Filtering,Web-Stat-Compression,Web-Mgmt-Tools # Create a self-signed certificate. New-SelfSignedCertificate -CertStoreLocation Cert:\LocalMachine\My\ -DnsName 'windows-deploy-connect' # View the self-signed certificate. ls Cert:\LocalMachine\My # Add a secure connection using the created self-signed certificate. $windows_test_key=(Get-ChildItem -Path Cert:\LocalMachine\My | Where-Object {$_.Subject -match "windows-deploy-connect"}).Thumbprint cmd /c "winrm set winrm/config/Listener?Address=*+Transport=HTTPS @{Enabled=`"true`";Port=`"5986`";Hostname=`"windows-deploy-connect`";CertificateThumbprint=`"$windows_test_key`"}" - Check whether the Windows firewall allows external hosts to access the WinRM service. For details, see .

Cloud Hosts
Locate the issue in the same way as you would do for a Windows or Linux host. Configure the security group for the cloud host to allow access from the public IP addresses of CodeArts Deploy. (For details, see Preparations in the User Guide.)
Feedback
Was this page helpful?
Provide feedbackThank you very much for your feedback. We will continue working to improve the documentation.


