

更新时间:2023-09-07 GMT+08:00
Web端二三维地图支撑软件集群
- 服务信息如下:
表1 服务信息 服务名
服务器
安装目录
端口
GeoServer
10.190.x.x
10.190.x.x
10.190.x.x
/app/apache-28080
admin/geoserver
- 软件安装
- 安装NFS共享目录
yum install -y nfs-utils
mkdir -p /app/nfs
mkdir -pv /app/nfs/nfs-data
chmod 666 -R /app/nfs log:
#修改配置文件根据服务器所在网段修改
vim  /etc/exports
/app/nfs    192.168.32.0/24(rw,no_root_squash,no_all_squash,sync)
/usr/sbin/exportfs -r   ##加载nfs配置
#启动服务,顺序不能错
systemctl start rpcbind && systemctl  enable rpcbind
systemctl start nfs  && systemctl enable nfs
#验证
showmount -e localhost
#输出
Export list for localhost:
/app/nfs 10.190.0.0,10.0.0.0/8
三节点客户端挂载NFS:
#安装nfs
yum install -y nfs-utils
# 启动服务顺序不能错
systemctl start rpcbind && systemctl  enable rpcbind
systemctl start nfs  && systemctl enable nfs
# 查看服务器端共享文件
showmount -e NFS-IP
# 绑定服务器端共享目录
mount -t nfs NFS-IP:/app/nfs/nfs-data   /app/nfs-data
#查看绑定是否成功
df -h
图1 图示1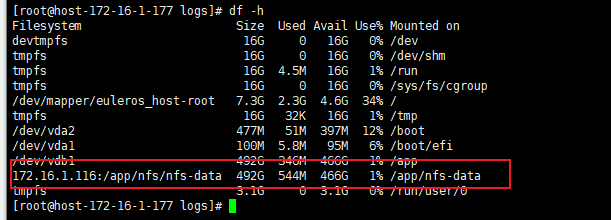
设置开机自动挂载
vim /etc/fstab
NFS-IP:/app/nfs/nfs-data   /app/nfs-data   nfs  defaults  0  0
使用tomcat部署geoserver:
修改tomcat/conf/server.xml port = 28080
图2 图示2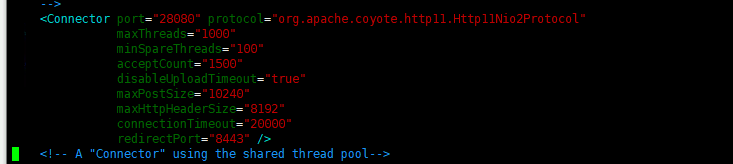
开启自动解压功能
图3 图示3
- 下载geoserver部署包
https://build.geoserver.org/geoserver/2.20.x/geoserver-2.20.x-2022-09-01-war.zip
unzip geoserver-2.20.x-2022-09-01-war.zip
- 设置nfs共享目录
修改geoserver/tomcat-9091/webapps/geoserver/WEB-INF/web.xml
图4 图示4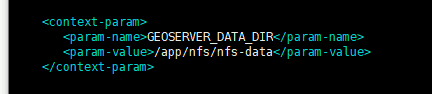
- 安装插件
下载地址:https://build.geoserver.org/geoserver/2.20.x/community-2022-09-01/
- 根据版本选择下载geoserver-2.20-SNAPSHOT-jms-cluster-plugin.zip
- 将解压后的所有.jar包复制到tomcat中webapps/geoserver/WEB-INF/lib目录下
- 重启tomcat,等待geoserver启动成功
- 在共享目录/app/nfs/nfs-data目录下生成cluster目录,如果没有配置web.xml里面的共享目录默认在webapps/geoserver/data目录下生成cluster目录
- 服务验证
- 安装NFS共享目录
父主题: CIM数据汇聚管理软件部署


