Configuring SSL for a Standard HTAP Instance
Secure Socket Layer (SSL) is an encryption-based Internet security protocol for establishing secure links between a server and a client. It provides privacy, authentication, and integrity to Internet communications. SSL:
- Authenticates users and servers, ensuring that data is sent to correct clients and servers.
- Encrypts data to prevent data theft.
- Ensures data integrity during transmission.
By default, SSL is enabled for new HTAP instances. Enabling SSL increases the network connection response time and CPU usage, and you are advised to evaluate the impact on service performance before enabling SSL.
You can use a client to connect to your HTAP instance through a non-SSL or SSL connection.
- If SSL is enabled, you can connect to a database using an SSL connection, which is more secure.
- If SSL is disabled, you can connect to a database using a non-SSL connection.

Enabling or disabling SSL will reboot the instance immediately. During the reboot, the instance is unavailable. Rebooting an instance will clear its cache. To prevent traffic congestion during peak hours, you are advised to reboot it during off-peak hours.
Enabling SSL
- Log in to the TaurusDB console.
- On the Instances page, click the instance name.
- In the navigation pane, choose HTAP Analysis. Click the name of an HTAP instance to access the Basic Information page.
- In the DB Instance Information area, click
 next to SSL.
Figure 1 Enabling SSL
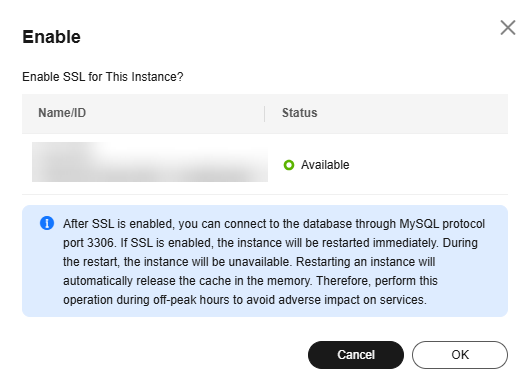
- In the displayed dialog box, click OK.
Figure 2 Confirmation dialog box

- Wait for a while and check that SSL has been enabled on the Basic Information page.
- After SSL is enabled, you can click
 to download a certificate.
Figure 3 Downloading an SSL certificate
- After SSL is enabled, you can connect to the HTAP instance over HTTPS. For details, see Connecting to the Instance with an SSL Certificate.
- After SSL is enabled, you can click
Disabling SSL
- Log in to the TaurusDB console.
- On the Instances page, click the instance name.
- In the navigation pane, choose HTAP Analysis. Click the name of an HTAP instance to access the Basic Information page.
- In the DB Instance Information area, click
 next to SSL.
Figure 4 Disabling SSL
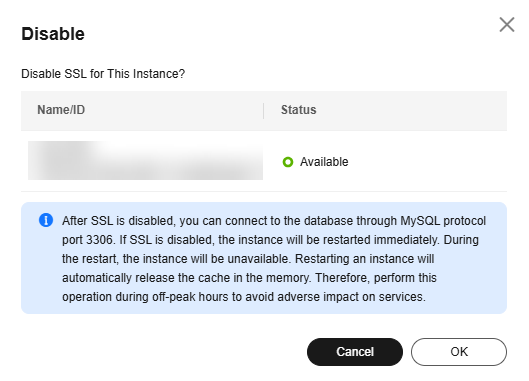
- In the displayed dialog box, click OK.
Figure 5 Confirmation dialog box

- Wait for a while and check that SSL has been disabled on the Basic Information page.
After SSL is disabled, you can connect to the HTAP instance using a non-SSL connection. For details, see Connecting to the Instance Without an SSL Certificate.
Feedback
Was this page helpful?
Provide feedbackThank you very much for your feedback. We will continue working to improve the documentation.See the reply and handling status in My Cloud VOC.
For any further questions, feel free to contact us through the chatbot.
Chatbot


