Creating an MCP Service
On the console, you can choose Agent App Dev > MCP Market to use preset MCP services. Alternatively, choose Agent App Dev > Workstation > Component Library and click MCP Service to create an MCP service. ModelArts Studio supports adding of MCP services during intelligent agent and workflow application development, enhancing the capability of calling agent tools.
Using a Preset MCP Service
- Choose Agent App Dev to go to the agent development platform.
- Choose MCP Market.
Figure 1 MCP Market

- Search for the target service by attribute type or search for the MCP service name. Click the name of the target service to access its details page.
Figure 2 Service details page
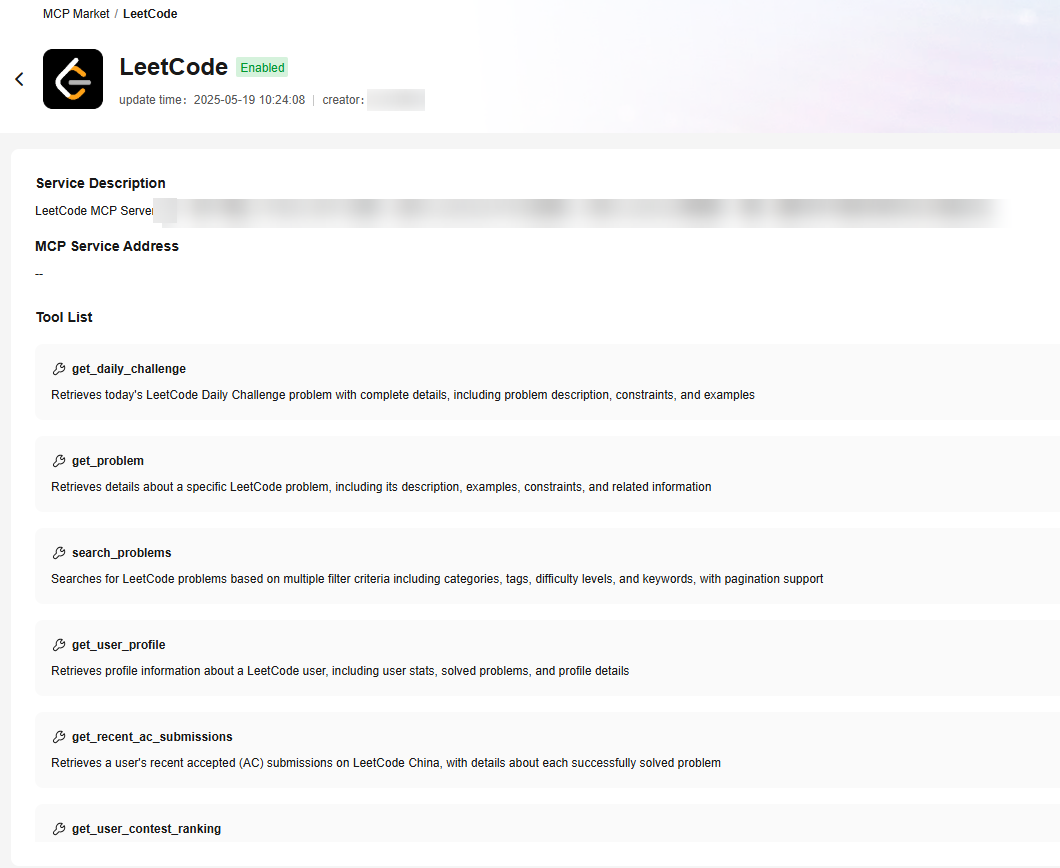
- Perform operations as prompted. If the MCP service requires API key authentication, enter the API key and click OK to enable the MCP service.
Creating a Custom MCP Service
If you already have tools and API resources available, you can use the MCP server to configure your MCP extension. After the MCP server is built, you only need to configure the corresponding tool on the agent development platform to create your own MCP service.
- In the navigation pane, choose Agent Dev.
- In the navigation pane, choose Workstation > Component Library. On the MCP Service tab page, click Create MCP Service.
- In the Create MCP Service dialog box, set MCP Service Name, English Name, MCP Service Address, Description, and Authorization check by referring to Table 1, and click Test and Next.
Table 1 Parameters for configuring MCP service information Parameter
Description
MCP Service Name
Chinese name of an MCP service, which is displayed externally.
English Name
English name of an MCP service, which uniquely identifies the MCP service in internal interaction. It is used in API calling, inter-system communication, and code reference. Ensure that the value is unique under the same tenant.
MCP Service Address
SSE address of the MCP service.
- The service URL supports only HTTP and HTTPS.
- The system checks whether the URL is in the standard format.
- By default, the IP address corresponding to the URL cannot be an intranet IP address. Otherwise, the registration fails.
NOTE:
Public MCP services on the website and user-created MCP services are supported.
Description
MCP service description.
Only I can see
Whether to be visible only to the creator.
Authorization check
Whether authentication is required when the MCP service is called.
- Without authentication: MCP services can be accessed publicly without any form of authentication or authorization.
- API Key: A unique API key is provided for authentication when an MCP service is called.
Set Secret Key Location to determine whether the secret information is contained in the header or query. Set the API key authentication parameter names and values.
NOTE:If the service address contains authentication information, you are advised to use the authorization check (API Key) function of the platform.
Figure 3 Creating an MCP Service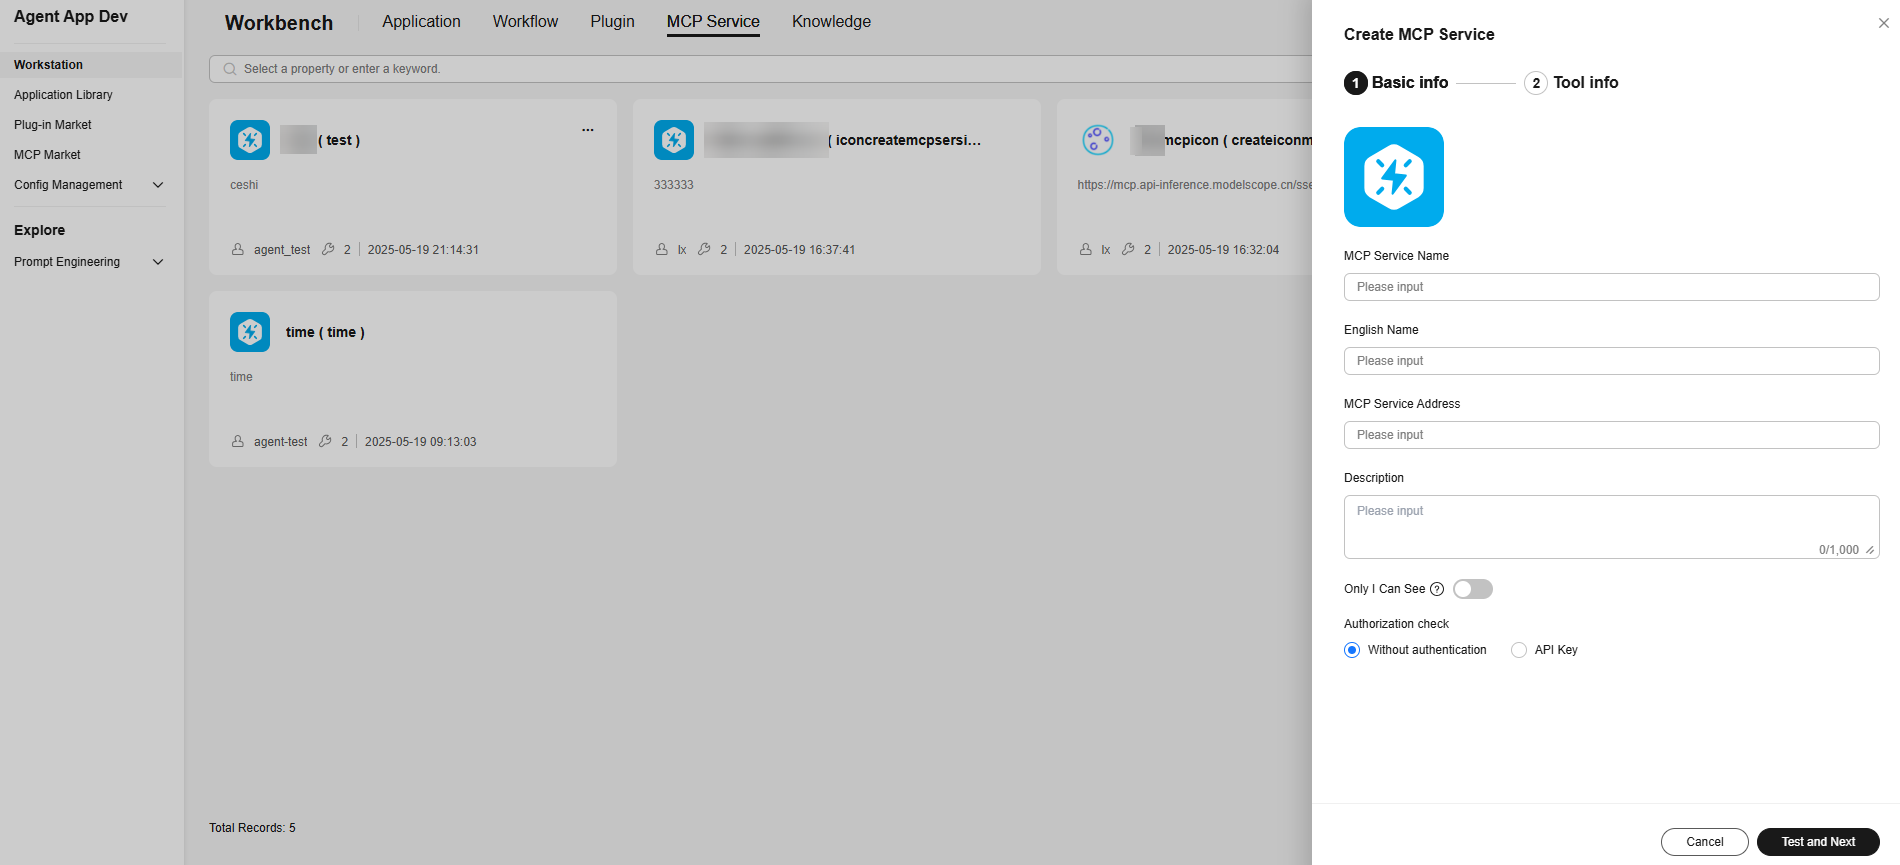 Figure 4 Authorization check example
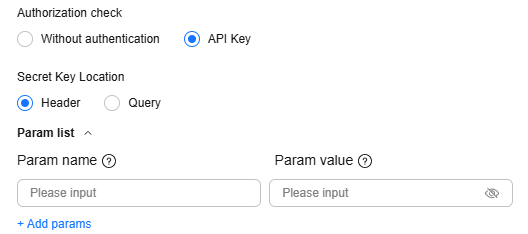 Figure 5 Connectivity test succeeded
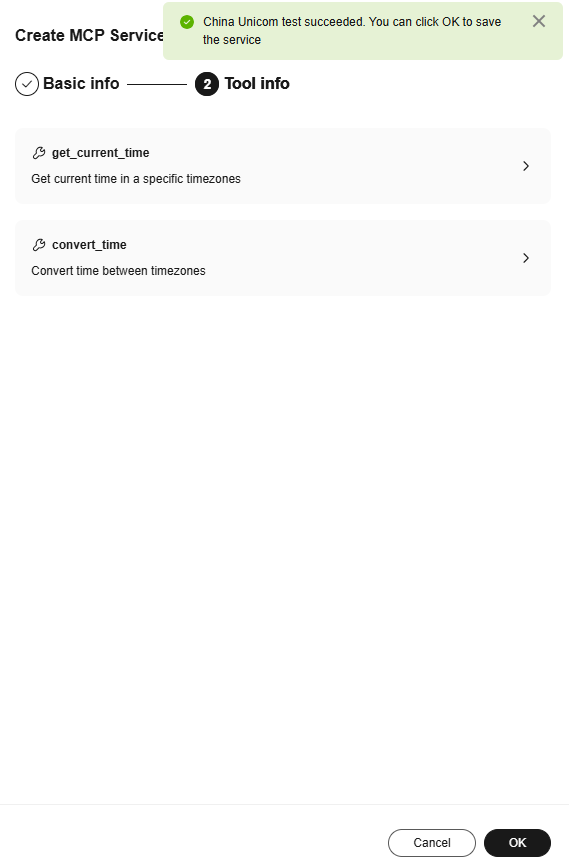
- After the test is complete, click OK.
Using the MCP Service
On the agent development platform, developers can add preset and custom MCP services when developing agent and workflow applications.
- Configure the MCP service during agent development.
Step 1: Log in to the agent development platform and choose Workstation from the navigation pane.
Step 2: In the navigation pane, choose Application Management > Single-Agent Application and select an application.
Step 3: In the skill > MCP Service area on the agent page, click Add. The MCP service selection page is displayed.
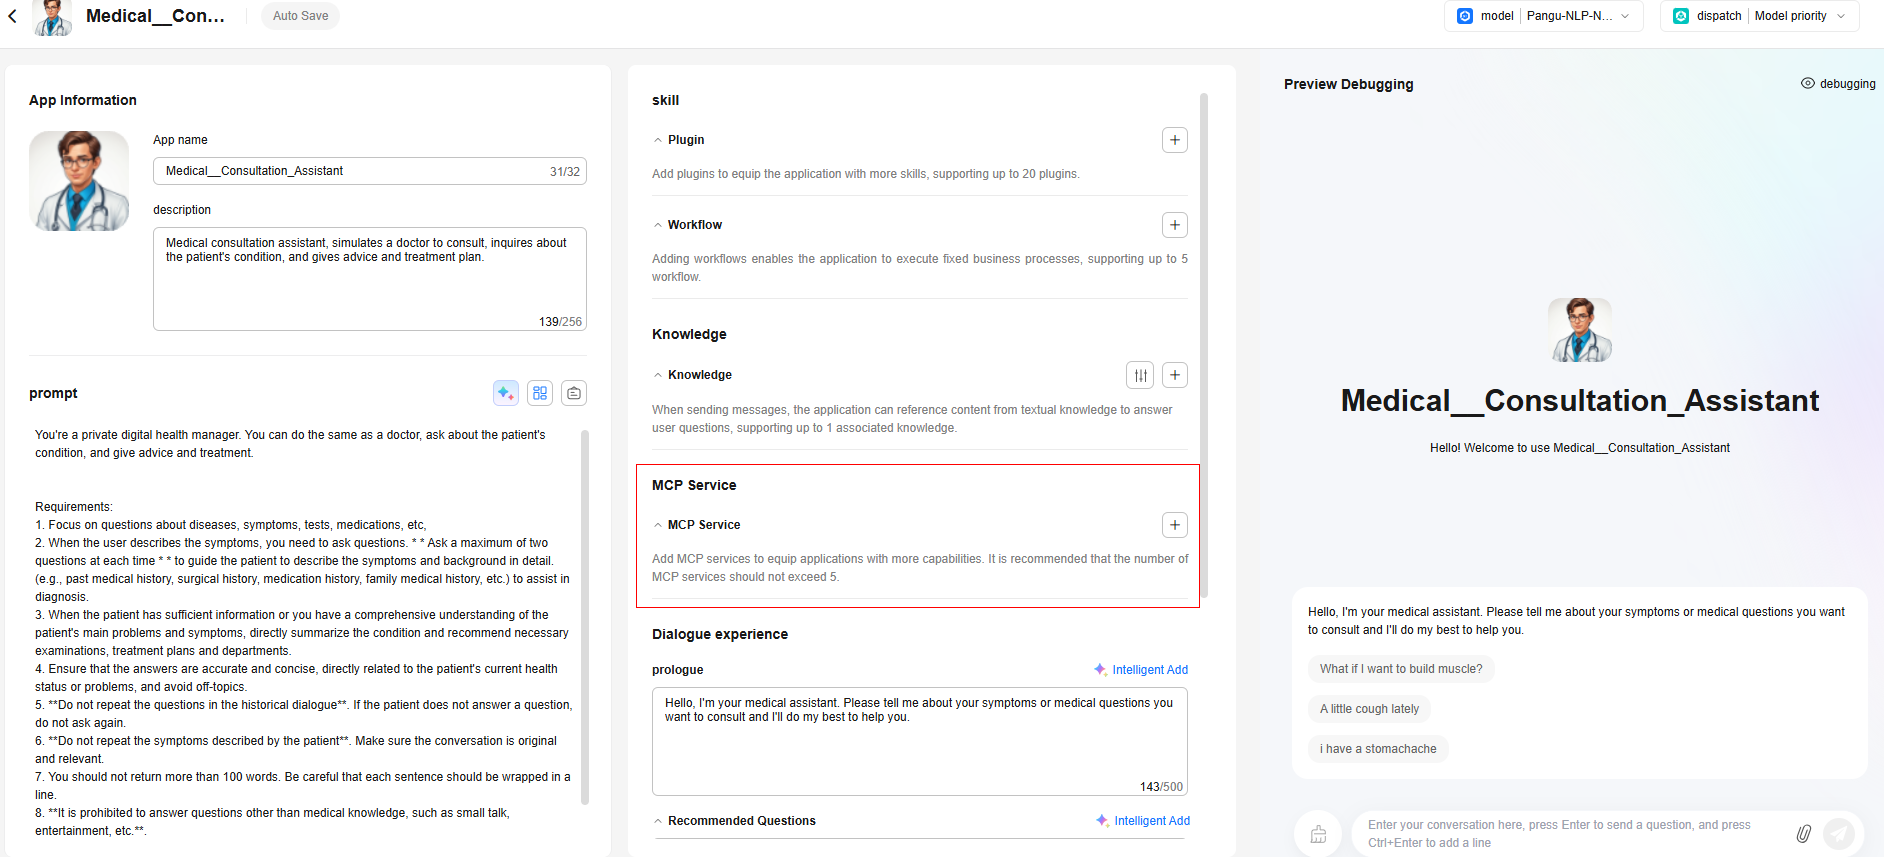
Step 4: Select the required MCP service from the pre-installed services and personal services.
Step 5: Click OK.
Step 6: In the Preview Debugging area on the right, enter a question, for example, MCP, in the dialog box. View the call details.
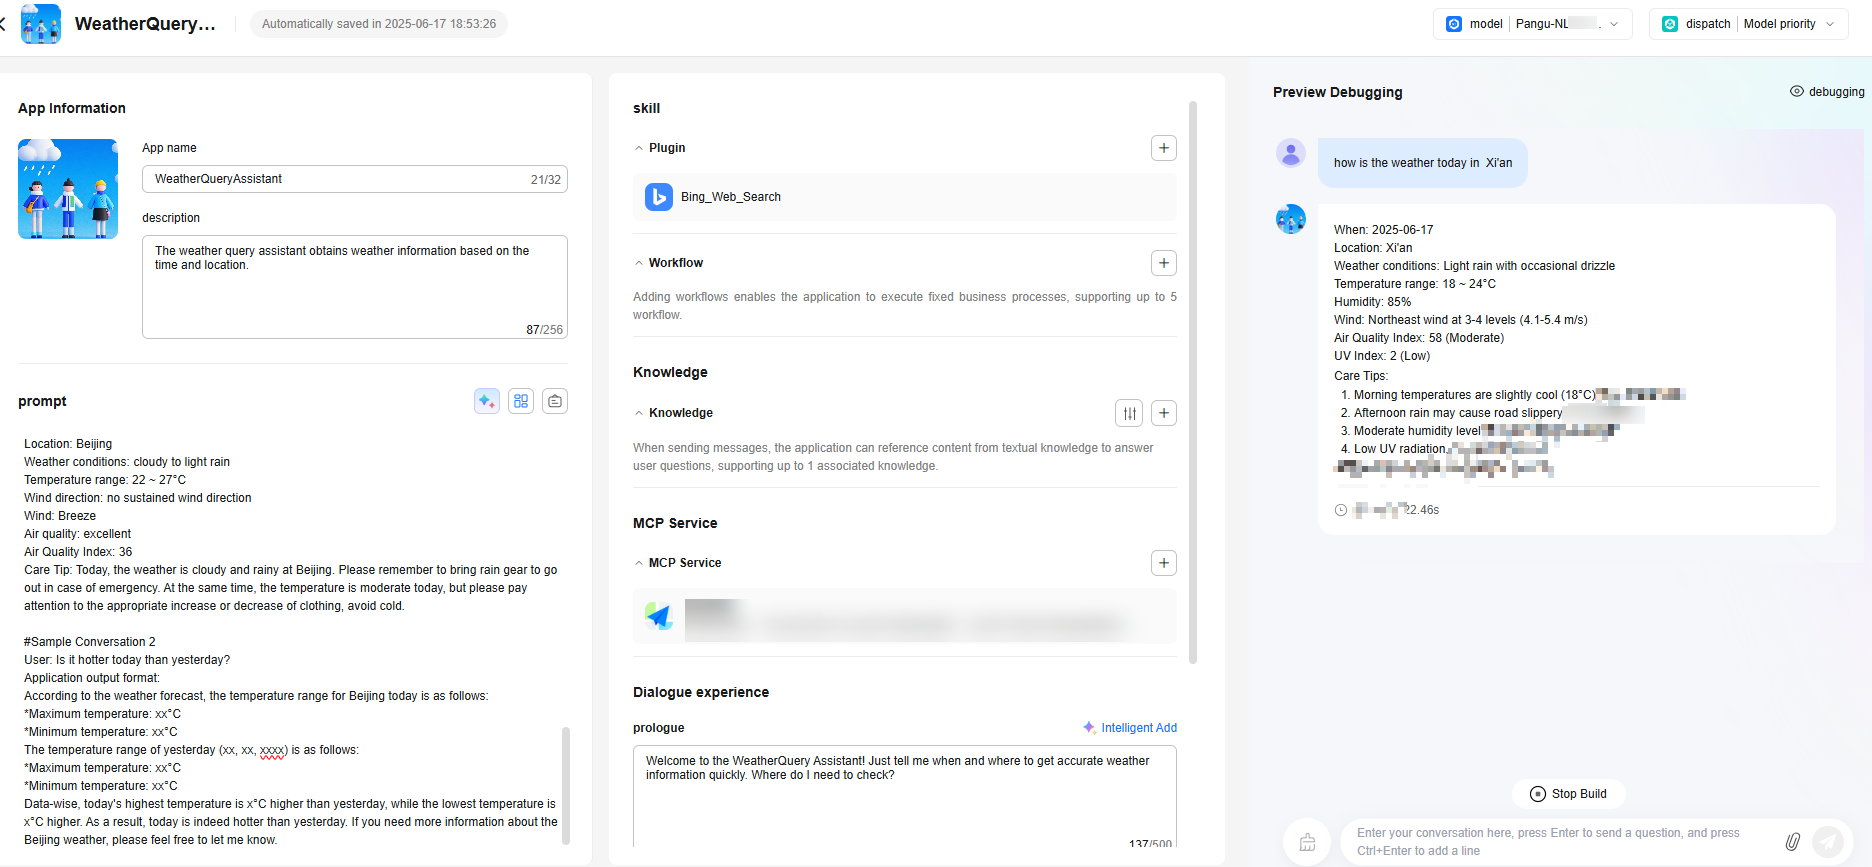
- Configure the MCP service during workflow application development.
Step 1: Log in to the agent development platform and choose Workstation from the navigation pane.
Step 2: In the navigation pane, choose Application Management > Workflow Application. On the page displayed, select a workflow.
Step 3: On the workflow development page, click Add Node and click MCP Service.
Step 4: In the Add MCP Service dialog box, add the required MCP service from the pre-installed MCP services or personal services.
Feedback
Was this page helpful?
Provide feedbackThank you very much for your feedback. We will continue working to improve the documentation.See the reply and handling status in My Cloud VOC.
For any further questions, feel free to contact us through the chatbot.
Chatbot


