Plugin Node
The Plugin node is the core component for calling third-party capabilities in a workflow. As an important carrier for function extension, this node can invoke a plug-in to execute specific function tasks. Each plug-in is essentially a set of API tools that are encapsulated in a standardized manner. Plug-ins provide plug-and-play modular services, expand the capability boundary of workflows, and complete more complex tasks.
There are preset plug-ins and personal plug-ins.
- Preset plug-ins: The code interpreter plug-in is preset on the platform to execute the Input code and obtain the execution result. Developers can directly add plug-ins to workflows or applications to enrich their capabilities.
- Personal plug-ins: The platform allows you to create custom plug-ins. APIs can be quickly created as plug-ins through configuration for workflows to use.
The Plugin node is an optional node. If it does not need to be configured, skip this section.
Plugin Node Configuration Example
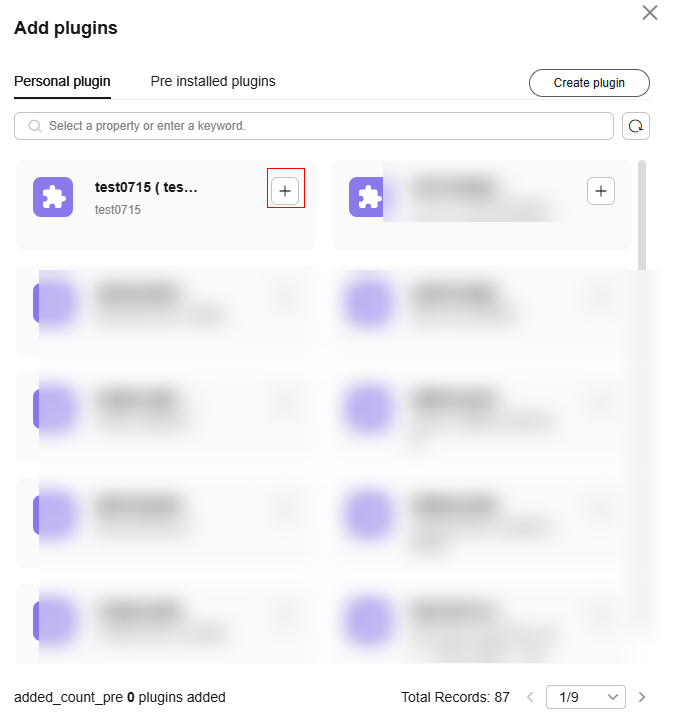
- Click Add Node in the lower part of the canvas, and drag the Plugin node from the node drawer to the canvas. On the Personal plugin or Pre installed plugins tab page, click
 to add a plug-in to the canvas.
- The Pre installed plugins tab page lists preset plug-ins of the platform.
- Personal plug-ins are user-defined. For details about how to create a plug-in, see Creating a Plug-in.
- Connect the Plugin node to other nodes.
- Click the added Plugin node in the canvas and configure the node by referring to Table 1.
Table 1 Plugin node configuration Configuration Type
Parameter Name
Description
Parameter configuration
Input params
- Param name: imported from the plug-in metadata. You do not need to manually add a parameter.
- Type and Value: Type can be set to ref and literal.
- ref: You can select the output variable value of a previous node that has been included in the workflow. This option applies to the scenario where plug-in input parameters need to be obtained from the output of a previous node.
- literal: You can customize the value. This type applies to the scenario where the plug-in input parameter value is fixed.
Output params
All output parameter information is automatically imported from the plugin metadata. You do not need to manually modify the information.
Exception Configuration
-
The configuration of the Exception ignored switch is used as the default configuration of the Plugin node. When the plug-in execution is abnormal, the default configuration can be returned to prevent the entire workflow from failing to run.
- When this function is disabled, exceptions are not ignored.
- When this function is enabled, set Default output. The parameters in Default output must be the same as those in Output params of the plug-in. When the Plugin node is running properly, the configuration does not affect subsequent nodes. If an exception occurs when a workflow runs to the Plugin node, the workflow does not stop and continues to run subsequent nodes. If a subsequent node references the output content of the Plugin node, the default output content is used.
Figure 1 Plugin node configuration example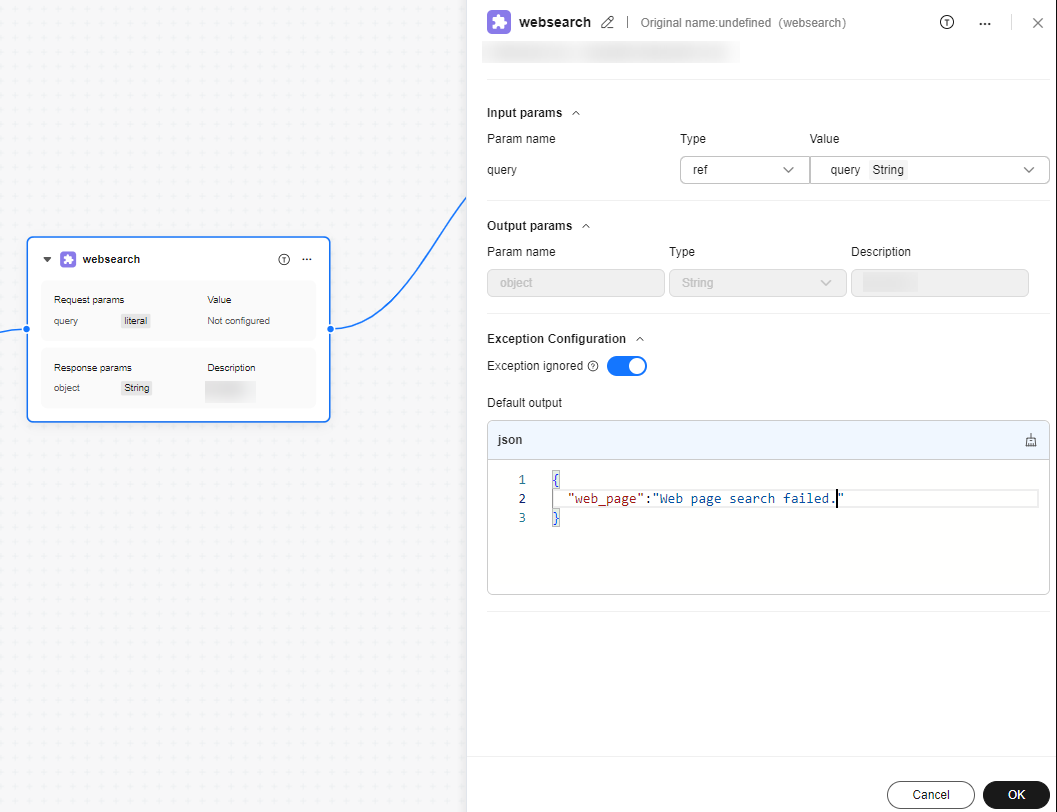
- After completing the configuration, click OK.
Example: Creating a Plug-in Using a Deployed Model
- Deploy a service, for example, deploy a DeepSeek model.
Obtain the URI. For details, see Obtaining the URI.
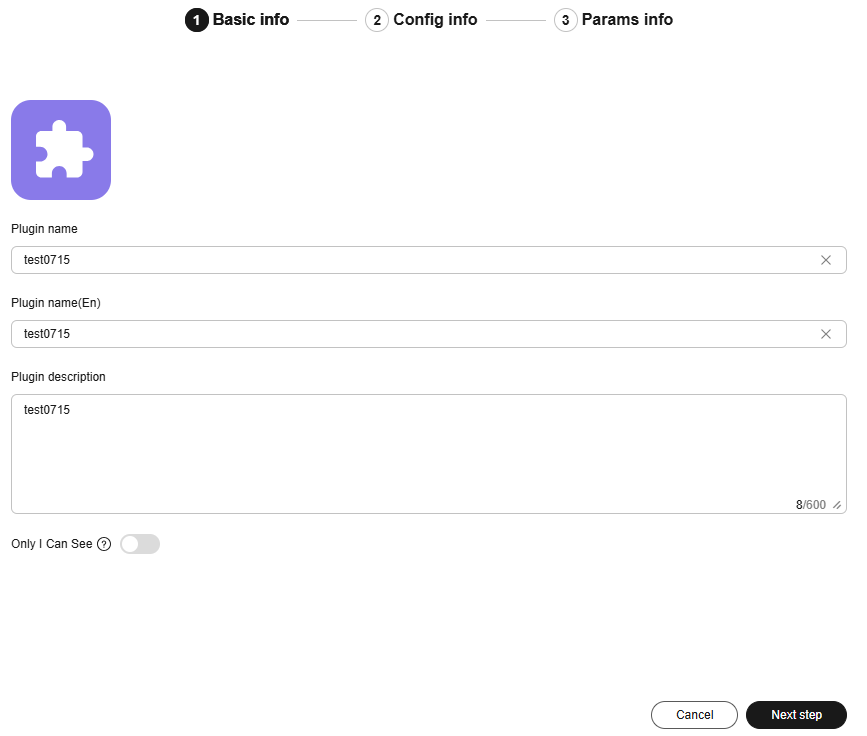
- Create a plugin on the platform and enter basic information. For details, see Creating a Plug-in.
Figure 2 Basic information
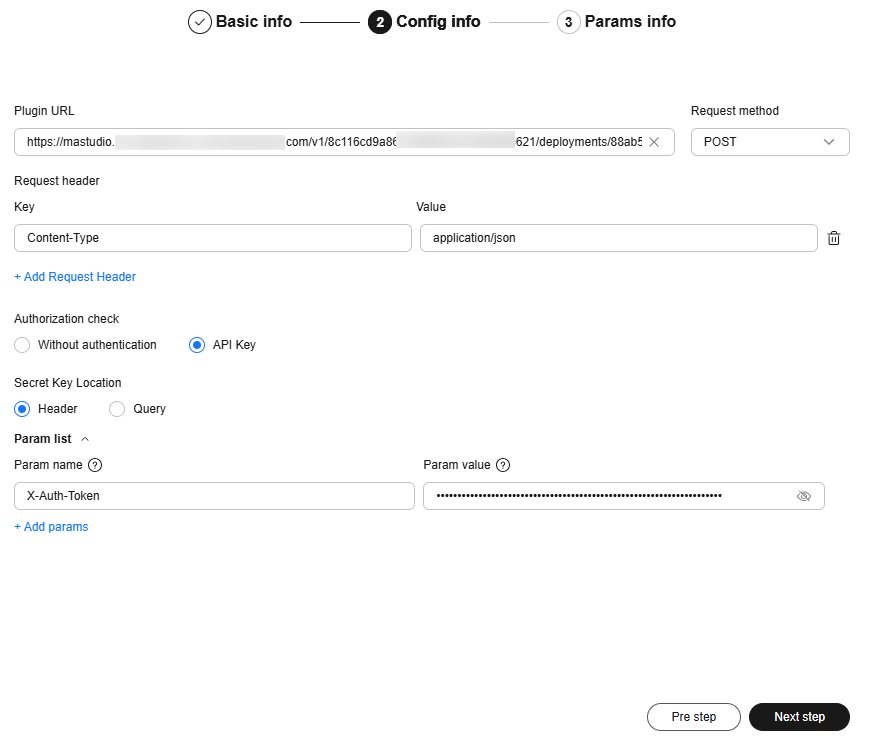
- Configure the Plugin URL and other request information.
Figure 3 Configuration
- Set parameters based on the API information and click Plugin Commissioning.
After confirming the information, click OK to create the plugin.
Figure 4 Parameters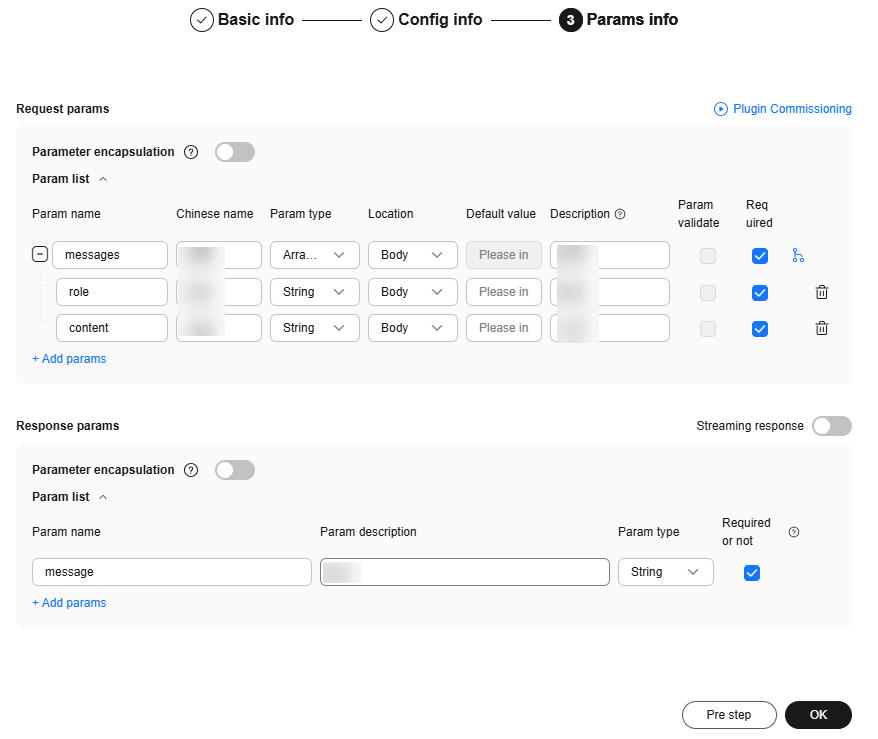
- Use this plug-in in the workflow.
Drag the Plugin node on the left to the canvas. On the Personal plugin tab page, click
 to add a plug-in to the canvas.Figure 5 Using the plug-in
Feedback
Was this page helpful?
Provide feedbackThank you very much for your feedback. We will continue working to improve the documentation.See the reply and handling status in My Cloud VOC.
For any further questions, feel free to contact us through the chatbot.
Chatbot


