SMS Sending Frequency
You can set limits and whitelist to prevent failure caused by sending multiple SMSs to the same number, ensuring SMS sending success rate and security.
Notes
- This function is in the open beta test (OBT). Submit a service ticket and attach your username for trial.
- This function is disabled by default. The frequency of sending SMSs to the same recipient number under the same application is not limited. With this function enabled, the system will limit the frequency of SMS sending to each recipient number under the same application.
Procedure
- Log in to the Message & SMS console. In the navigation pane, choose General Management > Settings.
- In the SMS sending frequency area, perform the following operations as required.

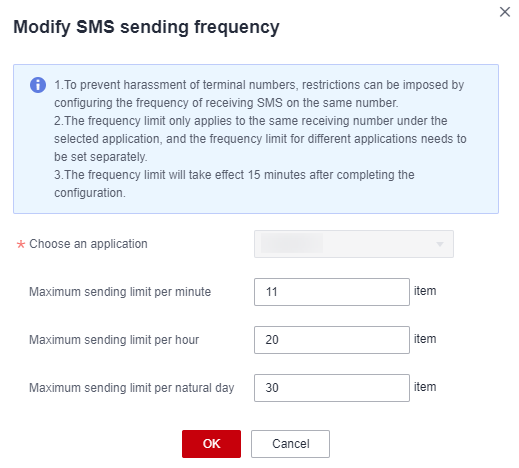
- Adding limits
- Click Add.
- In the displayed dialog box, configure parameters as required.

- You need to set limits for numbers under different applications separately.
- Max. limit values: 999 per minute, hour, or calendar day (GMT+08:00).
- The limits take effect 15 minutes after the configuration.

- Click OK.
- Modifying the limits
- Deleting limits
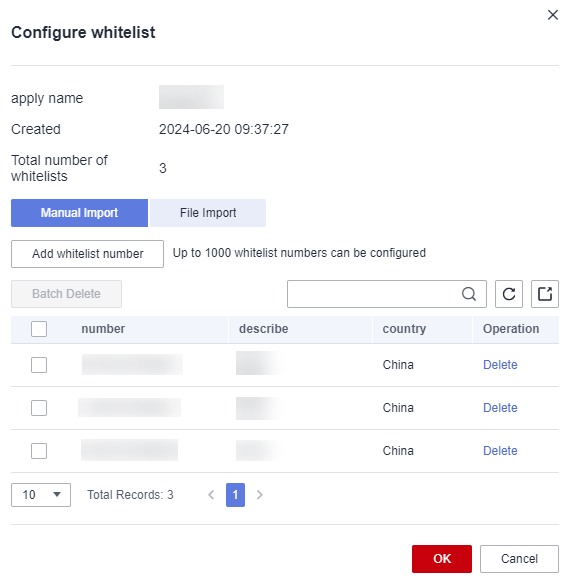
- Configuring whitelist
The SMS sending frequency limits will not apply to numbers in the whitelist. You can add up to 1,000 numbers to the whitelist.

- Click Whitelist in the operation column of the target policy.
- In the displayed dialog box, configure as required.
Two modes are available.
- Manual import
Select Manual import, click the button for adding whitelist numbers, and enter a complete number starting with a plus sign (+) and combining with an area code. Click OK.
- File import
Select File import and click Download Template. Enter complete numbers starting with plus signs (+) and combining with area codes in the template. Click the button for importing whitelist numbers. After the data is imported, click OK.
- Manual import
- Adding limits
Feedback
Was this page helpful?
Provide feedbackThank you very much for your feedback. We will continue working to improve the documentation.See the reply and handling status in My Cloud VOC.
For any further questions, feel free to contact us through the chatbot.
Chatbot


