
Logging In to a Linux FlexusL Instance Using an SSH Key Pair
Scenarios
This section describes how to remotely log in to a Linux instance using an SSH key pair in Windows and Linux.
Prerequisites
- You have created or imported a key pair. For details, see Creating a Key Pair and Importing a Private Key.
- You have bound the key pair to the instance to be logged in to. For details, see Binding a Key Pair to an ECS.
In the cloud server list on the DEW console, use the server name or ID to search for the target instance. On the FlexusL console, click the target instance. On the Cloud Servers page, you can view the cloud server name and ID.
Figure 1 Viewing the server name and ID of a FlexusL instance Figure 2 Binding a key pair to a FlexusL instance
- Port 22 has been allowed in the inbound direction of the security group that the cloud server belongs to. For details, see Configuring Security Group Rules for a FlexusL Instance.
- The network connection between the login tool (PuTTY) and the target cloud server is normal. For example, the default port 22 is not blocked by the firewall.
Logging In to the Linux Instance from a Local Windows Server
You have two methods to log in to a Linux instance from a local Windows server.
Method 1: Use PuTTY to log in to the instance.
- Check whether the private key file has been converted to .ppk format.
- Visit the following website and download PuTTY and PuTTYgen:
https://www.chiark.greenend.org.uk/~sgtatham/putty/latest.html

PuTTYgen is a private key generator, which is used to create a key pair that consists of a public key and a private key for PuTTY.
- Run PuTTYgen.
- In the Actions pane, click Load and import the private key file that you stored during instance creation.
Ensure that the format of All files (*.*) is selected.
Figure 3 Importing the private key file
- In the Actions area, click Save private key.
- Save the converted private key, for example, kp-123.ppk, in a local directory.
- Double-click PUTTY.EXE. The PuTTY Configuration page is displayed.
- Click Session and enter the elastic IP address bound to the cloud server under Host Name (or IP address). Figure 4 Configuration

- Choose Connection > Data. Enter the Linux cloud server username in Auto-login username. Figure 5 Entering the username

- Choose Connection > SSH > Auth > Credentials. In the configuration item Private key file for authentication, click Browse and select the private key converted in step 6. Figure 6 Importing the private key file

- Click Open.
Log in to the cloud server.
Method 2: Use Xshell to log in to the cloud server.
- Start the Xshell tool.
- Run the following command to remotely connect to the cloud server using SSH:
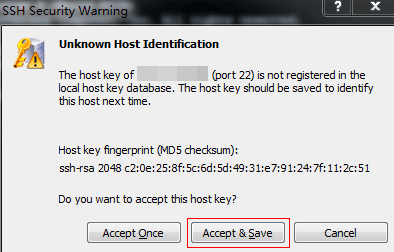
- (Optional) During the first connection, if the system displays the SSH Security Warning dialog box, click Accept & Save. Figure 7 SSH security warning
- Select Public Key and click Browse beside the user key text box.
- In the user key dialog box, click Import.
- Select the locally stored key file and click Open.
- Click OK to log in to the cloud server.
Logging In to the Linux Instance from a Local Linux Server
- On the Linux CLI, run the following command to change operation permissions:
In the preceding command, path specifies the path where the private key file is saved.
- Run the following command to log in to the cloud server:
ssh -i /path/kp-123.pem Default username@EIP
For example, if the default username is root and the EIP is 123.123.123.123, run the following command:
ssh -i /path/kp-123.pem root@123.123.123.123
- In the preceding command, path specifies the path where the private key file is saved.
- The EIP is the one bound to the cloud server.
Feedback
Was this page helpful?
Provide feedbackThank you very much for your feedback. We will continue working to improve the documentation.See the reply and handling status in My Cloud VOC.
For any further questions, feel free to contact us through the chatbot.
Chatbot


