
Using Deregistration Delay of a Dedicated Load Balancer to Ensure Smooth Service Termination
Scenarios
When a backend server is detected as unhealthy or gets removed, connections established with the backend server are not interrupted immediately. Client requests keep going to this server, which can lead to service termination failures or request issues.
To address this issue, you can use the deregistration delay feature of a dedicated load balancer. After deregistration delay is enabled, if a backend server is removed or the health check fails, ELB continues to route in-flight requests to this server until the deregistration delay timeout expires.
Preparations
- Create a dedicated load balancer.
- Create two ECSs in the same VPC as the load balancer.
This practice uses CentOS ECSs as an example. An ECS (ECS_client) acts as the client to send requests, and it must support persistent connections. The other ECS (ECS_server) serves as the backend server for deploying backend applications.
Step 1: Create a Backend Server Group and Enable Deregistration Delay
In this practice, enable Deregistration Delay and set Deregistration Delay Timeout (s) to 30 seconds.
- Go to the backend server group list page.
- Click Create Backend Server Group in the upper right corner.
- Configure the parameters based on Table 1. Retain the default values for other parameters.
Table 1 Parameters required for configuring a backend server group Parameter
Example Value
Description
Backend Server Group Name
server_group
Specifies the name of the backend server group.
Type
Dedicated
Specifies the type of the load balancer that can use the backend server group.
Load Balancer
Associate existing
Specifies whether to associate a load balancer now.
Click Associate existing and select the load balancer you have created.
Backend Protocol
TCP
Specifies the protocol that backend servers in the backend server group use to receive requests from the listeners.
Select TCP.
Load Balancing Algorithm
Weighted round robin
Select Weighted round robin.
Deregistration Delay
Enable it.
This parameter is enabled by default if the backend protocol is TCP, UDP, or QUIC.
If a backend server is removed or the health check fails, ELB stops routing new requests but continues to route in-flight requests to this server until the deregistration delay timeout expires.
Deregistration Delay Timeout (s)
30
ELB continues to route in-flight requests to the backend server until the deregistration delay timeout expires.
In this practice, set it to 30 seconds.
- Click Next to add backend servers and configure health check.
- Click Add Cloud Server, select ECS_server, and retain the default values for other parameters.
- Enable health check and retain the default values for other health check parameters.
- Click Next.
- Confirm the configurations and click Create Now.
Step 2: Add a TCP Listener and Associate It with the Backend Server Group
This practice uses a TCP listener as an example to distribute traffic.
- Go to the load balancer list page.
- Locate the target load balancer and click Add Listener in the Operation column.
- On the Add Listener page, set Protocol to TCP and Port to 80, and retain the default values for other parameters.
- Click Next: Configure Request Routing Policy and configure the backend server group.
Click Use Existing and select the backend server group created in Step 1: Create a Backend Server Group and Enable Deregistration Delay.
- Click Next: Confirm, confirm the configurations, and submit your request.
Step 3: Deploy the Application on the Backend Server
- Remotely log in to ECS_server.
Multiple methods are available for logging in to an ECS. For details, see Logging In to an ECS.
- Create the Test directory on the backend server.
mkdir Test
- Create the server.py file in the Test directory and deploy the service for testing deregistration delay in the file to print the connection status between the server and client per second.
- Create the server.py file.
python server.py
- Press i to enter editing mode.
- Create the server.py file.
- Press Esc and enter :wq to save the server.py file.
- Run the server.py file.
python server.py
- Wait until the command output shown in Figure 1 is displayed, which indicates the backend service is successfully deployed.

Step 4: Deploy the Application on the Client Server
- Remotely log in to ECS_client.
- Create the Test_client directory on the client server.
mkdir Test_client
- Create the python_client.py file in the Test_client directory and deploy the application service in the file to print the connection status between the client and server every second.
- Create the python_client.py file.
vi python_client.py
- Press i to enter editing mode.
- Create the python_client.py file.
- Press Esc and enter :wq to save the client.py file.
- Run the client.py file.
python client.py
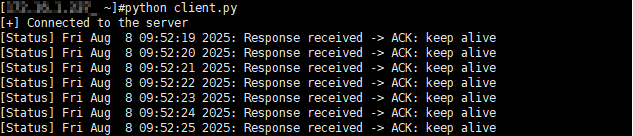
- Wait until the command output shown in Figure 2 is displayed, which indicates the backend service is deployed successfully.
- Check whether ECS_server receives the client request and prints the connection status with the client as shown in Figure 3.

Step 5: Remove the Backend Server and Record the Removal Time
In this practice, we remove a backend server to check how deregistration delay works.
- Go to the backend server group list page.
- On the backend server group list page, click the name of the target backend server group.
- Switch to the Backend Servers tab and click Cloud Servers.
- Select the backend servers you want to remove and click Remove above the backend server list.
- In the displayed dialog box, click OK.
- Record the time when the backend server is removed. The client prints the time 09:52:33.
Step 6: Verify the Deregistration Delay Function
- Observe the connection status printed by the client and server before deregistration delay timeout expires.
- Observe the connection status printed by the client and server after deregistration delay timeout (30s) expires.


Feedback
Was this page helpful?
Provide feedbackThank you very much for your feedback. We will continue working to improve the documentation.See the reply and handling status in My Cloud VOC.
For any further questions, feel free to contact us through the chatbot.
Chatbot


