
Using QUIC to Accelerate Access to an Application
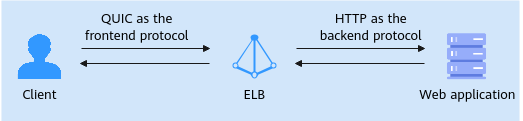
You can add a QUIC listener to forward requests. The Quick UDP Internet Connection (QUIC) is a UDP-based protocol at the transport layer. It improves congestion control and does not depend on kernel protocols.
QUIC features low latency and avoids head-of-line blocking. It makes video and page loading faster, improving network performance and data security.
QUIC Overview
QUIC is built on top of UDP. Unlike TCP, QUIC does not require a three-way handshake for connection establishment, and it also avoids head-of-line blocking. QUIC's stream multiplexing allows multiple independent streams in a single connection. This means that if one stream experiences a loss or delay, it does not block the progress of other streams. Compared with TCP, QUIC is more flexible.
QUIC and HTTP/3
- HTTP/3, based on QUIC, is the third major version of the Hypertext Transfer Protocol (HTTP). When a browser makes its first request to a server, the connection is typically established using either HTTP/1.1 or HTTP/2. The server then informs the browser about its support for QUIC. The browser will then attempt a QUIC connection and a TCP connection in parallel for the second request. If the QUIC connection is established faster, the browser will use QUIC over HTTP/3 to communicate with the server.
- Clients can use QUIC only over HTTP/3. If no HTTP/3 connection can be established, HTTP/1.1 or HTTP/2 will be used.
Preparations
- There is a dedicated load balancer with an EIP bound to it. If there is no such a load balancer, you can buy one and bind an IPv4 EIP to the load balancer.
- You have created two ECSs running CentOS in the same VPC as the load balancer. The first ECS (ECS_client) is used as the client to send HTTP requests, and the second ECS (ECS_server) is used as the backend server for deploying the web application.
- You have purchased a certificate or uploaded a third-party certificate to SSL Certificate Manager (SCM). You are advised to purchase a server certificate on Cloud Certificate & Manager (CCM). For details, see Purchasing an SSL Certificate.
- There is an HTTP backend server group with an ECS (ECS_server) added to it. The backend port in this practice is 442.
Step 1: Configure the Client to Support HTTP/3
For web applications, the client that supports QUIC connections must support HTTP/3. For more information, see HTTP/3 and QUIC Support.
- Remotely log in to ECS_client.
Multiple methods are available for logging in to an ECS. For details, see Logging In to an ECS.
- Install the basic dependencies.
- Install the epel-release package to enable the Extra Packages for Enterprise Linux (EPEL) repository and update the cache.
sudo yum install -y epel-release
sudo yum makecache
- Install the required software packages.
sudo yum install -y git perl-IPC-cmd autoconf automake libtool libpsl-devel
- Install the epel-release package to enable the Extra Packages for Enterprise Linux (EPEL) repository and update the cache.
- Build the curl tool that supports QUIC and HTTP/3.
Step 2: Deploy the Web Application on the Backend Server
- Remotely log in to the backend server ECS_server.
- Create the quic_testweb directory on the backend server.
mkdir quic_testweb
- Create an index.html file in the quic_testweb directory.
- Create an index.html file.
vi index.html
- Press i to enter the editing mode. The following shows an index.html script:
hello, this is quic!
- Create an index.html file.
- Press Esc to exit the editing mode. Then, enter :wq to save the index.html file.
Step 3: Add a QUIC Listener
- Go to the load balancer list page.
- Locate the target load balancer and click Add Listener in the Operation column.
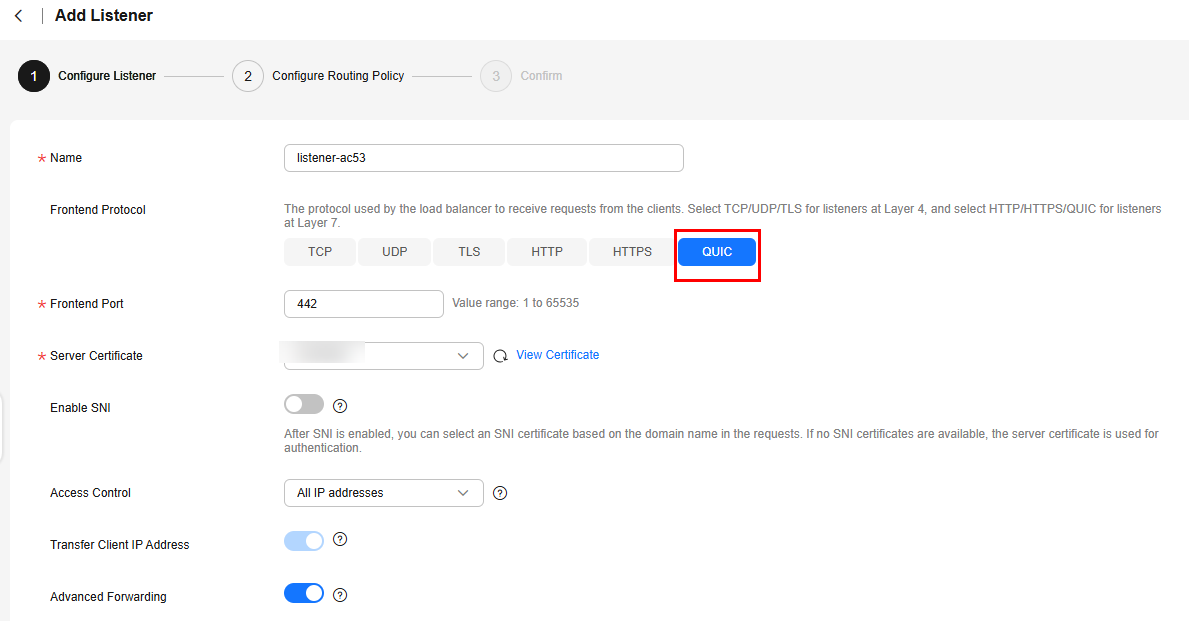
- On the Add Listener page, set the protocol to QUIC and port to 442.
Figure 2 Adding a QUIC listener
- Click Next: Configure Request Routing Policy and select Use existing for Backend Server Group. Select the HTTP backend server group you have created and click Next: Confirm.
- Confirm the configurations and click Submit.
Step 4: Verify QUIC Connections
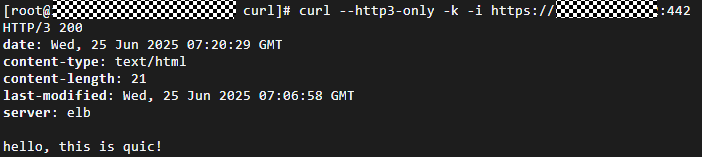
- Run the following command to access the EIP and listening port of the load balancer:
curl --http3-only -k -i https://<EIP>:<PORT>
- If the page shown in Figure 3 is displayed, the client and backend server communicate with each other using HTTP/3 through QUIC negotiation.
Feedback
Was this page helpful?
Provide feedbackThank you very much for your feedback. We will continue working to improve the documentation.See the reply and handling status in My Cloud VOC.
For any further questions, feel free to contact us through the chatbot.
Chatbot


