
Event Management
Events occur when indicators exceed their thresholds during system running. They can be manually created or automatically generated by the alarm monitoring module. Their severity ranges from P1 to P5 on HaydnCSF. P1 is the most severe level.
- P1: All core services of customers are adversely affected. For example, all systems break down, causing all core services to be unavailable.
- P2: Some core services of customers are adversely affected. For example, some key applications or functions do not work, causing multiple core services to be unavailable.
- P3: A single core service is adversely affected. For example, a single application or function does not work, causing a core service to be unavailable.
- P4: Common services are adversely affected, but alternative solutions are available. If faults cannot be rectified in time, the production process may be affected.
- P5: There are customer consultation or backend data query issues, but services are not affected.
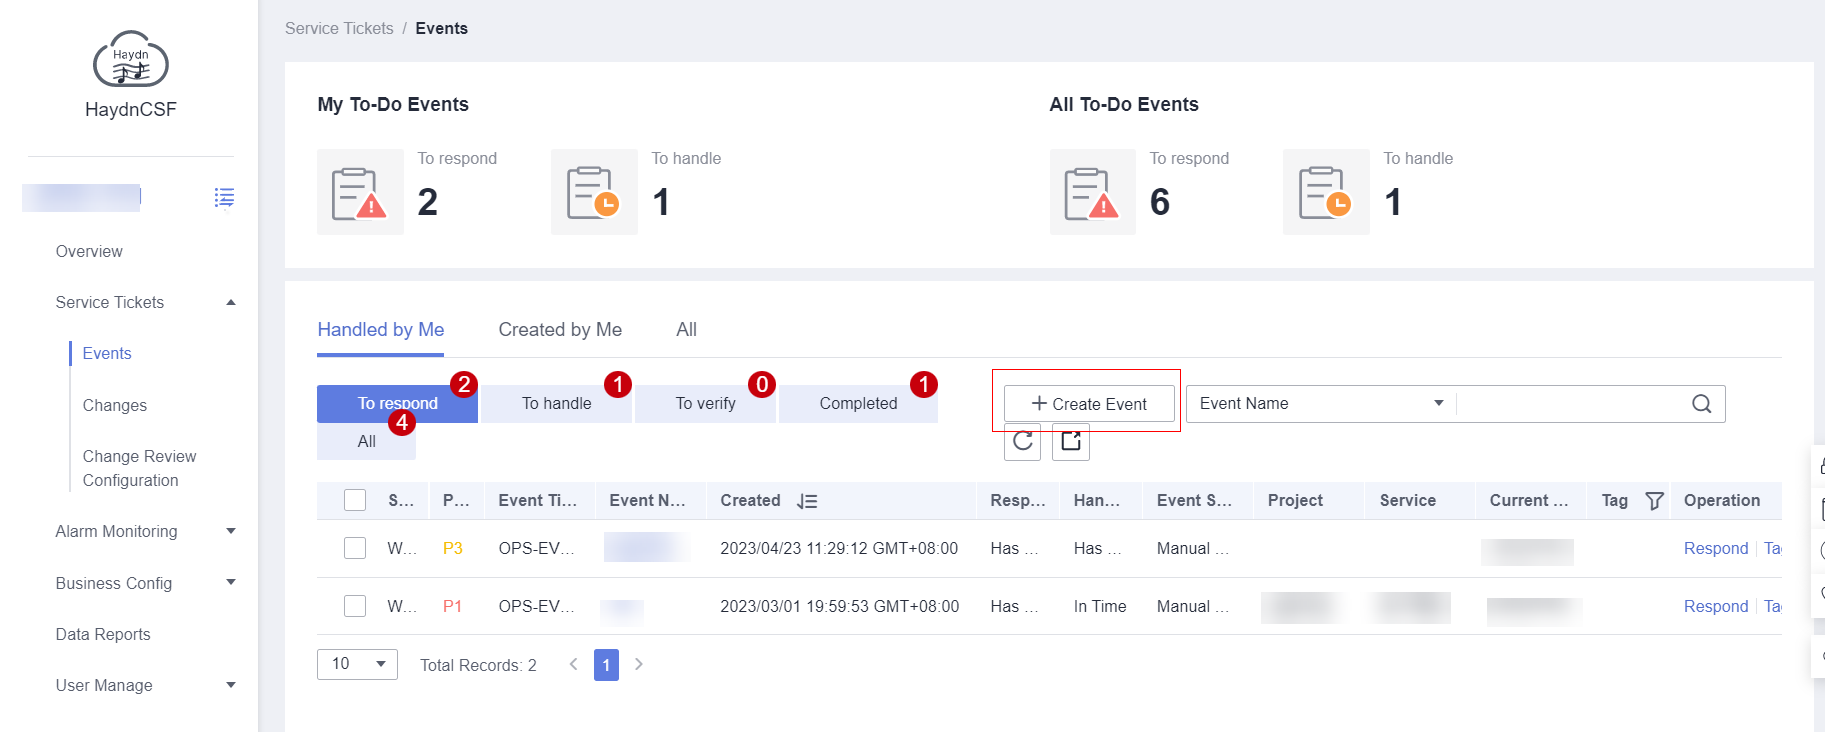
Creating an Event
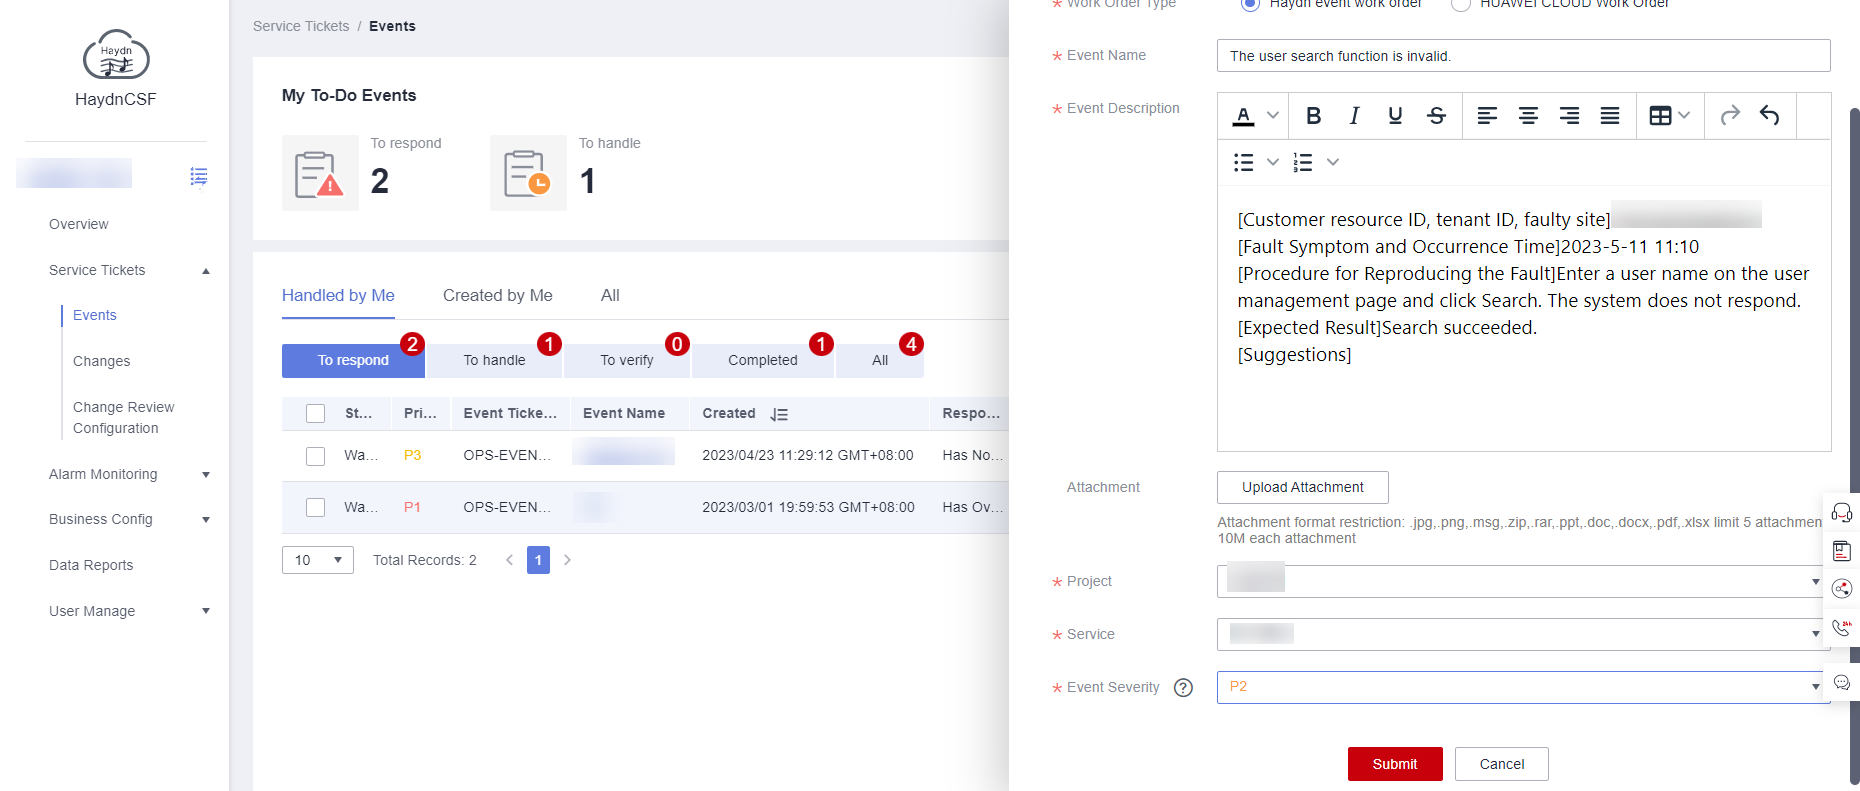
Access the desired O&M workspace and choose Service Tickets > Events. Click Create Event and configure parameters Event Name (summarize the event), Event Description (describe the event), Project, Service, and Event Severity.
Responding to an Event
The status of a new event is To respond, indicating that an O&M engineer needs to acquire the basic information about the event.
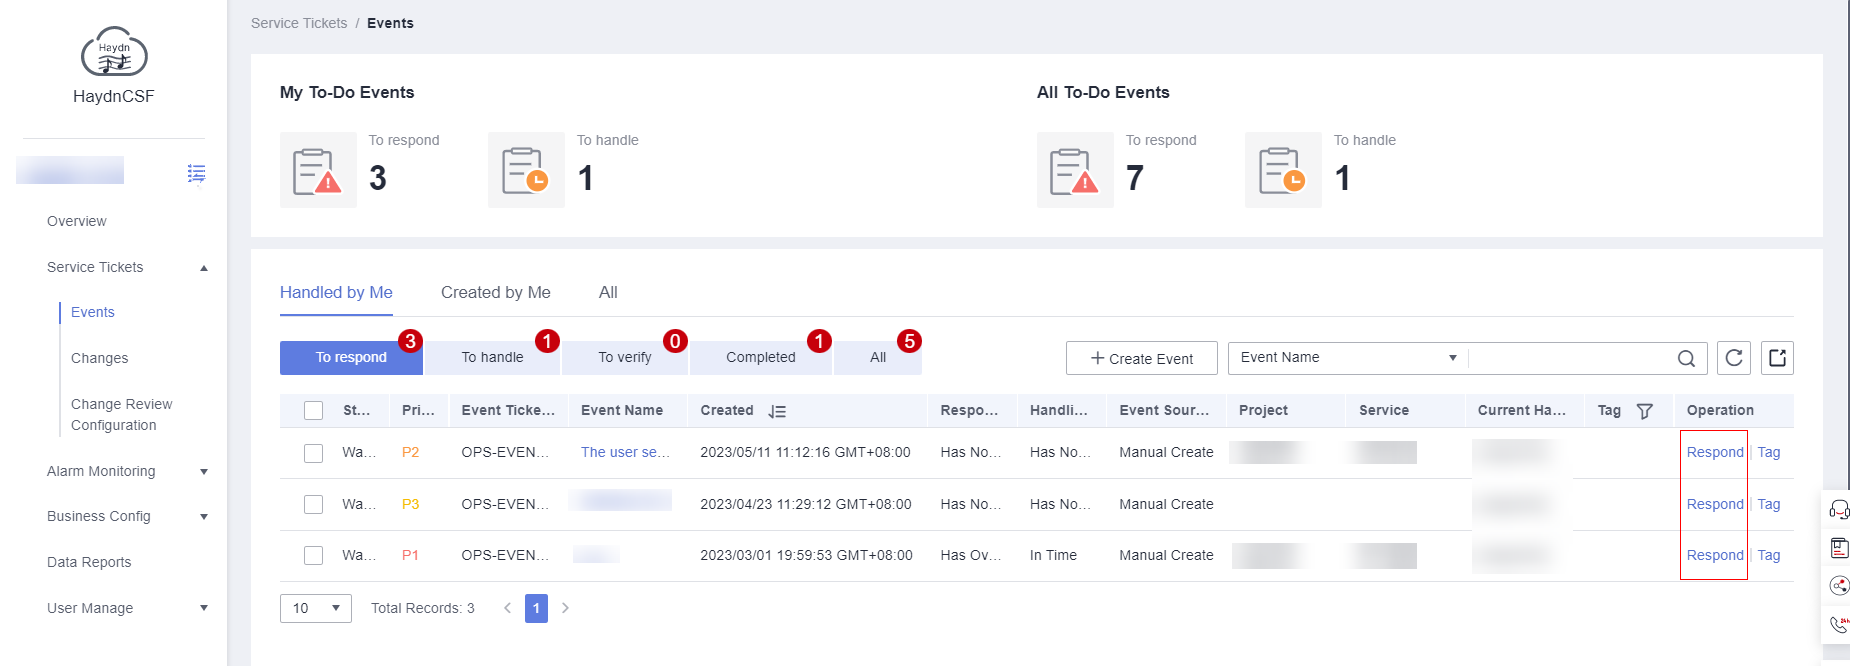

- If the O&M engineers in a user group associated to a service are not scheduled, all O&M engineers can respond to events of the service as the handlers.
- If the O&M engineers in a user group associated to a service have been scheduled, only the on-duty O&M engineer can respond to events of the service as the handler. For details about scheduling operations, see Scheduling a User Group.
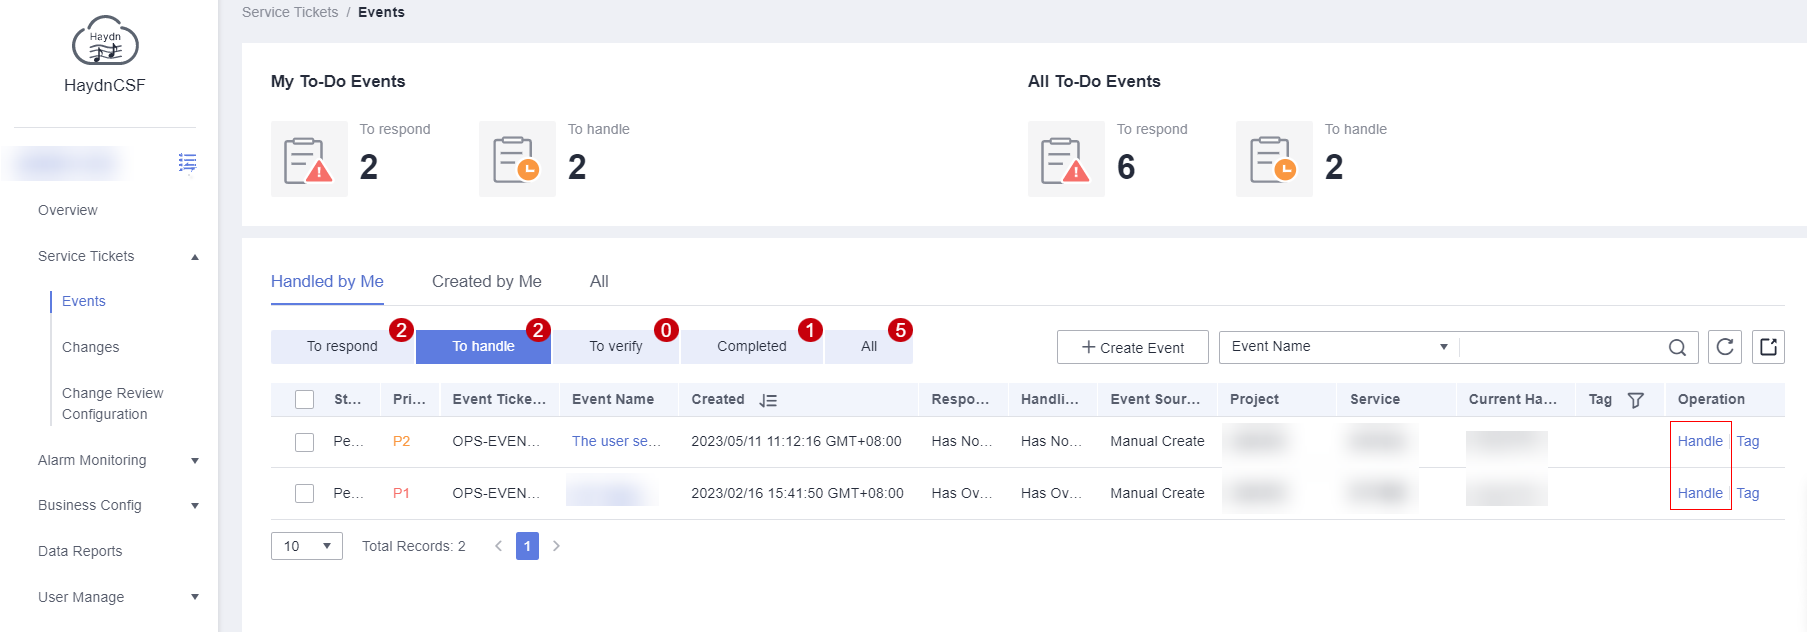
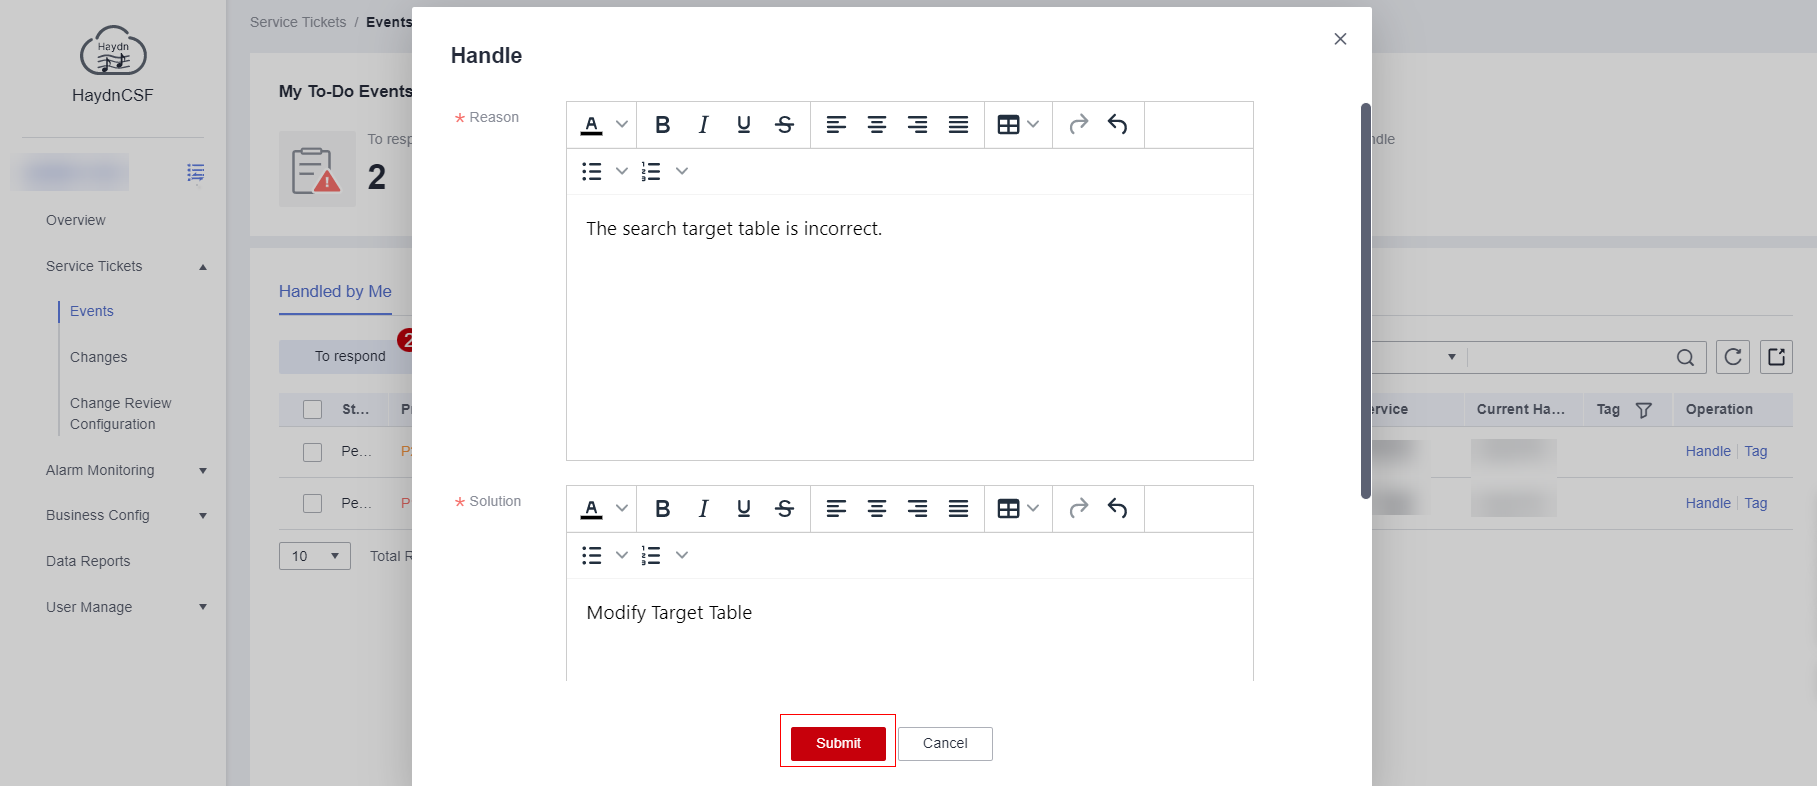
Handling an Event
The status of a responded event is To handle, indicating that the handler needs to handle the event.
- Locate the responded event and click Handle in the Operation column.
Figure 4 Handling an event
- Enter the event reason and solution and click Submit.
Figure 5 Submitting an event
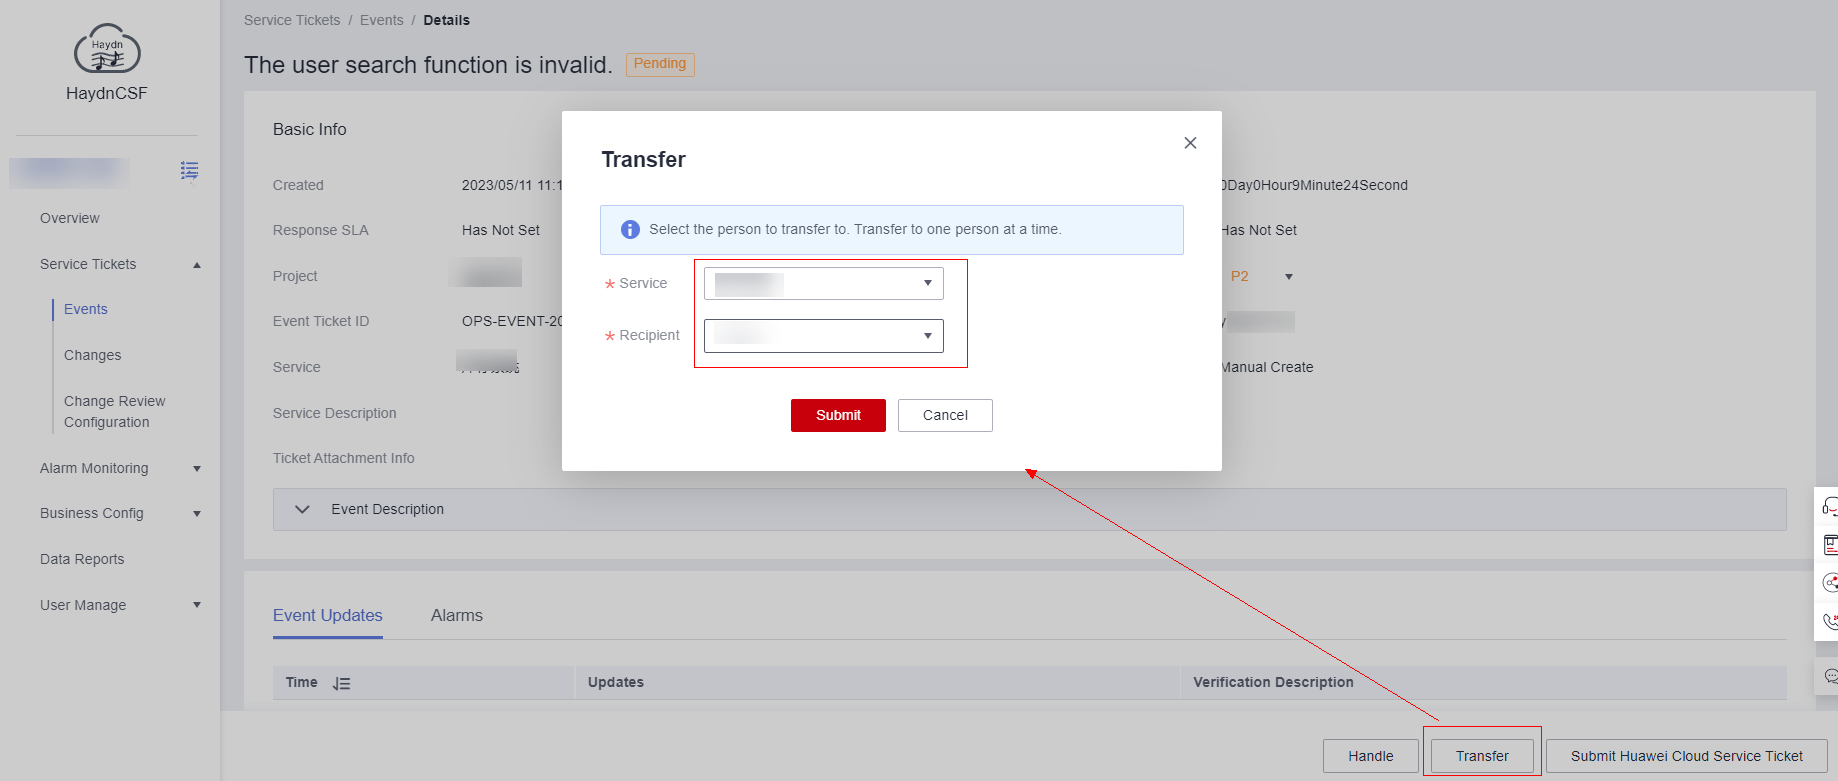
How can I transfer an event to other engineers?
If you are not responsible for handling an event or the service that an event belongs to is incorrect, you can transfer the event to engineers of other services.
Click the event name to go to the Details page. In the lower right corner, click Transfer. In the displayed dialog box, select the service and recipient.
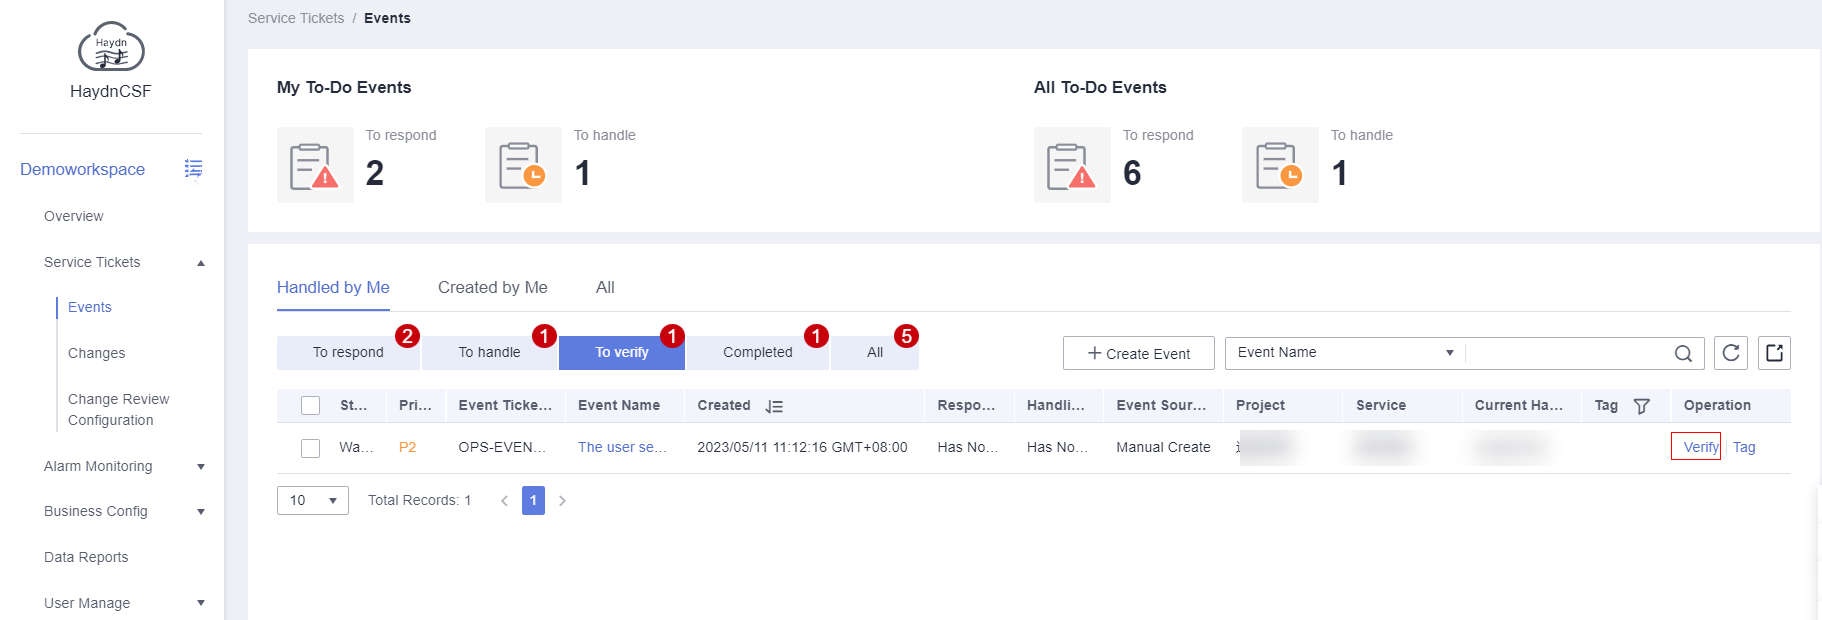
Verifying an Event
The status of a handled event is To verify, indicating that the event creator needs to verify the event.
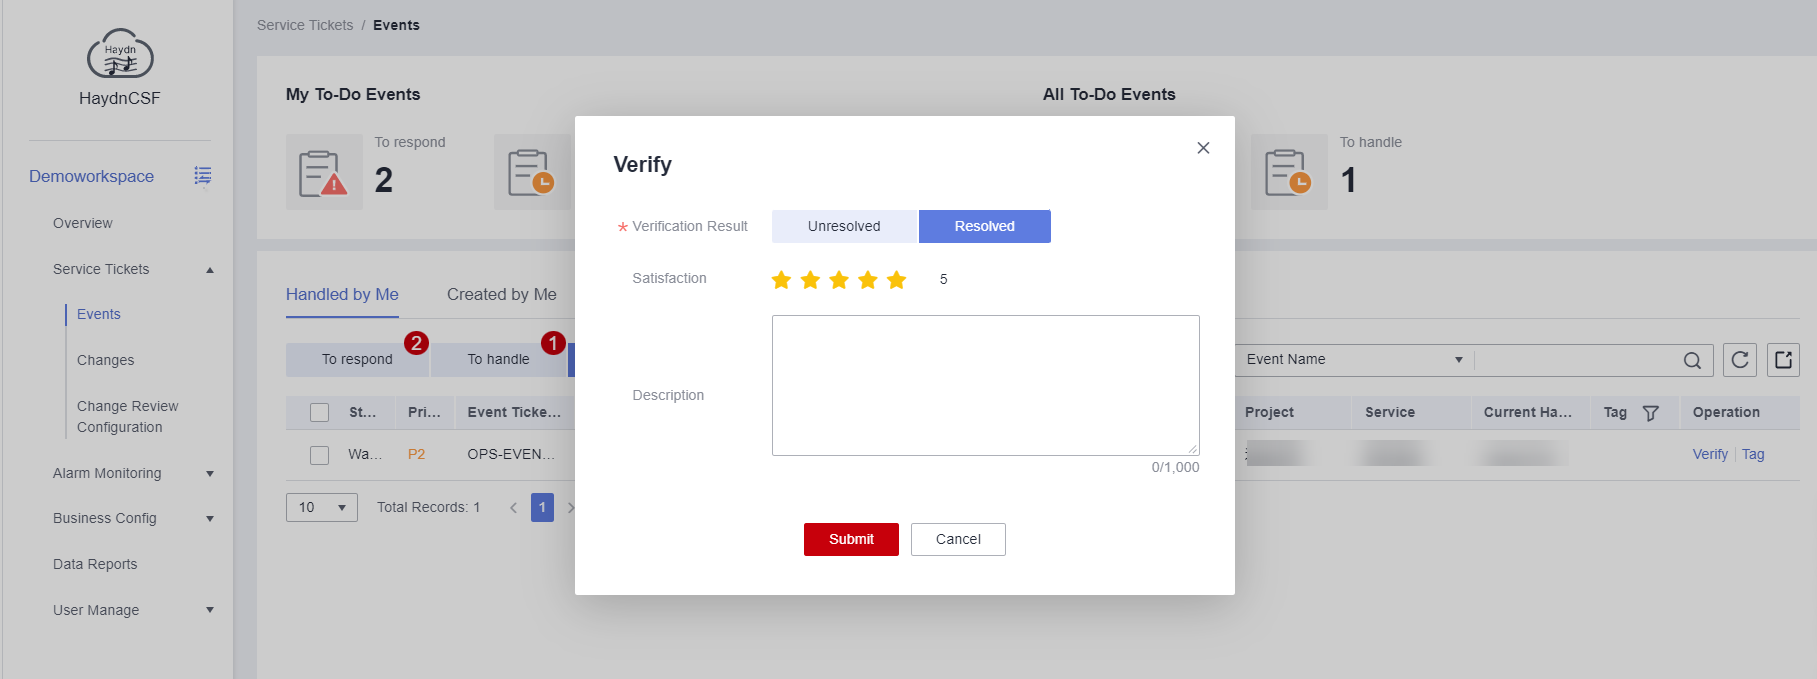
Locate the handled event and click Verify in the Operation column. In the displayed dialog box, configure Verification Result and Description. The options of Verification Result are as follows:
- Unresolved: The event is not resolved successfully and its status becomes To handle.
- Resolved: The event has been resolved and its status is Completed.
Click Submit.
If the verified event is not accepted, the acceptance will be automatically triggered 14 working days later.
Feedback
Was this page helpful?
Provide feedbackThank you very much for your feedback. We will continue working to improve the documentation.See the reply and handling status in My Cloud VOC.
For any further questions, feel free to contact us through the chatbot.
Chatbot


