Importing Data from Oracle to HDFS
Scenario
This section describes how to import data from Oracle to HDFS by using the CDLService web UI.
Prerequisites
- The CDL and HDFS services have been installed in a cluster and are running properly.
- Write-ahead logging is enabled for the Oracle database. For details, see Instructions for Using CDL.
- You have created a human-machine user, for example, cdluser, added the user to user groups cdladmin (primary group), hadoop, and kafka, and associated the user with the System_administrator role on FusionInsight Manager.
Procedure
- Log in to FusionInsight Manager as user cdluser (change the password upon the first login) and choose Cluster > Services > CDL. On the Dashboard page, click the hyperlink next to CDLService UI to go to the native CDL page.
- Choose Driver Management and click Upload Driver to upload the driver file of Oracle. For details, see Uploading a Driver File.
- Choose Link Management and click Add Link. On the displayed dialog box, set parameters for adding the oracle and hdfs links by referring to the following tables.
Table 1 Oracle data link parameters Parameter
Example Value
Link Type
oracle
Name
oraclelink
DB driver
oracle-connector-java-8.0.24.jar
Host
10.10.10.10
Port
1521
User
user
Password
Password of the user user
Sid
orcl
Description
Data link description
Table 2 HDFS data link parameters Parameter
Example Value
Link Type
hdfs
Name
hdfslink
Description
-
- After the parameters are configured, click Test to check whether the data link is normal.
After the test is successful, click OK.
- On the Job Management page, click Add Job. In the displayed dialog box, configure the parameters and click Next.
Specifically:
Parameter
Example Value
Name
job_oracletohdfs
Desc
xxx
- Configure Oracle job parameters.
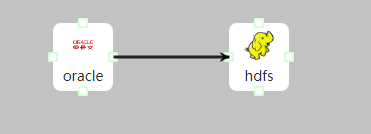
- On the Job Management page, drag the oracle icon on the left to the editing area on the right and double-click the icon to go to the Oracle job configuration page.
Table 3 Oracle job parameters Parameter
Example Value
Link
oraclelink
Tasks Max
1
Mode
insert, update, and delete
Schema
ORACLEDBA
dbName Alias
orcl
Connect With Hudi
No
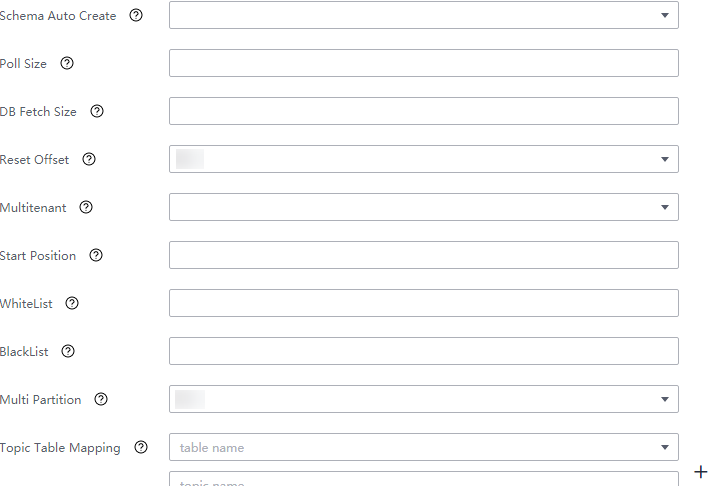
- Click the plus sign (+) to display more parameters.

- WhiteList: Enter the name of the table in the database, for example, myclass.
- Topic Table Mapping
- This parameter is mandatory if Connect With Hudi is set to Yes.
- In the first text box, enter a topic name (the value must be different from that of Default Topic), for example, myclass_topic. In the second text box, enter a table name, for example, myclass. The value must be in one-to-one relationship with the topic name entered in the first text box.)
- Click OK. The Oracle job parameters are configured.
- On the Job Management page, drag the oracle icon on the left to the editing area on the right and double-click the icon to go to the Oracle job configuration page.
- Configure HDFS job parameters.
- On the Job Management page, drag the hdfs icon on the left to the editing area on the right and double-click the icon to go to the HDFS job configuration page. Configure parameters based on Table 4.
- Click OK.
- After the job parameters are configured, drag the two icons to associate the job parameters and click Save. The job configuration is complete.

- In the job list on the Job Management page, locate the created jobs, click Start in the Operation column, and wait until the jobs are started.
Check whether the data transmission takes effect, for example, insert data into the table in the Oracle database and view the content of the file imported to HDFS.
Feedback
Was this page helpful?
Provide feedbackThank you very much for your feedback. We will continue working to improve the documentation.See the reply and handling status in My Cloud VOC.
For any further questions, feel free to contact us through the chatbot.
Chatbot


