Using ROMA Connect for Composite Applications
Composite applications are built by integrating multiple existing applications via open APIs and event channels for fast service replication and innovation.
This chapter describes how to expose an API that returns hello world via a composite application.
The steps for using composite applications with ROMA Connect are as follows:
Step 1: Creating a Composite Application
Step 2: Configuring a Workflow
Step 3: Publishing an Application
Prerequisites
Before performing this operation, complete the following preparations:
- You have created a ROMA Connect instance (new version).
- You have downloaded and installed Postman on your local PC.
Step 1: Creating a Composite Application
- Log in to the ROMA Connect console (new version).
- In the navigation pane on the left, choose Application. On the page displayed, click Create.
- Select the blank template to customize a composite application.
You can also select a service template to create a composite application. This section uses a blank template as an example.
Figure 1 Selecting a blank template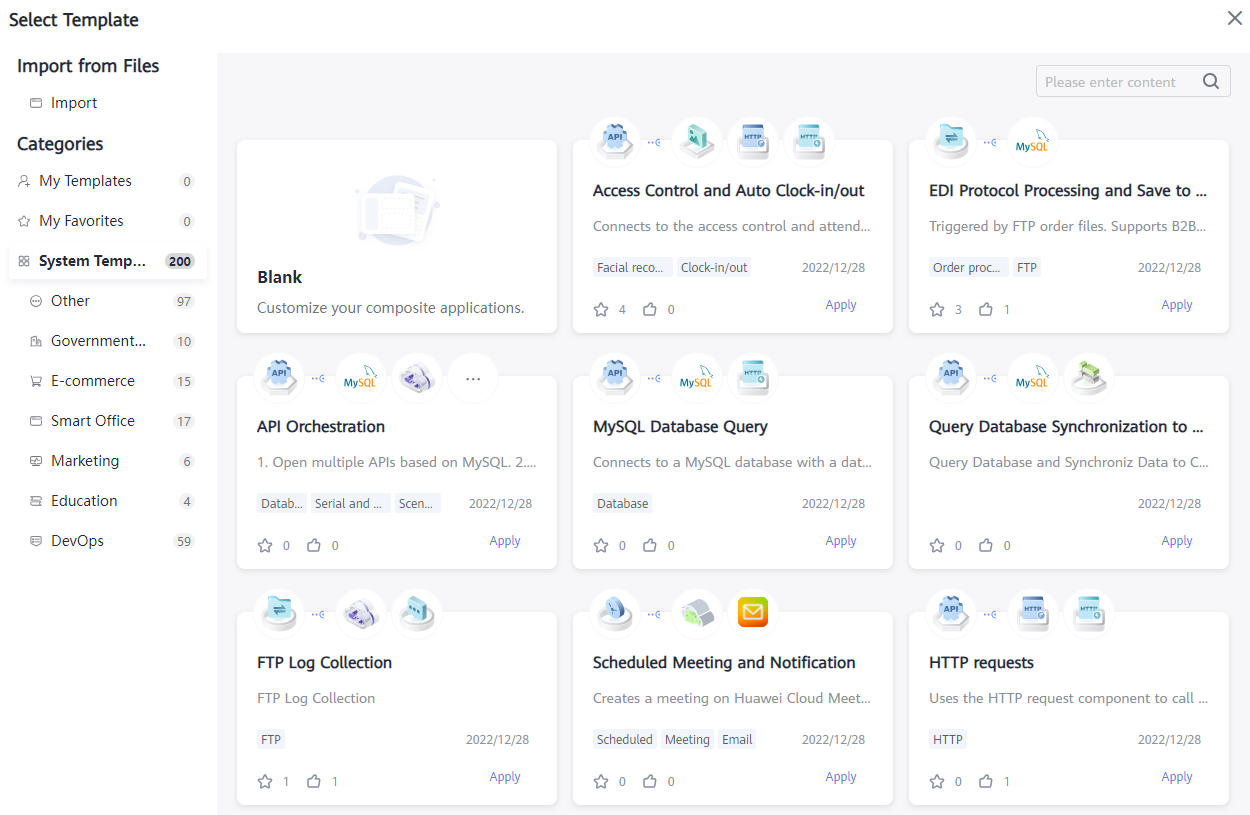
- On the editing page for creating a composite application, design the application according to the instructions on the canvas.
Figure 2 Creating a composite application

Step 2: Configuring a Workflow
- Click the first empty node and select OpenAPI under the Triggers tab from the panel on the right. The start node of each workflow (one default workflow for a blank template) must be a trigger.
Figure 3 Selecting a trigger

- Configure the OpenAPI trigger by referring to the following information. For details, see OpenAPI.
- Security Authentication: Select None.
- Request Method: Select GET.
- Request Path: Enter /hello-world.
Figure 4 Configuring OpenAPI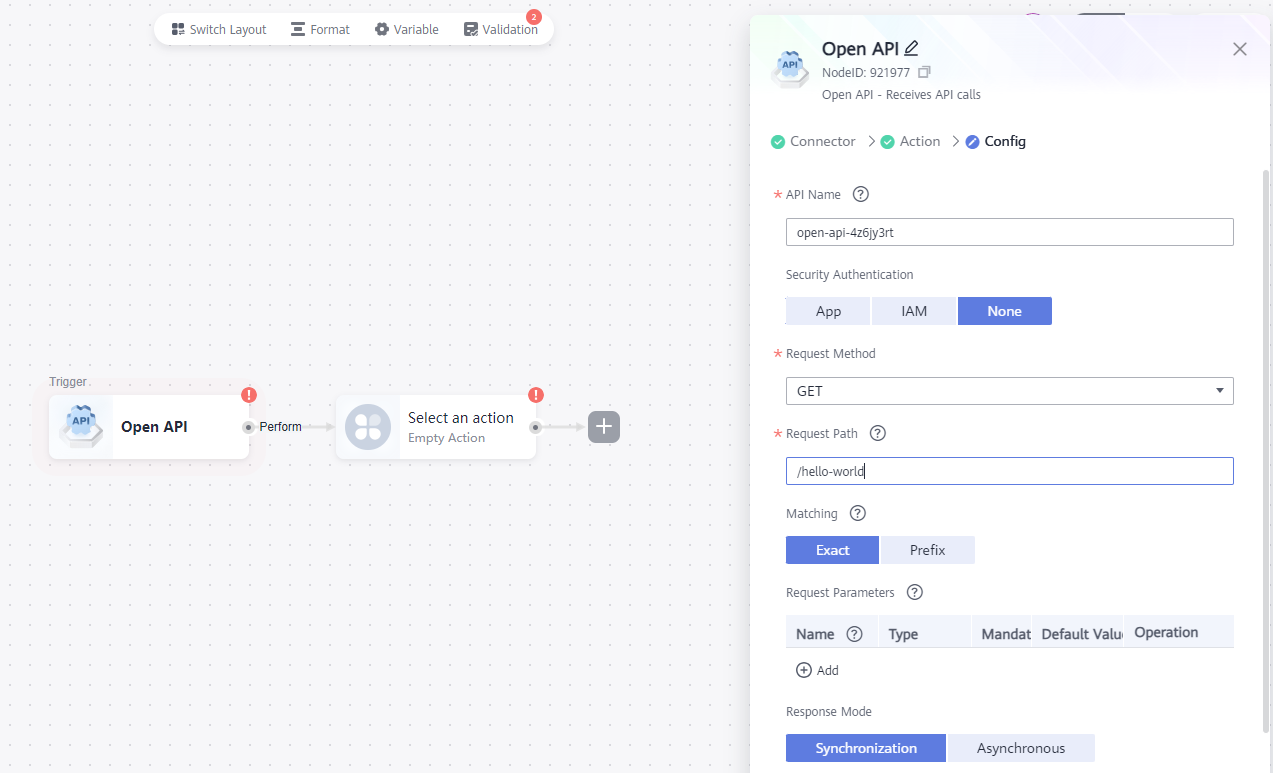
- Click the empty node, select HTTP response under the Triggers tab from the panel on the right, and set the parameters by referring to the following information. For details, see HTTP Response.
Response Header: Leave it blank.
Response Body: Enter hello world.
Response Code: Select 200 - OK.
Figure 5 Configuring the HTTP response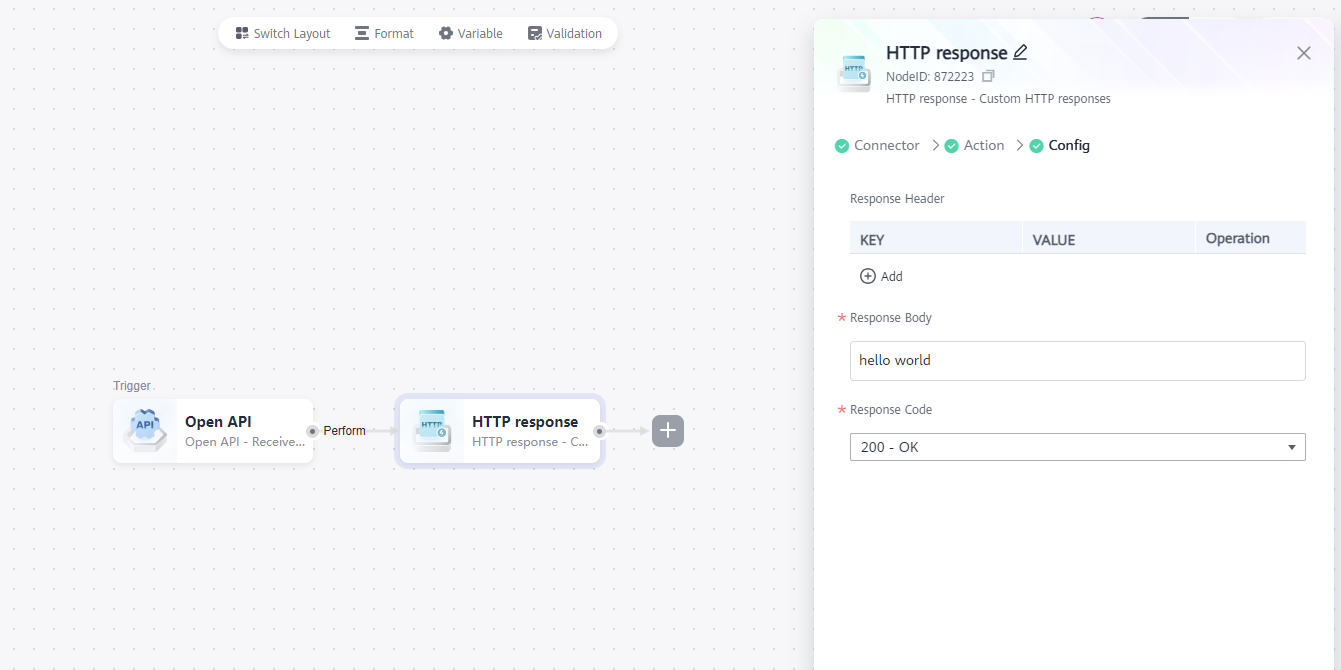
- In the upper right corner of the page, click Save. In the dialog box displayed, set Name and Description, and click Yes.
Step 3: Publishing an Application
- In the upper right corner of the page, click Start. In the dialog box displayed, set Region and Project, select an instance, and click OK.
Figure 6 Starting a composite application
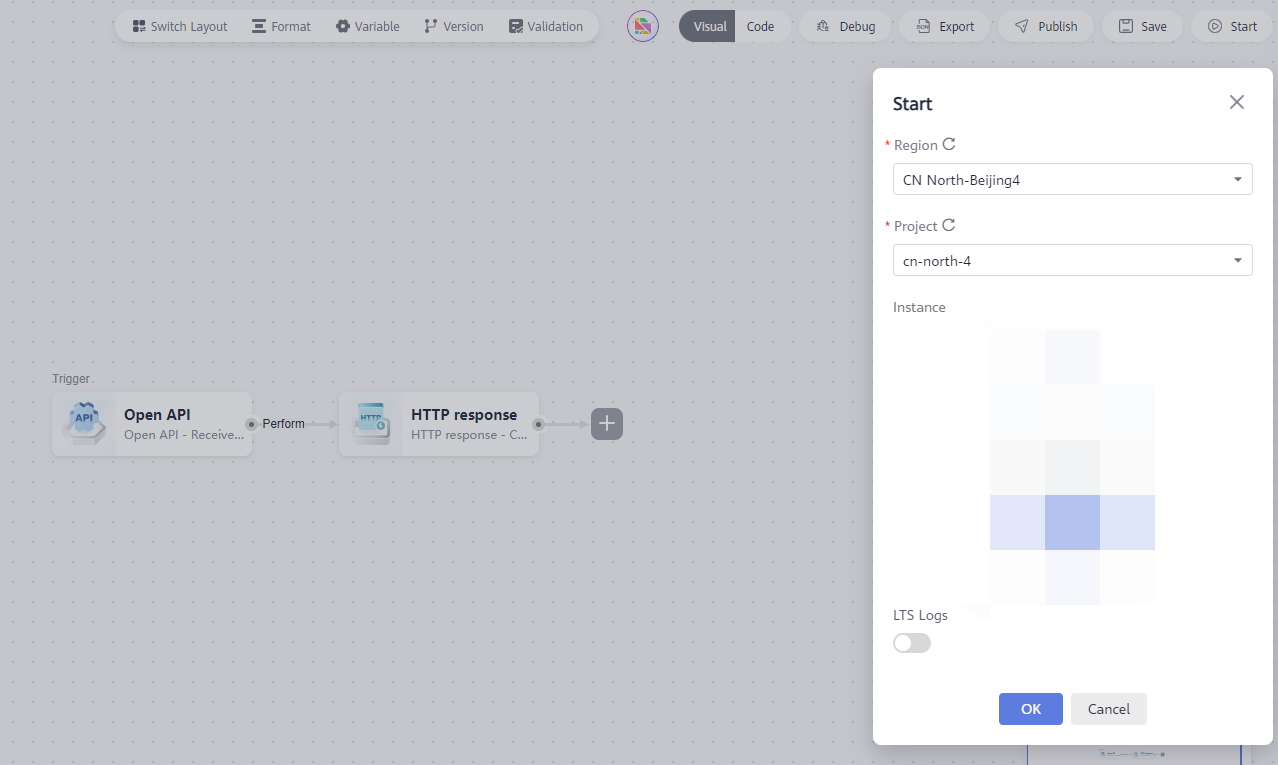
- Check that a message is displayed in the upper right corner of the canvas. If yes, the workflow is started successfully.
Figure 7 Composite application started successfully

Step 4: Viewing Results
- On the canvas for editing the composite application, click the OpenAPI trigger and view the API information in the lower part of the panel.
Figure 8 API information
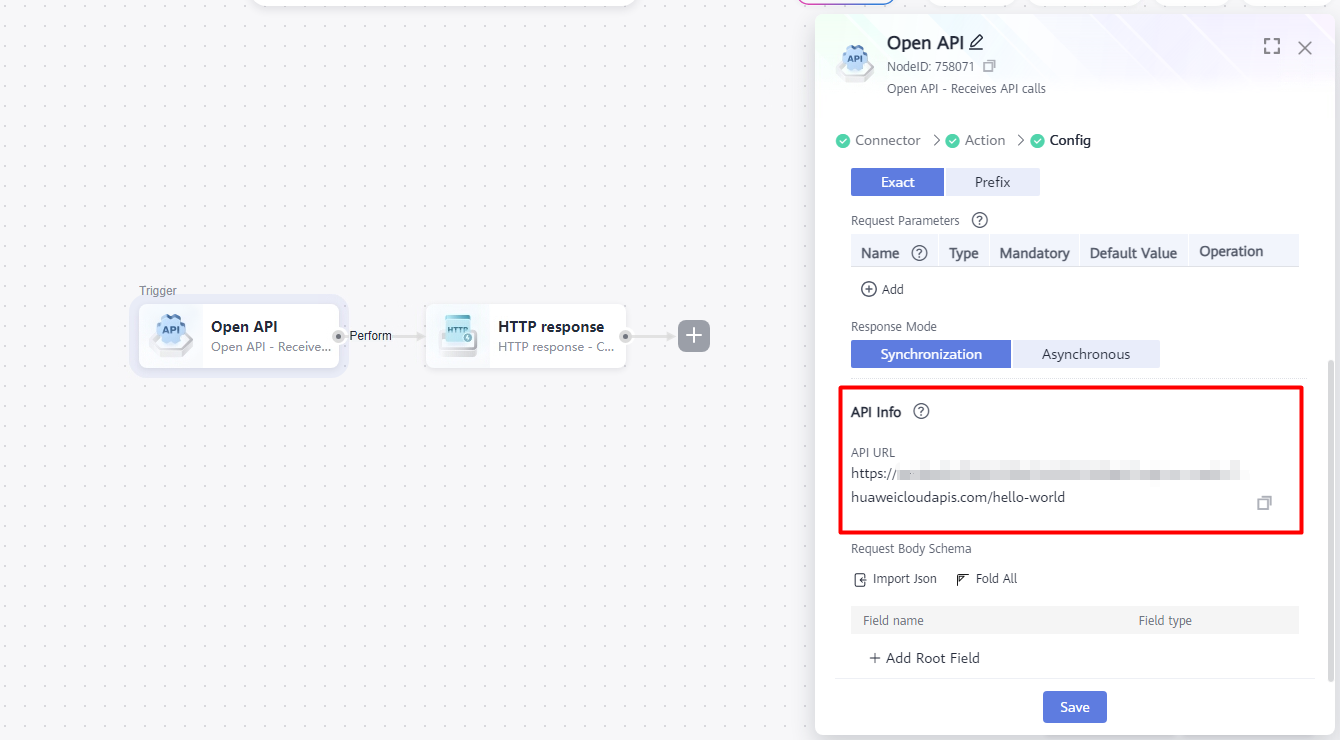
- As configured in previous steps, this API uses the GET request method without authentication. Use Postman to test the API information in 1.
As shown in the following figure, when the API is accessed, the system returns hello world.Figure 9 API testing result

Feedback
Was this page helpful?
Provide feedbackThank you very much for your feedback. We will continue working to improve the documentation.See the reply and handling status in My Cloud VOC.
For any further questions, feel free to contact us through the chatbot.
Chatbot


