Restoring Databases or Tables to a Specific Point in Time
Scenarios
When a table-level automated backup policy is enabled, you can use existing backups to restore lost table data to a specific point in time in the case of accidental or intentional deletions.
Procedure
|
Step |
Description |
|---|---|
|
Use Data Admin Service (DAS) to create a database and table and insert data into the table. |
|
|
Delete the instance. |
|
|
Restore the deleted table data using table-level point-in-time recovery (PITR). |
|
|
Log in to the DAS console and check whether the data was restored. |
Step 1: Prepare Data
- Log in to the management console.
- Click
 in the upper left corner and select a region and project.
 - Click
 in the upper left corner of the page and choose .
 - On the Instances page, locate the instance and, in the Operation column, click Log In to access the DAS console.
Alternatively, click the instance name on the Instances page. On the displayed Basic Information page, click Log In in the upper right corner.
- Enter the database username and password and click Test Connection. After the connection test is successful, click Log In.
- On the menu bar on top, choose SQL Operations > SQL Query.
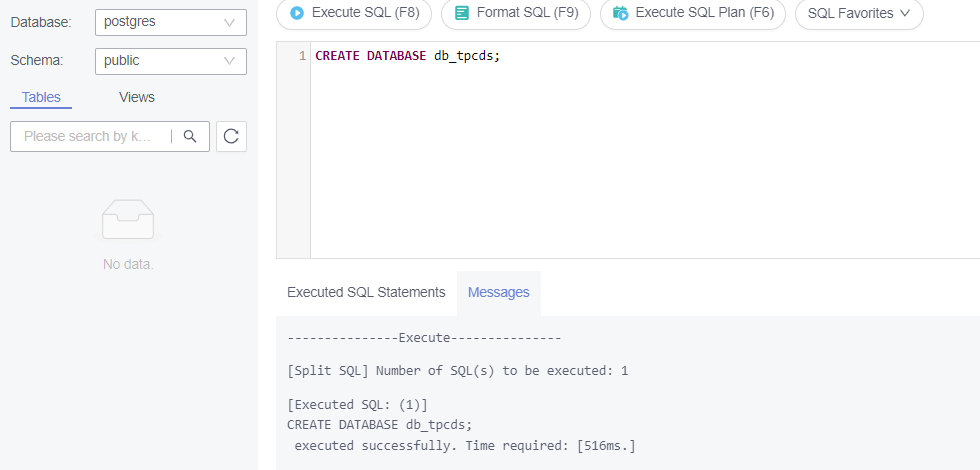
- In the SQL execution window, run the following statement to create a database:
CREATE DATABASE db_tpcds;
If information shown in the following figure is displayed, the creation was successful.
Figure 1 Creating a database
Switch to the newly created database db_tpcds in the upper left corner.
- Use SQL statements to create a table and insert data.
- Create a schema.
CREATE SCHEMA myschema;
Switch to the newly created schema in the upper left corner.
- Create a table named mytable that has only one column. The column name is firstcol and the column type is integer.
CREATE TABLE myschema.mytable (firstcol int);
- Insert data into the table.
INSERT INTO myschema.mytable values (100);
- Create a schema.
- Query table data.
SELECT * FROM myschema.mytable;
Step 2: Delete Table Data
- Log in to the management console.
- Click
 in the upper left corner and select a region and project.
 - Click
 in the upper left corner of the page and choose .
 - On the Instances page, locate the instance and, in the Operation column, click Log In to access the DAS console.
Alternatively, click the instance name on the Instances page. On the displayed Basic Information page, click Log In in the upper right corner.
- Enter the database username and password and click Test Connection. After the connection test is successful, click Log In.
- On the menu bar on top, choose SQL Operations > SQL Query.
- Delete table data.
DELETE FROM myschema.mytable WHERE firstcol = 100;
Step 3: Restore Table Data
- Log in to the management console.
- Click
 in the upper left corner and select a region and project.
 - Click
 in the upper left corner of the page and choose .
 - On the Instances page, click the name of the instance to access the Basic Information page.
- In the navigation pane, choose Backups. On the displayed page, click the Table Backup tab.
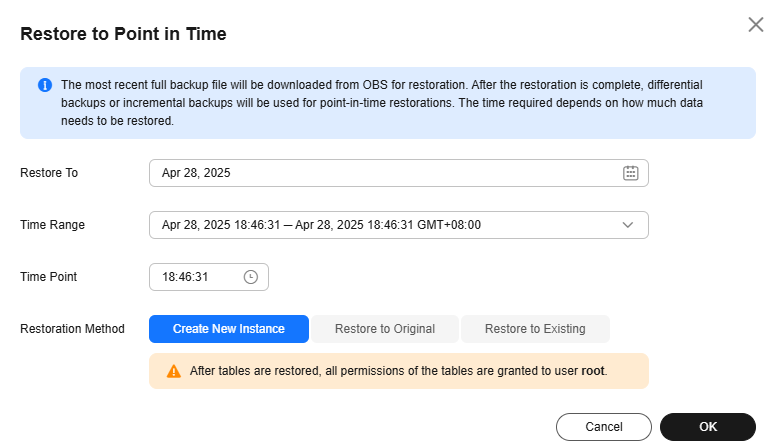
- Click Restore to Point in Time. In the displayed dialog box, specify the time range and point for restoration, and set Restoration Method to Restore to Original.
Figure 2 Restoring data to a specified point in time

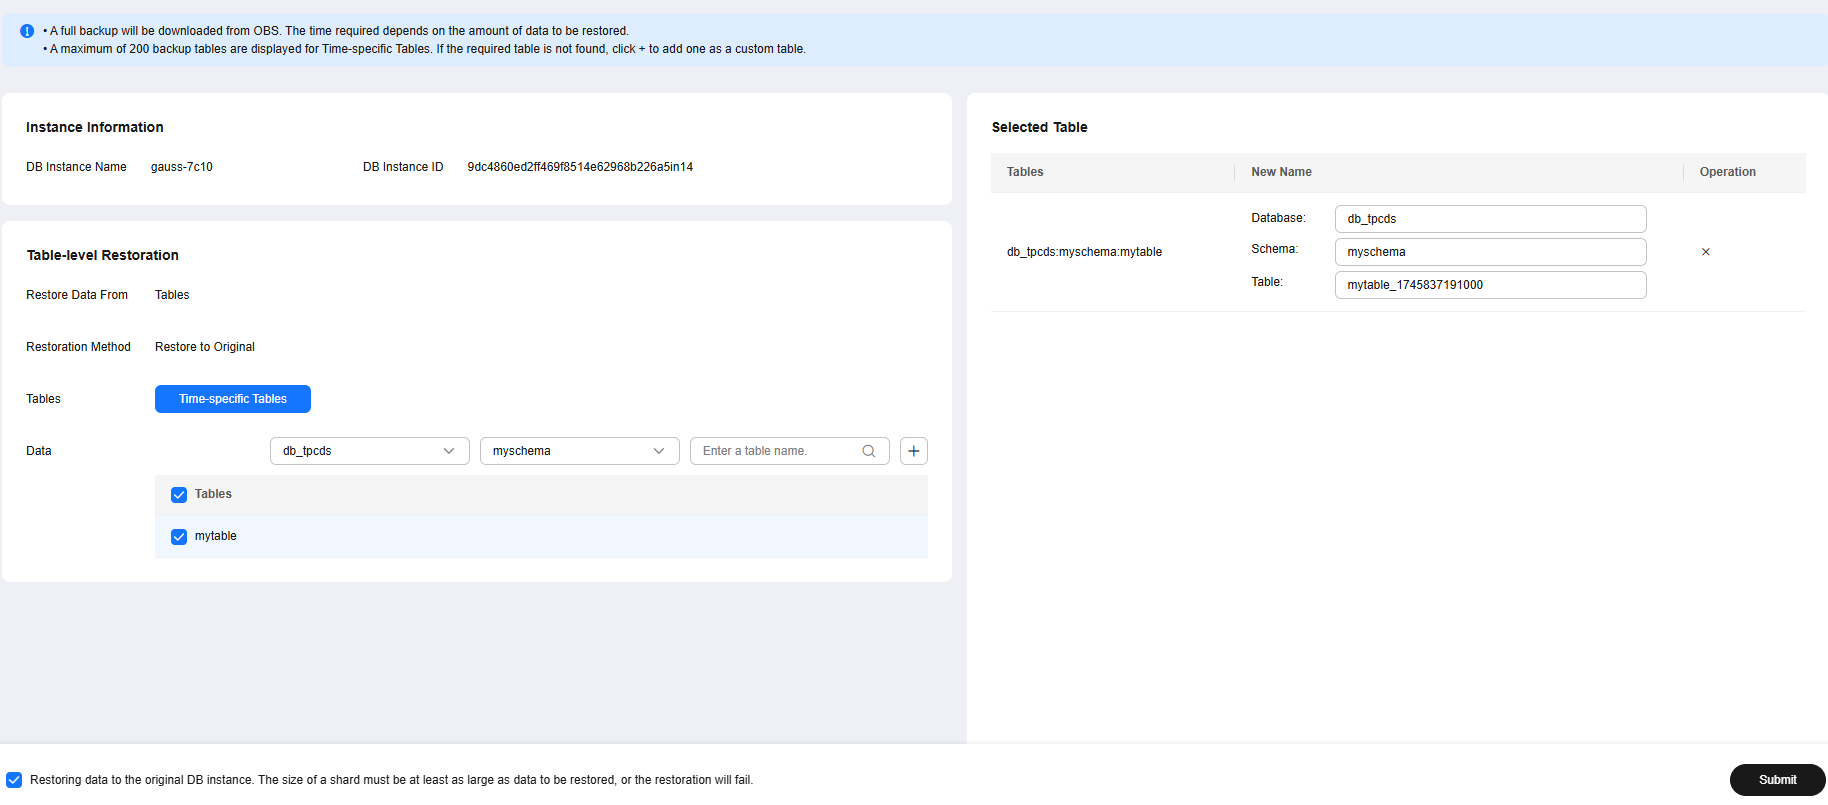
- Select the tables to be restored and click Submit.
Figure 3 Selecting tables to be restored

- Go to the Instances page and check that the target instance is in the Restoring state. When the instance status changes to Available, the restoration is complete.
Step 4: Check the Results
- Log in to the management console.
- Click
 in the upper left corner and select a region and project.
 - Click
 in the upper left corner of the page and choose .
 - On the Instances page, locate the instance and, in the Operation column, click Log In to access the DAS console.
- Enter the database username and password and click Test Connection. After the connection test is successful, click Log In.
- Check the database name and table data to verify that the restoration is complete.
Feedback
Was this page helpful?
Provide feedbackThank you very much for your feedback. We will continue working to improve the documentation.See the reply and handling status in My Cloud VOC.
For any further questions, feel free to contact us through the chatbot.
Chatbot


