DataArts DataService Data Migration Configuration

In Management Center, you can directly migrate the APIs published in DataArts DataService.
You can perform a migration by following the instructions provided in Management Center Data Migration Configuration or by using the import and export functions of DataArts DataService described in this section.
Constraints
- To export all APIs, you must have the permissions of the DAYU Administrator or Tenant Administrator.
- All the APIs of a workspace can be exported only once, and only one such export task can be executed within a minute.
Exporting Data from the Old Workspace
You can export all APIs based on the current filter criteria. You must have the permissions of the DAYU Administrator or Tenant Administrator.
- On the DataArts Studio console, locate a workspace and click DataArts DataService.
- In the left navigation pane, choose an edition, for example, Exclusive Edition. The Overview page is displayed.
- Choose .
- Above the API list, choose .

- To export all APIs, you must have the permissions of the DAYU Administrator or Tenant Administrator.
- All the APIs of a workspace can be exported only once, and only one such export task can be executed within a minute.
In the displayed dialog box, click Yes to export all the APIs to an Excel file.
Figure 1 Exporting all APIs
- Open the downloaded Excel file to view the exported APIs. APIs of different types are exported to different sheets.
Importing Data to the New Workspace
- On the DataArts Studio console, locate a workspace and click DataArts DataService.
- In the left navigation pane, choose an edition, for example, Exclusive Edition. The Overview page is displayed.
- Choose .
- Click More above the API list and select Import.
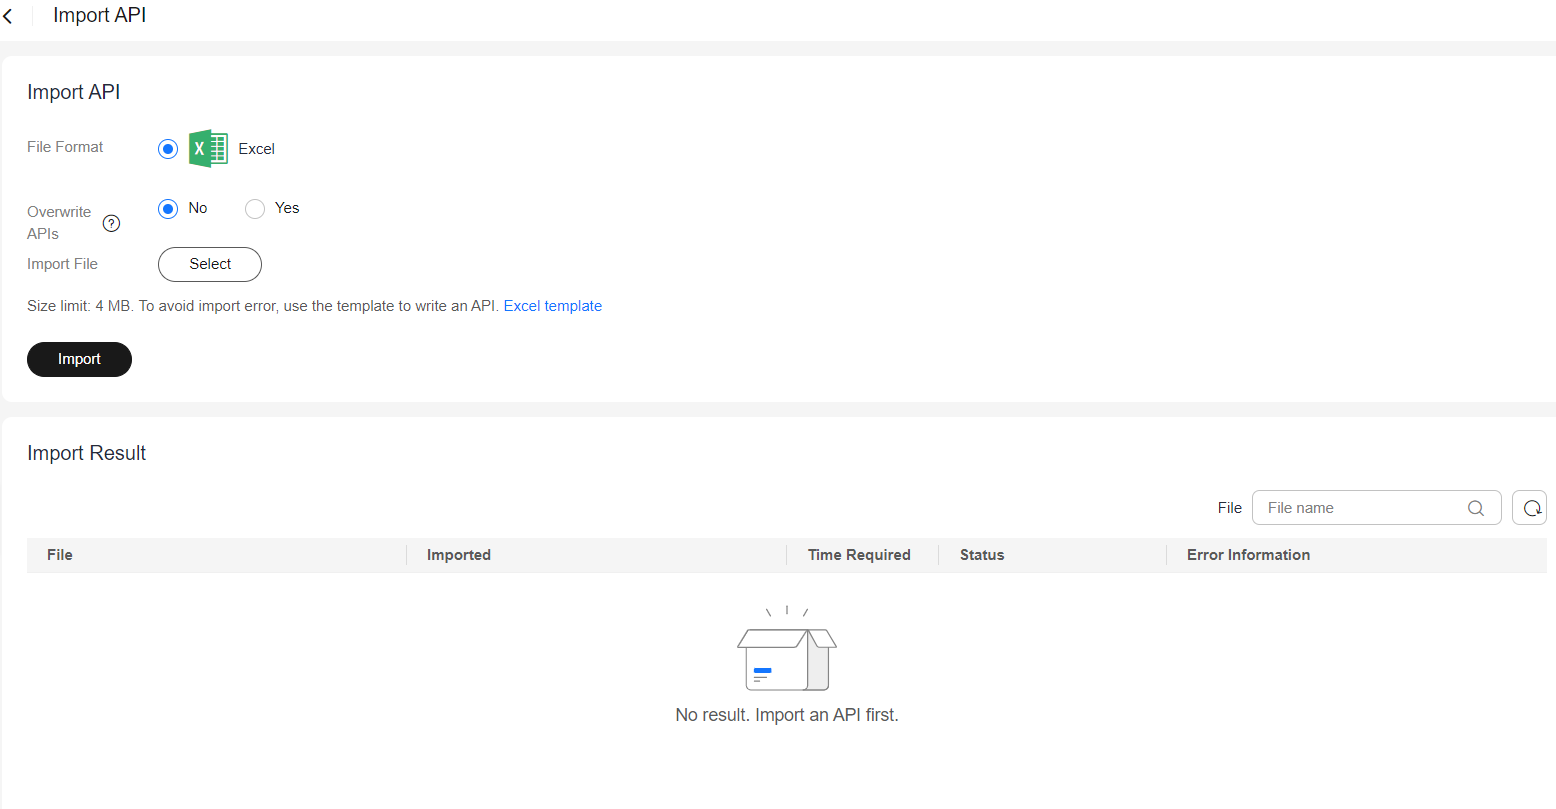
- On the Import API page, set parameters and click Select. Select the API file to be imported and click Import. The import status is displayed in the Import Result area.
Table 1 Parameters for importing APIs Parameter
Description
Overwrite
Whether to overwrite APIs with the same names as the APIs to be imported. By default, APIs are not overwritten.
- No: If there is an API with the same name as an API to be imported, the API will not be imported.
- Yes: If there is already an API with the same name, the API definition is updated based on the imported API.
Import File
The API file can be one exported from another project or an Excel file edited based on the template specifications.
Figure 2 Importing APIs
- After the APIs are imported successfully, you can view them in the API list.
Feedback
Was this page helpful?
Provide feedbackThank you very much for your feedback. We will continue working to improve the documentation.See the reply and handling status in My Cloud VOC.
For any further questions, feel free to contact us through the chatbot.
Chatbot


