
Building with Maven to Generate a Private Dependency for Another Build (Built-in Executors, GUI)
Scenario
In this practice, you upload the artifact of a Maven build project to a self-hosted repo and include it as a second-party or third-party dependency within another Maven build project, which then downloads and uses this artifact to build an application in CodeArts Build. You will need:
- dependency_task: This build project releases the resulting dependencyProject-1.0.jar package defined in the pom.xml file to the self-hosted repo. The package will be used for build project release_task.
- release_task: This build project looks for the dependencyProject-1.0.jar package released by build project dependency_repo in the self-hosted repo, includes the package as a dependency in the build process, and releases the final application.
- dependency_libs: This self-hosted repo stores the dependencyProject-1.0.jar package released by build project dependency_task. Build project release_task will download the package from this repo.
These steps depend on the following services:
- CodeArts Repo: stores your project code.
- CodeArts Artifact: stores your private dependencies.
Requirements
- You have permissions for CodeArts Artifact.
- You have permissions for CodeArts Repo.
Procedure
| Step | Description |
|---|---|
| Create a project. | |
| Create a self-hosted repo. | |
| Create the code repository for releasing the dependencyProject-1.0.jar package. | |
| Create the build task for releasing the dependencyProject-1.0.jar package. | |
| Create a code repository for releasing the application. | |
| Create the build task that depends on the dependencyProject-1.0.jar package to build and release the application. | |
| Verify the build results. |
Creating a Project
- Log in to the Huawei Cloud console with your Huawei Cloud account.
- Click
 in the upper left corner and choose from the service list.
 - Click Access Service. The homepage of CodeArts is displayed.
- Click Create Project, and select the Scrum template.
- Set the project name to build-bestpractice, and leave the other parameters as default.
- Click OK to access the project.
Creating a Self-hosted Repo
- In the navigation pane, choose .
- Click Create and set parameters according to Table 2.
Table 2 Parameters for creating a self-hosted repo Parameter
Description
Repository Type
Select Local Repository.
Repository Name
Assign a custom name to the repository, for example, dependency_libs.
Package Type
Select Maven.
Project
Leave the value as default. The field is autofilled with build-bestpractice in this practice.
Include Patterns
Leave it blank.
Version Policy
Specify the version of artifacts stored in the repository. Select either Release (the release version with stable functions) or Snapshot (the development version with unstable functions). You can also select both of them if needed. In this practice, select Release.
Description
Enter additional information to describe the repository. Use no more than 200 characters.
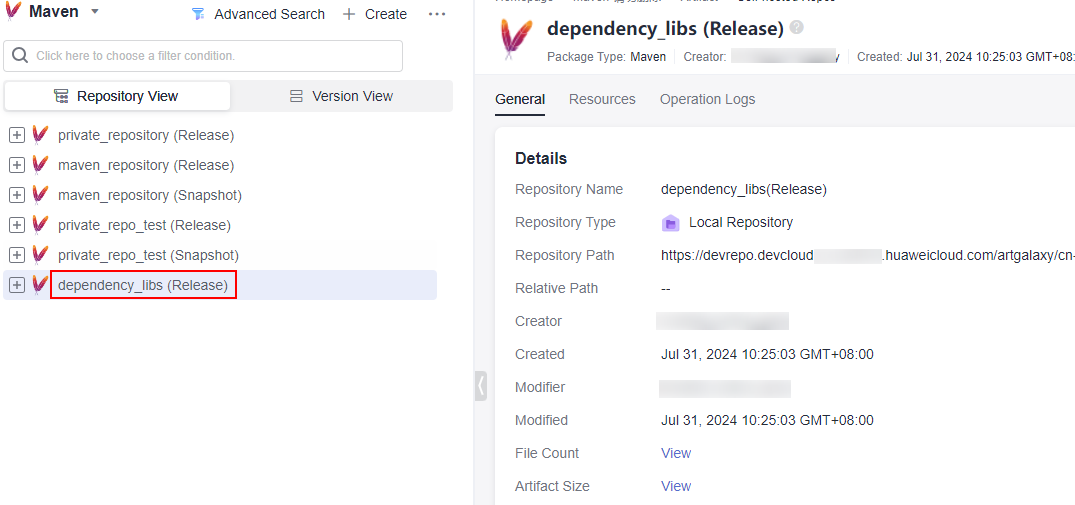
- Click Submit. The details page of dependency_libs is displayed. Figure 1 shows the created self-hosted repo.
Creating Code Repository dependency_repo
- In the navigation pane, choose .
- On the displayed page, click New Repository. Select Template, and click Next.
- On the template selection page, select the Java Maven Demo template and click Next.
- On the repository creation page, type dependency_repo in the Repository Name field, and leave the other parameters as default.
- Click OK. The code repository details page is displayed. Figure 2 shows the directory that stores files of the code repository.
- Click the pom.xml file to enter its details page. In the right pane, click
 to access the file editor. Figure 3 Editing the pom.xml file
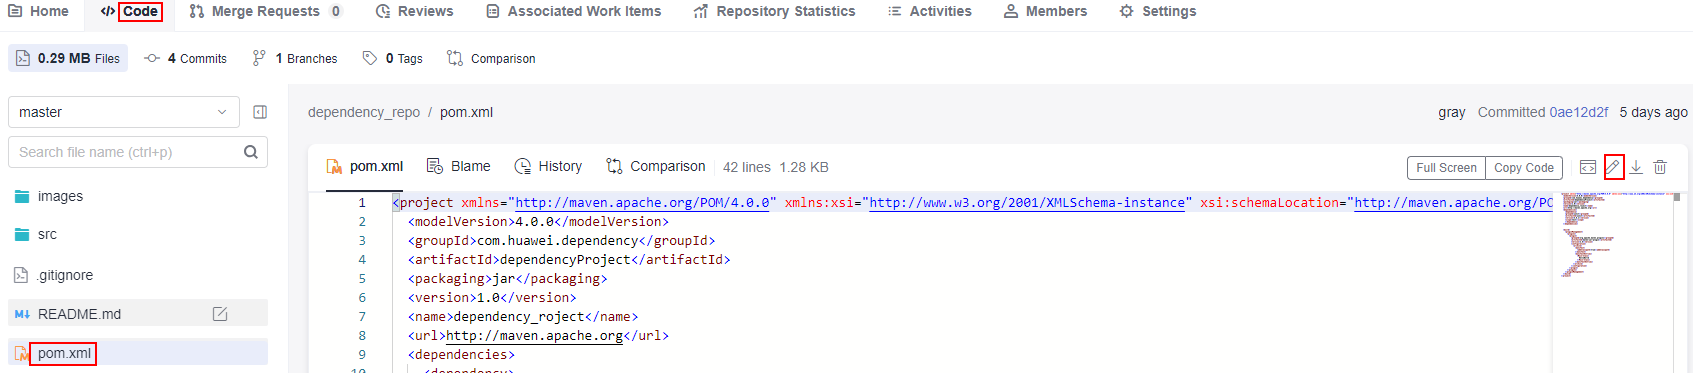
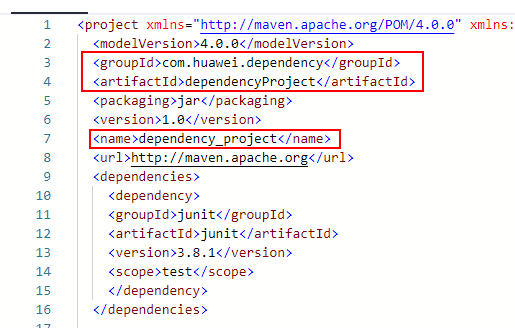
- Change groupId to com.huawei.dependency, artifactId to dependencyProject, and name to dependency_project, as shown in Figure 4. Click OK to save your changes to the pom.xml file.

Creating Build Task dependency_task
- In the navigation pane, choose .
- Click Create Task. On the displayed Basic Information page, set the following parameters. Leave the other parameters as default.
- Name: Assign a custom name to the build task, for example, private_repository_task.
- Code Source: Select Repo.
- Repository: Select private_repository_repo, the code repository created in Creating Code Repository dependency_repo.
- Click Next. On the displayed page, select Blank Template. Click OK. The Build Actions page is displayed.
- On the Build Actions page, click the GUI tab. Then click Add Build Actions on the left and add the Build with Maven action.
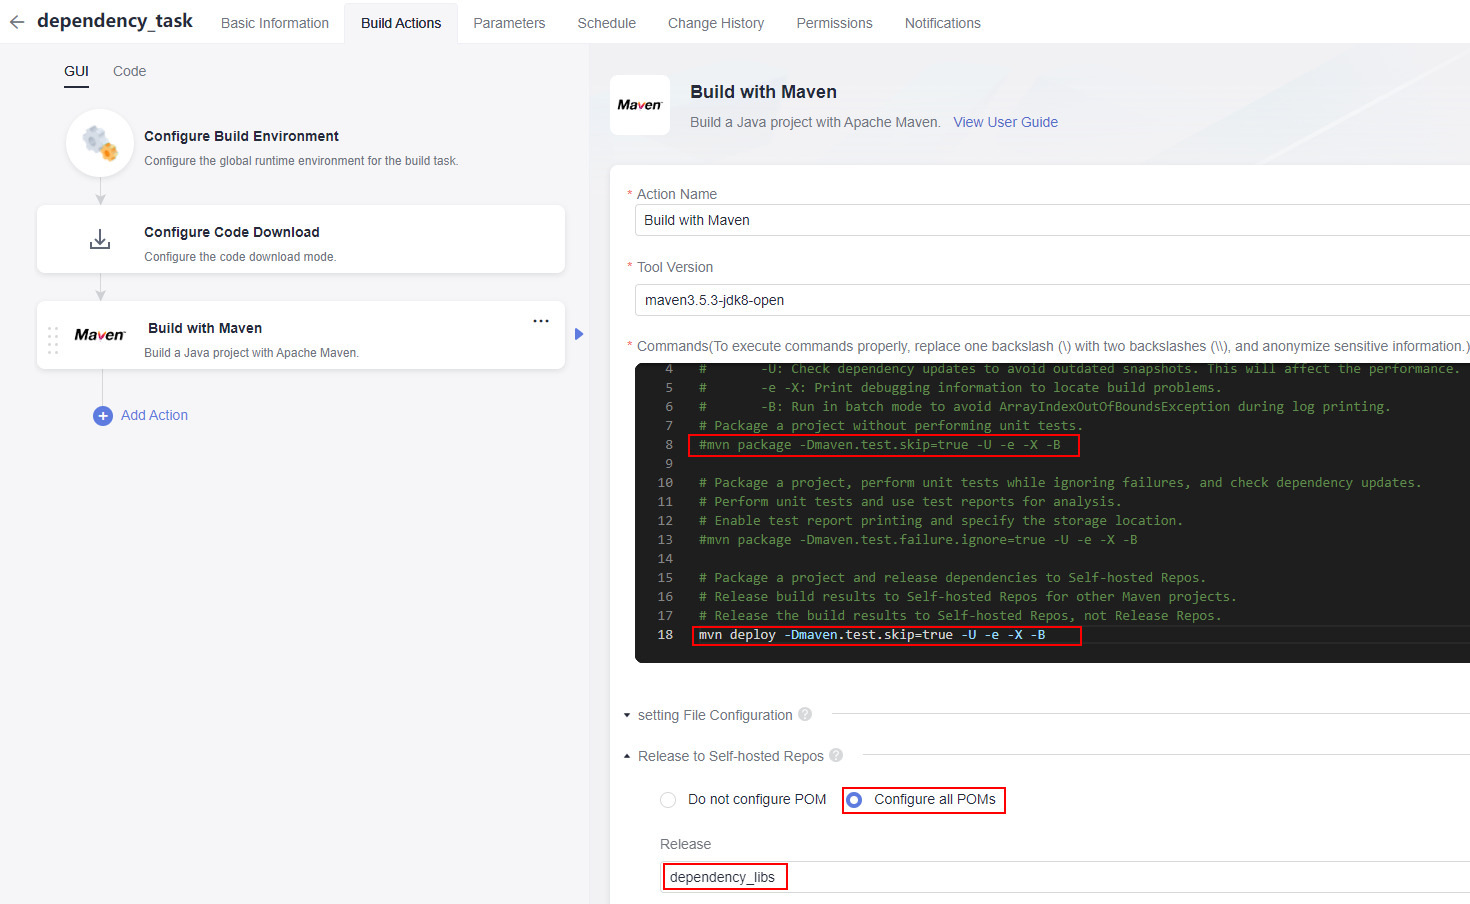
- Click the Build with Maven action, and set the following parameters. Leave the other parameters as default.
- Commands: Add a number sign (#) before the mvn package -Dmaven.test.skip=true -U -e -X -B command and delete the number sign before the #mvn deploy -Dmaven.test.skip=true -U -e -X -B command.
- Release to Self-hosted Repos: Select Configure all POMs.
- Release: Select the name (dependency_libs is used in this practice) of the created self-hosted repo. Figure 5 Configuring the action of building with Maven
- Click Save and Execute in the upper right corner. In the displayed dialog box, click OK. The build task execution page is displayed.
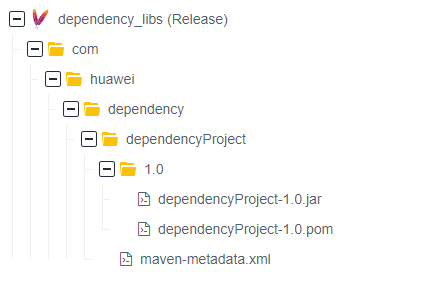
- After the build task is complete, check the build products. In the navigation pane, choose . On the displayed page, expand the directory of dependency_libs (Release) to check the released dependencies as build outputs, as shown in Figure 6.
Creating Code Repository release_repo
- In the navigation pane, choose .
- On the displayed page, click New Repository. Select Template, and click Next.
- On the template selection page, select the Java Maven Demo template and click Next.
- On the repository creation page, type release_repo in the Repository Name field, and leave the other parameters as default.
- Click OK. The code repository details page is displayed.
- Click the pom.xml file to enter its details page. In the right pane, click
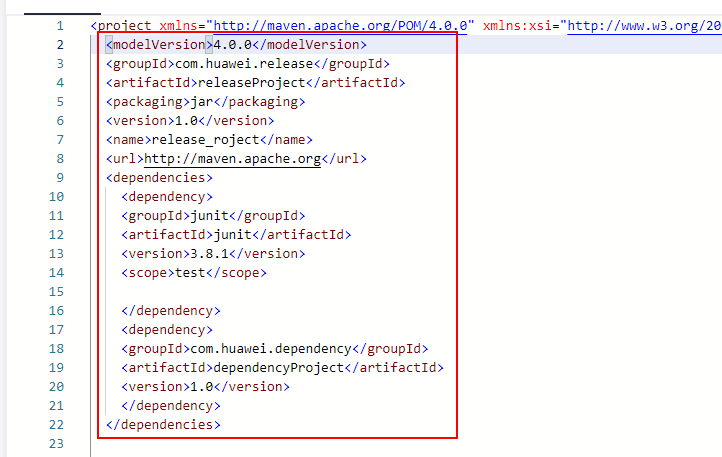
 to access the file editor. Copy the following code to the red box shown in Figure 7. Click OK to save your changes to the pom.xml file.
 The following sample code adds the dependencyProject-1.0.jar package generated as the output of the build task dependency_task in the dependency element.
<modelVersion>4.0.0</modelVersion>
  <groupId>com.huawei.release</groupId>
  <artifactId>releaseProject</artifactId>
  <packaging>jar</packaging>
  <version>1.0</version>
  <name>release_roject</name>
  <url>http://maven.apache.org</url>
  <dependencies>
    <dependency>
    <groupId>junit</groupId>
    <artifactId>junit</artifactId>
    <version>3.8.1</version>
    <scope>test</scope>
    </dependency>
    <dependency>
    <groupId>com.huawei.dependency</groupId>
    <artifactId>dependencyProject</artifactId>
    <version>1.0</version>
    </dependency>
  </dependencies>
Creating Build Task release_task
- In the navigation pane, choose .
- Click Create Task. On the displayed Basic Information page, set the following parameters. Leave the other parameters as default.
- Name: Assign a custom name to the build task, for example, release_task.
- Code Source: Select Repo.
- Repository: Select release_repo, the code repository created in Creating Code Repository release_repo.
- Click Next. On the displayed page, select Blank Template. Click OK. The Build Actions page is displayed.
- On the Build Actions page, click the GUI tab. Then click Add Build Actions on the left and add the Build with Maven action. Leave the parameters as default.
- Click Save and Execute in the upper right corner. In the displayed dialog box, click OK. The build task execution page is displayed. Figure 8 Running a build task

Viewing the Build Results
On the Actions tab, check that the console displays the logs of the build task as it runs. The Build Logs window automatically scrolls down to show new entries. As shown in the following figure, the build log indicates that the dependencyProject-1.0.jar package produced as the output of the build task dependency_task is pulled as a dependency from the self-hosted repo dependency_libs.

Related Operations
For Maven build questions, see Maven Build FAQs.
Feedback
Was this page helpful?
Provide feedbackThank you very much for your feedback. We will continue working to improve the documentation.See the reply and handling status in My Cloud VOC.
For any further questions, feel free to contact us through the chatbot.
Chatbot


