Implementing Image Display and URL Redirection with the Banner Widget on Advanced Pages
Expected Results
The banner widget on an advanced page is used to automatically switch between multiple images. You can also add a hyperlink to an image, so you can click the image to go to the specified website.
Implementation Methods
- Create a low-code application.
- Apply for a free trial or purchase a commercial instance by referring to Authorization of Users for Huawei Cloud Astro Zero Usage and Instance Purchases.
- After the instance is purchased, click Access Homepage on Homepage. The application development page is displayed.
- In the navigation pane, choose Applications. On the displayed page, click Low-Code or
 .
.
When you create an application for the first time, create a namespace as prompted. Once it is created, you cannot change or delete it, so check the details carefully. Use your company or team's abbreviation for the namespace.
- In the displayed dialog box, choose Standard Applications and click Confirm.
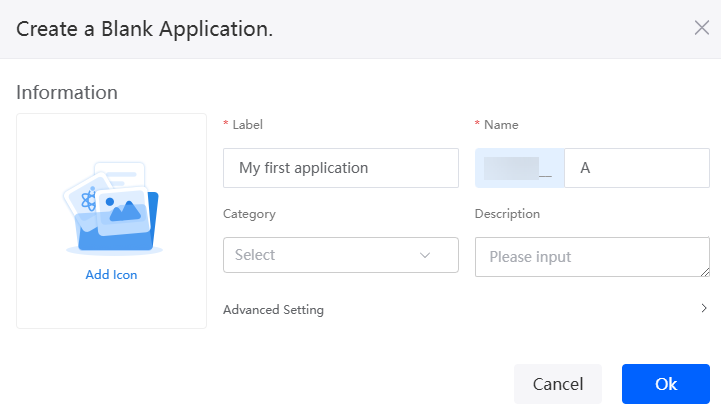
- Enter a label and name of the application, and click the confirm button. The application designer is displayed.
Figure 1 Creating a blank application
- In the navigation pane, choose Page, and click + next to Advanced Page.
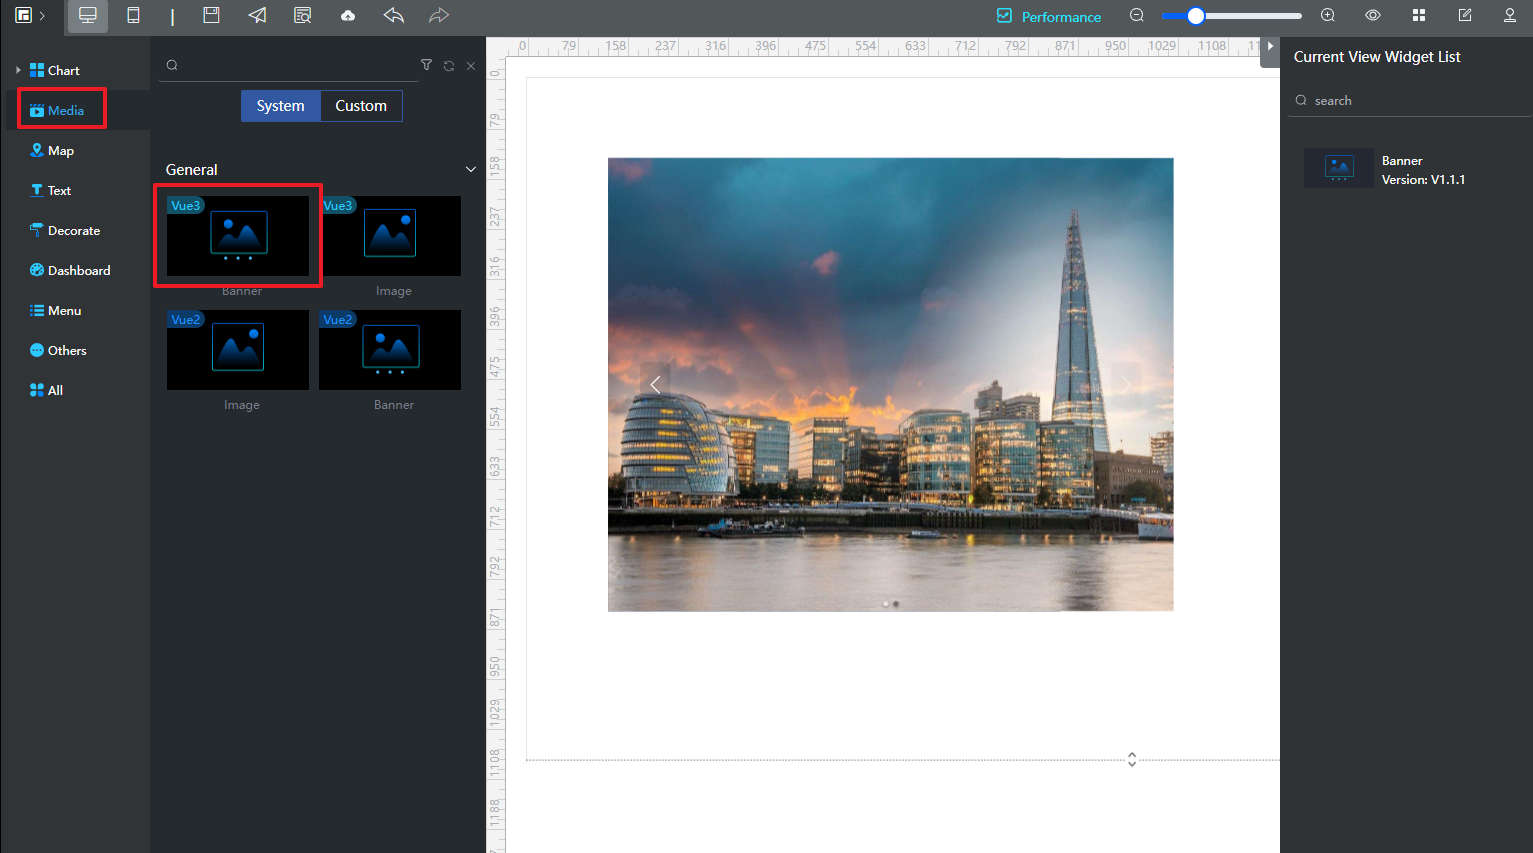
- Click
 and drag the banner widget to the canvas on the right.
Figure 2 Dragging the banner widget
- Right-click the banner widget and choose Setting from the shortcut menu.
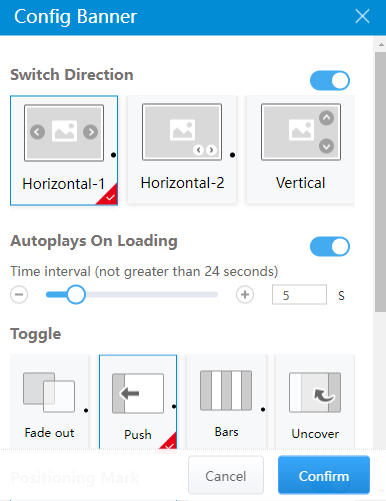
- Click Config Banner and set the direction and image playback interval as required.
Figure 3 Setting the banner widget
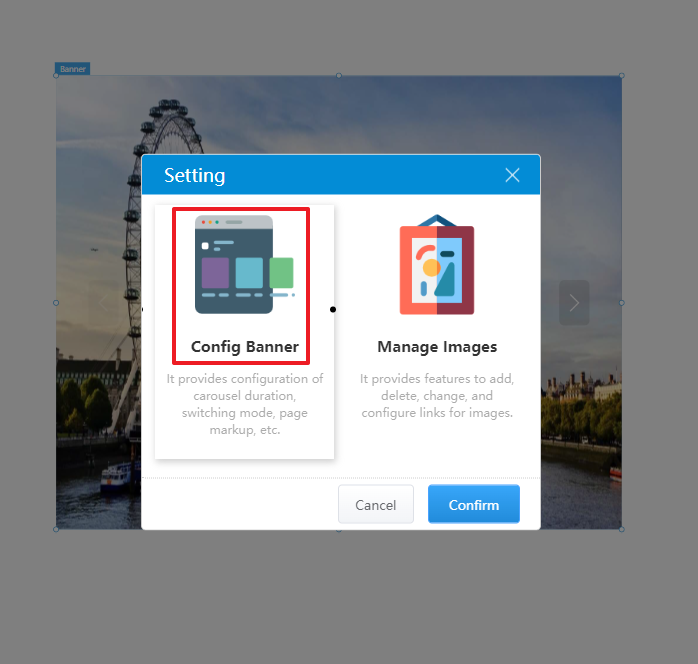 Figure 4 Config Banner
- Add an image and set the URL redirection.
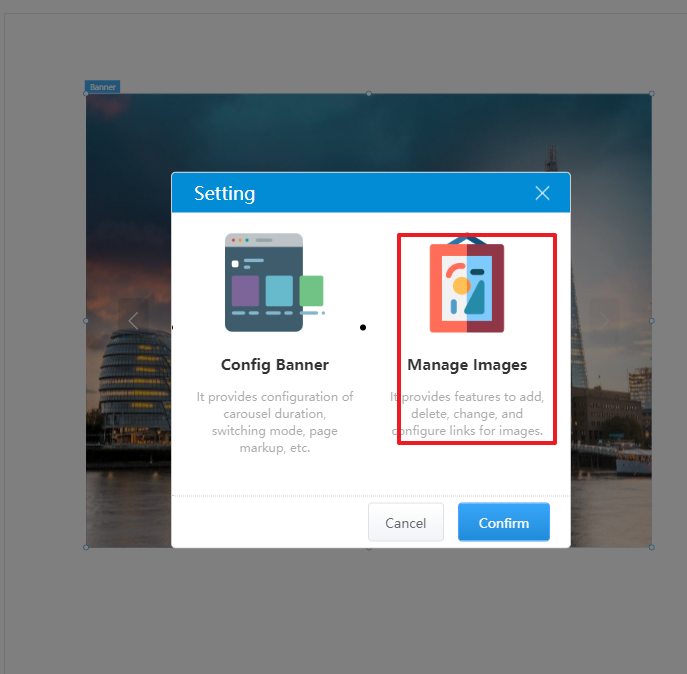
- Right-click the banner widget again, choose Setting from the shortcut menu, and select Manage Images.
Figure 5 Selecting Manage Images
- Click Add, select the desired image, and click Save.
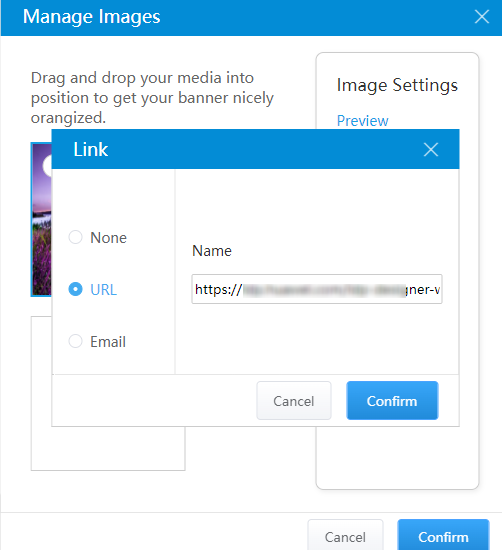
- Select the added image and click
 next to the link in Image Settings on the right.
 - Set the redirection URL and click Confirm.
Figure 6 Adding a link
- Right-click the banner widget again, choose Setting from the shortcut menu, and select Manage Images.
- Click Confirm to return to the advanced page.
- Click
 to save the advanced page settings. After the page settings are saved, click
  to release the page.
 - After the release is successful, click
 to preview.
Feedback
Was this page helpful?
Provide feedbackThank you very much for your feedback. We will continue working to improve the documentation.See the reply and handling status in My Cloud VOC.
For any further questions, feel free to contact us through the chatbot.
Chatbot


