
Managing Custom Types
Scenario
This section describes how to manage custom object types.
- Adding a Custom Type: describes how to define types.
- Adding a Subtype for a User-Defined Type: describes how to define subtypes.
- Associating a Custom Type/Subtype with a Layout: describes how to associate a user-defined type or subtype with an existing layout.
- Editing a Custom Type/Subtype: describes how to edit a user-defined type or subtype.
- Enabling/Disabling a User-defined Subtype: describes how to enable or disable a new type or subtype.
- Viewing Custom Types or Subtypes: describes how to view new user-defined types and subtypes.
- Deleting a Custom Type or Subtype: describes how to delete a user-defined type or subtype.
Limitations and Constraints
- Built-in types and sub-types cannot be associated with layouts, edited, deleted, enabled, or disabled.
- After a custom type is added, its values of Data Class, Type Name, and Type ID cannot be modified.
- After a subtype is added, its values of Data Class, Type Name, Type ID, and Subtype ID cannot be modified.
Adding a Custom Type
- Log in to the management console.
- Click
 in the upper part of the page and choose Security > SecMaster.
 - In the navigation pane on the left, choose Workspaces > Management. In the workspace list, click the name of the target workspace.
Figure 1 Workspace management page

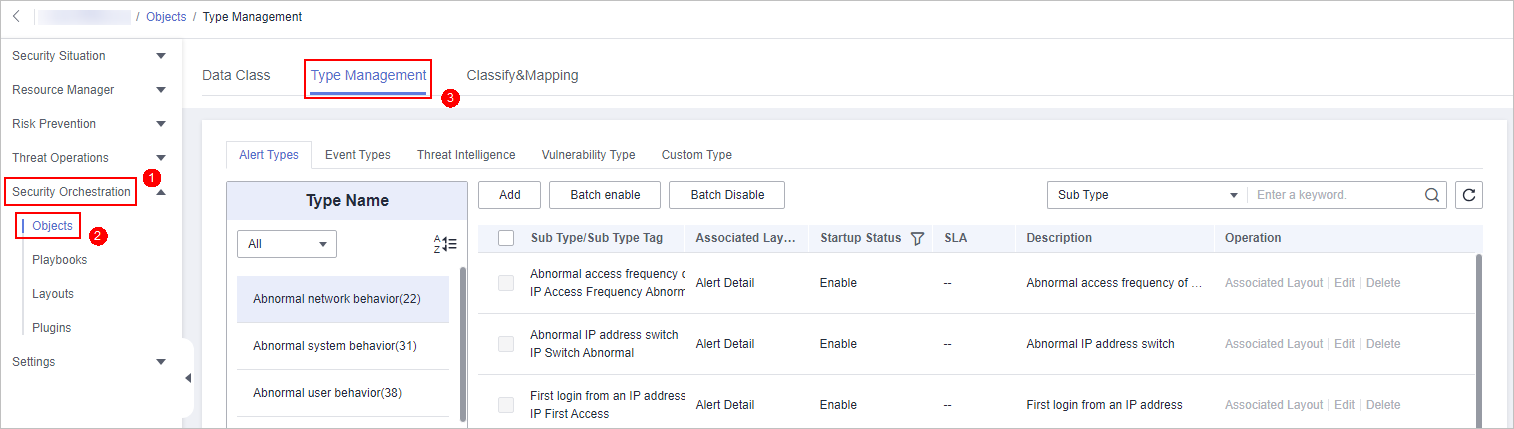
- In the navigation pane on the left, choose . On the displayed page, click the Type Management tab.
Figure 2 Type Management page
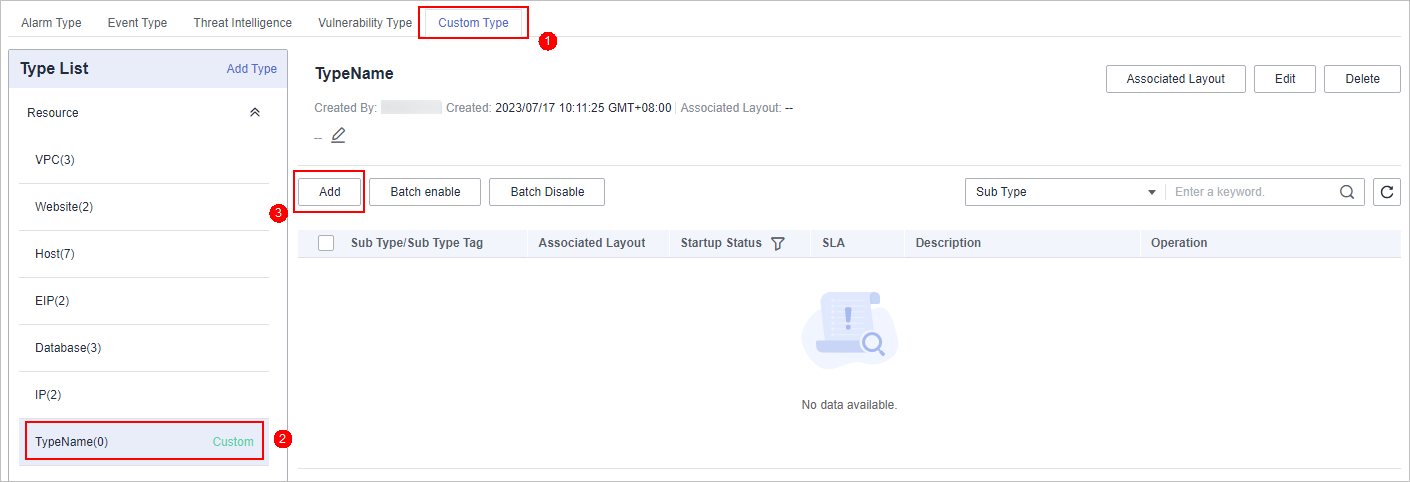
- On the Type Management page, click the Custom Type tab. On the displayed page, click Add.
Figure 3 Add Type

- On the Add Type page, set type parameters.
Table 1 User-defined type parameters Parameter
Description
Data Class
Select an existing data class.
Type Name
Create a name for the type you want to define.
Type Tag
Enter a type tag. The keyword must comply with the upper camel case naming rules, for example, TypeTag.
Startup Status
The enabling status of the type:
Description
Description of a custom type.

After a user-defined type is added, the Data Class, Type Name, and Type ID cannot be modified.
- In the lower right corner of the page, click OK.
After the type is added, you can view the new type in the Type List on the User-Defined Types page.
Adding a Subtype for a User-Defined Type
- Log in to the management console.
- Click in the upper part of the page and choose Security > SecMaster.
- In the navigation pane on the left, choose Workspaces > Management. In the workspace list, click the name of the target workspace.
Figure 4 Workspace management page
- In the navigation pane on the left, choose . On the displayed page, click the Type Management tab.
Figure 5 Type Management page
- On the Type Management page, click the Custom Type tab. In the type list on the left, click the name of the custom type for which you want to add a subtype. Details about the custom type are displayed on the right.
- On the Custom Types page on the right, click Add.
Figure 6 Adding a subtype
- On the Add Subtype page, set parameters.
Table 2 Subtype parameters Parameter
Description
Data Class
Name of the current data class.
Type Name
Name of the current type.
Type ID
ID of the current type.
Subtype
User-defined subtype keyword.
Subtype ID
Custom subtype ID. The keyword must comply with the upper camel case naming rules, for example, SubTypeTag.
Status
Indicates the enabling status of the subtype:
SLA
Set the SLA processing time of the subtype.
Description
Description of a subtype
- Click OK.
Associating a Custom Type/Subtype with a Layout
Built-in types and subtypes have been associated with layouts by default. You cannot customize associated layouts.
- Log in to the management console.
- Click in the upper part of the page and choose Security > SecMaster.
- In the navigation pane on the left, choose Workspaces > Management. In the workspace list, click the name of the target workspace.
Figure 7 Workspace management page
- In the navigation pane on the left, choose . On the displayed page, click the Type Management tab.
Figure 8 Type Management page
- On the Type Management page, click the Custom Type tab. On the displayed page, perform operations based on the type.
- For a type:
- In the Type List on the left of the Custom Type page, select the type to be associated with a layout.
- In the detailed information about the type on the right, click Associate Layout. The Associate Layout dialog box is displayed.
- In the Associate Layout dialog box, select the target layout and click OK.
- For a subtype:
- In the Type List on the left of the Custom Type page, select the type to be associated with a layout.
- In the subtype list of this type displayed on the right, click Associate Layout in the Operation column of the target type to associate with the layout. The Associate Layout dialog box is displayed.
- In the Associate Layout dialog box, select the target layout and click OK.
- For a type:
Editing a Custom Type/Subtype
- Built-in types and subtypes cannot be edited.
- After a user-defined type is added, the Data Class, Type Name, and Type ID cannot be modified.
- After a subtype is added, its Data Class, Type Name, Type Tag, Sub Type, and Sub Type Tag cannot be modified.
- Log in to the management console.
- Click in the upper part of the page and choose Security > SecMaster.
- In the navigation pane on the left, choose Workspaces > Management. In the workspace list, click the name of the target workspace.
Figure 9 Workspace management page
- In the navigation pane on the left, choose . On the displayed page, click the Type Management tab.
Figure 10 Type Management page
- On the Type Management page, click the Custom Type tab. On the displayed page, perform operations based on the type.
- For a type:
- In the Type List on the left of the Custom Type page, select the type to be edited.
- Click Edit on the target type detail page. The Edit Type page is displayed on the right.
- On the Edit Type page, edit the parameters of the type.
Table 3 Type parameters Parameter
Description
Data Class
Data class to which the type belongs, which cannot be modified.
Type Name
Name of a user-defined type, which cannot be modified.
Type ID
Vulnerability type ID, which cannot be modified.
Status
The enabling status of the type.
Description
Description of a custom type
- In the lower right corner of the page, click Confirm.
- For a subtype:
- In the Type List on the left of the Custom Type page, select the type you want to edit.
- In the subtype list of this type on the right, click Edit in the Operation column of the target subtype. The Edit Subtype page is displayed on the right.
- On the Edit Subtype page, edit the parameters of the subtype.
Table 4 Subtype parameters Parameter
Description
Data Class
Data class to which the type belongs, which cannot be modified.
Type Name
Name of a user-defined type, which cannot be modified.
Type ID
Vulnerability type ID, which cannot be modified.
Subtype Name
Name of the sub type, which cannot be edited.
Subtype ID
Subtype ID, which cannot be modified.
Startup Status
The enabling status of the subtype.
SLA
SLA processing time of the subtype
Description
Description of a custom subtype
- In the lower right corner of the page, click OK.
- For a type:
Enabling/Disabling a User-defined Subtype
Built-in subtypes are enabled by default and cannot be disabled.
- Log in to the management console.
- Click in the upper part of the page and choose Security > SecMaster.
- In the navigation pane on the left, choose Workspaces > Management. In the workspace list, click the name of the target workspace.
Figure 11 Workspace management page
- In the navigation pane on the left, choose . On the displayed page, click the Type Management tab.
Figure 12 Type Management page
- On the Type Management page, click the Custom Type tab. In the type list on the left of the page, select the type you want to associate with the layout.
- In the subtype list displayed on the right, enable or disable the target subtype in the Startup Status column.
You can batch enable or disable subtypes. To do so, select them and click Batch enable or Batch Disable in the upper left corner above the type list.
- In the dialog box displayed, click OK.
If the system displays a message indicating that the operation is successful and the status of the target type changes to Disabled (or Enabled), the target type is disabled (or enabled).
Viewing Custom Types or Subtypes
- Log in to the management console.
- Click in the upper part of the page and choose Security > SecMaster.
- In the navigation pane on the left, choose Workspaces > Management. In the workspace list, click the name of the target workspace.
Figure 13 Workspace management page
- In the navigation pane on the left, choose . On the displayed page, click the Type Management tab.
Figure 14 Type Management page
- On the Type Management page, click the Custom Type tab. On the displayed page, view details about existing custom types or subtypes.
- The type list is displayed on the left, showing the existing types.
- To view details about a type, click the type name in the type list. The type details are displayed on the right. The detailed information is as follows:
- Basic information about the target type: name, creator, creation time, and associated layout.
- Subtype list: information about existing subtypes, subtype names, and layouts associated with subtypes.
Deleting a Custom Type or Subtype
Built-in types and subtypes cannot be deleted.
- Log in to the management console.
- Click in the upper part of the page and choose Security > SecMaster.
- In the navigation pane on the left, choose Workspaces > Management. In the workspace list, click the name of the target workspace.
Figure 15 Workspace management page
- In the navigation pane on the left, choose . On the displayed page, click the Type Management tab.
Figure 16 Type Management page
- On the Type Management page, click the Custom Type tab. On the displayed page, perform operations based on the type.
- For a type:
- In the Type List on the left of the Custom Type page, select the target.
- In the right pane, click Delete on the target type page to delete the type. A dialog box is displayed for you to confirm the deletion.
- In the displayed dialog box, click OK.
- For a subtype:
- In the Type List on the left of the Custom Type page, select the target type.
- In the subtype list of this type on the right, click Delete in the Operation column of the target type to be deleted. The deletion confirmation dialog box is displayed.
- In the displayed dialog box, enter DELETE and click OK.
- For a type:
Feedback
Was this page helpful?
Provide feedbackThank you very much for your feedback. We will continue working to improve the documentation.See the reply and handling status in My Cloud VOC.
For any further questions, feel free to contact us through the chatbot.
Chatbot


