
Creating a Training Job
Developing models involves optimizing their performance effectively. Traditional methods require repeatedly testing various model designs, datasets, and hyperparameters, which takes significant time and effort but may still fail to deliver good results. ModelArts simplifies this process by offering tools for creating training jobs, tracking progress in real time, and managing versions. With ModelArts, users can test different configurations easily and identify the best-performing setup faster.
Create a production training job in either of the following ways:
- Create a production training job on the ModelArts console. This chapter provides the operation guide of the new page. For details about the operation guide of the old (default) page, see Creating a Production Training Job (Old Version).
- Use the ModelArts API to create a production training job. For details, see Using PyTorch to Create a Training Job (New-Version Training).
Notes and Constraints
By default, up to 10,000 training jobs can be created. You can view the remaining quota on the training job list page.

Prerequisites
- Account not in arrears (paid resources required for training jobs).
- Data for training uploaded to an OBS directory.
- At least one empty folder in OBS for storing training output.

ModelArts does not support encrypted OBS buckets. When creating an OBS bucket, do not enable bucket encryption.
- OBS directory and ModelArts in the same region.
- Access authorization configured. If you have not yet configured access, follow the instructions in Configuring Agency Authorization for ModelArts with One Click.
Billing
Model training in ModelArts uses compute and storage resources, which are billed. Compute resources are billed for running training jobs. Storage resources are billed for storing data in OBS or SFS. For details, see Model Training Billing Items.
Procedure
To create a training job, follow these steps:
Access the page for creating a training job. For details, see Step 1: Accessing the Page for Creating a Training Job.
Configure basic information, such as the runtime type, job name, description, and experiment. For details, see Step 2: Configuring Basic Settings.
Configure environment information, such as the algorithm type, boot mode, engine, and version. For details, see Step 3: Configuring the Environment.
Configure training parameters, including inputs, outputs, hyperparameters, and environment variables. For details, see Step 4: (Optional) Configuring Training Settings.
Configure the resource pool type, instance specifications, number of instances, and mounted storage. For details, see Step 5: Configuring Resources.
Configure auto restart (unconditional auto restart and restart upon suspension). For details, see Step 6: Configuring HA.
Set the job priority, preemption, and auto stop. For details, see Step 7: Configuring Scheduling Parameters.
Configure logs, event notifications, and tags. For details, see Step 8: Configure Advanced Parameters.
Submit a training job and view its status. For details, see Step 9: Submitting a Training Job and Viewing Its Status.
Step 1: Accessing the Page for Creating a Training Job
- Log in to the ModelArts console.
- In the navigation pane, choose Model Training > Training Jobs.
- Click Create Training Job. The new-version page is displayed by default. The following describes how to create a training job on the old-version page.
Step 2: Configuring Basic Settings
| Parameter | Description |
|---|---|
| Runtime Type | Select Production. Debug your training code either in the cloud or locally before using it to create production training jobs.
|
| Name | Job name, which is mandatory. The system automatically generates a name, which you can then rename according to the following rules.
|
| Description (Optional) | Job description, which helps you learn about the job information in the training job list. Enter 0 to 256 characters. Only letters, digits, spaces, hyphens (-), underscores (_), commas (,), and periods (.) are supported. |
| Experiment | Specifies whether to organize training jobs into experiments for better management. It helps manage multiple job versions efficiently. Experiments help manage and optimize training jobs. For example, after fine-tuning hyperparameters, you can sort and compare job results in an experiment to find the optimal training configuration.
If you do not enable this feature, the job will not be managed in any experiment. |
Step 3: Configuring the Environment
- Custom algorithm: Create a training job using a preset image or a custom image.
Table 2 Environment settings (custom algorithm) Parameter
Description
Algorithm Type
Select Custom algorithm. This parameter is mandatory.
Boot Mode
This parameter is mandatory when Algorithm Type is set to Custom algorithm. Options:
- Preset image: Create a training job using a preset training framework and image.
- Custom image: Create a training job using a custom image.
If the software in the preset images cannot meet your needs, you can use a custom image for training. This image must be uploaded to SWR beforehand. For details about how to create an image, see Preparing a Model Training Image.
Engine and Version
If Boot Mode is set to Preset image, you need to select the required engine and version.
Ensure that the framework of the AI engine you select is the same as the one you use for writing algorithm code. For example, if PyTorch is used for writing algorithm code, select PyTorch when you create a job.
Image
Select a container image for training. For details about the training image creation requirements, see Preparing a Model Training Image.
- If Boot Mode is set to Preset image and the engine version is set to Customize, you need to select a proper image from the container images. Figure 2 Boot Mode > Preset image

- If the Boot Mode is set to Custom image, you need to select a proper image from the container images. Figure 3 Boot Mode > Custom image

You can set the container image path in either of the following ways:- To select your image or an image shared by others, click Select on the right and select a container image for training. The required image must be uploaded to SWR beforehand.
- To select a public image, enter the address of the public image in SWR. Enter the image path in the format of "Organization name/Image name:Version name". Do not contain the domain name (swr.<region>.myhuaweicloud.com) in the path because the system will automatically add the domain name to the path. For example, if the SWR address of a public image is swr.<region>.myhuaweicloud.com/test-image/tensorflow2_1_1:1.1.1, enter test-images/tensorflow2_1_1:1.1.1.
Code Source
Select the code source. The default value is Object Storage Service – Bucket.
- Object Storage Service – Bucket: Select Object Storage Service – Bucket if the training code is stored in an OBS bucket.
Code Directory
This parameter is available only when Code Source is set to OBS.
Select the OBS directory where the training code file is stored. This parameter is mandatory when Boot Mode is set to Preset image. This parameter is optional when Boot Mode is set to Custom image.
- Upload code to the OBS bucket beforehand. The total size of files in the directory cannot exceed 5 GB, the number of files cannot exceed 1,000, and the folder depth cannot exceed 32. If there is a pre-trained model, put it in the code directory.
- The training code file is automatically downloaded to the ${MA_JOB_DIR}/demo-code directory of the training container when the training job is started. demo-code is the last-level OBS directory for storing the code. For example, if Code Directory is set to /test/code, the training code file is downloaded to the ${MA_JOB_DIR}/code directory of the training container.
NOTE:Encrypt sensitive data before saving it to your OBS bucket.
Boot File
Select or enter the Python boot script of the training job in the code directory. This parameter is mandatory when Boot Mode is set to Preset image. This parameter is not required when Boot Mode is set to Custom image.
ModelArts supports only the boot file written in Python. Therefore, the boot file must end with .py.
Boot Command
Command for booting an image. This parameter is not required when Boot Mode is set to Preset image. This parameter is mandatory when Boot Mode is set to Custom image.
When a training job is running, the boot command is automatically executed after the code directory is downloaded.- If the training boot script is a .py file, train.py for example, the boot command is as follows.
python ${MA_JOB_DIR}/demo-code/train.py - If the training boot script is a .sh file, main.sh for example, the boot command is as follows:
bash ${MA_JOB_DIR}/demo-code/main.sh
You can use semicolons (;) and ampersands (&&) to combine multiple commands. demo-code in the command is the last-level OBS directory where the code is stored. Replace it with the actual one.
If there are input pipes, output pipes, or hyperparameters, ensure that the last command of the boot command runs the training script.
Reason: The system appends input pipes, output pipes, and hyperparameters to the end of the boot command. If the last command is not the training script, an error will occur.
Example: If the last line of the boot command is python train.py and the --data_url hyperparameter exists, the system executes python train.py --data_url=/input when running properly. However, if the boot command ends with another command, such as:
python train.py
pwd    # The last command is pwd instead of the training script.
The system will execute python train.py pwd --data_url=/input, leading to an error.
NOTE:To ensure data security, do not enter sensitive information, such as plaintext passwords.
User ID
ID of the user who runs the container. This parameter is not required when Boot Mode is set to Preset image. This parameter is optional when Boot Mode is set to Custom image.
If the UID needs to be specified, its value must be within the specified range. The UID ranges of different resource pools are as follows:
- Public resource pool: 1000 to 65535
- Dedicated resource pool: 0 to 65535
The default value 1000 is recommended.
If the user ID is set to 0, the user in the training container is root.
Local Code Directory
This parameter is available in More Configurations only when Code Source is set to OBS. This parameter is optional.
This parameter specifies the local directory of the training container. When training starts, the code directory is downloaded to this directory. The default local code directory is /home/ma-user/modelarts/user-job-dir.
Cannot be under /home/ma-user/modelarts/*, /home/ma-user/modelarts-dev/*, /home/ma-user/infer/*, or /home/ma-user.
Click Preview Runtime Environment in the upper right corner of the page to view the work directory of the training job.
Container Execution Directory
Specify the local directory of the training container. During training, the system automatically runs the cd command to execute the boot file in this directory.
It is the local directory where the boot command is executed during the training job. This directory can store generated temporary files. This directory must be the parent directory of the boot file's local directory.
- My algorithm: Use an algorithm in Algorithm Management to create a training job.
Set Algorithm Type to My algorithm and select an algorithm from the algorithm list. If no algorithm meets the requirements, you can create an algorithm. For details, see Creating an Algorithm.
Step 4: (Optional) Configuring Training Settings
When creating a training job, you must configure inputs, outputs, hyperparameters, and environment variables of the training job.
| Parameter | Description |
|---|---|
| Input | Click Add and configure training inputs.
|
| Output | Click Add and configure training outputs.
|
| Hyperparameter | Used for tuning. This parameter is determined by the selected algorithm. If hyperparameters have been defined in the algorithm, all hyperparameters in the algorithm are displayed. Hyperparameters can be modified and deleted. The status depends on the hyperparameter constraint settings in the algorithm. For details, see Table 6.
NOTE: To ensure data security, do not enter sensitive information, such as plaintext passwords. |
| Environment Variable | Add environment variables based on service requirements. For details about the environment variables preset in the training container, see Managing Environment Variables of a Training Container.
NOTE: To ensure data security, do not enter sensitive information, such as plaintext passwords. |
| Automated Hyperparameter Search | If you select My algorithm for Algorithm Type and the selected algorithm supports the autoSearch(S) policy, you can click More Configurations to show Automated Hyperparameter Search. Selecting it enables automated hyperparameter search during training, potentially increasing the time needed. For details, see Overview. |


Step 5: Configuring Resources
When creating a training job, you need to choose training resources. Select Public resource pool or Dedicated resource pool. Select a resource pool as required. A dedicated resource pool is recommended. For details about the differences between dedicated and public resource pools, see Differences between dedicated resource pools and public resource pools.
| Parameter | Description |
|---|---|
| Source of resources |
|
| Resource Pool | This parameter appears only for dedicated resource pools. In the Resource Pool section, click Select Resource Pool and choose your desired dedicated resource pool or logical subpool from the menu on the right. Click OK. You can view the dedicated resource pool name, node pool specifications, number of available nodes/maximum number of nodes, number of available NPU/GPUs, available CPUs (vCPUs), available memory (GiB), and resource fragments. Hover over View in the Resource Fragment column to check fragment details and check whether the resource pool meets the training requirements. Once you choose a resource pool, its details appear. To choose a different one, click Reselect. |
| Specification Type | This parameter is displayed when you select a dedicated resource pool. The following specifications types are supported:
Figure 5 Specifications  |
| Specifications | For a dedicated resource pool, choose both a resource pool and its preset specifications. For a public resource pool, simply choose the specifications in the right pane and click OK.
|
| Compute Nodes | Select the number of instances as required. The default value is 1.
|
| Specify Affinity Nodes | This parameter is supported only for dedicated resource pools. It allows you to configure supernode and node affinity for training jobs. Select the checkbox to enable it. When enabled, it allows fine-grained control over pod deployment strategies, including: strict placement (strong affinity), preferred placement (weak affinity), prohibited placement (strong anti-affinity), and avoided placement (weak anti-affinity). Affinity Type: Node affinity: Requires all instances of a training job to be scheduled on selected nodes, either strictly or preferentially. Node anti-affinity: Requires all instances of a training job to be avoided or strictly excluded from selected nodes. Strength: The degree of affinity. Weak: The system will try to place the pod on the specified node, but it is not guaranteed. Strong: The pod must be scheduled onto the specified node; otherwise, scheduling will not proceed. Supernode Affinity Method: Supported only for supernode resource pools. At the supernode level, currently only scenarios where all instances of a training job belong to one affinity group are supported. This is suitable for training jobs where traffic must not cross supernodes. Random child nodes: The system randomly schedules tasks to child nodes within the target supernode. Specify child nodes: The system schedules tasks to the specified child nodes. Select Supernode: Choose the supernode(s) to be configured. Supported only for supernode resource pools. Select Node: Choose the node(s) to be configured. |
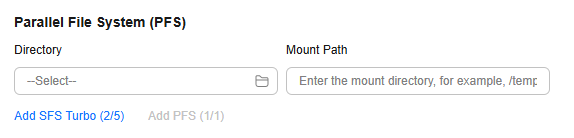
| Storage Mounting |
|
| Supernode Affinity Group Instances |
|
| Training Mode | ModelArts offers various training modes when using a MindSpore preset image with Ascend specifications.
|


Step 6: Configuring HA
You can set auto restart for a training job when creating it.
| Parameter | Description |
|---|---|
| Auto Restart | Choose whether to enable automatic restart for a training job.
|
| Maximum Restarts | This parameter is available when Auto Restart is enabled. The training job will stop if it is still abnormal after maximum automatic restarts.
The value cannot be changed once the training job is created. Set this parameter based on your needs. |
| Unconditional Auto Restart | This parameter is available when Auto Restart is enabled. If Unconditional auto restart is selected, the training job will be restarted unconditionally once the system detects a training exception. To prevent invalid restarts, the system limits unconditional restarts to three consecutive attempts. |
| Restart Upon Suspension | This parameter is available when Auto Restart is enabled. ModelArts continuously monitors job processes to detect suspension and optimize resource usage. When this feature is enabled, suspended jobs can be automatically restarted at the process level. CPU specifications do not support job restarts upon suspension. However, ModelArts does not verify code logic, and suspension detection is periodic, which may result in false reports. By enabling this feature, you acknowledge the possibility of false positives. To prevent unnecessary restarts, ModelArts limits consecutive restarts to three. |
Step 7: Configuring Scheduling Parameters
When creating a training job, you can configure its scheduling policy. For example, you can increase its priority, enable preemption, or set it to stop automatically. These changes help boost scheduling efficiency.
| Parameter | Description |
|---|---|
| Job Priority |
|
| Preemption |
|
| Auto Stop | Choose whether to enable Auto Stop.
|
Step 8: Configure Advanced Parameters
| Parameter | Description |
|---|---|
| Persistent Log Saving | This function is enabled by default when Ascend specifications are selected. This function is available when CPU or GPU specifications are selected.
|
| Log Path | When Persistent Log Saving is enabled, you must configure a log path to store log files generated by the training job. Ensure that you have read and write permissions to the selected OBS directory. You can choose your own OBS bucket or enter a path. The path must start with obs:// and end with a slash (/), like this: obs://bucketname/path/. For shared buckets from other users, you must enter the path. |
| Job Visibility | The options are Workspace and Creator.
|
| Event Notification | Choose whether to enable event notification for the training job.
NOTE:
|
| Password-free SSH Between Instances | Choose whether to enable password-free SSH between instances.
|
| Tags | TMS's predefined tags are recommended for adding the same tag to different cloud resources. For details about how to use tags, see Using TMS Tags to Manage Resources by Group. You can add up to 20 tags to a training job. |
Step 9: Submitting a Training Job and Viewing Its Status
After setting the parameters, click Submit.
A training job runs for a period of time. You can go to the training job list to view the basic information about the training job.
- In the training job list, Status of a newly created training job is Pending.
- When the status of a training job changes to Completed, the training job is finished, and the generated model is stored in the corresponding output path.
- If the status is Failed or Abnormal, click the job name to go to the job details page and view logs for troubleshooting.
Feedback
Was this page helpful?
Provide feedbackThank you very much for your feedback. We will continue working to improve the documentation.See the reply and handling status in My Cloud VOC.
For any further questions, feel free to contact us through the chatbot.
Chatbot


