Configuring SQL Server CDC
Overview
Change Data Capture (CDC) enables ROMA Connect to synchronize data with data sources and physically delete data tables in real time.
This section describes how to enable the CDC function for the SQL Server database.
Constraints
- If the SQL Server database is deployed in primary/secondary mode, the secondary SQL Server database is not used.
- Fields of the binary type, such as BINARY, VARBINARY, and IMAGE, cannot be collected.
- You have downloaded the SQL Server Management Studio (SSMS) client. For details, see Download SQL Server Management Studio (SSMS).
Procedure
It is recommended that the database administrator configure the CDC function. The following uses the Windows environment as an example.
- Enable CDC.
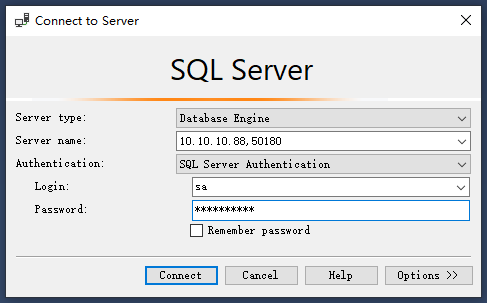
- Use the SSMS client to connect to the server where the SQL Server database is located, and log in to the database as user sa.

Password indicates the password of user sa of the database. You can obtain the password from the database administrator.
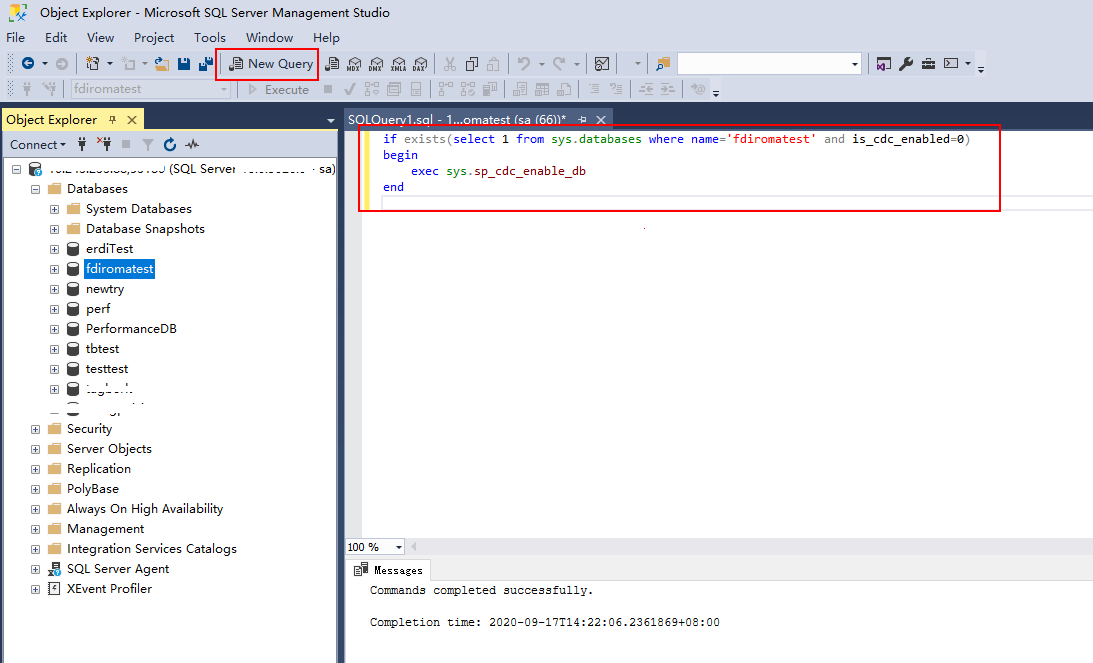
- Click New Query and select the database for which you want to enable CDC. Run the following command to start CDC for the SQL Server database:
if exists(select 1 from sys.databases where name='fdiromatest' and is_cdc_enabled=0)
begin
    exec sys.sp_cdc_enable_db
end
Replace fdiromatest with the actual database name.

- Run the following command to check whether CDC is successfully enabled. If 1 is displayed, CDC is successfully enabled.
select is_cdc_enabled from sys.databases where name='fdiromatest'
Replace fdiromatest with the actual database name.

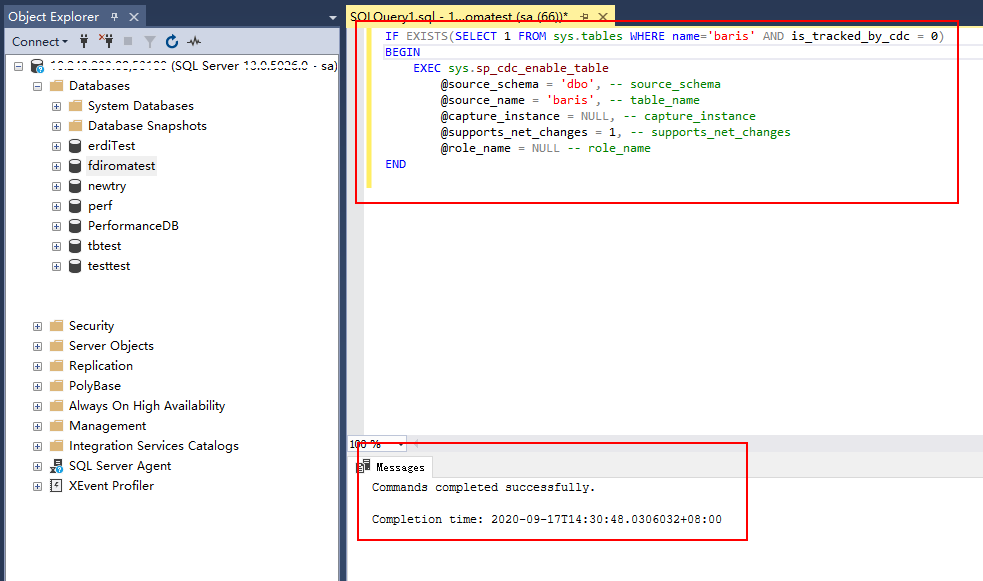
- Enable the table-level configuration.
IF EXISTS(SELECT 1 FROM sys.tables WHERE name='baris' AND is_tracked_by_cdc = 0)
BEGIN
    EXEC sys.sp_cdc_enable_table
        @source_schema = 'dbo', -- source_schema
        @source_name = 'baris', -- table_name
        @capture_instance = NULL, -- capture_instance
        @supports_net_changes = 1, -- supports_net_changes
        @role_name = NULL -- role_name
END
Replace baris with the name of the table for which CDC needs to be enabled.

- Run the following command to query the execution result. If the result is 1, the operation is successful.
SELECT is_tracked_by_cdc FROM sys.tables WHERE name='baris'
Replace baris with the name of the table for which CDC needs to be enabled.

After CDC is created, the system creates a series of system catalogs, views, stored procedures, and jobs to implement CDC functions.

- Use the SSMS client to connect to the server where the SQL Server database is located, and log in to the database as user sa.
- After the CDC is configured, you need to create a user and assign permissions to the user.
- Right-click Security and choose New > Login from the shortcut menu.
- On the General page, enter the created username and password.
Select SQL Server authentication and enter the password.
- On the Server Roles page, select dbcreator and public.
- On the User Mapping page, select the users and database role members that are mapped to this login.
- In the Users mapped to this login area, select the database for which you want to configure CDC, for example, fdiromatest.
- In the Database role membership for area, select db_datareader, db_owner, and public.
- Click OK.
Follow-Up Operations
If the system table structure changes or the table level is adjusted, you need to enable CDC again. The configuration procedure is as follows:
- Disable CDC and set schema and name based on the site requirements.
EXEC sys.sp_cdc_disable_table
 @source_schema = N'dbo',
 @source_name = 'baris',
 @capture_instance ='all'
- Enable CDC again and set schema and name based on the site requirements.
Enable the table-level configuration.
IF EXISTS(SELECT 1 FROM sys.tables WHERE name='baris' AND is_tracked_by_cdc = 0)
 BEGIN
     EXEC sys.sp_cdc_enable_table
         @source_schema = 'dbo', -- source_schema
         @source_name = 'baris', -- table_name
         @capture_instance = NULL, -- capture_instance
         @supports_net_changes = 1, -- supports_net_changes
         @role_name = NULL -- role_name
 END
Feedback
Was this page helpful?
Provide feedbackThank you very much for your feedback. We will continue working to improve the documentation.See the reply and handling status in My Cloud VOC.
For any further questions, feel free to contact us through the chatbot.
Chatbot


