Updated on 2025-12-10 GMT+08:00
Modifying or Deleting an SCP
The following describes how to modify and delete a custom SCP.
Modifying an SCP
- Log in to the Organizations console as an organization administrator or using the management account.
- On the Policies page, click Service control policies.
- Locate the custom SCP you want to modify and click Edit in the Operation column. In the displayed dialog box, enter "Confirm" and click OK.
Figure 1 Modifying an SCP

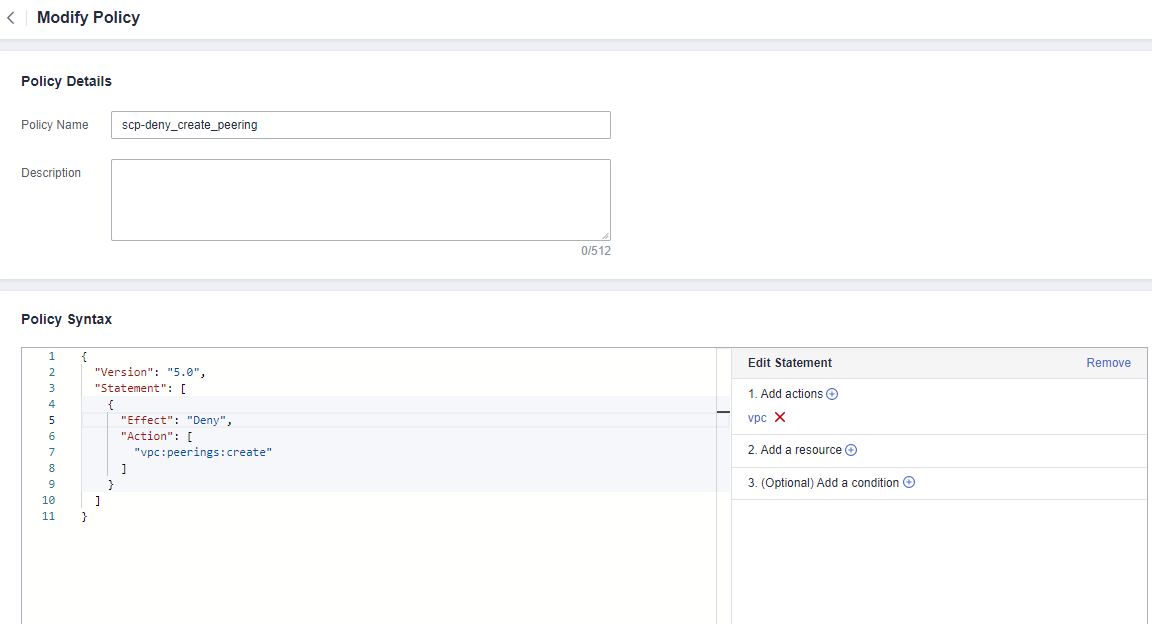
- On the Modify Policy page, modify the policy name and description as needed, as shown inFigure 2.
- Edit the policy content if needed. You can use the statement editor to modify the policy syntax. For details, see SCP Syntax.
- Click Save. If the policy list is displayed, the SCP is updated successfully. If a message appears indicating incorrect policy content, modify the SCP syntax.
Deleting an SCP
An SCP that is attached to OUs or accounts cannot be deleted. To delete such an SCP, you need to detach the SCP from the OUs or accounts first.
- Log in to the Organizations console as an organization administrator or using the management account.
- On the Policies page, click Service control policies.
- Locate the target custom SCP and click Delete in the Operation column.
- Click OK in the displayed dialog box.
Figure 3 Deleting an SCP

Parent topic: Managing SCPs
Feedback
Was this page helpful?
Provide feedbackThank you very much for your feedback. We will continue working to improve the documentation.See the reply and handling status in My Cloud VOC.
The system is busy. Please try again later.
For any further questions, feel free to contact us through the chatbot.
Chatbot


