Adding Recipients
You can add recipients on Message Center.
Procedure
- Log in to the management console.
- Click
 in the upper right corner.
 - In the left navigation pane, choose Recipient Management.
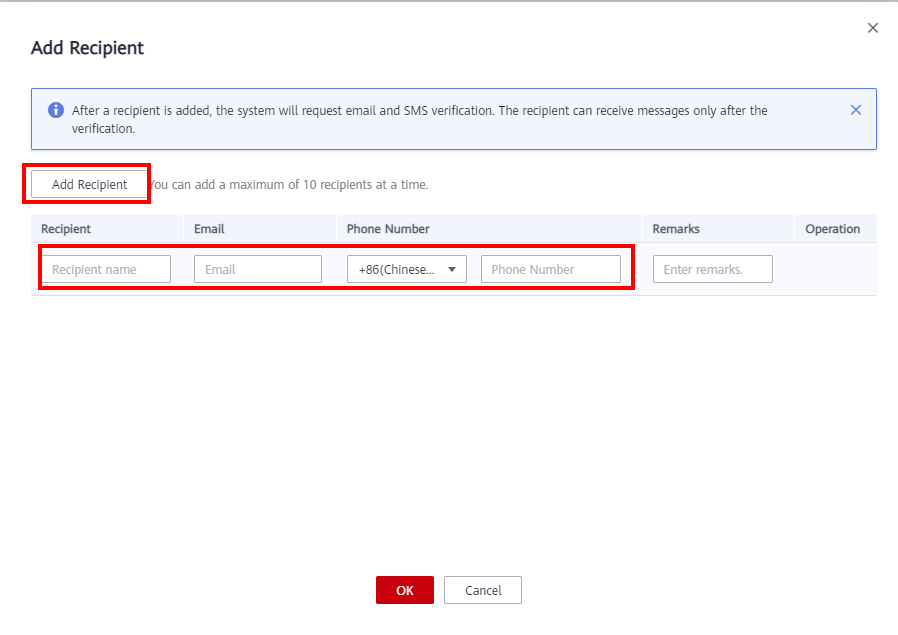
- On the Phone Number/Email tab, click Add Recipient.

- Enter the name, email address, phone number, and remarks (optional) of a recipient.

You can click Add Recipient again to add a maximum of 10 recipients at a time.
- Click OK.

After the recipient is added, the system automatically sends a verification message to the entered phone number and email address. The newly added recipient can receive messages only after the verification. If the verification is not performed in time, perform the verification again by referring to Resending a Verification Code.
- On the WeCom Robot tab, click Add Recipient.

- Enter the name and webhook address of a recipient.
- Click OK.
- On the Webhook Robot tab, click Add Recipient.

- Enter the name, webhook address, and private key of a recipient.
- Click OK.
- On the Feishu Robot tab, click Add Recipient.

- Enter the name, webhook address, and private key of a recipient.
- Click OK.
Feedback
Was this page helpful?
Provide feedbackThank you very much for your feedback. We will continue working to improve the documentation.See the reply and handling status in My Cloud VOC.
For any further questions, feel free to contact us through the chatbot.
Chatbot


