
Solicitação e modificação de um nome de domínio privado
Você pode solicitar um nome de domínio privado e se conectar a instâncias do DDS por meio do nome de domínio privado.
Precauções
- Depois que um nome de domínio privado for gerado, a alteração do endereço IP privado interromperá as conexões do banco de dados. Tenha cuidado ao realizar esta operação.
- Você precisa solicitar as permissões necessárias para usar nomes de domínio privados. Para obter detalhes, entre em contato com o atendimento ao cliente.
- Quando essa função está habilitada, você precisa solicitar um nome de domínio para uma instância existente. Um nome de domínio é aplicado automaticamente para uma nova instância.
- Esta função está disponível nas seguintes regiões: CN North-Beijing4, CN East-Shanghai1, CN South-Guangzhou, CN-Hong Kong e CN Southwest-Guiyang1.
Solicitação de um nome de domínio privado
- Faça logon no console de gerenciamento.
- Clique em
 no canto superior esquerdo e selecione uma região e um projeto.
 - Clique em
 no canto superior esquerdo da página e escolha Databases > Document Database Service.
 - Na página Instances, clique no nome da instância para ir para a página Basic Information.
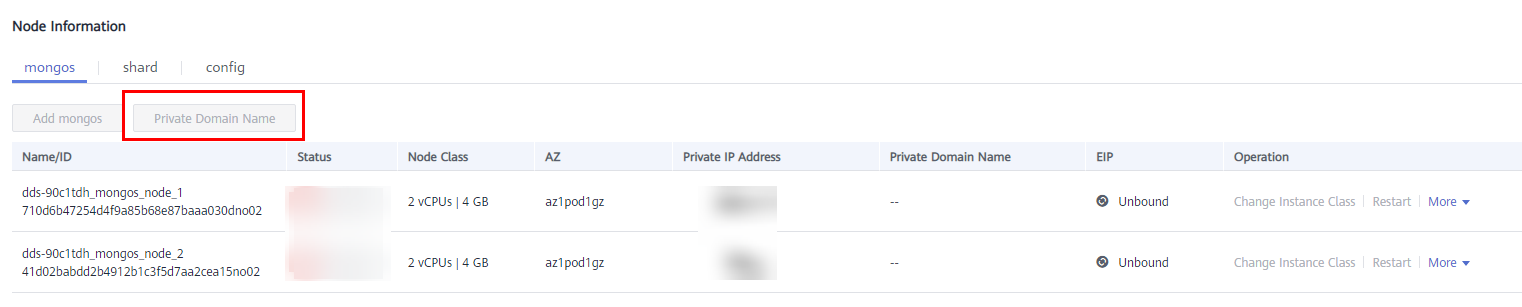
- Na área Node Information da página Basic Information, clique em Private Domain Name. Como alternativa, no painel de navegação à esquerda, escolha Connections. Na área Basic Information da guia Private Connection, clique em Private Domain Name.Figura 1 Solicitação de um nome de domínio privado
- Na área Node Information na página Basic Information, visualize os nomes de domínio privados gerados na coluna Private Domain Name.
Como alternativa, clique em Connections no painel de navegação à esquerda. Na área Basic Information na página exibida, exiba os nomes de domínio privados gerados na coluna Private Domain Name.
Modificação de um nome de domínio privado
Você pode alterar o nome de domínio privado de uma instância de BD existente.
- Faça logon no console de gerenciamento.
- Clique em
 no canto superior esquerdo e selecione uma região e um projeto.
 - Clique em
 no canto superior esquerdo da página e escolha Databases > Document Database Service.
 - Na página Instances, clique no nome da instância.
- Na área Node Information na página Basic Information, escolha More > Change Private Domain Name na coluna Operation.
Como alternativa, escolha Connections no painel de navegação à esquerda. Na parte inferior da área Basic Information da guia Private Connection, escolha More > Change Private Domain Name na coluna Operation.
- Na caixa de diálogo exibida, insira um novo nome de domínio privado. Clique em OK. Depois que o nome de domínio privado é alterado, leva cerca de 5 minutos para que a alteração entre em vigor.
- Apenas o prefixo de um nome de domínio privado pode ser modificado.
- O prefixo de um nome de domínio privado pode conter de 8 a 56 caracteres e pode incluir apenas letras e dígitos.
- O novo nome de domínio privado deve ser diferente dos existentes.
- Se você ativou a proteção de operação, clique em Send Code na caixa de diálogo Identity Verification exibida e insira o código de verificação obtido. Em seguida, clique em OK.
A autenticação de dois fatores melhora a segurança da sua conta e do produto na nuvem. Para obter detalhes sobre como ativar a proteção de operação, consulte o Guia de usuário do Identity and Access Management.


