Using the Event-Action Mechanism to Implement Widget Interaction Between Advanced Pages
Scenario
Huawei Cloud Astro Zero provides the event-action mechanism for interactions between widgets and between widgets and pages.
- An event is an action that occurs on a page or an operation (for example, single-clicking or loading a widget) performed by a user when an application is running.
- An action is a preset response (such as page redirection) to an event. For example, when a user clicks a button on a web page, a message box is displayed in response to this operation.
This section describes the preset common events and actions and how to configure events for advanced page widgets.
Getting to Know Events and Actions
- View the available events.
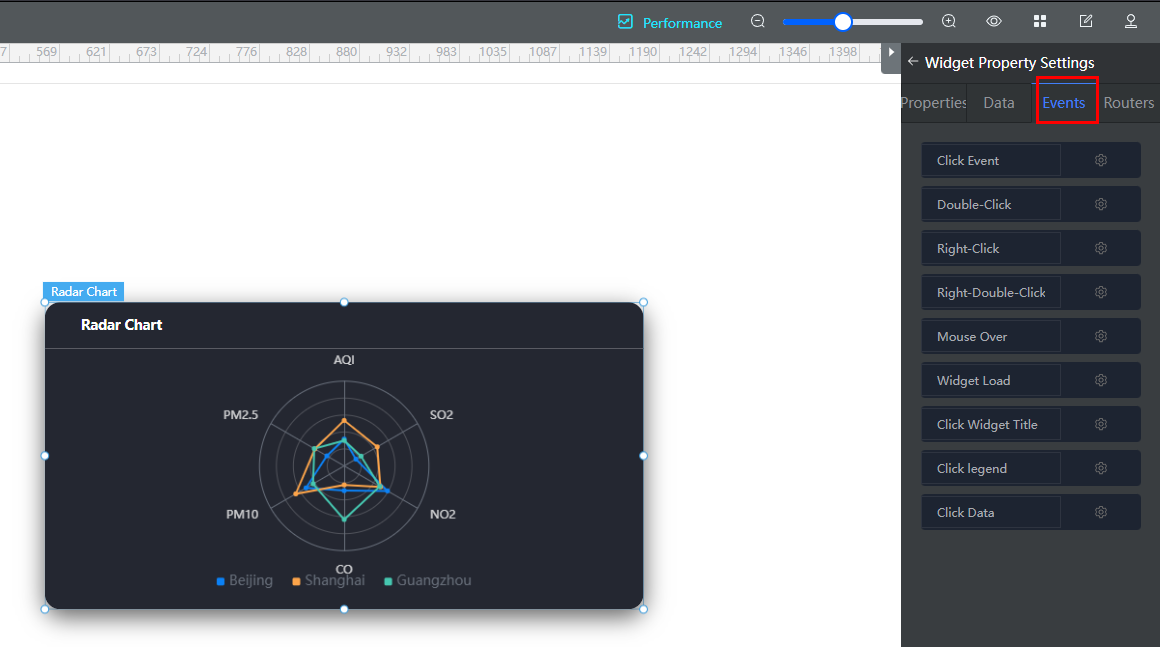
Take the radar chart widget as an example. Drag the widget to the canvas, and click the widget. In the widget property settings area on the right, click the Events tab, and view the available events.
Table 1 Preset events Name
Event Description
Click Event
Triggered by clicking a widget.
Double-Click
Triggered by double-clicking the widget.
Right-Click
Triggered by right-clicking the widget.
Right-Double-Click
Triggered by right-clicking the widget twice.
Mouse Over
Triggered by hovering the mouse cursor over the widget.
Widget Load
Triggered by loading the widget.
Click Widget Title
Triggered by clicking the widget title.
Click Legend
Triggered by clicking a legend.
Click Data
Triggered by clicking data.
The redirection event shown in Figure 1 is not a preset event in the platform. It is registered in the radar chart and triggered when the chart title is clicked. Events registered in widgets are also displayed in the event list for configuration. For details about how to register events in widgets, see Using the Event-Action Mechanism to Implement Widget Interaction Between Advanced Pages.
Events can be triggered only in the runtime environment (the running state or preview page of an application). They cannot be triggered in the development environment (the advanced page editing).
- Configure response actions for events.
Click
 next to an event name. On the Edit Event page, configure the response action.
- Edit Event dialog box
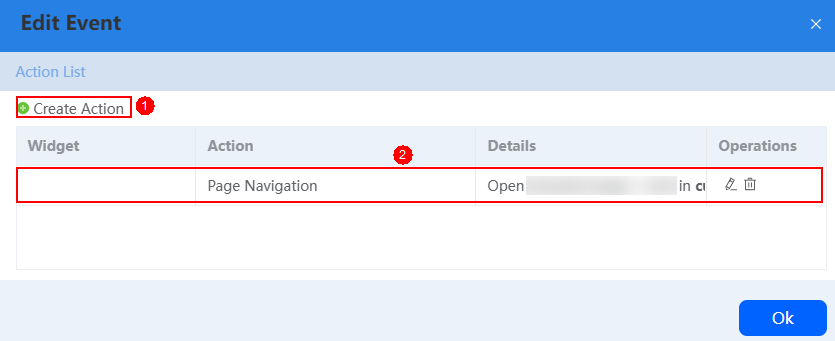
As shown in the following figure, click Create Action to add a response action for the current event. The actions configured for this event are displayed in the list and can be edited or deleted as required.Figure 2 Edit Event dialog box
- Preset actions
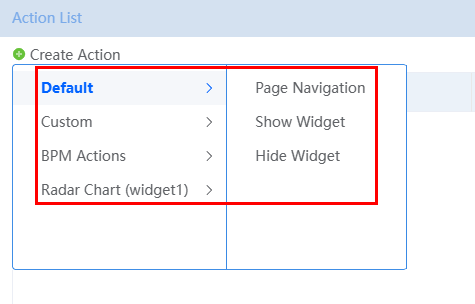
After you click New Action, the list of actions available for the current event are displayed.
Table 2 Preset actions Category
Action
Description
Default
Page Navigation
Redirecting to another page. The action parameters include:
- Page Type: type of the page to redirect to.
- Advanced Page, Standard Page, and External Page: Select one as required.
- Action Parameters: Parameters to be transferred through page macros. This setting can be ignored.
- How does it open: Mode of opening the redirection page. Options: Current Window and New Window.
Show Widget
Select the widgets to be displayed.
Hide Widget
Select the widgets to be hidden.
Custom
Custom Action
Write code to implement the action logic.
//var flag=true
//{widgetxxx}.flag=flag;
console.log('Test the custom action');
BPM Actions
Submit Instance
User activities are important in BPMs, with all interactions implemented through pages. The "dependency inversion" pattern is used for interactions between BPMs and pages. While page transitions are managed through event codes on the page, the BPM dictates the subsequent steps, not the page. This design enhances the reusability of pages, as developers can focus on the current task without concern for what follows.
Advanced pages come with built-in APIs for custom interactions, expressed as closures due to their lazy loading approach.
- Obtaining variables: $BPM (op => op.loadVariables(variables))
- Submitting instances: $BPM (op => op.submitInstance(variables))
- Submitting tasks: $BPM (op => op.submitTask(variables))
- Changing variables: $BPM (op => op.putVariables(variables))
In the JavaScript file for custom widgets on advanced pages, you can execute the following code to initiate a test BPM BPM and pass the value of test1 to it as the val variable.$BPM (op => op.submitInstance({ "name": "testBPM", "variables":{ "val": "test1" } }))Submit Task
Transfer Task
Change Variables
The Full Moon Pie Chart action shown in Figure 3 is not a preset action in the platform. It is registered in the full moon pie chart. The actions registered in all the widgets on the canvas are displayed for configuration. For details about how to register events in widgets, see Configuring Widget Interaction on the Same Page.
- Edit Event dialog box
- After the setting is complete, click
 in the upper part of the page to save the page.
 - Click
 . On the preview page that is displayed, check whether the configured events and actions can be triggered.
Events and Actions in Custom Widgets
If the preset events and actions cannot meet your requirements, create more for your service logic.
The widget templates provided by the platform contain event and action templates (widgetEventTemplate and widgetActionTemplate). Choose Maintenance > Global Elements > Page Assets > Widget Templates to search for and download the widget template. For details about how to download templates, see Managing Widget Templates.
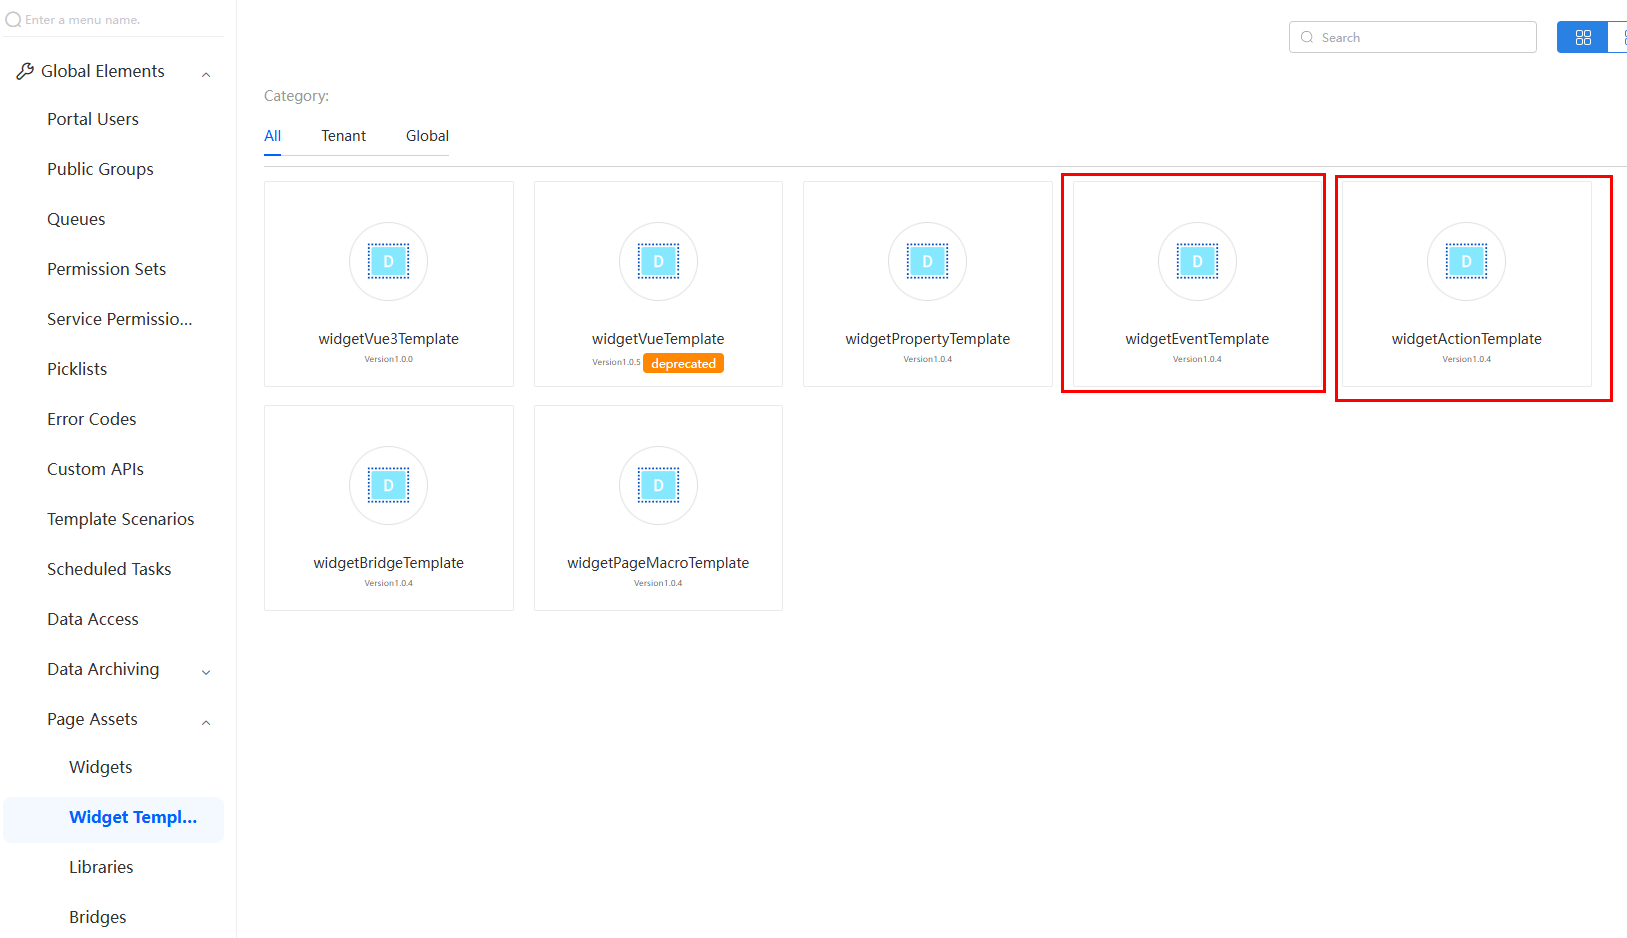
Widget templates include sample widgets with different functions. Develop custom widgets with these templates. For details about how to download widget templates, see Developing Custom Widgets.
The widget template code contains APIs for registering and triggering events and actions. See Table 3.
|
Type |
Function |
Description |
|---|---|---|
|
Event |
Studio.registerEvents( thisObj, "eventName", "Event Label", [] ); |
Event registering API. Only the events registered using this API can be displayed in the event list of widgets.
|
|
thisObj.triggerEvent( "eventName", {} ); |
Event triggering API.
|
|
|
Action |
Studio.registerAction( thisObj, "actionName", "Action Label", [], $.proxy(this.receiveActionCbk, this), [] ); |
Action registering API. Only the actions registered using this API can be displayed in the action list of widgets.
|
The following uses widgetEventTemplate and widgetActionTemplate to describe how to use the preceding event and action APIs.
Implement the following logic with the two templates: Clicking trigger Event in widgetEventTemplate passes the text in the text box to widgetActionTemplate. The widgetActionTemplate displays the text in its own text box.
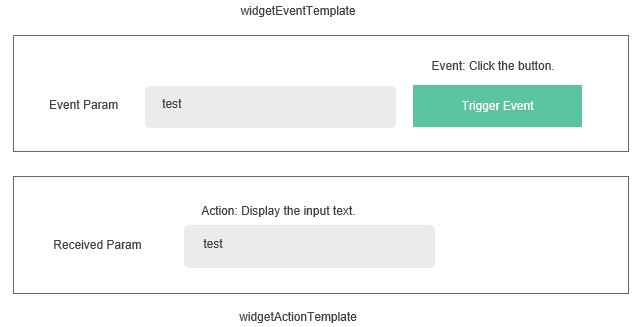
The implementation is as follows:
- widgetEventTemplate
In the widgetEventTemplate.js file, register the sendEvent event, which will be triggered when the trigger Event button is clicked. The code is as follows:
- Register the sendEvent event.
var sendEventConfig = [{ "name": "param1", "displayName": "Param1" }]; Studio.registerEvents( thisObj, "sendEvent", "Send Event", sendEventConfig ); - The sendEvent event is triggered by clicking the trigger Event button.
$("#triggerEvent", elem).bind('click', function () {
     if ($("#eventParam", elem).val()) {
         thisObj.triggerEvent("sendEvent", {
             param1: $("#eventParam", elem).val()
         });
     }
})
- Register the sendEvent event.
- widgetActionTemplate
In the widgetActionTemplate.js file, register the receiveAction action, and define the callback function receiveActionCbk to set the value for the text box.
- Register the receiveAction action.
Studio.registerAction( thisObj, "receiveAction", "Receive Action", [], $.proxy(this.receiveActionCbk, this), [] ); - Define the callback function receiveActionCbk.
receiveActionCbk: function(data){
    var thisObj = this;
    var elem = thisObj.getContainer();
    $("#receivedParam",elem).val(data.eventParam.param1)
}
- Register the receiveAction action.
Configuring Widget Interaction on the Same Page
Upload widgetEventTemplate and widgetActionTemplate to the widget library and test them on an advanced page.
- Upload the widget templates widgetEventTemplate and widgetActionTemplate by referring to 1.
- Open an advanced page and drag the uploaded widgets to the canvas.
Figure 6 Using event and action templates

- Configure events and actions.
Select the widgetEventTemplate widget. On the Event tab page, click
 next to sendEvent, and choose the new action > widgetActionTemplate (widget number) > Receive Action.
 - Click
 in the upper part of the page to save the page.
 - Click
 to publish the page.
 - Click
 to view the page.
Feedback
Was this page helpful?
Provide feedbackThank you very much for your feedback. We will continue working to improve the documentation.See the reply and handling status in My Cloud VOC.
For any further questions, feel free to contact us through the chatbot.
Chatbot

