HSS Security Scan
Before releasing an image product, perform a security scan using HSS and antivirus scan using a recommended tool, and pre-process the scan results to ensure that no high-risk vulnerability exists after the image is deployed on an ECS. If a vulnerability persists, the KooGallery operations personnel will reject the product release request.
Perform HSS security scan as follows. For details about antivirus scan, see Antivirus Scan.

Before the pre-processing, ensure that you have created a private image.
After the HSS security scan is complete, send an email with the result file and antivirus scan materials to wujunchuan@huawei-partners.com.
Procedure
- Apply for an ECS.
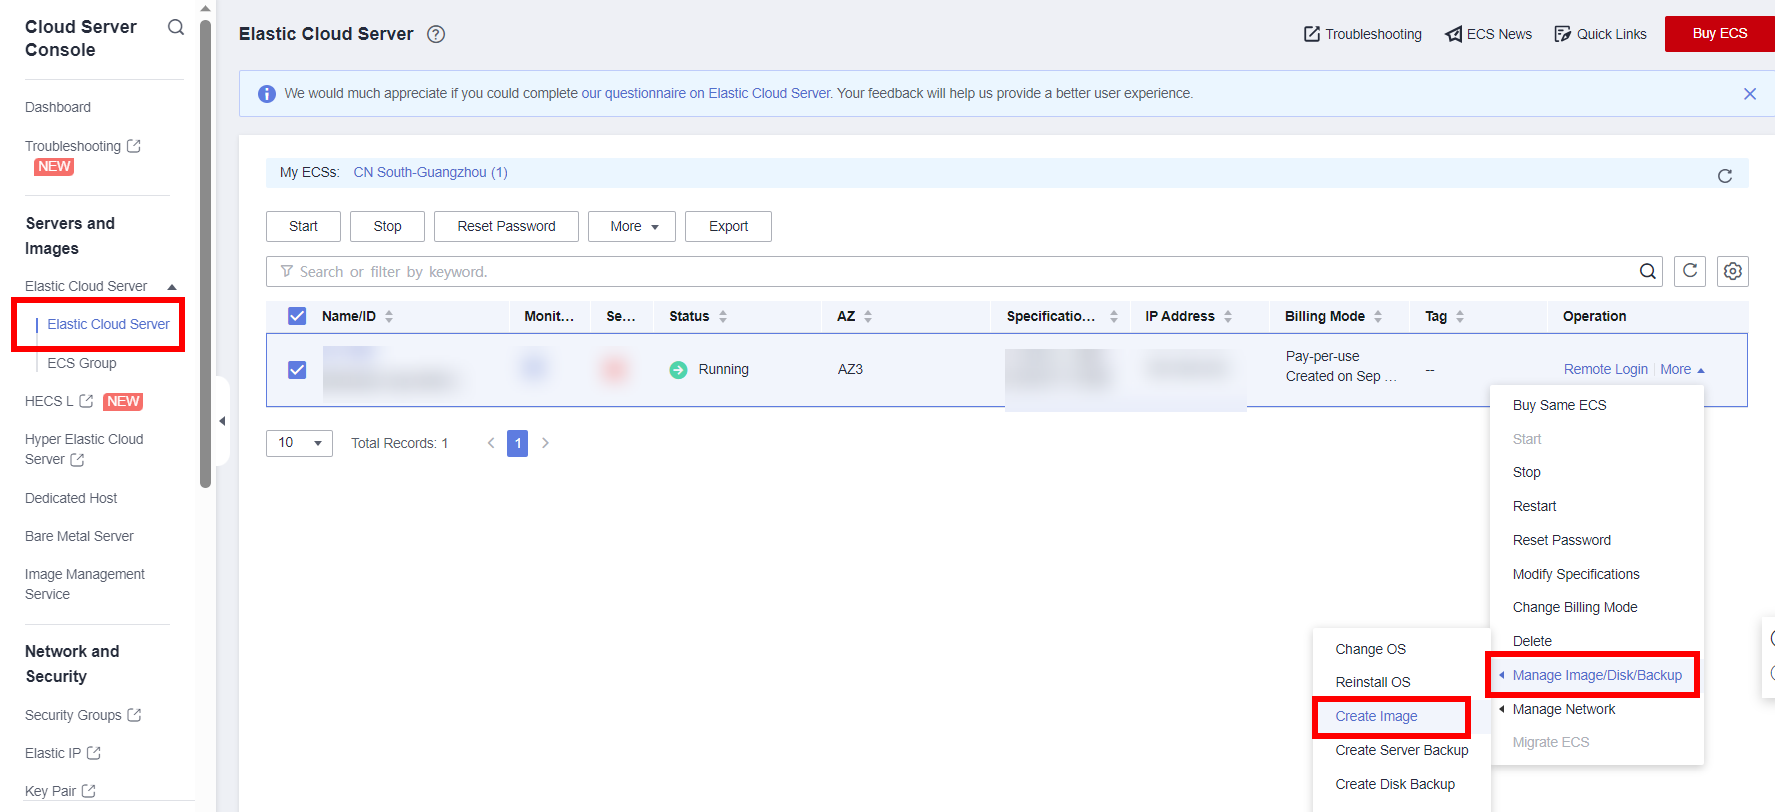
Log in to the Huawei Cloud console and choose Service List > Compute > Image Management Service. Click the Private Images tab, locate the image to be released, and click Apply for Server.

- Create an ECS.
The process of creating an ECS using a private image is the same as that using a public image. For details, see Creating Images. Pay attention to the following settings:
- Use HSS to scan the ECS.
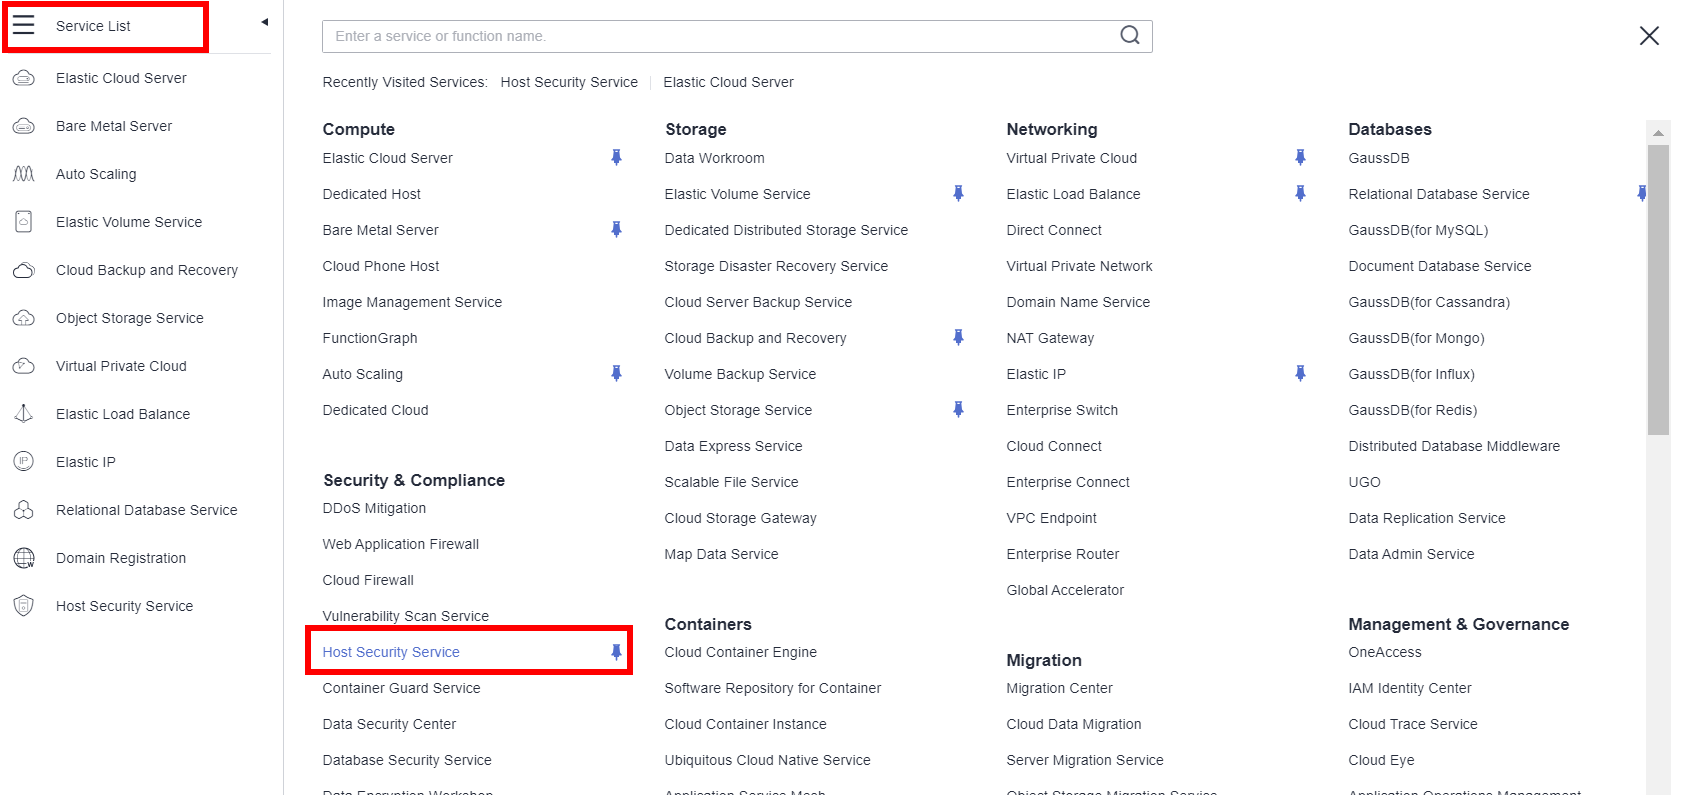
- In the service list, choose Host Security Service.
- In the navigation pane, choose Asset Management > Servers & Quota.

- Click Enable in the Operation column to enable HSS for the created ECS.


If HSS has been enabled for the created ECS (Protected is displayed in the Protection Status column), click Switch Edition in the Operation column to switch from the basic edition to the enterprise edition and then start the HSS baseline check.

- Purchase HSS as required.

- Set Billing Mode to Pay-per-use and Edition to Enterprise.
- The enterprise edition is billed for $0.03 USD per hour. After the scan is complete, click Disable in the Operation column to stop billing.


- Start the HSS baseline check.
- After purchasing the service, choose Prediction > Baseline Checks in the navigation pane. On the Baseline Checks page, click Policies in the upper right corner.

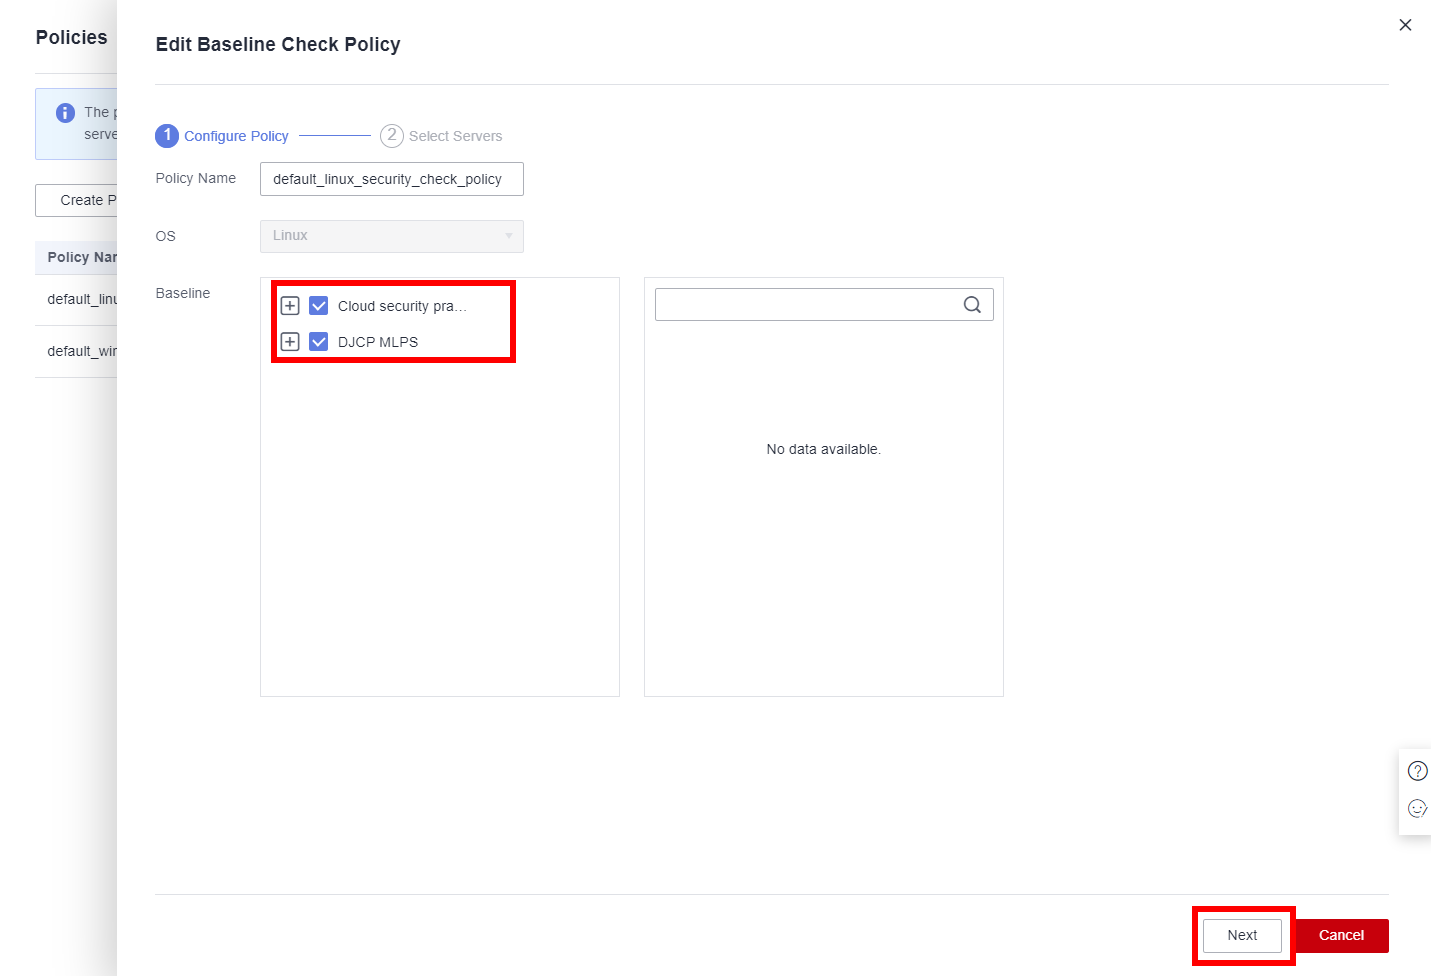
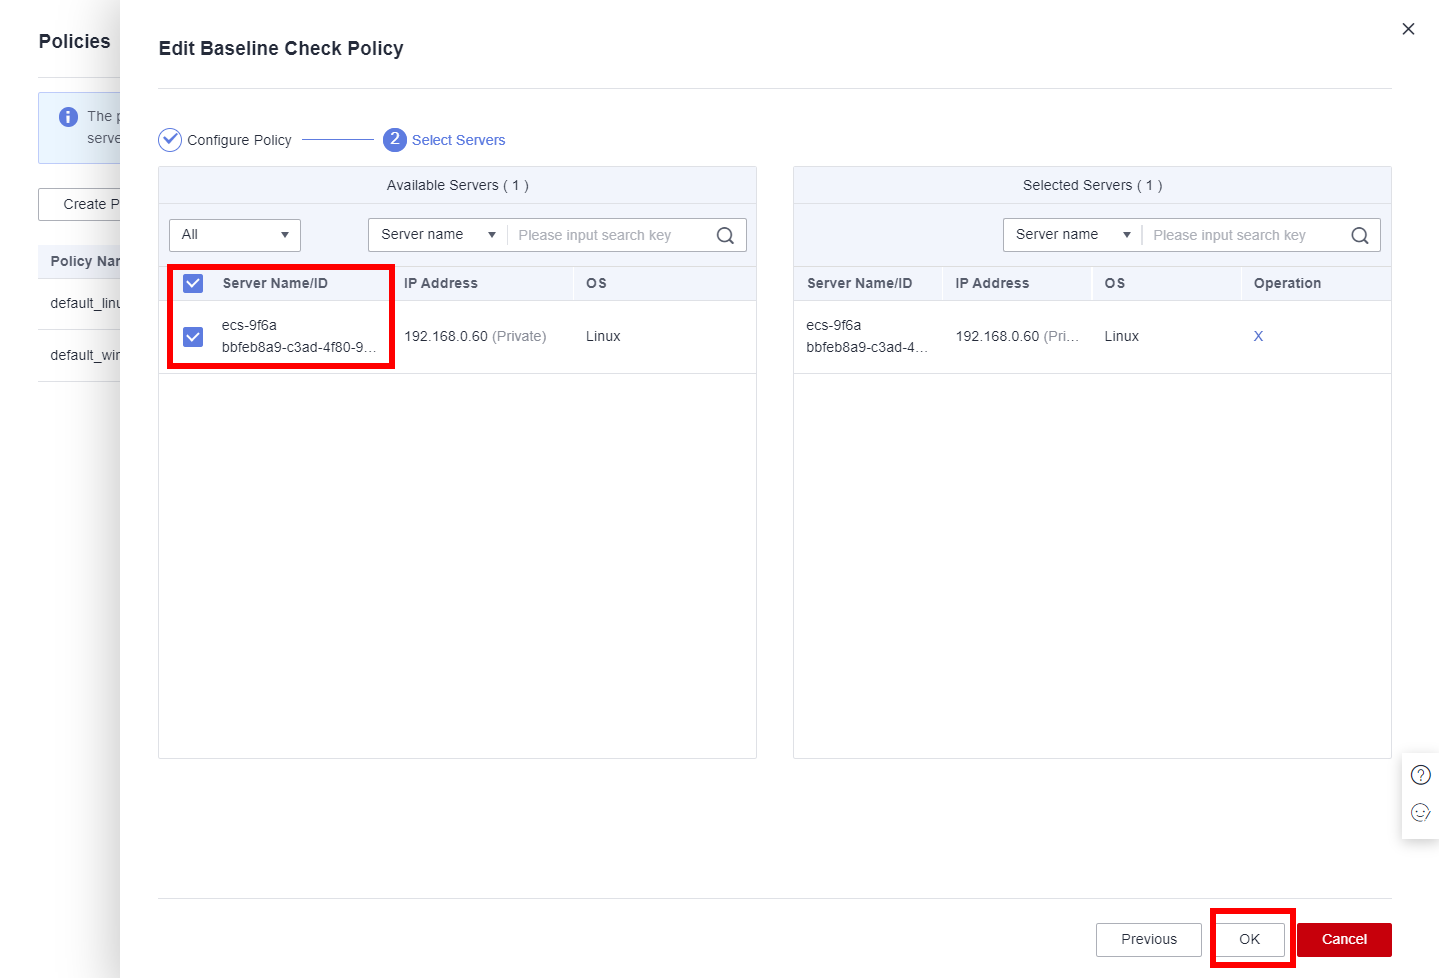
Click Edit in the Operation column of the corresponding policy. On the Edit Baseline Check Policy page, select Cloud security practices and DJCP MLPS, click Next, select the created ECS, and click OK.

- Go to the Baseline Checks page, select the corresponding policy from the Baseline Check Policy drop-down list, and click Scan.

- After the scan is complete, export the scan report.
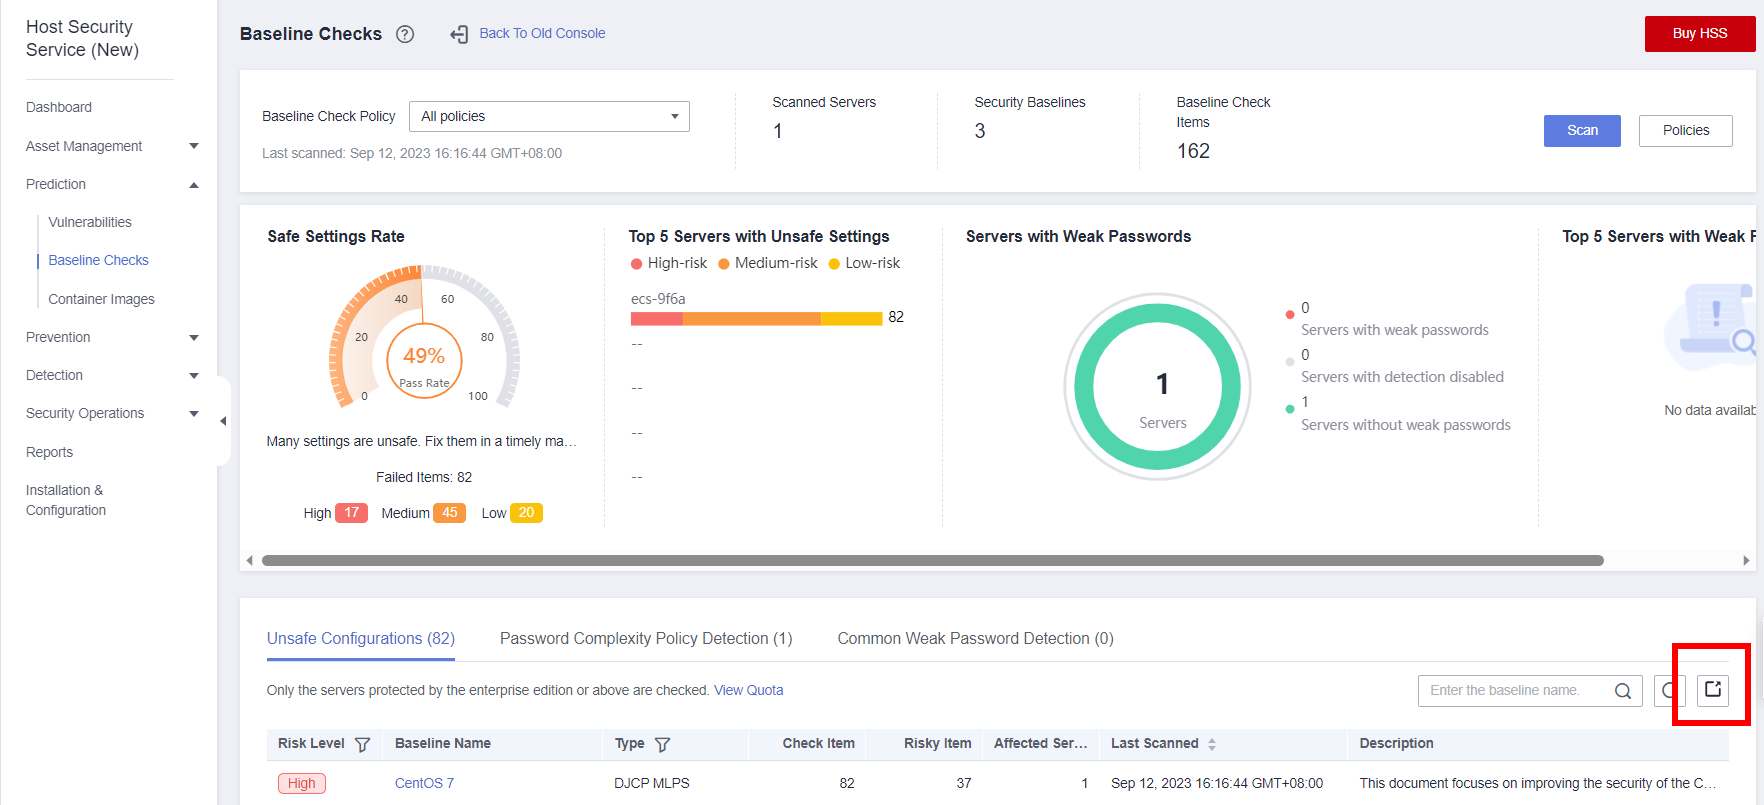
- In the navigation pane, choose Prediction > Baseline Checks, and click Export on the right to export the scan report.
- Fix high-risk issues based on the scan report.
Open the scan report and filter out the issues whose risk level is High and scan result is Failed.


If the rule description indicates that the permission on the key file used by the SSH service needs to be restricted, rectify the fault by referring to the FAQ. For other issues, rectify them in the ECS backend by referring to the suggestions in the report.
- In the navigation pane, choose Prediction > Baseline Checks, and click Export on the right to export the scan report.
- In the service list, choose Host Security Service.
- Package the ECS as an image again and use HSS to scan it.
- After fixing high-risk vulnerabilities, package the ECS into an image.
- Use the packaged image to create an ECS, enable HSS again, and repeat step 3 to scan the ECS using HSS.
- Release the image to KooGallery.
If no high-risk vulnerability is found after the scan is complete, release the image to KooGallery.
- (Optional) Submit a service ticket.
- If you have any questions about the preceding operations, see the FAQ.
- If the problem persists, submit a service ticket and provide your contact information so that Huawei engineers can contact you.
FAQ
- How do I restrict the permissions on the key file used by SSH?
During image startup, the /etc/ssh/*key and /etc/ssh/*key.pub files are initialized. Run the following commands before packaging the image:
chmod 400 /etc/ssh/*key
chmod 400 /etc/ssh/*key.pub
chattr +i /etc/ssh/*key
chattr +i /etc/ssh/*key.pub
- How do I restrict the access permission of the /etc/ssh/sshd_config file?
Cloud-Init restores the default SSH configuration. Therefore, you need to comment out SSH in Cloud-Init and set the access permission of the /etc/ssh/sshd_config file.
- Run the vi /etc/cloud/cloud.cfg command to open the /etc/ssh/sshd_config file and comment out SSH-related content.
- Run chattr +i /etc/ssh/sshd_config to lock the file.

To comment out SSH-related content, run the vi /etc/cloud/cloud.cfg command to open the /etc/cloud/cloud.cfg file and add a number sign (#) at the beginning of SSH-related content. This step must be performed by technical support engineers to prevent errors.
Feedback
Was this page helpful?
Provide feedbackThank you very much for your feedback. We will continue working to improve the documentation.See the reply and handling status in My Cloud VOC.
For any further questions, feel free to contact us through the chatbot.
Chatbot


