
Workspaces
HaydnCSF uses workspaces to isolate information and resources of different users. Only users who have joined a workspace can view the workspace, and their permissions can be controlled using roles.
Creating a Workspace
- Log in to the HaydnCSF platform and click Workspaces. On the displayed page, click Create.
- Workspace Name: Name this workspace, for example, Data Enablement v3.0 Solution Workspace.
- Type: Select a workspace type from standard workspace, delivery workspace, and O&M workspace.
- Standard workspace: a workspace for solution building and verification, covering scenarios such as architecture design, baseline verification, project POC, and certification test.
- Delivery workspace: a project delivery workspace that can be used for auxiliary design and development implementation such as project management, requirement management, logical model and physical model design.
- O&M workspace: a workspace that provides functions such as unified alarm access, event transfer, ticket management, statistics analysis, and SLA monitoring to meet O&M event management requirements.
- Description: Describe this workspace.
Figure 1 Creating a workspace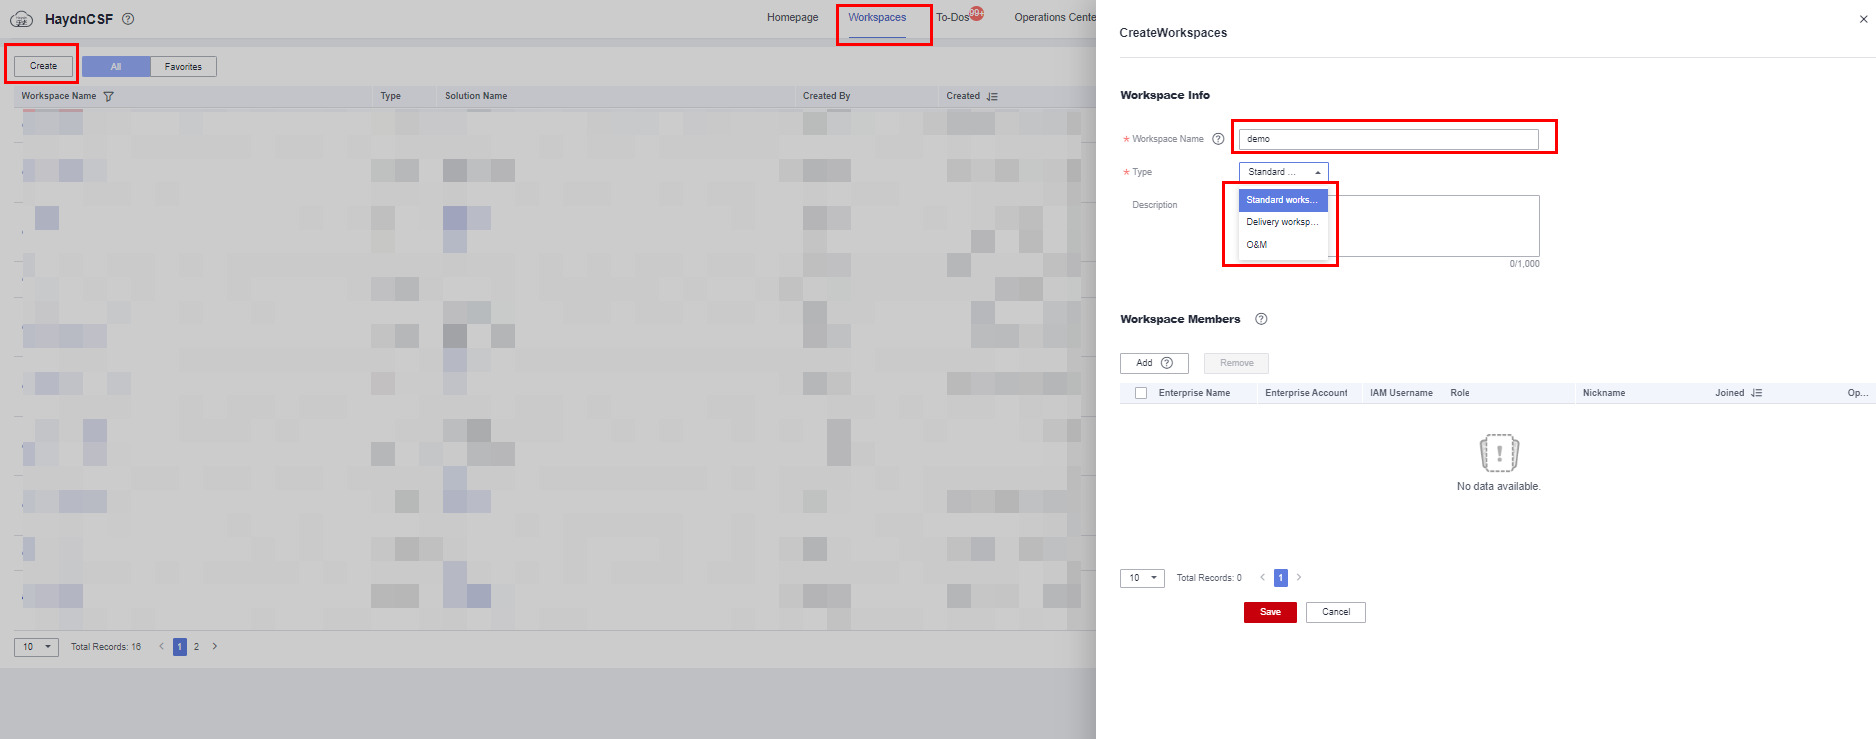
- Click Save.
- After a workspace is created, click Edit in the Operation column to modify the workspace information, as shown in Figure 2.

The delivery center is in the invited test phase. To experience delivery workspaces, contact HaydnCSF service support for help.
Managing Workspace Members
If you are the creator of a workspace or have the administrator or project manager role in the workspace, you can add, delete, modify, and view members in the workspace. Member management is available only in standard workspaces and delivery workspaces.
- Viewing Workspace Members
You can view all members in a workspace.
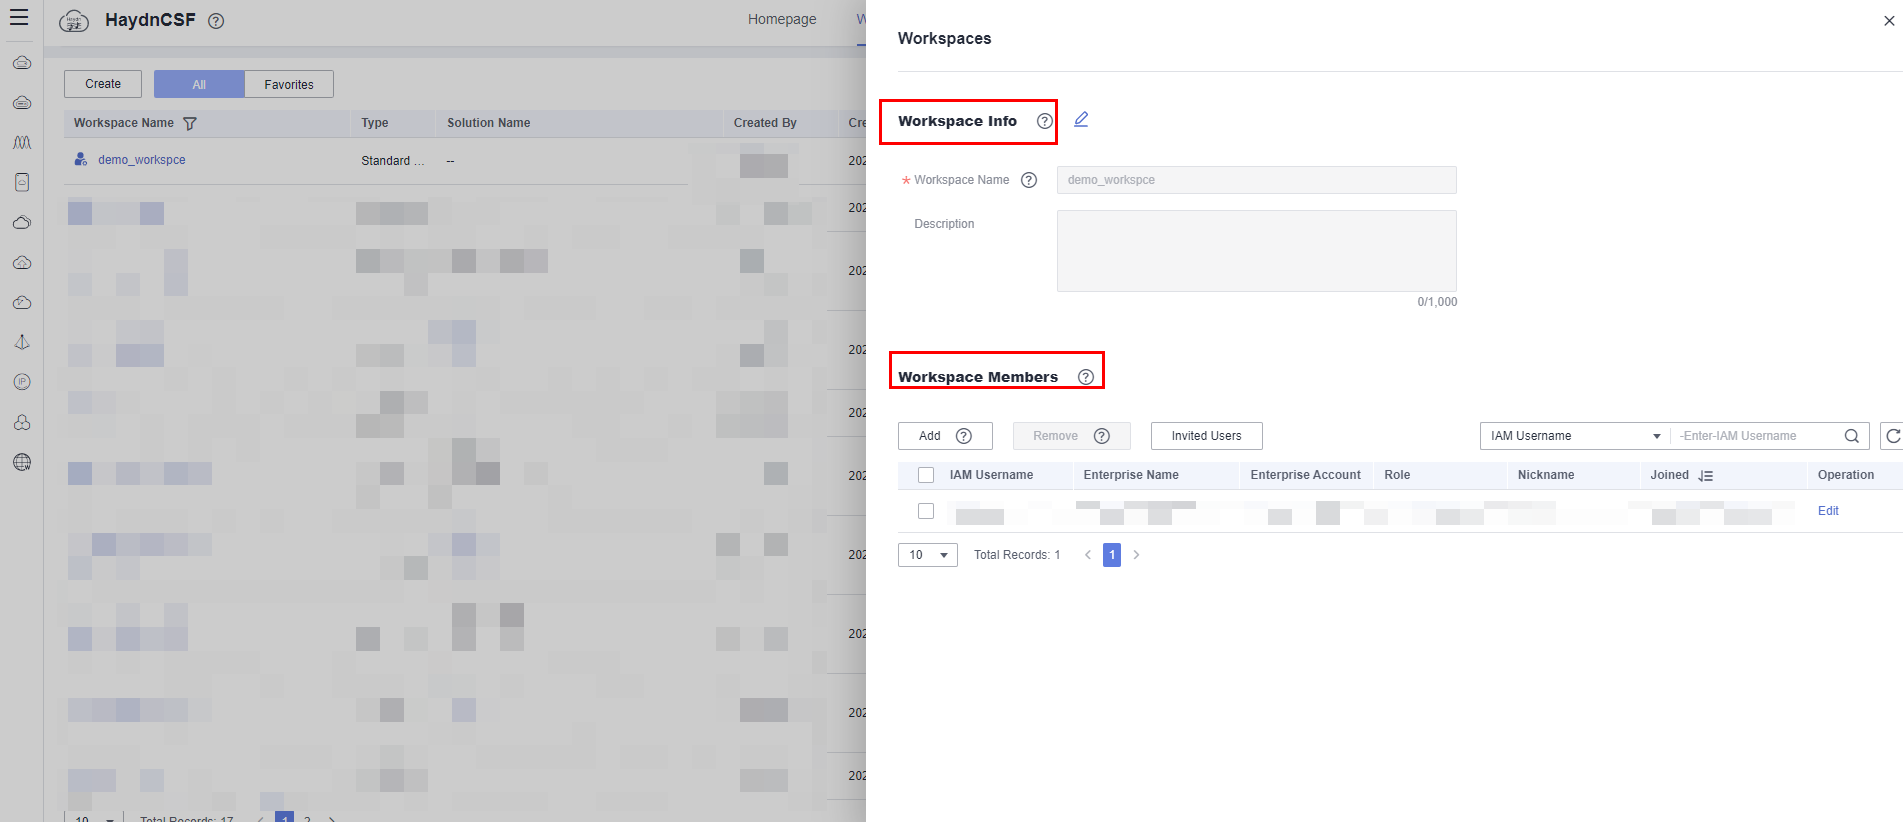
- Log in to the HaydnCSF platform and click Workspaces. On the displayed page, locate the workspace and click Edit or Manage Members in the Operation column.
- View the workspace information and members.
Figure 3 Workspace editing page
- Adding Users from Your Enterprise
If you have the administrator or project manager role, you can add users in your enterprise as workspace members.
Locate the workspace and click Edit or Manage Members in the Operation column. Under Workspace Members of the displayed page, click Add. In the displayed dialog box, select My Enterprise for Enterprise, and then select an IAM user and role.
Figure 4 Adding a user from your enterprise
- When you add a user from your enterprise, only IAM users who have been added to HaydnCSF are displayed. If the user you want to add is not displayed in the drop-down list, contact the enterprise administrator to add the user on the User Management page of the Operations Center. For details, see Adding a User. Alternatively, ask the user to log in to the HaydnCSF platform as an IAM user and add to the workspace as a member. For details, see Accessing HaydnCSF.
- A user can have multiple roles. If you only need to grant the read-only permission to a user, set the user as a visitor when adding the user. For details about the permissions of each role, see HaydnCSF User Access Permission.
- Inviting Users from Other Enterprises
If you have the administrator or project manager role, you can invite users in other enterprise as workspace members.
Locate the workspace and click Edit or Manage Members in the Operation column. Under Workspace Members of the displayed page, click Add. In the displayed dialog box, select Other Enterprises (Invitation) for Enterprise, enter the enterprise's account name and IAM username, select a role, and click OK. The user who is invited can see your invitation on the To-Dos page and will become the member of your workspace after agreeing to the invitation.
Figure 5 Inviting a user from another enterprise as a member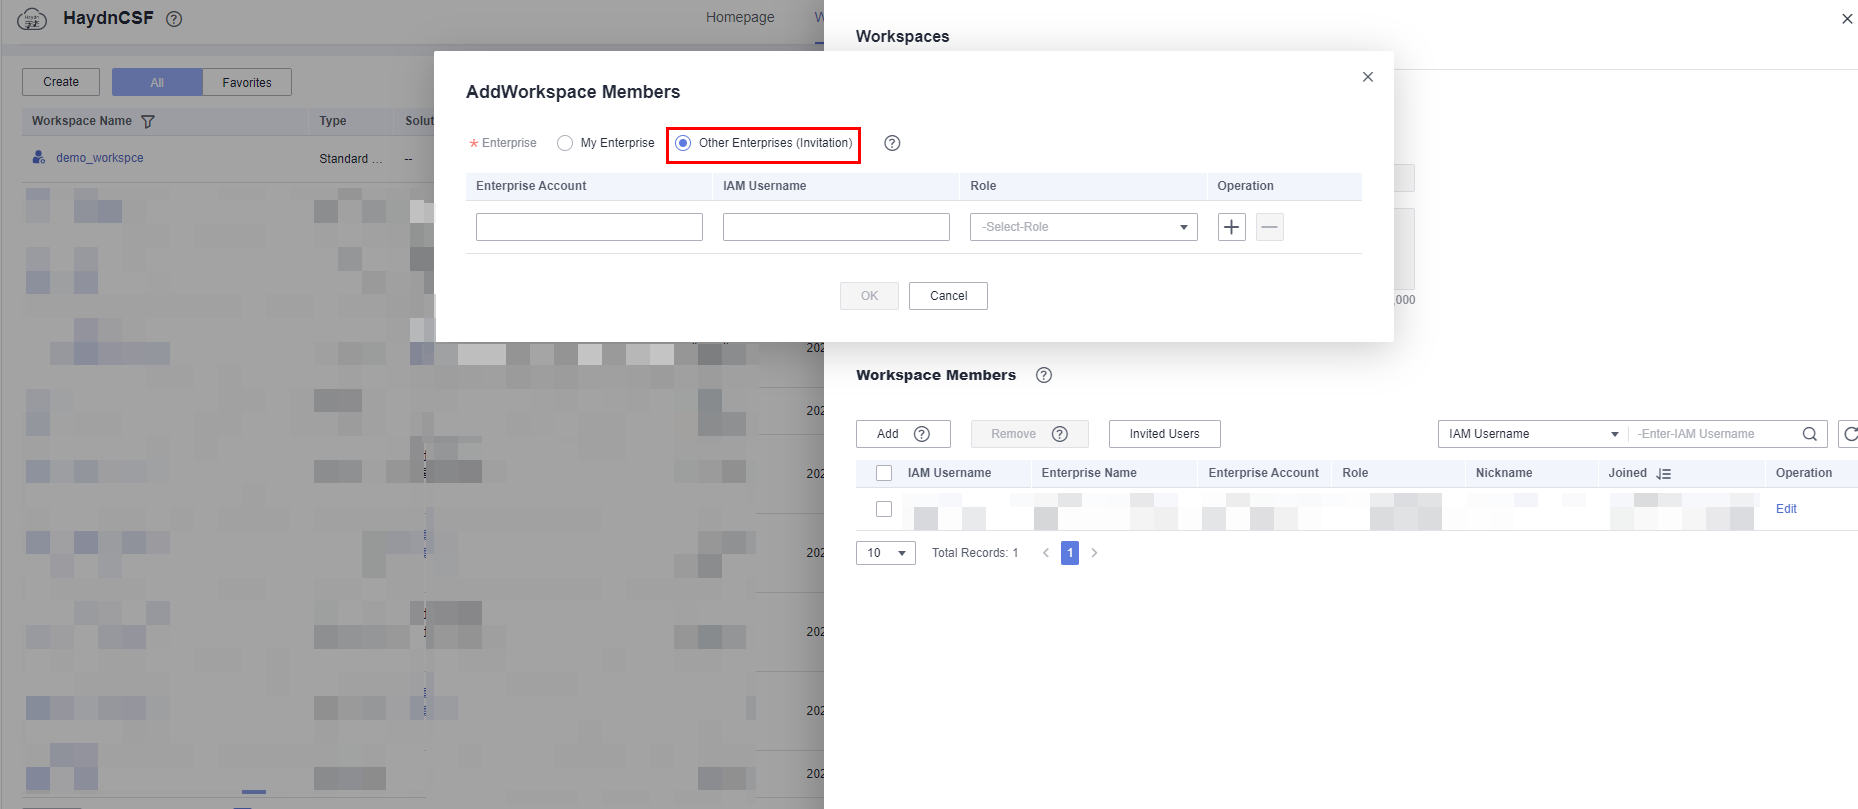 Figure 6 Agreeing to the invitation
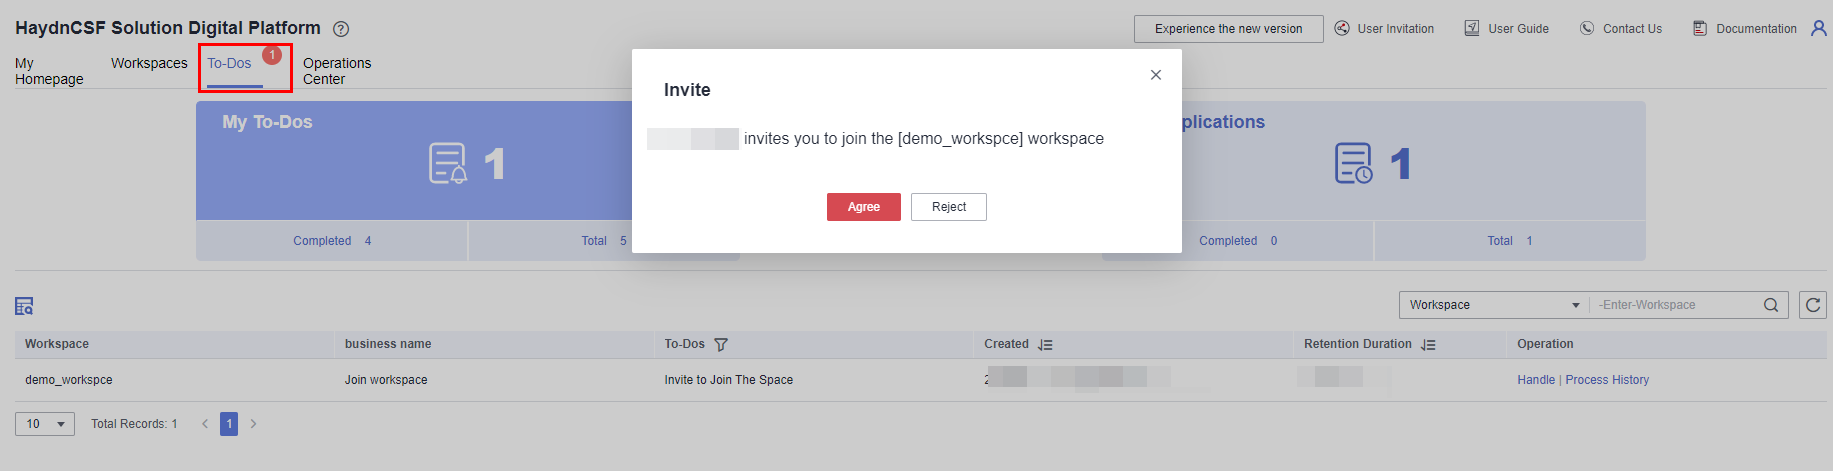
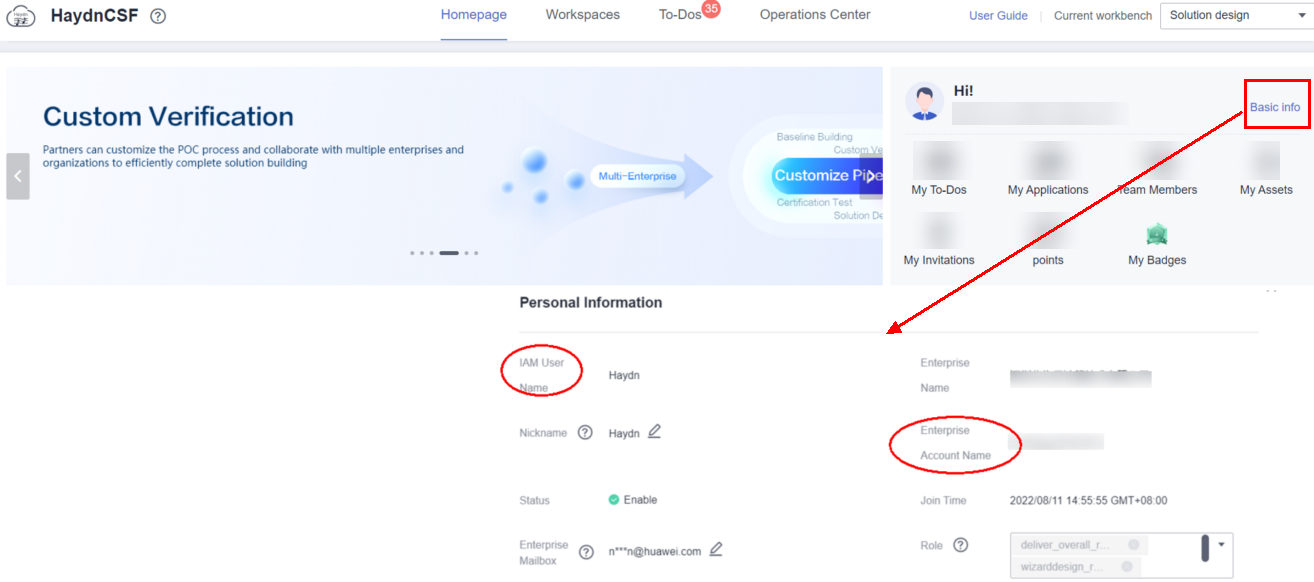
- Ensure that the users you invite have joined HaydnCSF. If they have not joined HaydnCSF, you can send Accessing HaydnCSF to them. If they have joined HaydnCSF, they can view their account names and IAM usernames in the personal center, as shown in Figure 7.
- A user can have multiple roles. If you only need to grant the read-only permission to a user, set the user as a visitor when adding the user. For details about the permissions of each role, see HaydnCSF User Access Permission.
- Removing Workspace Members
If you have the administrator or project manager role, you can remove workspace members.
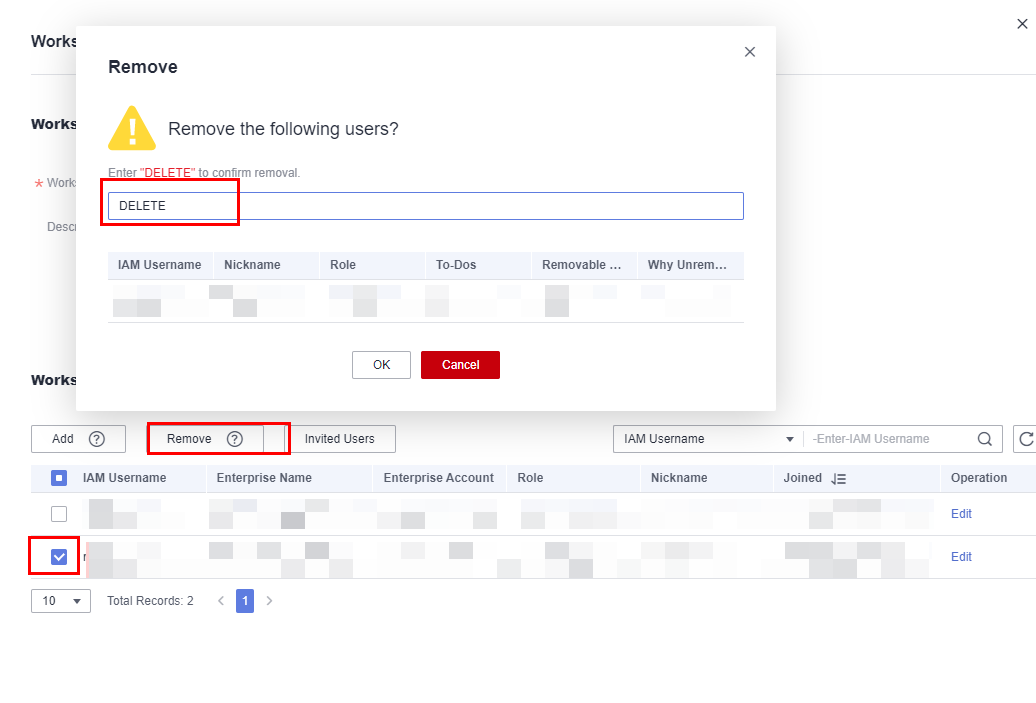
Locate the workspace and click Edit or Manage Members in the Operation column. Under Workspace Members of the displayed page, select the members and click Remove above the member list. In the displayed dialog box, enter DELETE in the text box to confirm the removal and then click OK.
In the Remove Users dialog box, you can check whether a user can be removed and the reason why the user cannot be removed. As shown in Figure 8, the member cannot be removed because the member has associated to-do tasks that are not cleared. The member can be removed only after the member completes the to-do tasks in the workspace or transfers the to-do tasks to others.

Adding a Workspace to Favorites
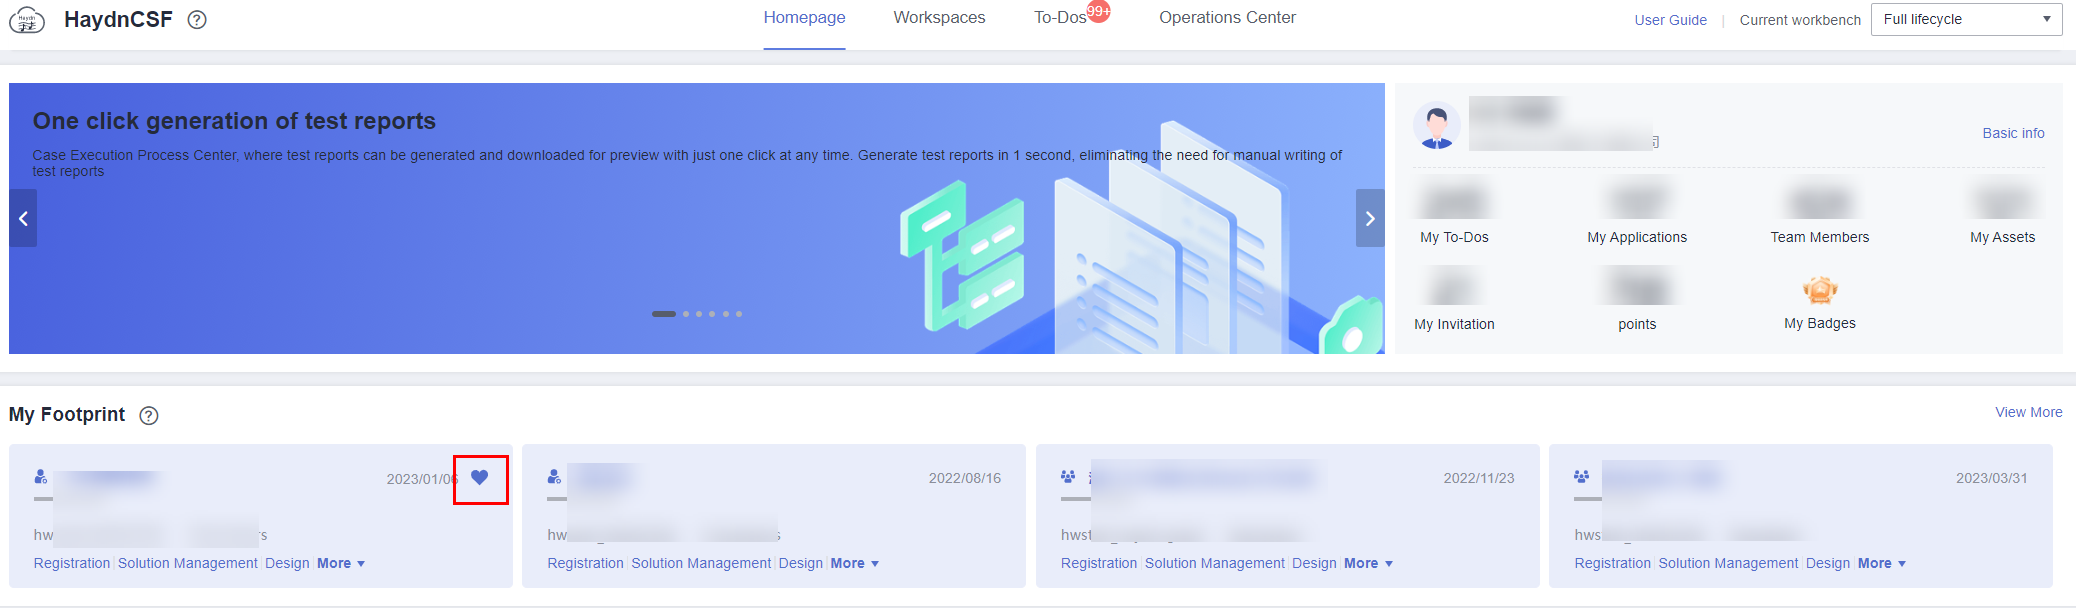
Workspace members can add a workspace to favorites so that the workspace is preferentially displayed in My Footprint. Members can also remove a workspace from favorites.
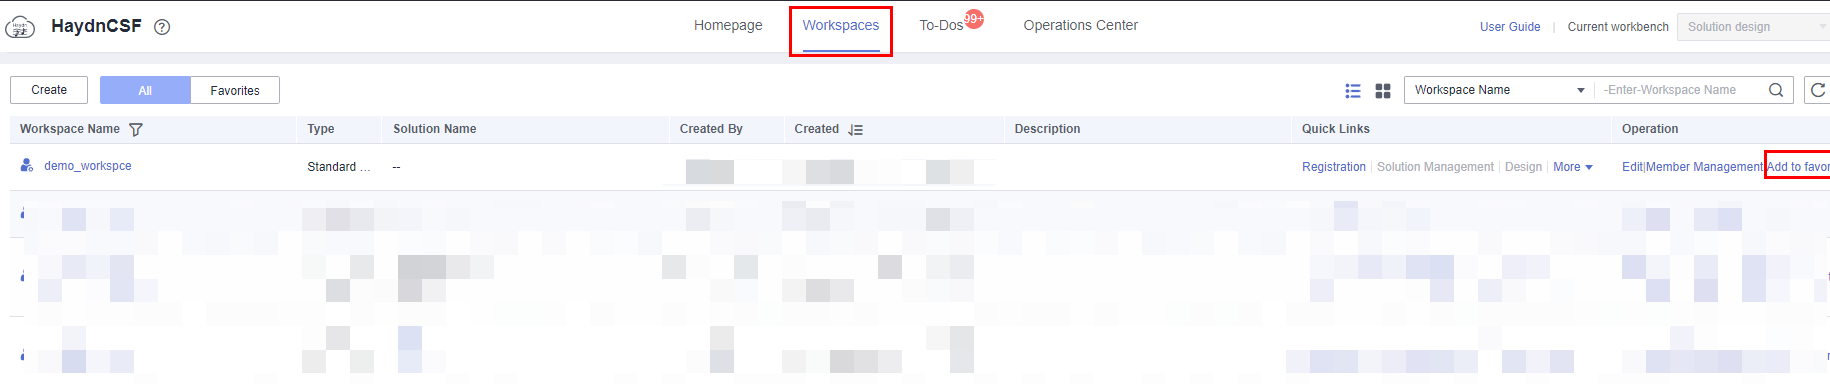
To add a workspace to favorites, locate the workspace and click Add to Favorites in the Operation column. A heart symbol is displayed in the upper right corner of the workspace card. To remove the workspace from favorites, click Remove from Favorites in the Operation column.
Deleting a Workspace
Only users with administrator role can delete the workspace. Only HaydnCSF administrators can restore the deleted workspaces.
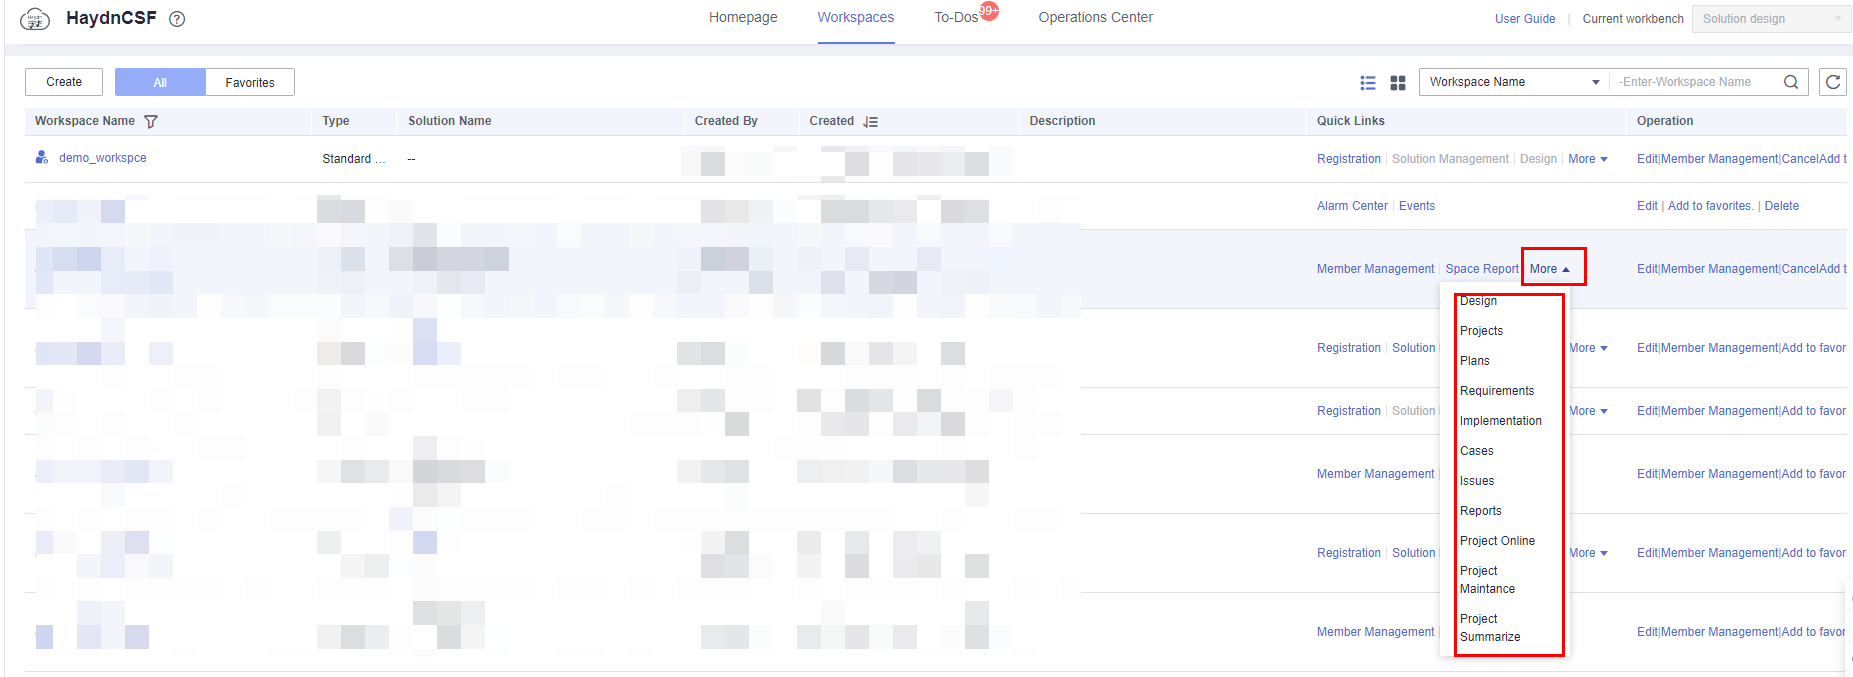
- Log in to the HaydnCSF platform, click Workspaces, locate the workspace, and click Delete in the Operation column.
Figure 11 Entry for deleting a workspace

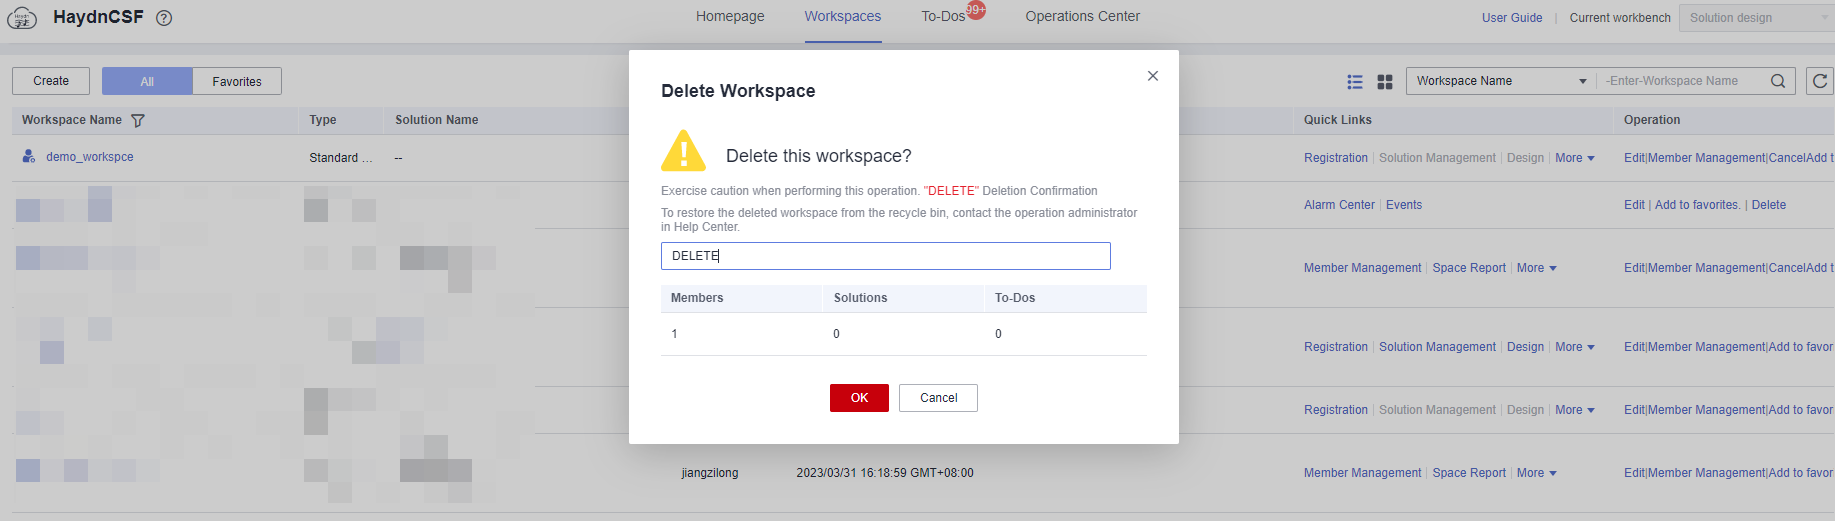
- In the displayed dialog box, enter DELETE and click OK.
Figure 12 Deleting a workspace
If you need to restore the workspace, contact the HaydnCSF administrator. For details, see Obtaining Help.
Quick Entries to a Workspace
You can quickly enter some pages such as the solution registration and solution design pages through the shortcut entries.
The shortcut entries are the same as those on the workspace card in My Footprint. For details, see My Footprint.
Feedback
Was this page helpful?
Provide feedbackThank you very much for your feedback. We will continue working to improve the documentation.See the reply and handling status in My Cloud VOC.
For any further questions, feel free to contact us through the chatbot.
Chatbot


